How To Add Check Box In Word
In the realm of document creation and form design, Microsoft Word stands out as a versatile tool, offering a myriad of features to enhance user interaction and data collection. One such feature that proves incredibly useful is the checkbox, allowing readers to easily mark selections or indicate completion of tasks within a document. Whether you're crafting a to-do list, designing a survey, or creating an interactive form, knowing how to add checkboxes in Word can significantly improve the functionality and professionalism of your documents. This article will guide you through the process of incorporating checkboxes into your Word documents, exploring three key areas: understanding checkbox options in Microsoft Word, providing a step-by-step guide to adding checkboxes, and delving into advanced checkbox techniques and troubleshooting. By mastering these aspects, you'll be able to create more dynamic and user-friendly documents that cater to a variety of needs. Let's begin by examining the different checkbox options available in Microsoft Word and how they can be utilized to enhance your document's interactivity.
Understanding Checkbox Options in Microsoft Word
Microsoft Word, a cornerstone of document creation and editing, offers a plethora of features designed to enhance user experience and document functionality. Among these features, checkboxes stand out as a versatile tool for creating interactive forms and checklists within documents. Understanding how to effectively implement and utilize checkboxes in Word can significantly improve document interactivity and data collection. This article delves into the intricacies of checkbox options in Microsoft Word, exploring three key aspects: the importance of the Developer Tab in accessing advanced features, the distinction between Legacy Tools and Content Control Checkboxes, and the crucial considerations for compatibility across different versions of Word. By mastering these elements, users can create more dynamic and user-friendly documents that cater to a wide range of needs, from simple to-do lists to complex forms. Whether you're a casual user or a professional document creator, grasping the nuances of checkbox options in Microsoft Word will undoubtedly elevate your document creation skills and open up new possibilities for interactive content.
Developer Tab and its importance
The Developer Tab in Microsoft Word is a powerful and often overlooked feature that provides advanced tools and functionalities for users who want to create more complex and interactive documents. While it's not visible by default, enabling the Developer Tab opens up a world of possibilities for customizing Word documents, including the ability to add and manipulate checkboxes. This tab is particularly important for users who need to create forms, templates, or documents with interactive elements. One of the key features accessible through the Developer Tab is the ability to insert and customize form controls, such as checkboxes, text fields, and dropdown menus. These elements allow document creators to design interactive forms that can be filled out electronically, making data collection and information gathering more efficient and organized. Checkboxes, in particular, are valuable for creating to-do lists, questionnaires, or any document where users need to make binary choices. The Developer Tab also provides access to macro tools, which allow users to automate repetitive tasks and create custom functions within Word. This can be especially useful for businesses or individuals who frequently work with similar document structures or need to perform complex operations on their documents. Additionally, the tab offers XML tools for working with structured data and content controls for creating dynamic, data-driven documents. For those interested in creating more sophisticated documents, the Developer Tab provides access to Visual Basic for Applications (VBA) editor. This powerful tool allows users to write custom code to extend Word's functionality, create advanced macros, and develop tailored solutions for specific document needs. While VBA programming requires some technical knowledge, it opens up virtually limitless possibilities for document customization and automation. Another important aspect of the Developer Tab is its role in template development. Users can create and modify document templates, including the ability to add content controls and form fields, which can then be used as the basis for creating new documents. This is particularly useful for organizations that need to maintain consistency across various types of documents or forms. Understanding and utilizing the Developer Tab can significantly enhance a user's ability to create sophisticated, interactive, and data-driven documents in Microsoft Word. While it may seem intimidating at first, exploring the features available in this tab can lead to more efficient document creation, improved data collection, and the ability to automate many aspects of document handling. For those looking to master checkbox options and other interactive elements in Word, becoming familiar with the Developer Tab is an essential step in unlocking the full potential of this versatile word processing software.
Legacy Tools vs. Content Control Checkboxes
Legacy Tools vs. Content Control Checkboxes When it comes to adding checkboxes in Microsoft Word, users have two primary options: Legacy Form Field Checkboxes and Content Control Checkboxes. Understanding the differences between these two types of checkboxes is crucial for selecting the most appropriate option for your document needs. Legacy Form Field Checkboxes have been a part of Microsoft Word for many versions and are still available in modern iterations of the software. These checkboxes are primarily designed for use in traditional forms and are often preferred by users who need backward compatibility with older versions of Word. Legacy checkboxes are inserted using the Developer tab and offer basic functionality, such as the ability to check or uncheck the box. They are particularly useful in protected documents where you want to restrict users to only interacting with specific form fields. On the other hand, Content Control Checkboxes are a more recent addition to Microsoft Word and offer enhanced functionality and flexibility. These checkboxes are part of the broader Content Control feature set, which includes various form elements designed to make documents more interactive and data-driven. Content Control Checkboxes can be easily customized in terms of appearance and behavior, allowing for a more modern and visually appealing design. They also integrate seamlessly with other Content Controls, making them ideal for creating dynamic, data-linked documents. One significant advantage of Content Control Checkboxes is their ability to bind to external data sources, such as XML files or databases. This feature allows for the automatic population and updating of checkbox states based on external data, which is particularly useful in template-based documents or when creating forms that need to interact with other systems. While Legacy Form Field Checkboxes excel in simplicity and compatibility, Content Control Checkboxes offer more advanced features for those requiring greater customization and data integration. The choice between the two often depends on the specific requirements of your document, your target audience, and whether you need to maintain compatibility with older versions of Word. It's worth noting that Content Control Checkboxes are generally easier to use and more intuitive for most users, especially those who are not familiar with the intricacies of form design in Word. They also provide a more consistent user experience across different devices and platforms, including web-based versions of Word. Ultimately, the decision between Legacy Tools and Content Control Checkboxes should be based on a careful consideration of your document's purpose, your audience's needs, and the level of functionality required. By understanding the strengths and limitations of each option, you can make an informed choice that best suits your specific use case and ensures your Word documents are both functional and user-friendly.
Compatibility considerations across different Word versions
Compatibility considerations across different Word versions play a crucial role when working with checkbox options in Microsoft Word documents. As Microsoft continuously evolves its Office suite, including Word, features and functionalities may vary between versions, potentially affecting how checkboxes are created, displayed, and interacted with across different iterations of the software. One of the primary concerns when dealing with checkboxes in Word is ensuring that they remain functional and visually consistent across various versions. For instance, checkboxes created in newer versions of Word may not be fully compatible or editable in older versions. This can lead to formatting issues, loss of interactivity, or even the complete disappearance of checkboxes when opening documents in earlier Word releases. To mitigate compatibility issues, it's essential to consider the target audience and the versions of Word they are likely to use. If you're creating documents for a wide range of users, it may be prudent to stick with more universally supported checkbox options, such as those created using form fields or symbols. These methods tend to have better backwards compatibility and are less likely to cause issues when opened in older versions of Word. Another important aspect to consider is the use of ActiveX controls for checkboxes. While these offer enhanced functionality in newer versions of Word, they may not be supported or may behave differently in older versions or on different operating systems. For example, ActiveX controls may not function properly on Mac versions of Word, leading to potential cross-platform compatibility issues. When working with checkbox options, it's also crucial to be aware of the differences in checkbox behavior between Word versions. Newer versions may offer more advanced features, such as the ability to link checkboxes to content controls or to use them in protected documents. However, these features may not be available or may function differently in older versions, potentially causing confusion or limiting functionality for users of earlier Word releases. To ensure maximum compatibility, it's advisable to test documents containing checkboxes across multiple Word versions and platforms. This allows you to identify any potential issues and make necessary adjustments before distributing the document. Additionally, considering alternative methods for creating interactive elements, such as using tables or text boxes with symbols, can provide a more consistent experience across different Word versions. In conclusion, while checkbox options in Microsoft Word offer valuable functionality for creating interactive documents, it's crucial to carefully consider compatibility issues when implementing them. By understanding the limitations and differences across Word versions, you can make informed decisions about the best approach for creating checkboxes that will work seamlessly for your intended audience, regardless of the Word version they're using.
Step-by-Step Guide to Adding Checkboxes
Mastering the art of adding checkboxes in Microsoft Word can significantly enhance the functionality and interactivity of your documents. Whether you're creating surveys, to-do lists, or interactive forms, checkboxes provide an intuitive way for users to indicate selections or completion status. This comprehensive guide will walk you through the process of incorporating checkboxes into your Word documents, ensuring you can leverage this powerful feature with confidence. We'll begin by exploring how to enable the Developer Tab, a crucial first step that unlocks access to advanced document controls. Next, we'll delve into the specifics of inserting checkboxes using Content Controls, demonstrating how to seamlessly integrate these interactive elements into your text. Additionally, we'll cover the nuances of customizing checkbox appearance and behavior, allowing you to tailor these elements to suit your document's specific needs and aesthetic preferences. By following this step-by-step guide, you'll gain the skills necessary to create more dynamic and user-friendly documents. As we explore these key aspects of working with checkboxes, you'll also develop a deeper understanding of the various checkbox options available in Microsoft Word, setting the stage for even more advanced document customization.
Enabling the Developer Tab
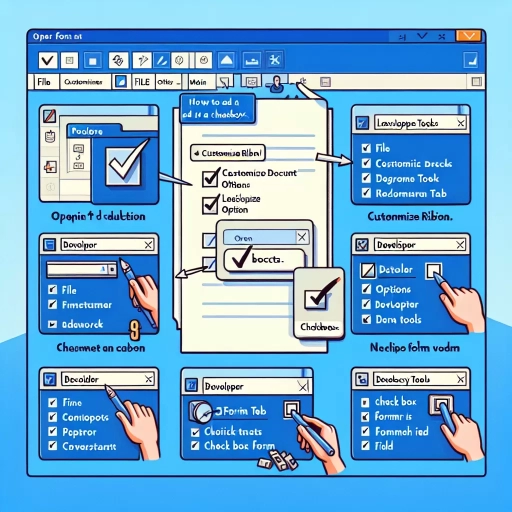
Enabling the Developer Tab is a crucial first step in adding checkboxes to your Microsoft Word documents. This often-overlooked feature unlocks a treasure trove of advanced tools and functionalities, including the ability to insert form controls like checkboxes. By default, the Developer tab is hidden to streamline the user interface for everyday tasks. However, for those looking to create interactive documents or forms, enabling this tab is essential. To enable the Developer tab, start by opening Microsoft Word and locating the File menu in the top-left corner. From there, click on "Options" to open the Word Options dialog box. In the left pane of this window, select "Customize Ribbon." This section allows you to personalize which tabs and commands appear in your Word interface. On the right side of the Customize Ribbon panel, you'll see a list of available tabs. Look for the checkbox next to "Developer" and make sure it's ticked. Once you've done this, click "OK" to apply the changes. Upon returning to your Word document, you'll notice the newly added Developer tab in the main ribbon, typically positioned between the "View" and "Help" tabs. This tab houses a variety of advanced features, including the Controls group, which contains the checkbox option you'll need for your document. The Developer tab not only gives you access to checkboxes but also to other form controls like text fields, drop-down lists, and more sophisticated tools for macros and add-ins. It's worth noting that enabling the Developer tab is a one-time process. Once activated, it will remain visible across all your Word documents until you choose to hide it again. This persistence makes it convenient for users who frequently work with forms or require advanced document features. Additionally, familiarizing yourself with the Developer tab can open up new possibilities for document creation and automation, potentially enhancing your productivity and the functionality of your Word documents. For users working in professional or academic environments, the ability to create documents with interactive elements like checkboxes can significantly improve data collection, survey creation, and form design. By taking this initial step to enable the Developer tab, you're not just preparing to add checkboxes; you're unlocking a whole new dimension of document creation capabilities in Microsoft Word.
Inserting a checkbox using Content Controls
Inserting a checkbox using Content Controls is a powerful and versatile method for adding interactive elements to your Microsoft Word documents. Content Controls provide a more robust and customizable approach to creating checkboxes, offering greater flexibility and functionality compared to traditional form fields or symbol-based checkboxes. To begin, ensure that the Developer tab is visible in your Word ribbon. If it's not already displayed, you can easily enable it by right-clicking anywhere on the ribbon, selecting "Customize the Ribbon," and checking the box next to "Developer" in the main tabs list. Once the Developer tab is accessible, you'll find the Content Controls group, which contains various form elements, including the checkbox option. To insert a checkbox using Content Controls, place your cursor at the desired location in your document and click on the "Check Box Content Control" button in the Developer tab. This action will insert a checkbox that users can interact with by clicking to toggle between checked and unchecked states. One of the advantages of using Content Controls is that they automatically adjust to match the document's formatting, ensuring a cohesive and professional appearance. Content Control checkboxes offer enhanced customization options. You can modify their properties by right-clicking on the checkbox and selecting "Properties." This opens a dialog box where you can set various attributes, such as giving the checkbox a title, specifying default values, and even linking it to document properties or XML data. These features make Content Controls particularly useful for creating dynamic, data-driven documents. Furthermore, Content Control checkboxes can be easily integrated with other Word features. For instance, you can use them in combination with macros or VBA (Visual Basic for Applications) to create more complex forms or automate document processes based on checkbox selections. This integration capability makes them ideal for creating interactive documents, surveys, or forms that require user input and data collection. Another benefit of using Content Controls is their compatibility with Word's Restrict Editing feature. This allows you to lock down parts of your document while leaving the checkboxes editable, ensuring that users can interact with the checkboxes without altering other content. This feature is particularly useful when creating templates or standardized forms. It's worth noting that Content Control checkboxes are fully supported in newer versions of Word and maintain their functionality when the document is shared or viewed on different devices. This cross-platform compatibility ensures a consistent user experience, regardless of how the document is accessed or edited. In conclusion, inserting checkboxes using Content Controls offers a sophisticated and flexible solution for adding interactive elements to your Word documents. Whether you're creating simple forms or complex, data-driven documents, this method provides the tools and customization options needed to meet a wide range of document design and functionality requirements.
Customizing checkbox appearance and behavior
Customizing checkbox appearance and behavior is an essential aspect of creating interactive and visually appealing documents in Microsoft Word. By tailoring the look and functionality of checkboxes, you can enhance the user experience and make your forms more professional and user-friendly. This process allows you to adapt checkboxes to your specific needs, whether you're creating surveys, questionnaires, or interactive checklists. To begin customizing your checkboxes, start by selecting the checkbox you want to modify. Right-click on it and choose "Properties" from the context menu. This action will open the Content Control Properties dialog box, where you can access various customization options. In the "General" tab, you can assign a unique title to your checkbox, which can be useful for identifying and organizing multiple checkboxes within your document. One of the most visually impactful customizations is changing the checkbox symbol. In the "Properties" dialog box, navigate to the "Check Box" tab. Here, you can choose from a variety of symbols to represent the checked and unchecked states of your checkbox. Options range from traditional checkmarks to more creative symbols like stars, hearts, or custom characters. This feature allows you to align the checkbox appearance with your document's theme or branding. You can also modify the size and color of your checkboxes to make them stand out or blend seamlessly with your document's design. In the "Font" section of the "Check Box" tab, you can adjust the font size and choose a color that complements your document's color scheme. This level of customization ensures that your checkboxes are both functional and aesthetically pleasing. For more advanced customization, you can use Word's Developer tools to add custom properties and behaviors to your checkboxes. By accessing the "Developer" tab and clicking on "Properties," you can set up conditional formatting, link checkboxes to specific actions, or create dependencies between multiple checkboxes. This functionality allows you to create dynamic forms that respond to user input, enhancing the interactivity of your documents. Another useful customization feature is the ability to add instructional text or tooltips to your checkboxes. In the "Content Control Properties" dialog box, you can enter placeholder text that appears when the checkbox is empty, providing guidance to users on how to interact with the form. Additionally, you can add tooltips that appear when users hover over the checkbox, offering further instructions or explanations. By taking advantage of these customization options, you can create checkboxes that not only serve their functional purpose but also contribute to the overall design and usability of your Word documents. Whether you're aiming for a minimalist look or a more elaborate design, the flexibility of Word's checkbox customization tools allows you to achieve the perfect balance between form and function in your interactive documents.
Advanced Checkbox Techniques and Troubleshooting
Checkboxes are an essential element in many digital documents, forms, and applications, offering users a simple and intuitive way to make selections or indicate preferences. While they may seem straightforward at first glance, advanced checkbox techniques can greatly enhance the functionality and user experience of your documents. This article delves into the intricacies of working with checkboxes, exploring three key areas that will elevate your checkbox game. First, we'll examine how to effectively link checkboxes to form data, ensuring seamless integration and data collection. Next, we'll guide you through the process of creating fillable PDF forms with checkboxes, a valuable skill for professionals across various industries. Finally, we'll address common issues that arise when working with checkboxes and provide practical solutions to troubleshoot these problems. By mastering these advanced techniques, you'll be able to create more dynamic and user-friendly documents that streamline data collection and improve overall efficiency. As we explore these topics, it's important to start with a solid foundation in checkbox basics. To that end, let's begin by understanding checkbox options in Microsoft Word, a widely used platform for creating documents with interactive elements.
Linking checkboxes to form data
Linking checkboxes to form data is a powerful technique that enhances the functionality and interactivity of your Word documents. This advanced feature allows you to create dynamic forms that respond to user input, automate data collection, and streamline document workflows. By connecting checkboxes to form fields, you can create intelligent documents that update content, trigger actions, or perform calculations based on the state of the checkboxes. To link checkboxes to form data, you'll need to utilize Word's content control features and form fields. Start by inserting a checkbox content control into your document, then add a corresponding form field that will store the checkbox's state. Use the Developer tab to access these advanced tools if they're not already visible in your Word interface. Once you have both elements in place, you can establish the link between them using Word's built-in field codes or more advanced VBA macros for complex interactions. One common application of linked checkboxes is to show or hide specific content based on the user's selection. For example, you might create a questionnaire where certain follow-up questions only appear if a particular checkbox is ticked. This conditional display of information helps create cleaner, more focused documents that adapt to the user's needs. Additionally, linked checkboxes can be used to populate other form fields automatically, such as calculating totals or generating summaries based on selected options. When working with linked checkboxes, it's important to consider the document's overall structure and usability. Ensure that the relationship between checkboxes and their associated data is clear and intuitive for the end-user. Use descriptive labels and provide clear instructions on how the form should be completed. It's also crucial to test your linked checkboxes thoroughly, checking for any unexpected behavior or errors that might occur under different scenarios. For more complex implementations, you may need to delve into Word's macro capabilities using Visual Basic for Applications (VBA). This powerful scripting language allows you to create custom functions and automate intricate processes based on checkbox states. While VBA offers tremendous flexibility, it requires a deeper understanding of programming concepts and Word's object model. As you become more proficient with linking checkboxes to form data, you'll discover numerous ways to enhance your documents' functionality. From creating interactive surveys and decision trees to building sophisticated data entry forms, this technique opens up a world of possibilities for document automation and user interaction. By mastering this advanced feature, you'll be able to create more efficient, user-friendly, and data-driven Word documents that save time and reduce errors in various professional and personal contexts.
Creating fillable PDF forms with checkboxes
Creating fillable PDF forms with checkboxes is an essential skill for professionals who need to design interactive documents for data collection, surveys, or questionnaires. Advanced checkbox techniques and troubleshooting can elevate your form design, making it more user-friendly and efficient. When working with checkboxes in PDF forms, it's crucial to understand the various options available and how to implement them effectively. One advanced technique involves creating mutually exclusive checkboxes, also known as radio buttons. These allow users to select only one option from a group of choices. To achieve this, you'll need to assign the same name to all checkboxes in the group but give each a unique export value. This ensures that only one selection can be made within the group, preventing conflicting responses. Another powerful feature is the ability to create dynamic forms using JavaScript. By incorporating scripts, you can make checkboxes trigger actions or calculations based on user input. For example, you could design a form that automatically calculates a total cost when specific checkboxes are selected, or hide/show certain sections of the form depending on the user's choices. Conditional formatting is another advanced technique that can enhance the functionality of your checkboxes. This allows you to change the appearance or behavior of form elements based on specific conditions. For instance, you could highlight required fields in red if they're left unchecked or display additional information when a particular checkbox is selected. When troubleshooting checkbox issues in PDF forms, common problems include checkboxes not appearing correctly, inability to select or deselect options, or data not being saved properly. To resolve these issues, ensure that you're using the latest version of your PDF software and that the form is properly configured for filling and saving. Check for any conflicting form field properties or overlapping elements that might interfere with checkbox functionality. If you're experiencing issues with checkbox appearance, verify that the correct font is embedded in the PDF and that the checkbox symbols are properly defined. Sometimes, compatibility issues between different PDF readers can cause display problems, so it's essential to test your form across multiple platforms and devices. For forms that will be filled out electronically, consider implementing form field validation to ensure that required checkboxes are selected before submission. This can help prevent incomplete or inaccurate data from being collected. Additionally, you can use tooltips or hover text to provide users with additional information about each checkbox option, improving the overall user experience. By mastering these advanced checkbox techniques and troubleshooting methods, you can create more sophisticated and functional PDF forms that meet the diverse needs of your audience. Whether you're designing simple surveys or complex data collection tools, understanding the intricacies of checkbox implementation will help you produce professional-quality forms that are both user-friendly and efficient.
Common issues and their solutions when working with checkboxes
Common issues and their solutions when working with checkboxes While checkboxes are generally straightforward to use in Microsoft Word, users may encounter several challenges that can hinder their productivity or the overall functionality of their documents. One common issue is the inability to check or uncheck boxes, which can occur if the document is protected or if the content control is locked. To resolve this, ensure that the document is not in protected mode and that the checkbox content control properties allow for editing. Another frequent problem is checkboxes disappearing when the document is shared or opened on different devices. This can happen due to compatibility issues or missing fonts. To mitigate this, save the document in a widely compatible format like .docx and embed fonts before sharing. Sometimes, users struggle with aligning checkboxes properly within their document layout. This can be addressed by using tables or text boxes to create a structured layout, or by adjusting the paragraph and line spacing settings. Formatting inconsistencies may also arise when copying and pasting checkboxes, leading to misaligned or differently sized boxes. To maintain consistency, use the Format Painter tool or create a style specifically for checkboxes that can be easily applied throughout the document. Another issue is the checkbox not printing correctly or appearing as a square instead of a check mark. This can be resolved by updating printer drivers, adjusting print settings, or using a different symbol for the checked state. In some cases, checkboxes may not function correctly in older versions of Word or on different operating systems. To ensure compatibility, consider using form fields instead of content controls for wider support across various platforms and versions. When working with large documents containing numerous checkboxes, users may find it challenging to manage and update them efficiently. Utilizing macros or VBA scripts can automate checkbox-related tasks, such as checking all boxes at once or resetting them to their default state. Additionally, linking checkboxes to Excel data or other external sources can streamline data collection and analysis processes. Accessibility concerns may arise when using checkboxes, particularly for users relying on screen readers. To address this, always provide clear labels for each checkbox and use the built-in accessibility checker in Word to ensure that your document is easily navigable for all users. Finally, if checkboxes are not behaving as expected or causing document corruption, it may be necessary to rebuild the document by copying the content into a new file, minus the problematic checkboxes, and then recreating them. By understanding these common issues and their solutions, users can effectively troubleshoot and optimize their use of checkboxes in Word documents, ensuring smooth functionality and improved document usability across various scenarios and platforms.