How To Remove A Popsocket
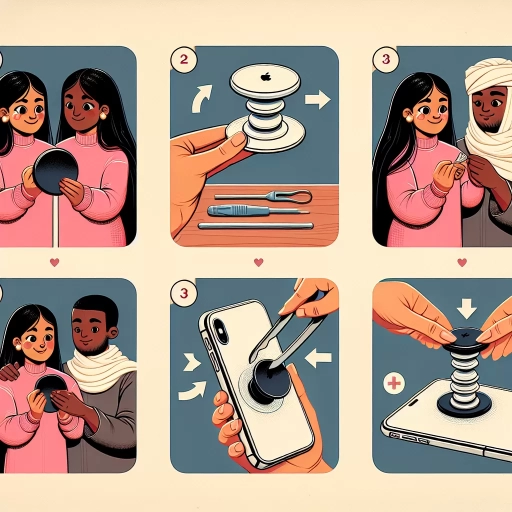
Here is the introduction paragraph: Removing a PopSocket from your phone case or laptop can be a daunting task, but with the right approach, it can be done easily and safely. Whether you're looking to replace your PopSocket with a new one or simply want to remove it for good, it's essential to know the proper techniques to avoid damaging your device or the PopSocket itself. In this article, we'll guide you through the process of removing a PopSocket, covering the essential preparation steps, effective removal methods, and post-removal care to ensure a smooth and successful process. To start, let's begin with the crucial first step: Preparation is Key.
Preparation is Key
Preparation is key when it comes to removing a PopSocket from your phone case. To ensure a smooth and damage-free removal process, it's essential to take the necessary steps beforehand. This includes choosing the right removal method, preparing the necessary tools, and cleaning the area around the PopSocket. By doing so, you'll be able to avoid any potential damage to your phone case or the PopSocket itself. In this article, we'll dive into the details of each of these steps, starting with the importance of choosing the right removal method.
Choose the Right Removal Method
When it comes to removing a PopSocket, choosing the right removal method is crucial to avoid damaging the device or the PopSocket itself. There are several methods to remove a PopSocket, and the right one for you depends on the type of device you have and the level of adhesion. For most devices, the "pull and twist" method is the safest and most effective way to remove a PopSocket. This involves gently pulling the PopSocket away from the device while twisting it counterclockwise. This method works best for devices with a smooth surface, such as phones or tablets. However, if you have a device with a textured or curved surface, such as a laptop or a camera, you may need to use a different method. In this case, you can try using a hair dryer or a heat gun to loosen the adhesive before attempting to remove the PopSocket. Another method is to use a removal tool, such as a credit card or a specialized PopSocket removal tool, to gently pry the PopSocket away from the device. It's essential to be careful when using this method, as it can be easy to scratch the device. Regardless of the method you choose, it's crucial to be patient and gentle when removing a PopSocket to avoid damaging the device or the PopSocket itself.
Prepare the Necessary Tools
To remove a PopSocket, it's essential to prepare the necessary tools to avoid damaging the device or the PopSocket itself. Start by gathering a few simple tools, including a hair dryer or a heat gun, a credit card or a similar tool, and a pair of tweezers. The hair dryer or heat gun will help loosen the adhesive that holds the PopSocket in place, making it easier to remove. The credit card or similar tool will be used to gently pry the PopSocket away from the device, while the tweezers will come in handy for removing any remaining adhesive residue. Additionally, having a cleaning cloth or a soft brush on hand can be helpful for cleaning the area where the PopSocket was attached. By having these tools ready, you'll be well-prepared to safely and effectively remove the PopSocket from your device.
Clean the Area Around the PopSocket
Cleaning the area around the PopSocket is a crucial step in the removal process. Before you start, make sure to clear the surrounding area of any debris, dust, or dirt that may interfere with the removal process. Use a soft cloth or a cotton swab to gently wipe away any dirt or grime that may have accumulated around the PopSocket. This will ensure that the adhesive remover or heat gun can effectively penetrate the adhesive and loosen the PopSocket's grip on the surface. Additionally, cleaning the area will also help prevent any dirt or debris from getting stuck under the PopSocket as you remove it, making the process smoother and more efficient. By taking the time to clean the area around the PopSocket, you'll be able to remove it more easily and avoid any potential damage to the surface or the PopSocket itself.
Removal Methods
When it comes to removing a PopSocket from your phone case, there are several methods you can try. The goal is to remove the PopSocket without damaging the case or leaving behind any residue. Three effective methods for removing a PopSocket include using heat to loosen the adhesive, applying an adhesive remover or solvent, and gently prying the PopSocket off. Each of these methods has its own advantages and can be effective in different situations. By understanding the different removal methods, you can choose the best approach for your specific situation. One of the most popular and often effective methods is using heat to loosen the adhesive, which can help to break the bond between the PopSocket and the case, making it easier to remove.
Using Heat to Loosen the Adhesive
Using heat to loosen the adhesive is a popular method for removing PopSockets, as it can effectively weaken the bond between the adhesive and the surface. To use this method, start by applying heat to the PopSocket using a hair dryer or a heat gun. Hold the heat source about 6 inches away from the PopSocket and move it slowly back and forth to distribute the heat evenly. Continue applying heat for about 30 seconds to 1 minute, or until the adhesive starts to loosen. You can test the adhesive by gently prying the PopSocket away from the surface. If it still feels stuck, apply more heat and try again. Be careful not to apply too much heat, as this can damage the surface or the PopSocket itself. Once the adhesive is loose, use a credit card or a similar tool to carefully pry the PopSocket away from the surface. If there is any remaining adhesive, use a gentle adhesive remover or soap and water to clean the area.
Applying Adhesive Remover or Solvent
Applying adhesive remover or solvent is a common method for removing PopSockets. This approach involves using a chemical-based solution to dissolve the adhesive, making it easier to remove the PopSocket. To apply adhesive remover or solvent, start by selecting a suitable product, such as Goo Gone, WD-40, or nail polish remover. Spray or apply the remover to the adhesive area, making sure to saturate it thoroughly. Let it sit for a few minutes to allow the solvent to penetrate the adhesive. Use a credit card, scraper, or your fingers to gently pry the PopSocket away from the surface. Be careful not to apply too much pressure, which can damage the surface or leave residue. If the PopSocket is still stubborn, repeat the process as needed. It's essential to note that some adhesive removers or solvents may damage certain surfaces, such as paint or varnish, so test a small area first to ensure the product is safe to use. Additionally, be sure to follow the manufacturer's instructions and take necessary safety precautions, such as wearing gloves and working in a well-ventilated area. By applying adhesive remover or solvent, you can effectively remove your PopSocket without causing damage to the surface.
Gently Prying the PopSocket Off
When it comes to gently prying the PopSocket off, it's essential to exercise caution to avoid damaging the phone case or the PopSocket itself. Start by locating the edge of the PopSocket, where it meets the phone case. Gently insert a thin, flat tool, such as a credit card or a similar tool, into the gap between the PopSocket and the case. Slowly and carefully pry the PopSocket away from the case, working your way around the edges. Be patient and gentle, as excessive force can cause the PopSocket to tear or the case to crack. If the PopSocket is particularly stubborn, you can try applying a small amount of heat to the area using a hair dryer or a warm cloth. This can help loosen the adhesive and make it easier to remove. As you continue to pry the PopSocket off, be careful not to stretch or pull it too hard, as this can cause it to lose its shape or become misshapen. With patience and care, you should be able to gently pry the PopSocket off without causing any damage.
Post-Removal Care
Proper post-removal care is crucial to ensure a smooth and safe process after removing a sticker, label, or adhesive residue. This care involves several key steps that help prevent any potential damage or complications. Firstly, it is essential to remove any residual adhesive left behind, as this can attract dirt and dust, leading to further issues. Additionally, cleaning the area thoroughly is vital to remove any remaining residue and prevent bacterial growth. Lastly, inspecting the area for any damage caused during the removal process is necessary to address any problems promptly. By following these steps, individuals can ensure a successful removal process and maintain the integrity of the surface. To begin with, removing residual adhesive is a critical first step in post-removal care.
Removing Residual Adhesive
Removing residual adhesive from your phone case or device can be a bit of a challenge, but it's essential to do so to prevent any damage or residue buildup. To start, gently scrape off any excess adhesive using a credit card, your fingernail, or a similar tool. Be careful not to scratch the surface of your device. Next, apply a small amount of adhesive remover, such as Goo Gone or WD-40, to the affected area. Let it sit for a few minutes to allow the solvent to penetrate the adhesive. Then, use a soft cloth or cotton ball to gently wipe away the adhesive. If some residue still remains, you can try using a mixture of equal parts water and white vinegar on a soft cloth to wipe it away. For tougher adhesive residue, you can also try using a hair dryer to heat the area for a few seconds before wiping it away with a soft cloth. It's essential to be patient and gentle when removing residual adhesive to avoid damaging your device or phone case. Additionally, make sure to clean the area thoroughly with soap and water to remove any remaining residue or solvent. By following these steps, you should be able to successfully remove residual adhesive and have your device looking like new again.
Cleaning the Area Thoroughly
Cleaning the area thoroughly is a crucial step in post-removal care after taking off a PopSocket. This process ensures that any remaining adhesive residue is removed, and the surface is left clean and free of debris. To start, gently wipe the area with a soft cloth or a cotton swab to remove any visible residue. For more stubborn adhesive, a small amount of adhesive remover or nail polish remover can be applied to the affected area. Gently rub the area with a soft cloth or cotton swab, working from the outside inwards to avoid spreading the adhesive further. Once the adhesive is removed, use a damp cloth to wipe the area clean, removing any remaining residue or cleaning solution. It's essential to dry the area thoroughly with a soft cloth to prevent any water spots or mineral deposits. If there are any remaining sticky patches, a small amount of oil, such as coconut or olive oil, can be applied to the area and gently rubbed in with a soft cloth. This will help to break down the adhesive and leave the surface clean and residue-free. By following these steps, you can ensure that the area is thoroughly cleaned and prepared for any future use or application.
Inspecting for Any Damage
Inspecting for any damage is a crucial step in the post-removal care process. After removing the PopSocket, carefully examine the surface where it was attached for any signs of damage, such as scratches, residue, or adhesive marks. Check for any remaining adhesive or residue and gently remove it using a soft cloth or a gentle adhesive remover. If there are any scratches or marks, assess their severity and consider using a scratch remover or a touch-up paint to repair them. Additionally, inspect the surrounding area to ensure that the removal process did not damage any nearby surfaces or objects. If you notice any damage, take steps to repair or replace the affected area to prevent further damage or deterioration. By inspecting for any damage, you can ensure that the surface is restored to its original condition and prevent any potential issues from arising in the future.