How To Wash Hockey Gear
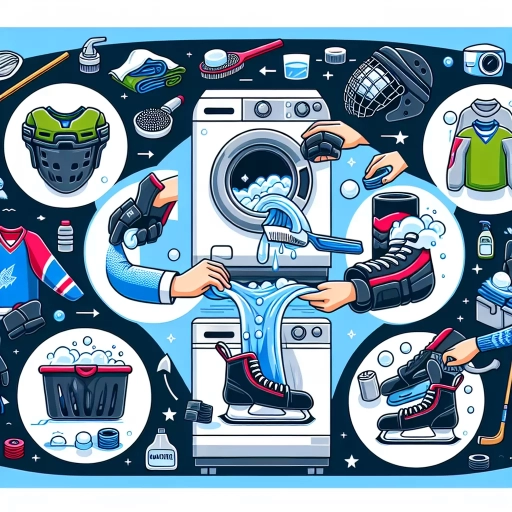
Hockey gear can be notoriously difficult to clean, but with the right techniques and strategies, you can keep your equipment in top condition. To ensure your gear remains fresh, clean, and free of bacteria, it's essential to follow a comprehensive cleaning process. This process involves three critical steps: pre-wash preparation, washing and sanitizing, and drying and storage. In this article, we'll delve into each of these steps, providing you with expert advice on how to wash your hockey gear effectively. By following these guidelines, you'll be able to remove dirt, sweat, and bacteria from your equipment, preventing the growth of unpleasant odors and extending the lifespan of your gear. To get started, let's begin with the first step: pre-wash preparation.
Pre-Wash Preparation
Pre-wash preparation is a crucial step in the laundry process that is often overlooked. However, taking the time to properly prepare your clothes before washing can make a significant difference in the cleanliness and longevity of your garments. To ensure your clothes receive the best possible care, it's essential to remove excess dirt and debris, take out removable parts, and check the care labels. By doing so, you can prevent damage to your clothes, reduce the risk of colors bleeding, and ensure that your clothes are cleaned effectively. In this article, we will explore the importance of pre-wash preparation and provide tips on how to do it correctly. First, let's start with the first step: removing excess dirt and debris.
Remove Excess Dirt and Debris
Here is the paragraphy: Before you start washing your hockey gear, it's essential to remove any excess dirt and debris that may be stuck to the surface. This step is crucial in ensuring that your gear is properly cleaned and sanitized. Start by gently tapping off any loose dirt or debris from the gear using a soft-bristled brush or a clean cloth. For more stubborn dirt and debris, you can use a soft-bristled toothbrush or a small, soft-bristled brush to gently scrub the affected areas. Be careful not to scratch the surface of the gear, as this can damage the materials and compromise their performance. Once you've removed as much dirt and debris as possible, use a clean, damp cloth to wipe down the gear and remove any remaining dirt or debris. This will help to loosen any remaining dirt and make the washing process more effective. By removing excess dirt and debris, you'll be able to get a deeper clean and prevent the growth of bacteria and mildew that can cause unpleasant odors and affect the performance of your gear. Regularly removing excess dirt and debris will also help to extend the lifespan of your gear and keep it looking its best.
Take Out Removable Parts
Take out removable parts such as mouthguards, throat protectors, and any other detachable components from your hockey gear before washing. These parts can be cleaned separately and may require special care. For example, mouthguards can be washed with mild soap and warm water, while throat protectors may need to be hand washed with a soft-bristled brush to remove any debris. By removing these parts, you can prevent any damage or discoloration during the washing process. Additionally, taking out removable parts allows for a more thorough cleaning of the gear, ensuring that all areas are cleaned and sanitized properly. This step is crucial in maintaining the quality and longevity of your hockey gear, as well as preventing the growth of bacteria and odor-causing microorganisms.
Check the Care Labels
No need to explain. Here is the paragraphy: Always check the care labels on your hockey gear before washing. The care label will provide specific instructions on how to wash, dry, and care for your gear. Some gear may require dry cleaning, while others may be machine washable. The label may also specify the temperature of the water, the type of detergent to use, and whether the gear can be tumble dried or air dried. It's essential to follow these instructions to prevent damage to your gear and ensure it lasts longer. Ignoring the care label can result in shrinkage, discoloration, or damage to the materials, which can affect the performance and safety of your gear. By following the care label instructions, you can ensure your hockey gear is properly cleaned and maintained, extending its lifespan and keeping you safe on the ice. Additionally, some gear may have special care instructions, such as avoiding fabric softener or bleach, which can damage the materials or affect the gear's performance. Always check the care label before washing to ensure you're using the right cleaning method for your gear.
Washing and Sanitizing
When it comes to washing and sanitizing, it's essential to follow the right techniques to ensure cleanliness and hygiene. To start, you'll need to decide whether to hand wash or machine wash your items, considering the type of fabric and level of soiling. Next, it's crucial to use mild detergent and cold water to prevent damage and preserve the quality of your belongings. Additionally, sanitizing with vinegar or baking soda can provide an extra layer of protection against bacteria and germs. By following these steps, you can keep your items clean, hygienic, and in great condition. So, let's dive into the first step: Hand Wash or Machine Wash?
Hand Wash or Machine Wash
The article is written for hockey players and parents. When it comes to washing and sanitizing hockey gear, one of the most important decisions is whether to hand wash or machine wash. Both methods have their own advantages and disadvantages, and the right choice for you will depend on the type of gear you're washing, its material, and your personal preference. Hand washing is a great option for delicate or sensitive items, such as gloves, shin guards, and helmets, as it allows for a more gentle cleaning process that won't damage the materials. Additionally, hand washing is often the best way to remove stubborn stains and odors, as you can target specific areas and use a variety of cleaning products. On the other hand, machine washing is a faster and more convenient option for bulkier items, such as jerseys, socks, and pants. It's also a great way to sanitize gear, as the hot water and agitation can help kill bacteria and viruses. However, machine washing can be tough on some materials, and may cause shrinkage or damage to certain types of fabric. Ultimately, the key is to choose the method that best suits the specific item you're washing, and to always follow the manufacturer's instructions. By doing so, you can ensure that your gear is clean, sanitized, and ready for the next game.
Use Mild Detergent and Cold Water
Washing and sanitizing your hockey gear regularly is crucial to maintain hygiene and prevent the growth of bacteria and odor-causing microorganisms. When it comes to washing your hockey gear, it's essential to use mild detergent and cold water. Harsh detergents and hot water can damage the materials and compromise the gear's performance. Mild detergent is gentle on the fabrics and helps to remove dirt and grime without stripping away the gear's natural oils. Cold water, on the other hand, helps to prevent the growth of bacteria and mildew, which can thrive in warm and humid environments. Additionally, cold water helps to preserve the colors and textures of the gear, ensuring that it remains in good condition for a longer period. By using mild detergent and cold water, you can effectively clean your hockey gear without damaging it, keeping it fresh and hygienic for your next game.
Sanitize with Vinegar or Baking Soda
When it comes to sanitizing hockey gear, two natural and effective methods stand out: using vinegar or baking soda. Both of these household staples have antimicrobial properties that can help eliminate bacteria, viruses, and fungi that thrive in damp environments. Vinegar, in particular, is a potent sanitizer due to its acidity, which creates an environment that is inhospitable to microorganisms. To sanitize with vinegar, mix equal parts water and white vinegar in a spray bottle, then spray the solution onto the gear, making sure to saturate all surfaces. Let it sit for 10-15 minutes before rinsing with clean water. Baking soda, on the other hand, is a gentle yet effective sanitizer that can be used to absorb moisture and neutralize odors. To sanitize with baking soda, sprinkle a generous amount onto the gear, let it sit for 30 minutes to an hour, then wipe clean with a damp cloth. Both methods are safe to use on most hockey gear materials, including plastic, metal, and fabric. However, it's always a good idea to spot test a small area first to ensure the solution doesn't damage the material. By incorporating vinegar or baking soda into your sanitizing routine, you can help keep your hockey gear fresh, clean, and free from the growth of microorganisms that can cause odors and infections.
Drying and Storage
Proper drying and storage techniques are crucial to maintaining the quality and longevity of your belongings. When it comes to drying, there are several methods to consider, including air drying, tumble drying on low, and reshaping and laying flat to dry. Each of these methods has its own advantages and disadvantages, and choosing the right one depends on the type of item being dried. Additionally, once an item is dry, it's essential to store it in a well-ventilated area to prevent moisture buildup and damage. By understanding the best drying and storage methods for your belongings, you can help extend their lifespan and keep them looking their best. One of the most effective ways to dry items, especially delicate or woolen ones, is to air dry or tumble dry on low.
Air Dry or Tumble Dry on Low
When it comes to drying hockey gear, there are two popular options: air drying or tumble drying on low. Both methods have their own advantages and disadvantages, and the right choice for you will depend on your specific needs and preferences. Air drying is a great option for those who want to preserve the quality and longevity of their gear. This method allows for a slower and more gentle drying process, which can help prevent damage to the materials and fabrics used in hockey equipment. Additionally, air drying can help prevent the growth of bacteria and mildew, which can thrive in warm and humid environments. On the other hand, tumble drying on low can be a faster and more convenient option, especially for those who need to dry their gear quickly. However, this method can be harsher on the materials and may cause them to degrade faster. It's also important to note that tumble drying can cause the fabrics to shrink or lose their shape, which can affect the fit and performance of the gear. Ultimately, the decision to air dry or tumble dry on low will depend on your specific needs and priorities. If you want to preserve the quality and longevity of your gear, air drying may be the better option. But if you need to dry your gear quickly and don't mind a slightly higher risk of damage, tumble drying on low can be a good choice.
Reshape and Lay Flat to Dry
When it comes to drying and storing hockey gear, two crucial steps are often overlooked: reshaping and laying flat to dry. Reshaping your gear, particularly helmets, shoulder pads, and gloves, is essential to maintain their original form and prevent damage. This involves gently manipulating the gear back into its natural shape, ensuring that all parts are properly aligned and not creased or bent. By doing so, you'll prevent the growth of bacteria and mold, which thrive in damp, distorted environments. Moreover, reshaping your gear will help maintain its protective qualities, ensuring that it continues to provide optimal support and cushioning during games and practices. Laying your gear flat to dry is equally important, as it allows air to circulate freely and prevents water from accumulating in crevices and pockets. This is especially crucial for gear with removable parts, such as helmets and shoulder pads, as water can become trapped and cause damage. By laying your gear flat, you'll speed up the drying process, reduce the risk of bacterial growth, and prevent musty odors from developing. Additionally, laying flat to dry helps prevent gear from becoming misshapen or developing creases, which can affect its performance and overall lifespan. By incorporating reshaping and laying flat to dry into your gear maintenance routine, you'll be able to extend the life of your equipment, maintain its performance, and ensure that it continues to provide the protection and support you need to perform at your best on the ice.
Store in a Well-Ventilated Area
Store your hockey gear in a well-ventilated area to prevent the growth of bacteria and mildew. This is especially important for gear that is prone to moisture accumulation, such as helmets, gloves, and pads. A well-ventilated area allows air to circulate around the gear, helping to evaporate any remaining moisture and prevent the growth of microorganisms. You can store your gear in a room with a window or use a fan to improve air circulation. Avoid storing your gear in a basement or attic, as these areas tend to be poorly ventilated and can be prone to moisture accumulation. Additionally, do not store your gear in a plastic bag or airtight container, as this can trap moisture and create an ideal environment for bacteria and mildew to grow. Instead, store your gear in a mesh bag or a breathable container that allows air to circulate around the gear. By storing your hockey gear in a well-ventilated area, you can help extend its lifespan and keep it in good condition.