How To Slow Mo A Video On Iphone
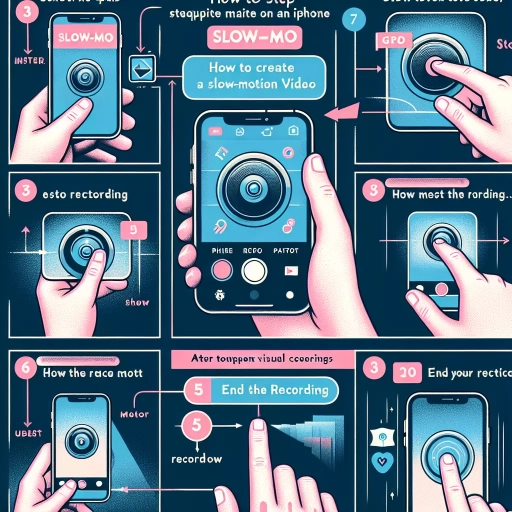
Here is the introduction paragraph: Are you looking to add a touch of drama or emphasize a specific moment in your iPhone videos? Slowing down a video can be a great way to do just that. Fortunately, you don't need to be a video editing expert to achieve this effect. In this article, we'll explore three easy methods to slow down a video on your iPhone. You can use the built-in Photos app, the iMovie app, or even third-party apps to achieve the desired effect. We'll start by looking at how to slow down a video using the Photos app, which is a great option if you want a quick and easy solution. Let me know if you need any changes.
Using the Photos App
The Photos app on your iPhone or iPad is a powerful tool for editing and enhancing your videos. One of the most popular features of the Photos app is the ability to slow down videos, creating a dramatic and eye-catching effect. To use this feature, you'll need to access the Photos app, select the video you want to slow down, and then apply the slow-motion effect. In this article, we'll take a closer look at how to use the Photos app to slow down your videos. We'll start by exploring how to access the Photos app, then move on to selecting the video you want to slow down, and finally, we'll cover how to apply the slow-motion effect. By the end of this article, you'll be able to create stunning slow-motion videos using the Photos app. So, let's get started by accessing the Photos app.
Accessing the Photos App
Accessing the Photos app on your iPhone is a straightforward process. To start, locate the Photos app icon on your home screen, which is typically represented by a colorful flower-like image. Tap on the icon to open the app. Alternatively, you can also access the Photos app from the App Library by swiping left on your home screen until you reach the App Library page, then tapping on the "Media" category and selecting "Photos." Once the app is open, you will see a grid view of your photos and videos, organized by date. You can browse through your media by scrolling up or down, or use the tabs at the bottom of the screen to switch between different views, such as "Media Types" or "Albums." If you're looking for a specific photo or video, you can use the search bar at the top of the screen to search by keyword, location, or date. Additionally, you can also access the Photos app from other apps, such as Messages or Mail, by tapping on a photo or video attachment and selecting "Open in Photos."
Selecting the Video to Slow Down
When selecting a video to slow down, it's essential to choose a clip that will benefit from the slow-motion effect. Look for videos with fast-paced action, such as sports, dance, or wildlife footage. These types of videos will showcase the slow-motion effect more dramatically, making it more engaging and entertaining to watch. Additionally, consider the lighting and camera quality of the video. A well-lit video with good camera quality will produce a better slow-motion effect than a poorly lit or low-quality video. You can also experiment with different types of videos, such as time-lapses or hyperlapses, to create unique and captivating slow-motion effects. Furthermore, if you're looking to create a dramatic or emotional impact, consider slowing down a video with a strong narrative or emotional content. This will help to amplify the emotional impact of the video and create a more immersive viewing experience. By carefully selecting the right video to slow down, you can create a stunning and engaging slow-motion effect that will captivate your audience.
Applying the Slow-Motion Effect
The Photos app on your iPhone offers a range of editing tools, including the ability to apply a slow-motion effect to your videos. To do this, open the Photos app and select the video you want to edit. Tap the "Edit" button in the top right corner of the screen, then tap the "Adjust" tab. From here, you can adjust the speed of your video by dragging the slider to the left to slow it down or to the right to speed it up. You can also tap the "Slow" button to apply a pre-set slow-motion effect. Additionally, you can trim your video to focus on a specific section by tapping the "Trim" button and adjusting the start and end points. Once you've made your adjustments, tap "Done" to save your changes. The slow-motion effect can add a dramatic touch to your videos, making them more engaging and fun to watch.
Using the iMovie App
The iMovie app is a powerful video editing tool that allows users to create stunning videos on their Mac or iOS devices. With its user-friendly interface and advanced features, iMovie makes it easy to import, edit, and share videos. In this article, we will explore how to use the iMovie app to create a slow-motion video. To achieve this, we will cover three essential steps: importing the video into iMovie, splitting the clip to apply slow-motion, and exporting the edited video. By following these steps, you will be able to create a professional-looking slow-motion video that showcases your creativity. Let's start by importing the video into iMovie, which is the first step in creating a stunning slow-motion video.
Importing the Video into iMovie
To import the video into iMovie, start by opening the iMovie app on your iPhone. If you have multiple videos in your Photos app, you can select the one you want to slow down by tapping on it. Once you've selected the video, tap the "Share" icon, which looks like a box with an arrow coming out of it. From the share menu, tap "iMovie" to import the video directly into the app. Alternatively, you can open iMovie and tap the "Media" tab at the top of the screen, then select "Video" to browse through your iPhone's video library. Find the video you want to slow down and tap on it to import it into iMovie. Once the video is imported, you'll see it appear in the iMovie timeline, where you can begin editing it to create your slow-motion effect.
Splitting the Clip to Apply Slow-Motion
When you want to apply slow-motion to a specific part of your video, you can split the clip to isolate that section. To do this, open the iMovie app and select the video clip you want to edit. Tap the "Edit" button, then tap the "Split" button, which looks like a pair of scissors. Move the playhead to the point where you want to split the clip, and tap the "Split" button again. This will divide the clip into two separate sections. You can then select the section you want to apply slow-motion to and tap the "Speed" button. Choose the slow-motion option, and adjust the speed to your liking. You can also add other effects, such as music or transitions, to enhance the slow-motion section. By splitting the clip, you can create a more dynamic and engaging video that showcases the action in slow-motion.
Exporting the Edited Video
Exporting the edited video is a straightforward process in iMovie. Once you have finalized your video, you can export it in various formats and resolutions. To export your video, tap on the "Share" icon, which looks like a box with an arrow coming out of it. This will open up a menu with several options, including "Save Video," "Save Trailer," and "Share." Select "Save Video" to export your edited video. You can then choose the resolution, file type, and other settings to customize your export. iMovie also allows you to export your video directly to various platforms, such as YouTube, Vimeo, and Facebook, making it easy to share your creations with others. Additionally, you can also export your video to your iPhone's Photos app, where you can further edit or share it. Overall, exporting your edited video in iMovie is a simple and convenient process that allows you to share your creations with others or save them for later use.
Using Third-Party Apps
Using third-party apps can be a great way to enhance your smartphone's video recording capabilities, particularly when it comes to slow-motion recording. While many smartphones come with built-in slow-motion recording features, third-party apps can offer more advanced features and better quality. To get started with using third-party apps for slow-motion recording, you'll need to download and install a slow-motion app, import the video into the app, and adjust the slow-motion settings to achieve the desired effect. By following these steps, you can create stunning slow-motion videos that showcase your creativity and style. In this article, we'll explore the process of using third-party apps for slow-motion recording, starting with the first step: downloading and installing a slow-motion app.
Downloading and Installing a Slow-Motion App
To download and install a slow-motion app on your iPhone, start by opening the App Store and searching for "slow motion video" or "slow mo video editor" in the search bar. Browse through the search results and select an app that suits your needs, such as Slow Motion Video Editor, SlowMo, or Video Speed Editor. Tap the "Get" button next to the app icon, and then tap "Install" to begin the download process. Wait for the app to download and install on your device, which should only take a few seconds. Once the installation is complete, tap the "Open" button to launch the app. You will then be prompted to grant the app access to your camera and photos, which is necessary for the app to function properly. After granting the necessary permissions, you can start using the app to slow down your videos. Most slow-motion apps have a user-friendly interface that allows you to easily import videos, adjust the speed, and export the edited video. Some apps may also offer additional features, such as video trimming, filters, and effects, to enhance your slow-motion video. By following these simple steps, you can download and install a slow-motion app on your iPhone and start creating stunning slow-motion videos in no time.
Importing the Video into the Third-Party App
Once you've selected the third-party app, the next step is to import the video into the app. This process is usually straightforward and may vary slightly depending on the app you're using. Typically, you'll need to open the app and look for an "Import" or "Add Media" button, which is often represented by a plus sign (+) or a folder icon. Tap on this button to access your iPhone's media library, where you can select the video you want to slow down. Some apps may also allow you to import videos directly from your iPhone's Photos app or other storage locations. Once you've selected the video, it will be imported into the app, and you can proceed to edit it. Some popular third-party apps, such as InShot, Adobe Premiere Rush, and Filmic Pro, offer a seamless import process, making it easy to get started with slowing down your video.
Adjusting the Slow-Motion Settings
Adjusting the slow-motion settings on your iPhone allows you to customize the playback speed of your video to achieve the desired effect. To access the slow-motion settings, open the Photos app, select the video you want to edit, and tap the "Edit" button. Then, tap the "Speed" icon, which looks like a speedometer, and choose from three options: 1/4 speed, 1/2 speed, or 1/8 speed. You can also tap the "Custom" option to adjust the speed manually by dragging the slider. Additionally, you can trim the video to focus on the part you want to slow down by tapping the "Trim" button and adjusting the edges of the video timeline. By adjusting the slow-motion settings, you can create a more dramatic or humorous effect, depending on the content of your video. For example, slowing down a video of a sports play can help highlight the action, while slowing down a video of a funny moment can make it even more comical. Experimenting with different slow-motion settings can help you achieve the desired effect and enhance the overall quality of your video.