How To Sew A Zipper
Here is the introduction paragraph: Sewing a zipper can be a daunting task, especially for beginners. However, with the right guidance and preparation, it can be a straightforward process. In this article, we will walk you through the steps to sew a zipper, from preparation to installation. We will cover the essential preparation steps to ensure a smooth process, provide a step-by-step guide on how to install a zipper, and offer troubleshooting tips for common issues that may arise. By following these steps, you will be able to confidently sew a zipper and take your sewing skills to the next level. So, let's start by preparing for success, and that begins with understanding the importance of preparation. In the next section, we will explore why preparation is key to sewing a zipper.
Preparation is Key
Preparation is key to a successful project, and this is especially true when it comes to sewing. Before starting a new sewing project, it's essential to take the time to prepare and plan carefully. This involves choosing the right zipper, selecting the appropriate fabric, and gathering all the necessary tools and materials. By doing so, you can ensure that your project turns out as desired and avoid costly mistakes. One of the most critical components of a sewing project is the zipper, and choosing the right one can make all the difference. With so many types of zippers available, it's crucial to select the one that best suits your project's needs. In the next section, we'll take a closer look at the importance of choosing the right zipper for your sewing project.
Choosing the Right Zipper
Choosing the right zipper for your sewing project is crucial to ensure a professional finish and smooth functionality. With various types of zippers available, selecting the correct one can be overwhelming, especially for beginners. To make the right choice, consider the type of garment or project you are working on, the fabric type, and the desired level of durability. For example, if you are sewing a delicate lingerie or a sheer fabric, a lightweight zipper with a small tooth size is ideal. On the other hand, if you are working on a heavy-duty project like a backpack or a jacket, a sturdy zipper with large teeth is more suitable. Additionally, consider the zipper's length, width, and color to ensure it matches your project's requirements. It's also essential to think about the zipper's functionality, such as whether you need a two-way or one-way zipper, and whether it should be separable or non-separable. By taking these factors into account, you can choose the right zipper for your project and achieve a professional-looking finish.
Selecting the Appropriate Fabric
When it comes to sewing a zipper, selecting the appropriate fabric is crucial to ensure a smooth and successful process. The type of fabric you choose can affect the ease of sewing, the appearance of the finished product, and the overall durability of the zipper. For beginners, it's recommended to start with fabrics that are easy to work with, such as cotton, linen, or denim. These fabrics are stable, smooth, and less prone to stretching or distorting, making it easier to sew a straight line and achieve a professional finish. Avoid using delicate or slippery fabrics like silk, chiffon, or velvet, as they can be challenging to work with and may require specialized techniques or tools. Additionally, consider the weight and thickness of the fabric, as heavier fabrics may require a stronger zipper or specialized sewing techniques. By choosing the right fabric, you'll set yourself up for success and ensure a beautiful, functional, and long-lasting zipper.
Gathering Essential Tools and Materials
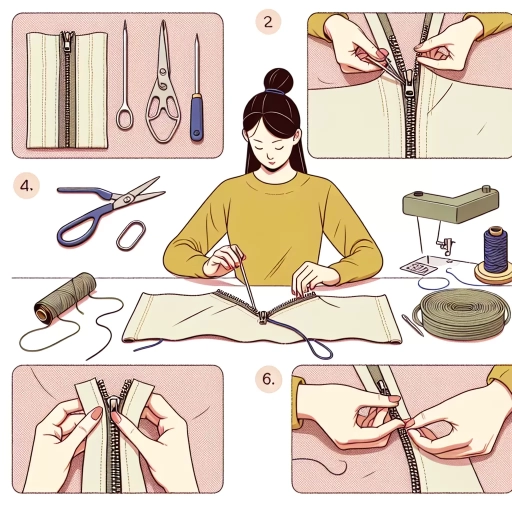
When it comes to sewing a zipper, having the right tools and materials is crucial for a successful outcome. To start, you'll need a sewing machine that can handle the thickness of the zipper and the fabric you're working with. A zipper foot attachment is also essential, as it allows you to get close to the zipper teeth and sew a straight line. In addition to your machine, you'll need a few basic hand-sewing tools, such as a seam ripper, scissors, and a tape measure. A ruler or other straightedge can also come in handy for drawing straight lines and measuring your fabric. For the zipper itself, you'll need to choose a type that's suitable for your project, such as a separating zipper or a non-separating zipper. You'll also need to select a zipper stop, which is a small device that prevents the zipper from coming off the track. Other materials you may need include interfacing or stabilizer to support the fabric around the zipper, and a zipper pull or tab to make it easier to grasp the zipper. Finally, make sure you have a variety of threads on hand, including a matching thread for the fabric and a contrasting thread for the zipper. By gathering all of these essential tools and materials, you'll be well-prepared to tackle your zipper-sewing project with confidence.
Step-by-Step Zipper Installation
Installing a zipper can seem like a daunting task, but with the right steps, it can be a straightforward process. To ensure a professional-looking finish, it's essential to follow a step-by-step approach. The first step in installing a zipper is to position it correctly on the fabric, taking into account the grain line and the desired placement. This is crucial in achieving a smooth and even installation. Once the zipper is in place, the next step is to secure it with pins and clips, ensuring that it remains stable and aligned during the sewing process. Finally, sewing the zipper in place with a straight stitch is the final step in completing the installation. By following these steps, you can achieve a high-quality zipper installation that is both functional and visually appealing. In this article, we will break down each of these steps in detail, starting with the crucial first step of positioning the zipper on the fabric.
Positioning the Zipper on the Fabric
Positioning the zipper on the fabric is a crucial step in zipper installation. To ensure a smooth and even application, it's essential to accurately place the zipper on the fabric. Start by identifying the center of the zipper and the center of the fabric opening. Align these two points, making sure the zipper is facing the correct direction. Next, place the zipper on the fabric, aligning the edge of the zipper tape with the edge of the fabric. Use a ruler or measuring tape to ensure the zipper is evenly spaced and parallel to the fabric's edge. If your fabric has a right and wrong side, make sure the zipper is placed on the wrong side, as it will be turned right side out during the sewing process. Additionally, consider the zipper's length and the fabric's thickness when positioning it. A longer zipper may require more fabric to be folded under, while a thicker fabric may need a shorter zipper to prevent bulkiness. To secure the zipper in place, use pins or clips to hold it firmly against the fabric. Make sure to leave a small margin between the zipper and the fabric's edge to allow for a smooth, even stitch. By carefully positioning the zipper on the fabric, you'll set yourself up for a successful zipper installation and a professional-looking finish.
Securing the Zipper with Pins and Clips
Securing the zipper with pins and clips is a crucial step in the zipper installation process. This step ensures that the zipper is properly aligned and in place, preventing any potential errors or misalignments during the sewing process. To secure the zipper, start by placing a pin at the top of the zipper, where the zipper stop meets the fabric. This pin will serve as a reference point and help maintain the zipper's position. Next, place additional pins along the length of the zipper, spacing them about 1-2 inches apart. Make sure to pin through both the zipper tape and the fabric, ensuring that the zipper is securely attached. For added security, consider using clips instead of pins, especially if working with delicate or slippery fabrics. Clips can be placed at the same intervals as pins and provide a stronger grip on the fabric. Once the zipper is pinned or clipped in place, double-check that it is properly aligned and smooth out any wrinkles or creases in the fabric. This step is essential in ensuring a professional-looking finish and preventing any potential issues during the sewing process. By taking the time to secure the zipper with pins and clips, you can ensure a successful and stress-free zipper installation.
Sewing the Zipper in Place with a Straight Stitch
Sewing the zipper in place with a straight stitch is a crucial step in the zipper installation process. To begin, place the zipper right side down on the fabric, aligning the edge of the zipper with the edge of the fabric. Make sure the zipper is centered and the teeth are facing the correct direction. Next, pin the zipper in place, using straight pins to secure it to the fabric. Then, thread your sewing machine with a matching thread color and set the stitch length to a medium or long length. Starting at the bottom of the zipper, sew a straight line along the edge of the zipper, using a 1/4 inch seam allowance. Make sure to backstitch at the beginning and end of the seam to secure it in place. As you sew, keep the fabric smooth and flat, using your hands to guide the fabric and prevent bunching. Continue sewing along the edge of the zipper, making sure to keep the stitches even and consistent. When you reach the top of the zipper, backstitch again to secure the seam. Finally, remove the pins and trim the excess thread. Your zipper is now securely in place, and you can move on to the next step in the installation process.
Troubleshooting Common Zipper Issues
Troubleshooting common zipper issues can be a frustrating experience, especially when it seems like there's no solution in sight. However, with the right techniques and tools, you can easily fix a range of zipper problems and extend the life of your garments, bags, and other textile items. In this article, we'll explore three common zipper issues and provide step-by-step solutions to resolve them. We'll cover dealing with uneven or wavy zipper edges, fixing a zipper that won't close or open smoothly, and concealing visible zipper stitches or threads. By understanding the causes of these issues and learning how to address them, you'll be able to breathe new life into your favorite items and save money by avoiding costly repairs or replacements. So, let's start by tackling one of the most common zipper problems: dealing with uneven or wavy zipper edges.
Dealing with Uneven or Wavy Zipper Edges
Here is the paragraphy: Dealing with uneven or wavy zipper edges can be frustrating, but there are a few techniques to help you achieve a smooth and professional finish. One common issue is when the zipper edge is not aligned with the seam allowance, causing the zipper to pucker or wave. To prevent this, make sure to press the seam allowance before attaching the zipper, and use a ruler or seam gauge to ensure the edge is straight. Another solution is to use a zipper foot or a walking foot on your sewing machine, which can help guide the zipper and prevent it from wavering. If the zipper edge is already uneven, you can try using a hot iron to press the edge, or use a seam ripper to carefully remove the stitches and re-sew the zipper. Additionally, using a zipper with a built-in stabilizer or a zipper with a wider tape can also help to prevent uneven edges. It's also important to note that the type of fabric you are working with can also affect the zipper edge, so it's best to test the zipper on a scrap piece of fabric before sewing it onto your project. By following these tips, you can achieve a smooth and even zipper edge that adds a professional touch to your sewing projects.
Fixing a Zipper that Won't Close or Open Smoothly
When a zipper won't close or open smoothly, it can be frustrating and affect the overall functionality of your garment or bag. To fix this issue, start by inspecting the zipper for any blockages or debris that may be causing the problem. Check if there are any threads, lint, or dirt accumulated in the zipper's teeth or slider. If you find any, use a soft-bristled brush or a lint roller to gently remove them. Next, try to identify if the zipper's teeth are misaligned or if the slider is not moving smoothly along the track. If the teeth are misaligned, try to realign them by gently pulling the zipper in the opposite direction. If the slider is stuck, apply a small amount of lubricant, such as silicone spray or wax, to the zipper's track and slider. This should help the slider move more smoothly. If the issue persists, check if the zipper's stop is damaged or missing. The stop is the small plastic or metal piece at the top of the zipper that prevents the slider from coming off. If it's damaged or missing, you may need to replace the zipper. Finally, if none of these solutions work, it may be time to replace the zipper entirely. By following these steps, you should be able to fix a zipper that won't close or open smoothly and get your garment or bag functioning properly again.
Concealing Visible Zipper Stitches or Threads
When it comes to concealing visible zipper stitches or threads, there are a few techniques you can employ to achieve a professional-looking finish. One method is to use a zipper foot, which allows you to sew close to the zipper teeth without catching the stitches on the foot. This will help to minimize the visibility of the stitches. Another approach is to use a blind hem stitch or a stretch stitch, which are designed to be nearly invisible. You can also use a matching thread color to blend in with the surrounding fabric, making the stitches less noticeable. Additionally, you can try using a serger or overlock machine to finish the seam, which will encase the stitches in a thread casing, making them virtually invisible. If you're working with a particularly visible thread, you can try using a thread conditioner or a thread wax to reduce its visibility. Finally, you can also use a seam ripper to carefully remove any visible stitches or threads, and then re-sew the area using one of the above techniques. By employing one or more of these methods, you can effectively conceal visible zipper stitches or threads and achieve a polished, professional finish.