How To Clip On Discord
Discord is a popular communication platform for gamers and communities, offering a range of features to enhance the user experience. One common issue that users face is clipping, which can be frustrating and disrupt the conversation. Clipping occurs when the audio signal is too loud, causing distortion and a "clipped" sound. To avoid clipping on Discord, it's essential to understand the basics of the platform, set up your audio equipment correctly, and follow a step-by-step guide to adjust your settings. In this article, we'll explore these three key areas to help you prevent clipping and ensure high-quality audio on Discord. First, we'll start by understanding the basics of Discord, including its audio settings and how they impact your sound quality.
Understanding the Basics of Discord
Discord is a popular communication platform designed specifically for gamers, but it has since grown to become a versatile tool for various communities and groups. To get the most out of Discord, it's essential to understand its basics. In this article, we'll delve into the fundamentals of Discord, starting with what it is and its features. We'll also cover how to create a Discord account, a crucial step in joining the platform. Additionally, we'll explore the concept of Discord channels and servers, which are vital components of the platform's functionality. By grasping these basics, you'll be well on your way to becoming a proficient Discord user. So, let's begin by exploring what Discord is and what features it has to offer.
What is Discord and its Features
Discord is a popular communication platform designed specifically for gamers, but it has since grown to become a versatile tool for various communities and groups. At its core, Discord is a free, web-based application that allows users to communicate through text, voice, and video. Its features are designed to facilitate seamless communication, collaboration, and community building. One of the key features of Discord is its server system, which enables users to create or join communities based on shared interests. Servers can be public or private, and they can be customized with various channels, roles, and permissions to suit the needs of the community. Discord also offers a range of features such as direct messaging, voice and video chat, screen sharing, and rich media support, making it an ideal platform for online communities, teams, and groups. Additionally, Discord has a large library of bots and integrations that can enhance the user experience, provide entertainment, and automate tasks. With its user-friendly interface, robust features, and cross-platform compatibility, Discord has become a go-to platform for millions of users worldwide.
How to Create a Discord Account
To create a Discord account, start by navigating to the Discord website on your computer or mobile device. Click on the "Register" button, usually located in the top right corner of the page. You will be prompted to enter your email address, choose a username, and create a password. Make sure to choose a strong and unique password to ensure the security of your account. You will also be asked to provide your date of birth, which is required to comply with Discord's terms of service. Once you have filled out the registration form, click on the "Create an Account" button. You will then receive a verification email to the email address you provided. Click on the verification link in the email to activate your account. After verifying your account, you can start customizing your profile by adding a profile picture, bio, and other information. You can also start exploring Discord servers and communities that align with your interests. To join a server, click on the "Join a Server" button and enter the server invite link or code. You can also search for public servers using the "Discover" feature. Once you have joined a server, you can start chatting with other members, participating in voice and video conversations, and engaging with various server activities. By following these steps, you can easily create a Discord account and start enjoying the platform's features and communities.
Understanding Discord Channels and Servers
Discord channels and servers are the backbone of the platform, allowing users to communicate and collaborate with each other in a structured and organized manner. A Discord server is essentially a community or group of users that share a common interest or goal, and it can be public or private. Within a server, there are various channels that serve different purposes, such as text channels for chatting, voice channels for voice conversations, and video channels for screen sharing and video conferencing. Users can join or create servers and channels, and they can also customize their experience by creating roles, assigning permissions, and setting up notifications. Understanding how to navigate and utilize Discord channels and servers is crucial for getting the most out of the platform, whether you're a gamer, content creator, or community manager. By mastering the basics of Discord channels and servers, you can create a seamless and engaging experience for yourself and others, and unlock the full potential of the platform.
Setting Up Your Audio Equipment
Setting up your audio equipment is a crucial step in ensuring high-quality sound for your online streams, podcasts, or video conferencing. To achieve this, it's essential to focus on three key areas: choosing the right microphone for clipping, connecting your microphone to your computer, and configuring your audio settings on Discord. By mastering these aspects, you'll be able to deliver clear and crisp audio that engages your audience. In this article, we'll delve into each of these topics, starting with the importance of selecting the right microphone for clipping. With so many options available, it can be overwhelming to decide which microphone is best suited for your needs. In the next section, we'll explore the key factors to consider when choosing the right microphone for clipping, helping you make an informed decision that elevates your audio quality.
Choosing the Right Microphone for Clipping
When it comes to choosing the right microphone for clipping on Discord, there are several factors to consider. First and foremost, you'll want to think about the type of microphone you need. There are two main types: condenser and dynamic. Condenser microphones are more sensitive and can pick up a wider range of frequencies, making them ideal for capturing detailed audio. However, they can also be more prone to picking up background noise. Dynamic microphones, on the other hand, are less sensitive and better suited for loud environments, but may not capture as much detail. If you're planning to use your microphone in a quiet space, a condenser microphone may be the better choice. But if you'll be using it in a noisy environment, a dynamic microphone could be a better fit. Another important consideration is the microphone's polar pattern. A cardioid polar pattern is ideal for clipping, as it picks up sound from the front and rejects sound from the sides and rear. This helps to reduce background noise and ensure that your voice comes through clearly. You'll also want to think about the microphone's frequency response. A flat frequency response is best for clipping, as it will accurately capture the full range of your voice. Some microphones may have a boost in the low end or high end, which can affect the sound quality. Finally, consider the microphone's connectivity options. If you plan to use your microphone with a computer, look for one with a USB connection. If you plan to use it with a gaming console or other device, you may need a different type of connection. By considering these factors, you can choose the right microphone for your clipping needs and ensure that your audio sounds its best.
Connecting Your Microphone to Your Computer
To connect your microphone to your computer, start by identifying the type of microphone you have. If you have a USB microphone, simply plug it into a free USB port on your computer. If you have a 3.5mm microphone, you'll need to plug it into the microphone jack on your computer, usually located on the front or back of the device. If your computer doesn't have a microphone jack, you can use a USB adapter to connect your microphone. Once your microphone is physically connected, you'll need to configure your computer's audio settings to recognize the microphone. On a Windows computer, go to the Start menu and select "Settings," then click on "System" and "Sound." On a Mac, go to the Apple menu and select "System Preferences," then click on "Sound." In the audio settings, select your microphone as the input device and adjust the volume levels as needed. You may also need to install drivers or software for your specific microphone, so be sure to check the manufacturer's website for any necessary downloads. Finally, test your microphone by speaking into it and checking that your computer is picking up the audio signal. If you're using Discord, you can test your microphone by going to the "Voice & Video" settings and clicking on the "Test Mic" button.
Configuring Your Audio Settings on Discord
Configuring your audio settings on Discord is a straightforward process that ensures you have the best possible audio experience while communicating with your friends or teammates. To start, navigate to the User Settings by clicking on the gear icon located at the bottom left corner of the Discord window. From there, select the "Voice & Video" option from the left-hand menu. In this section, you can choose your input device, which is the microphone you want to use to communicate with others. If you have multiple microphones connected to your computer, you can select the one you want to use from the dropdown menu. Additionally, you can adjust the input sensitivity by moving the slider to the left or right. If you're experiencing any issues with your microphone, you can also test it by clicking on the "Let's Check" button. Furthermore, you can also configure your output device, which is the device you want to use to hear audio from others. You can choose from a variety of options, including your computer's speakers, headphones, or external speakers. You can also adjust the output volume by moving the slider to the left or right. Another important setting to consider is the "Push to Talk" option, which allows you to choose whether you want to use a push-to-talk key or have your microphone always on. If you choose to use a push-to-talk key, you can select the key you want to use from the dropdown menu. Finally, you can also configure your audio quality settings, including the bitrate and codec, to ensure that you have the best possible audio experience. By configuring your audio settings on Discord, you can ensure that you have clear and crisp audio, and that you can communicate effectively with your friends or teammates.
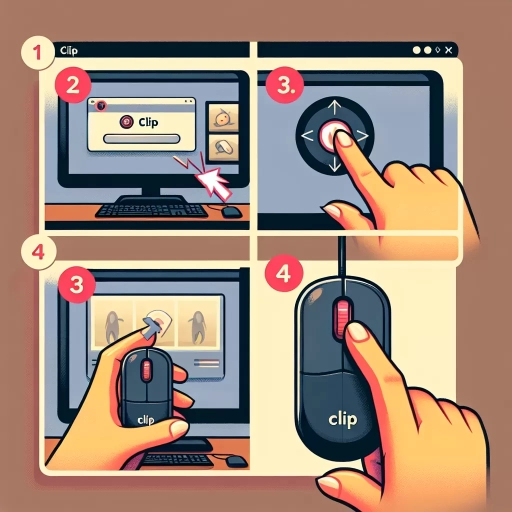
Clipping on Discord: A Step-by-Step Guide
Discord has become an essential platform for gamers and communities to connect, communicate, and share their experiences. One of the exciting features that Discord offers is the ability to clip and share memorable moments from voice and video conversations. Clipping on Discord allows users to capture and save specific parts of their conversations, making it easier to relive and share funny or important moments with others. In this article, we will explore the step-by-step process of clipping on Discord, including accessing the clip feature, recording and saving your clips, and sharing them with others on the platform. By the end of this guide, you will be able to create and share your own clips with ease. To get started, let's first explore how to access the clip feature on Discord.
Accessing the Clip Feature on Discord
To access the Clip feature on Discord, start by opening the Discord app on your device and navigating to the server where you want to clip a conversation. Ensure you have the necessary permissions to create clips, as this feature is typically restricted to server administrators or users with the "Manage Messages" permission. Once you've located the message or conversation you want to clip, click on the three dots at the end of the message and select "Clip" from the dropdown menu. Alternatively, you can also use the keyboard shortcut "Ctrl + Shift + C" (Windows) or "Cmd + Shift + C" (Mac) to quickly access the Clip feature. If you're using the Discord mobile app, you can access the Clip feature by long-pressing on the message and selecting "Clip" from the context menu. After selecting the Clip option, you'll be prompted to choose the clip duration, which can range from 15 seconds to 60 seconds. Choose your desired duration and click "Create Clip" to generate a shareable clip of the conversation. The clip will be uploaded to Discord's servers, and you'll receive a link to share with others. You can also edit the clip's title, description, and tags before sharing it with others. By following these steps, you can easily access the Clip feature on Discord and create shareable clips of your favorite conversations.
Recording and Saving Your Clips
Recording and saving your clips is a straightforward process on Discord. Once you've clipped a moment, you can easily record and save it for future reference or sharing. To record a clip, simply click on the "Clip" button, and Discord will automatically start recording the audio or video from the moment you clicked the button. You can then choose to record for a set amount of time, such as 15 seconds, 30 seconds, or 1 minute, or you can manually stop the recording when you're finished. Once you've finished recording, you can save the clip to your computer or share it directly with friends or in a server. Discord also allows you to edit your clips before saving or sharing them, giving you the option to trim the clip, add annotations, or even add music or other audio effects. This feature is especially useful for content creators who want to share highlights from their streams or videos with their audience. Additionally, Discord's clip feature also allows you to save clips from your favorite streams or videos, making it easy to relive your favorite moments or share them with others. Overall, recording and saving your clips on Discord is a convenient and user-friendly process that makes it easy to capture and share your favorite moments.
Sharing Your Clips with Others on Discord
Once you've created a clip on Discord, you can easily share it with others in various ways. To share a clip, click on the three dots next to the clip in your clip history and select "Copy Link." This will copy a direct link to the clip, which you can then share with others via direct message, email, or social media. Alternatively, you can click on the "Share" button next to the clip and select the platform you want to share it on, such as Twitter or Facebook. If you want to share the clip with someone who is not on Discord, you can also click on the "Download" button to save the clip as a video file, which you can then share via email or other means. Additionally, if you're in a voice channel, you can also share the clip with others in the channel by clicking on the "Share" button and selecting "Share in Channel." This will play the clip for everyone in the channel, allowing you to share your favorite moments with others in real-time. By sharing your clips with others, you can relive your favorite gaming moments, share funny moments with friends, or even create a highlight reel of your best plays. Overall, sharing clips on Discord is a great way to enhance your gaming experience and connect with others in the community.