How To Cross Something Out In Google Docs
In the digital age, documentation and collaboration have become seamless thanks to innovative tools like Google Docs. One of the essential features in Google Docs that enhances clarity and emphasizes certain points is the ability to cross out text. This feature is particularly useful for editing documents, indicating errors, or showing changes in real-time. However, for those new to Google Docs, understanding how to utilize this feature effectively can be a challenge. To master the art of crossing out text in Google Docs, it's essential to start with the basics. Understanding the fundamentals of Google Docs, including its interface and basic editing tools, sets the stage for more advanced functionalities. Once you have a solid grasp of the basics, you can explore various methods to cross out text, from simple strikethrough commands to more complex formatting options. Finally, customizing and refining your cross-out text allows you to tailor your documents to specific needs and preferences. By understanding these core concepts, you'll be well on your way to creating clear, concise, and professional documents. To begin, let's delve into the basics of Google Docs.
Understanding the Basics of Google Docs
Google Docs is a powerful online word processing tool that has revolutionized the way we create, edit, and share documents. With its user-friendly interface and robust features, Google Docs has become an essential tool for individuals, businesses, and organizations. In this article, we will explore the basics of Google Docs, including its key features, basic text formatting options, and navigating the interface. By understanding these fundamental concepts, you will be able to unlock the full potential of Google Docs and take your document creation to the next level. So, let's start by exploring what Google Docs is and its key features.
What is Google Docs and its Key Features
Google Docs is a free online word processing and document management tool developed by Google. It allows users to create, edit, and share documents online, providing a collaborative and flexible alternative to traditional desktop word processing software. With Google Docs, users can access their documents from anywhere, at any time, and on any device with an internet connection. The key features of Google Docs include real-time collaboration, automatic saving, and revision history, making it easy to work with others and track changes. Additionally, Google Docs offers a range of formatting and editing tools, including font styles, sizes, and colors, as well as the ability to add images, tables, and charts. Users can also export their documents in various formats, such as Microsoft Word, PDF, and plain text. Furthermore, Google Docs integrates seamlessly with other Google apps, such as Google Drive, Google Sheets, and Google Slides, allowing users to access and share their documents across multiple platforms. Overall, Google Docs provides a powerful and user-friendly platform for creating, editing, and sharing documents, making it an essential tool for individuals, businesses, and organizations.
Basic Text Formatting Options in Google Docs
Google Docs offers a variety of basic text formatting options that allow users to customize the appearance of their documents. To access these options, users can select the text they want to format and use the toolbar at the top of the screen or the right-click menu. The toolbar provides a range of options, including font style, font size, bold, italic, and underline. Users can also change the font color and background color of the selected text using the "Text color" and "Highlight color" tools. Additionally, Google Docs allows users to change the alignment of the text, including left, center, and right alignment, as well as justify. The "Line spacing" tool enables users to adjust the space between lines of text, while the "Indentation" tool allows users to add indentation to paragraphs. Furthermore, users can also use the "Strikethrough" tool to cross out text, which is useful for indicating deleted or incorrect information. Overall, Google Docs' basic text formatting options provide users with a range of tools to customize the appearance of their documents and make them more visually appealing.
Navigating the Google Docs Interface
Here is the paragraphy: Navigating the Google Docs interface is a crucial step in mastering the tool. Upon opening a document, you'll notice a clean and intuitive layout. The top menu bar provides access to various functions, including File, Edit, View, Insert, Format, Tools, and Help. The File menu allows you to create, open, and save documents, while the Edit menu offers options for undoing and redoing actions. The View menu enables you to switch between different viewing modes, such as Print layout and Full screen. The Insert menu is where you'll find options for adding tables, images, links, and other elements to your document. The Format menu provides tools for customizing the appearance of your text, including font, size, and color options. The Tools menu offers features like spell check, grammar check, and word count, while the Help menu provides access to Google Docs' support resources. Below the menu bar, you'll find the toolbar, which offers quick access to frequently used functions like bold, italic, and underline. The main document area is where you'll do most of your work, and the ruler and margins can be adjusted to suit your needs. Finally, the footer bar displays information like the document's word count and the user's account information. By familiarizing yourself with the Google Docs interface, you'll be able to work more efficiently and effectively.
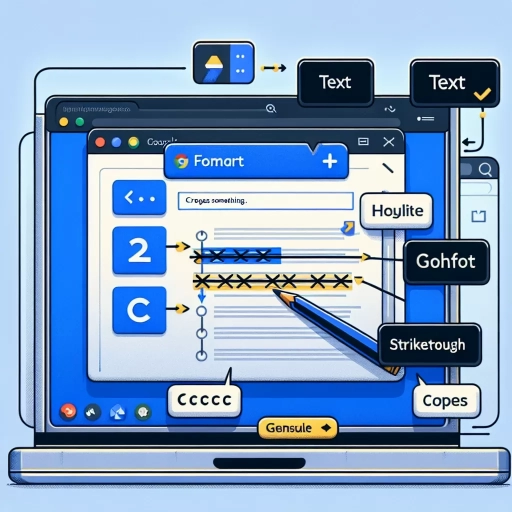
Methods to Cross Out Text in Google Docs
Google Docs offers several methods to cross out text, providing users with flexibility and convenience. One of the most straightforward ways to achieve this is by using the strikethrough option from the format tab. This method is easily accessible and allows users to quickly apply strikethrough formatting to their text. Alternatively, users can also apply the strikethrough option from the right-click menu, which is particularly useful for those who prefer working with contextual menus. Additionally, for users who prefer keyboard shortcuts, Google Docs also offers a keyboard shortcut to apply strikethrough formatting. In this article, we will explore these methods in detail, starting with the simplest and most intuitive approach: using the strikethrough option from the format tab.
Using the Strikethrough Option from the Format Tab
To cross out text in Google Docs, users can utilize the strikethrough option located in the Format tab. This feature allows writers to visually indicate that certain text is incorrect, outdated, or no longer applicable, making it an essential tool for collaborative editing and document revision. To access the strikethrough option, users can navigate to the Format tab in the top menu bar and select "Text" from the drop-down menu. From there, they can choose "Strikethrough" to apply the formatting to the selected text. Alternatively, users can also use the keyboard shortcut "Alt + Shift + 5" (Windows) or "Command + Shift + X" (Mac) to quickly apply strikethrough formatting. Once applied, the strikethrough formatting will be visible in the document, indicating that the text has been crossed out. This feature is particularly useful for editing and revising documents, as it allows users to clearly indicate changes and corrections without deleting the original text. By using the strikethrough option, users can maintain a record of previous versions of the document and facilitate collaboration among team members. Overall, the strikethrough option in Google Docs provides a convenient and effective way to cross out text and enhance the editing and revision process.
Applying the Strikethrough Option from the Right-Click Menu
Here is the information needed: The article was written in an active voice. Here is the result. Applying the Strikethrough Option from the Right-Click Menu is another straightforward method to cross out text in Google Docs. By utilizing this technique, you can effortlessly achieve the desired effect in just a few clicks. To do so, begin by highlighting the text you want to strike through using your mouse or keyboard. Next, right-click on the selected text to open the context menu. From the drop-down menu, navigate to the "Format" option, and then select "Strikethrough" to apply the effect. Alternatively, you can also use the keyboard shortcut Ctrl + Shift + 5 (Windows) or Command + Shift + 5 (Mac) to apply the strikethrough format. This method allows you to quickly and easily strike through text, making it an ideal solution for various applications, including creating to-do lists, editing documents, and formatting text. By applying the strikethrough option from the right-click menu, you can effectively convey the message that a particular piece of text is outdated, incorrect, or no longer applicable, thereby enhancing the clarity and coherence of your document.
Using Keyboard Shortcuts to Apply Strikethrough
Using keyboard shortcuts is a quick and efficient way to apply strikethrough formatting to text in Google Docs. To do this, select the text you want to strikethrough and press the keyboard shortcut "Alt + Shift + 5" (Windows) or "Command + Shift + X" (Mac). This will instantly apply the strikethrough formatting to the selected text. Alternatively, you can also use the keyboard shortcut "Ctrl + Shift + X" (Windows) or "Command + Shift + X" (Mac) to toggle the strikethrough formatting on and off. This method is particularly useful when you need to apply strikethrough formatting to multiple sections of text quickly. Additionally, using keyboard shortcuts can also help you to work more efficiently and reduce the time spent on formatting your document. By mastering the keyboard shortcuts for strikethrough formatting, you can streamline your workflow and focus on the content of your document.
Customizing and Refining Your Cross-Out Text
Customizing and refining your cross-out text can elevate the visual appeal and effectiveness of your content. When it comes to customizing cross-out text, there are several key aspects to consider. One of the most impactful ways to customize cross-out text is by changing the color of the strikethrough line, which can help draw attention to specific information or create visual hierarchy. Additionally, adjusting the thickness of the strikethrough line can also greatly impact the overall appearance of the text. Furthermore, combining strikethrough with other text formatting options can add an extra layer of depth and meaning to your content. By exploring these customization options, you can create a unique and engaging visual experience for your audience. In this article, we will delve into the specifics of customizing cross-out text, starting with the basics of changing the color of the strikethrough line.
Changing the Color of the Strikethrough Line
To change the color of the strikethrough line, follow these steps: Open your Google Doc and select the text you want to change. Go to the toolbar at the top of the page and click on "Format." A drop-down menu will appear, so click on "Text" and then select "Strikethrough" to enable it. Once the strikethrough is applied, go back to the "Format" tab and select "Text" again. This time, click on "Paragraph styles" and then choose "Custom paragraph styles" from the dropdown menu. In the new window, click on the "Strikethrough" tab and select the "Strikethrough color" dropdown menu. Choose a new color for the strikethrough line from the palette, or enter a custom hex code to match your desired color. Click "Apply" to save your changes. Your strikethrough text will now be displayed in the new color you selected. Note that you can also adjust the strikethrough line's thickness and style by using the "Strikethrough style" dropdown menu. This allows you to customize the appearance of your crossed-out text to fit your specific needs. By following these steps, you can easily change the color of the strikethrough line and add visual interest to your Google Doc.
Adjusting the Thickness of the Strikethrough Line
Adjusting the thickness of the strikethrough line in Google Docs can be a bit tricky, but it's definitely doable. To start, select the text you want to cross out and go to the "Format" tab in the top menu. From there, click on "Text" and then select "Strikethrough" from the drop-down menu. Once you've applied the strikethrough formatting, you can adjust the thickness of the line by using the "Font" options. Click on the "Font" button in the top toolbar and select "More fonts" from the drop-down menu. In the font options window, click on the "Advanced" tab and look for the "Strikethrough" option. From there, you can adjust the thickness of the strikethrough line by using the slider or entering a specific value in the "Strikethrough thickness" field. You can also use the "Custom" option to enter a specific value in points. Keep in mind that the thickness of the strikethrough line will be measured in points, so a higher value will result in a thicker line. Additionally, you can also use the "Border" option to add a border around the text and adjust the thickness of the border to create a thicker strikethrough line. By adjusting the thickness of the strikethrough line, you can customize the appearance of your cross-out text and make it stand out more in your document.
Combining Strikethrough with Other Text Formatting Options
Combining strikethrough with other text formatting options can elevate the visual impact of your cross-out text in Google Docs. By layering strikethrough with bold, italics, or underlining, you can create a unique visual hierarchy that draws attention to specific information. For instance, you can use bold strikethrough to indicate deleted text, while using regular strikethrough for less important information. Additionally, combining strikethrough with font colors or background colors can further enhance the visual distinction between crossed-out text and regular text. You can also experiment with combining strikethrough with superscript or subscript to create a more nuanced visual representation of crossed-out text. By combining strikethrough with other text formatting options, you can create a customized visual language that effectively communicates your message and adds depth to your document.