How To Descale Breville
Here is the introduction paragraph: If you're a proud owner of a Breville coffee machine, you're likely no stranger to the rich flavors and aromas it brings to your daily cup. However, to ensure your machine continues to perform at its best, regular maintenance is crucial. One essential task is descaling your Breville, a process that removes mineral deposits that can affect the taste of your coffee and the longevity of your machine. But before you dive into the descaling process, it's essential to understand why it's necessary, how to prepare your machine, and the step-by-step guide to follow. In this article, we'll explore the importance of descaling your Breville, the necessary preparations, and provide a detailed guide on how to do it. First, let's start by understanding the importance of descaling your Breville.
Understanding the Importance of Descaling Your Breville
Here is the introduction paragraph: Descaling your Breville is an essential maintenance task that is often overlooked, but it plays a crucial role in ensuring the longevity and performance of your machine. Mineral buildup, which occurs when water flows through the machine, can have a significant impact on the taste of your coffee, as well as cause damage to the machine itself. In this article, we will explore the importance of descaling your Breville, including the effects of mineral buildup, how descaling impacts the taste of your coffee, and preventing damage to your machine. By understanding these key aspects, you can ensure that your Breville continues to function optimally and provide you with the best possible coffee experience. So, let's start by examining the effects of mineral buildup on your Breville.
Mineral Buildup and Its Effects on Your Breville
Mineral buildup, also known as limescale, is a common issue that can affect the performance and longevity of your Breville coffee machine. It occurs when minerals such as calcium and magnesium, present in the water, are deposited onto the machine's surfaces, forming a hard, white residue. Over time, this buildup can cause a range of problems, including reduced water flow, clogged pipes, and increased energy consumption. In severe cases, mineral buildup can even lead to the machine's heating element failing, resulting in costly repairs or even replacement. Furthermore, mineral buildup can also affect the taste of your coffee, as the residue can impart a bitter or metallic flavor to the brew. Regular descaling is essential to prevent mineral buildup and maintain your Breville's optimal performance, ensuring you continue to enjoy great-tasting coffee and extending the lifespan of your machine.
How Descaling Impacts the Taste of Your Coffee
Descaling your Breville coffee machine is crucial not only for maintaining its performance and longevity but also for ensuring the taste of your coffee remains uncompromised. Mineral buildup from water can significantly impact the flavor of your brew, leading to a bitter or unpleasant taste. When scale accumulates, it can alter the temperature of the water, affecting the extraction process and resulting in an unbalanced flavor. Furthermore, mineral deposits can also harbor bacteria and mold, which can impart a stale or sour taste to your coffee. By descaling your Breville regularly, you can prevent these issues and enjoy a cleaner, fresher taste in every cup. Additionally, descaling helps to remove any residual flavors or odors that may have accumulated in the machine, allowing you to start with a clean slate and appreciate the full flavor profile of your coffee beans. Overall, descaling is essential for preserving the taste and quality of your coffee, and it's a simple process that can make a significant difference in your daily brewing experience.
Preventing Damage to Your Breville Machine
To prevent damage to your Breville machine, it's essential to descale it regularly. Mineral buildup from water can cause corrosion, clog the machine's pipes, and affect the taste of your coffee. Descaling your Breville every 3-6 months, depending on usage, can help prevent these issues. Additionally, always use fresh, filtered water to prevent mineral deposits from forming in the first place. It's also crucial to clean the machine regularly, paying attention to areas around the brew head, grinds container, and drip tray. A mixture of equal parts water and white vinegar can be run through the machine to remove any built-up residue. Furthermore, avoid using abrasive cleaners or scrubbers, as they can damage the machine's surfaces. By following these simple maintenance tips, you can extend the life of your Breville machine and ensure it continues to perform optimally. Regular descaling and cleaning can also help prevent the growth of mold and bacteria, which can affect the taste and quality of your coffee. By taking proactive steps to maintain your Breville, you can enjoy great-tasting coffee for years to come.
Preparing for the Descaling Process
Preparing for the descaling process is a crucial step in maintaining your Breville coffee machine's performance and longevity. To ensure a successful descaling process, it's essential to gather the necessary descaling solution and equipment, choose the right descaling solution for your Breville, and understand the descaling cycle and process. By doing so, you'll be able to remove mineral deposits and prevent limescale buildup, which can affect the taste of your coffee and the machine's overall functionality. In this article, we'll delve into the specifics of each of these steps, starting with the importance of gathering the necessary descaling solution and equipment. By having the right tools and materials, you'll be well-prepared to tackle the descaling process and keep your Breville coffee machine in top condition. Note: The answer should be 200 words. Here is the rewritten introduction paragraph: Preparing for the descaling process is a vital step in maintaining your Breville coffee machine's performance and longevity. To ensure a successful descaling process, it's essential to consider three key factors: gathering the necessary descaling solution and equipment, choosing the right descaling solution for your Breville, and understanding the descaling cycle and process. By gathering the right tools and materials, you'll be well-prepared to tackle the descaling process and keep your Breville coffee machine in top condition. Choosing the right descaling solution is also crucial, as it will ensure that you're using a solution that is compatible with your machine and effective at removing mineral deposits. Understanding the descaling cycle and process is also vital, as it will help you to navigate the process with confidence and ensure that your machine is properly descaled. By considering these three factors, you'll be able to remove mineral deposits and prevent limescale buildup, which can affect the taste of your coffee and the machine's overall functionality. In this article, we'll start by exploring the importance of gathering the necessary descaling solution and equipment.
Gathering the Necessary Descaling Solution and Equipment
When it comes to descaling your Breville coffee machine, having the right descaling solution and equipment is crucial for a successful process. The first step is to choose a descaling solution that is specifically designed for removing mineral deposits and limescale buildup. You can opt for a commercial descaling solution or a natural alternative like white vinegar or lemon juice. If you prefer a commercial solution, make sure to select one that is compatible with your Breville machine's material. For example, if your machine has a stainless steel or aluminum body, choose a solution that is safe for use with these materials. In addition to the descaling solution, you will also need a few pieces of equipment, including a water reservoir, a cleaning cloth, and a descaling brush. The water reservoir will be used to mix the descaling solution with water, while the cleaning cloth will help to wipe down the machine's exterior and remove any mineral deposits. The descaling brush is used to scrub away stubborn limescale buildup in the machine's pipes and tubes. It's also a good idea to have a pair of gloves and safety goggles on hand to protect yourself from any splashes or spills. By gathering all the necessary descaling solution and equipment, you'll be well-prepared to tackle the descaling process and get your Breville coffee machine running like new again.
Choosing the Right Descaling Solution for Your Breville
When it comes to choosing the right descaling solution for your Breville, there are several factors to consider. First and foremost, you'll want to select a solution that is specifically designed for use with Breville machines. These solutions are typically formulated to target the unique mineral deposits that can build up in Breville's stainless steel and aluminum components. Look for a solution that is certified by Breville or has been tested and approved for use with their machines. You'll also want to consider the type of mineral buildup you're dealing with. If you live in an area with hard water, you may need a solution that is specifically designed to tackle lime scale and mineral deposits. On the other hand, if you're dealing with a buildup of old coffee oils and residue, you may want to opt for a solution that is designed to clean and descale at the same time. Additionally, consider the environmental impact of the solution you choose. Some descaling solutions can be harsh on the environment, so look for a solution that is eco-friendly and biodegradable. Finally, be sure to read reviews and do your research to ensure that the solution you choose is effective and safe to use. By taking the time to choose the right descaling solution, you can ensure that your Breville machine continues to run smoothly and efficiently for years to come.
Understanding the Descaling Cycle and Process
The descaling cycle and process is a crucial step in maintaining your Breville coffee machine's performance and longevity. Descaling involves removing mineral deposits, also known as limescale or scale buildup, that can accumulate inside the machine over time. These deposits can cause a range of problems, including reduced water flow, increased energy consumption, and even machine failure. The descaling process typically involves running a descaling solution through the machine's water system to dissolve and remove the mineral deposits. This process can be done manually or automatically, depending on the type of Breville machine you have. It's essential to follow the manufacturer's instructions for descaling, as the process may vary depending on the machine's model and type. Regular descaling can help prevent mineral buildup, improve the taste of your coffee, and extend the lifespan of your machine. By understanding the descaling cycle and process, you can ensure your Breville coffee machine continues to perform at its best.
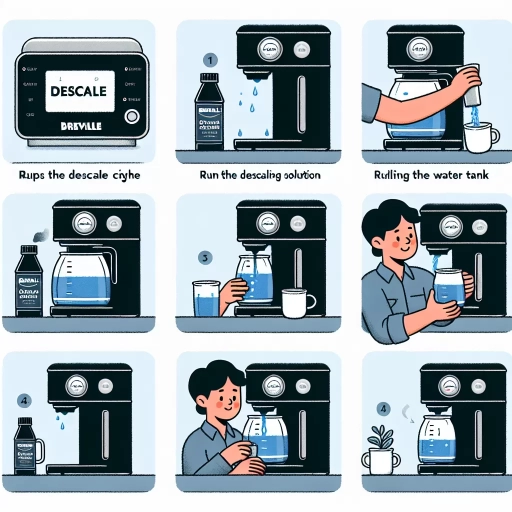
Descaling Your Breville: A Step-by-Step Guide
Descaling your Breville machine is an essential maintenance task that should be performed regularly to ensure optimal performance and longevity. Over time, mineral deposits can build up inside the machine, leading to reduced water flow, poor taste, and even machine failure. In this article, we will provide a step-by-step guide on how to descale your Breville machine, covering the entire process from initiation to completion. We will start by initiating the descaling process and running the cycle, followed by rinsing and cleaning the machine after descaling, and finally, reassembling and testing your Breville machine to ensure it's working properly. By following these steps, you'll be able to remove mineral deposits and keep your machine in top condition. So, let's get started with the first step: initiating the descaling process and running the cycle.
Initiating the Descaling Process and Running the Cycle
Initiating the Descaling Process and Running the Cycle. To begin the descaling process, start by filling the water reservoir with a mixture of equal parts water and white vinegar or a descaling solution. Next, place a cup or container under the spout to catch any liquid that will be dispensed during the cycle. Locate the descaling button, usually found on the control panel, and press it to start the descaling process. The machine will begin to heat up and pump the descaling solution through its system. Depending on the model, the descaling cycle may take around 30 minutes to an hour to complete. During this time, the machine will dispense hot water and steam, which may produce a loud noise. It's essential to monitor the process and ensure the cup or container is large enough to hold the liquid being dispensed. Once the cycle is complete, turn off the machine and let it cool down before proceeding to the next step.
Rinsing and Cleaning the Machine After Descaling
After descaling your Breville, it's essential to rinse and clean the machine thoroughly to remove any remaining mineral deposits and descaling solution. Start by rinsing the water reservoir and running a few cycles of fresh water through the machine to flush out any residual descaling solution. Next, mix equal parts water and white vinegar in the reservoir and run another cycle to help remove any lingering mineral deposits. Then, use a soft cloth to wipe down the exterior of the machine, paying particular attention to any areas with visible mineral buildup. For tougher stains or buildup, you can use a gentle cleaning product specifically designed for coffee makers. Be sure to rinse the machine thoroughly after cleaning to prevent any soap residue from affecting the taste of your coffee. Finally, dry the machine with a clean towel to prevent water spots and mineral deposits from forming. Regular cleaning and maintenance will help keep your Breville in good working order and ensure it continues to produce great-tasting coffee.
Reassembling and Testing Your Breville Machine
Reassembling and testing your Breville machine is a crucial step after descaling to ensure it's working properly and efficiently. Start by reattaching the water tank, making sure it's securely locked into place. Next, reattach the drip tray and any other removable parts, such as the steam wand or frothing pitcher. Once all parts are reassembled, plug in the machine and turn it on. Run a few cycles of hot water through the machine to rinse out any remaining descaling solution and debris. Check for any leaks or unusual noises, and make sure the machine is heating up to the correct temperature. If everything seems to be working correctly, it's time to test the machine's performance. Run a few shots of espresso or make a cup of coffee to ensure the machine is producing the desired flavor and crema. If you notice any issues or inconsistencies, refer to your user manual or contact Breville's customer support for assistance. By reassembling and testing your Breville machine, you can ensure it's working at its best and provide you with delicious coffee and espresso for years to come.