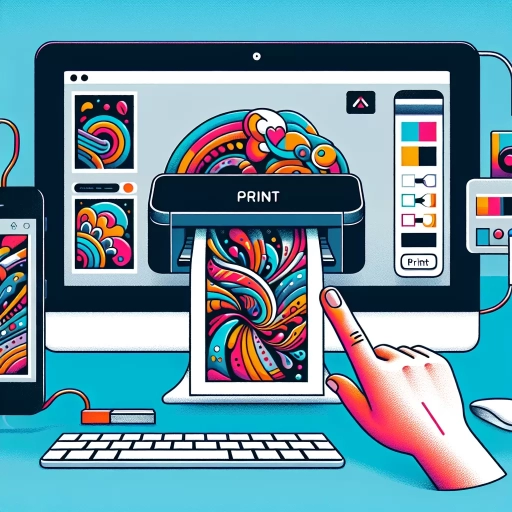
How To Print Canva Design
 Creating visually engaging content is essential to captivate your audience's attention, and Canva, a renowned graphic design platform, makes this task substantially simpler. This article will unfold a step-by-step guide to not just designing your creation using Canva, but also effectively preparing it for printing, culminating in the final act of bringing your design to life - the print. Discover how to effortlessly navigate the user-friendly interface of Canva to transform your ideas into well-polished designs. Furthermore, learn the nuances of effectively readying your design for the ideal print output, ensuring that your work on screen translates flawlessly onto paper. Finally, get acquainted with the process of printing your Canva masterpiece in high resolution. By the end of this article, you'll have all the knowledge you need to design, prepare, and print professional-quality Canva projects. Now, let’s dive into the fantastic world of designing your Canva project.
Designing Your Canva Project
To design an appealing Canva project, one has to consider several crucial steps that guarantee a sophisticated output. First, carefully selecting the right template is imperative. Canva offers a myriad of templates, each catering to different tastes and projects, making it crucial to identify your exact needs to select the most fitting. The second step involves being creative and customizing your design elements. Canva is a versatile platform that enables users to add personal touches, customize colors, sizes, and shapes to their projects to unambiguously convey their message. Lastly, adding text and images is equally important. This step enhances the visual appeal and communication effectiveness of your design as it gives viewers a concise, visually attractive summary of your content. This article will elaborate on these three key actions, offering insight and guidance to make the most out of your designing journey on Canva. Let's first delve into the importance and process of choosing the ideal template for your project.
Choosing the Right Template
Designing your Canva project involves several essential steps, and one crucial element of the process is choosing the right template. The template serves as a skeleton, determining the overall framework and layout of your design. In Canva, there's a vast selection of pre-designed templates to choose from, catering to a plethora of different design needs. Whether you're creating social media graphics, presentations, posters, or invites, Canva has got you covered. When choosing your template, the first aspect to consider is the function your design is going to serve. The template should align with the purpose of your project. For instance, if you're working on a social media campaign, you might want to choose a template that is intended for Instagram or Facebook posts. Canva has categorized its templates based on their uses to make this process easier for you. The next consideration is the style that aligns with your brand or the message you're aiming to project. Canva offers templates varying in style, from formal and corporate to playful and casual. It's crucial to match the template style with your brand identity. If you have a chic, modern brand, selecting a minimalistic and sleek template would maintain brand consistency. The template's flexibility is another crucial factor. Even though templates provide a starting point, they should still allow you to modify elements as you see fit. Canva's templates are highly customizable. You can alter the text, change colours, add elements, and tweak the layout. This feature opens up a world of possibilities, allowing you to cater the template to your exact needs. While choosing your template, also consider its visual hierarchy. It's important that the key message of your design stands out and isn't lost in the template's intricate details. Strategic use of font sizes, colours, and positioning can help you achieve this in your Canva project. Lastly, don't be shy to experiment with different templates. Canva's platform is designed for experimentation, it does not limit the number of changes, alterations, or even template switches within the design process. Try out a few different options; you might stumble upon a design setup you wouldn't have thought of otherwise. In conclusion, selecting the right template involves considering the function, style, flexibility, visual hierarchy, and openness to experimentation. This judicious selection is pivotal because it forms the bedrock of your Canva project further dictating the effectiveness of your print design. Remember, while the templates offer a design shortcut, your unique touch and understanding of these elements are what will genuinely make your Canva project stand out. You're merely a few clicks away from creating a stunning Canva design!
Customizing Your Design Elements
Design enhances communication efforts by facilitating the fiery narrative engulfed in the content. Therefore, being able to navigate through the customization process is a fundamental requisite for anyone engaging in design work. It's a central part of your project in Canva, which offers a plethora of diverse and customizable design elements that you can utilize, modify, and improve to match your project requirements. Canva features an extensive library brimming with design elements that can heighten the appearance and appeal of your project. Ranging from simple shapes and lines, to more ornate components like frames, stickers, charts, and gradients, these elements allow you to create personalized design experiences. It is in this library that you find the ingredients to make your design unique, engaging, and resonant with your brand. To optimize this experience, Canva enables you to easily manipulate the various design elements. Customizing design elements in Canva can be a seamless process as long as you comprehend the steps. Begin by selecting an element from the library. Following this, customization options will appear on your screen which may include aspect ratio, size, color, transparency, and positioning, among others. For instance, it's feasible to alter the dimensions of an element, or shift its position to accommodate your composition. In addition, Canva gives you the freedom to manage the color palette, allowing you to manipulate and adjust the tones to suit your brand identity or project's theme. Furthermore, you can adjust the opacity of elements that may be overlapped, which is beneficial in fostering interplay between multiple design aspects. Or, to make your design more interactive, insert dynamic stickers from Canva's collection. Canva also provides an accessible way to integrate, modify, and visualize data through customizable charts and graphs, empowering designers to exhibit information in a more engaging manner. The most noteworthy aspect, however, is Canva’s provision for the freedom of personal creativity. The vast library of design elements offers the flexibility to merge, overlap, and constantly rework compositions until you obtain your perfect vision. Entirely new design elements can be crafted through manipulating and combining existing ones, in turn, offering a creative playground to designers. The facility to consistently revise, experiment, and refine is what quintessentially empowers the customization process. In conclusion, understanding how to customize design elements in your Canva project is instrumental to crafting artful, expressive, and meaningful designs. It's a way of ensuring your unique touch permeates every aspect of your creation. Irrespective of your design's context, be it an infographic, social media post, or a simple logo, familiarizing yourself with Canva's customization tools takes you a step further towards making your project a reality. With Canva, the power to transform any design concept into a captivating piece lies in your hand.
Adding Text and Images
In creating your Canva project, one crucial step is the addition of text and images. This step should not be underestimated as it significantly dictates the outcome of your design project. Text, being an essential element of any visual design, is meant to communicate your message concisely and clearly. In Canva, adding text is quite straightforward. Simply click on the text tab and choose from a variety of pre-set fonts, or customize your own. You can modify the text size, color, and alignment to fit the overall look of your design. Make sure that the text you choose is easy to read and complements the rest of your design elements. Next to text, images are another vital component in your Canva design. Pictures help to visually convey your message, and when used correctly, they can significantly enhance your design. Adding images in Canva is equally straightforward. Click on the elements tab and select the images option, and a wide variety of stock photos will be displayed. You can also upload your own images if you prefer. In Canva, you have the freedom to resize, crop, and apply filters to your images to match the overall aesthetic of your design. Remember, in adding text and images, balance is everything. Too much text might overwhelm your target audience while too many images might distract them. It's essential to strike a balance to make your design effective and engaging. Likewise, when selecting images, it's crucial to consider quality, relevance, and copyright issues to avoid potential legal problems. For your text, make sure it is readable, grammatically correct, and free from typographical errors. In summation, adding text and images in your Canva project can be an exciting process. It gives you the room for creativity and expression. It allows you to communicate your message in a visually appealing and compelling way. Remember and apply these tips, and you're on your way to designing an aesthetically pleasing and engaging Canva project. It may require a bit of practice and patience, but the end result will be worth it. Happy designing!
Preparing Your Design for Printing
Creating a perfect design is only the first step in crafting a flawless printout. To achieve a high-quality print that accurately replicates your original design, it's critical to have a thorough understanding of the printing process. This article will provide you with a comprehensive guide on preparing your design for printing, focusing on three vital aspects. First, we dive into understanding print resolution, crucial for maintaining the sharpness and quality of your printout. We then look into the core aspect of setting up your print settings, which sets the groundwork for how your design is translated into a physical printout. Lastly, we shed light on ensuring color accuracy, a fundamental component for making sure the colors in your printout match your initial design. Grasping these concepts will allow you to manipulate your designs according to the limitations and capabilities of print technology, resulting in an optimum end product. But first, let's embark on our journey by delving into print resolution, an aspect that can drastically alter the overall appeal and sharpness of your design.
Understanding Print Resolution
of successful design projects, understanding print resolution is crucial in preparing your design for printing. There's widespread confusion concerning print resolution, often leading to disappointment when a project doesn't turn out as expected. In simplest terms, print resolution is a measure of image quality in terms of detail and clarity as rendered on paper. A basic concept to grasp is that of 'dots per inch' or DPI, a standard measure of print resolution. Put quite literally, it pertains to the number of ink dots placed in a single inch of a printed image. A higher DPI indicates more dots, leading to better clarity and quality. Mohawk Connects equates a high-DPI image to a highly detailed map where you can see even the tiniest roads distinctly. In contrast, a low-DPI image is like a rudimentary map wherein only major roadways are discernible. Typically, the required DPI for professional print output is 300, ensuring sharp, clear images. However, for web use, the standard is relatively lower, around 72 DPI, because computer screens display images at lower resolution than the printed versions. This fundamental difference is the prime reason why some designs appear stunning on the screen but quite pixilated and indistinct when printed. Therefore, when preparing your Canva design or any design project for printing, you need to initially set a high resolution at this stage. If you're working on a design software, ensure that your document settings are at least 300 DPI. It's essential to do this at the beginning of your design process because increasing resolution after a design is finished may not improve image quality. It is akin to attempting to add in small roadmap details after printing the large details; the added details just won't fit. Understandably, larger files may mean slower download and upload times and can be a nuisance for those with slow or capped internet. But investing time in high-res designs pays off in the long run, delivering impressive, high-quality results. In sum, understanding print resolution can make a significant difference in the output quality of your design. It's a fundamental concept that designers should master to ensure that digital designs translate beautifully into printed ones, avoiding frustration and saving resources. So, remember, in the world of printing, resolution is not just an option; it's a necessity.
Setting Up Your Print Settings
of any successful print job lies in setting up your print settings accurately. This process not only governs the quality of the final output but also ensures that your design aligns perfectly with the intended printing medium. The first step to make in setting up your print settings in Canva starts with selecting the print option, which takes you to a new window where you can manipulate various aspects to align with your preferences. Regardless of whether it's a flyer, postcard, or a business card, determining the proper size of the print is crucial. Canva offers a variety of pre-defined sizes and allows for custom dimensions. It's advisable to input dimensions that correspond with your intended print size to avoid any discrepancies in the final print. In addition, it's important to set a bleed and safe area. Bleeds refer to the extra margin on the print document that will get trimmed off, ensuring that your design extends all the way to the edge of the page. Safe areas, also regarded as safety margins, refer to the space that buffers your content from the edge of the document. Ensuring your text and important design elements stay within these safe areas prevent them from being cut off during the printing process. Color settings play a pivotal role in the success of a print job. Canva uses the RGB color model (an acronym for Red, Green, Blue), but in the printing world, CMYK (Cyan, Magenta, Yellow, and Key/Black) is the standard. Since not all colors produced on a computer monitor can be replicated via printing, it's crucial to adjust RGB files to CMYK for color accuracy. An indispensable part in preparing for print is setting the resolution. The resolution, measured in DPI (dots per inch), signifies the number of printed dots within one inch. The higher the DPI, the higher the image quality, detail, and sharpness. For professional print quality, a resolution of 300 DPI or more is recommended. Before proceeding with printing, remember to save your file in the appropriate format that your printer supports. This could be JPEG, PDF, PSP, PDF Print, and more. Utilizing the 'Print Preview' feature can provide a final look at your design before it gets printed. This preview helps ensure that all elements are positioned correctly, colors look right, and no component of your design is outside the safe area. Crafting an engaging design is just part of the process when it comes to producing high-quality print copies. The significance of establishing proper print settings cannot be overstated, as it directly impacts the end product's appearance. Following these guidelines will undoubtedly help you set up your print settings for a successful and top-quality print job. Through Canva's user-friendly setup, you are in control of your design as it transitions from the digital workspace to the printed page.
Checking for Color Accuracy
of a successful print project involves ensuring color accuracy. The process of translating digital color to print isn't simply a head-on transition; it's more of a transformation in the form of CMYK. Complexities often arise in ensuring your design's printed colors are a true representation of its digital form, and these complexities can alter the overall quality of prints if not properly managed. Color accuracy rests mainly on understanding the unique principles of CMYK and RGB color models. RGB, which stands for Red-Green-Blue, is a light-based color model used by screens. On the other hand, CMYK stands for Cyan-Magenta-Yellow-Key (Black) and is used in the process of printing. Given that designers often design digitally in RGB, they need to check the accuracy of how these colors will be rendered in CMYK before sending them off to print. Canva, a simple design tool commonly used, not only simplifies the design process but also gives you the tools to check for color accuracy. While your designs might look vibrant and pleasing on your digital screen, the print output might be a lot less lively due to the limited CMYK gamut. This discrepancy often occurs because certain RGB colors are not within the printable CMYK color range. Consequently, when RGB designs are converted to CMYK, color shifts occur, leading to disappointing print results. For an accurate indication of how your design's colors will appear when printed, make use of the soft-proofing feature available in Canva’s Print Studio. This feature works by simulating the colors of a CMYK printer on your RGB screen. Examining the modified color on your screen, you can see the direct impact of the CMYK conversion on your design's colors. This feature will highlight any undetectable colors or areas where color details may be lost during conversion, giving you a chance to rectify them before the print job. Additionally, a key aspect when checking for color accuracy is maintaining a consistent color representation across all devices. Factors such as the age of your monitor, its luminance, and the ambient light affect your perception of color on the screen. Thus, periodic calibration of devices is important to ensure they represent the same color accurately, consequently reducing visual discrepancies between devices. Color accuracy is crucial in printing as it directly impacts the fidelity of your prints. The best designs can quickly lose their allure when printed with inaccurate color representation. As part of the process of preparing your design for printing, allocate time to correctly set up your document color mode in Canva, simulate outcome using the soft-proofing feature, and ensure consistent color representation across all your devices. This attention to detail will be rewarded with high-quality, accurately colored finished prints that stay true to your original design vision.
Printing Your Canva Design
The process of translating your Canva design into a tangible artwork involves more than just hitting the print button. To truly bring your Canva creations to life, it's vital to focus on individual elements that make up the entire printing process. These key considerations include selecting the appropriate printer, ensuring you're printing in high-quality mode, and using the correct paper type for your design. The first, arguably critical step involves choosing the right printer. The variety of printers available in the market is vast, ranging from inkjet to laser printers, each with unique strengths and features. Therefore, an informed decision on the types of printers available and their compatibility with your design requirements can be an absolute game-changer. following this introduction, we'll delve into specifics on how to make an educated choice about the right printer for you.
Choosing the Right Printer
Choosing the Right Printer is an immensely crucial step in effectively translating your Canva design from digital to print. For best results, a printer that matches the specifications of your project should be used. First, you need to determine the type of printer best suited for your needs. If you're planning on carrying out large-scale print work, such as posters or billboards, then a wide-format printer would be the ideal choice. Suppose you're aiming for smaller prints, such as flyers or brochures—then a desktop printer would suffice. In case of printing photos, consider photo printers designed specifically for this task. These come with ink systems that create a broader range of colors than typical inkjet printers, enhancing the quality of your images. Secondly, decide the printer’s technology. Inkjet and laser are the two most common. Inkjet printers are versatile, offering high-quality color prints and can handle various media types, including glossy photo paper and textiles. On the other hand, Laser printers are faster and more suitable for high-volume print jobs due to their efficiency. Third, you also need to think about printer resolution, which is measured in dots per inch (DPI). The higher the DPI, the better the print quality. For instance, A design intended for professional printing will require a printer that can handle 300 DPI or more. Lastly, consider the printer's color capabilities. Some printers only print in black and white, while others have full-color capabilities. Color printers are typically more expensive -- but if your Canva design consists of vibrant hues or detailed imagery, the extra cost will result in a significantly superior final product. Choosing the printer's brand is also an essential factor to consider. Top-rated brands such as Canon, HP, Epson, and Brother are renowned for their sustained print quality, customer support, and ink efficiency, leading to cost savings over time. Always remember, the type of printer you choose may alter the appearance of your printed design – so it's important to select a printer that accurately represents the colors and details of your original Canva design. This will ensure that your project comes to life in print form, as accurately and vibrantly as it appeared on screen. Remember, printing does not have the same flexibility as digital designs where changes can be made with a few clicks. Once you've printed your Canva design, it's a final product. As such, ensuring that your printer is the most suitable one for your needs is an investment worth making. While choosing the right printer may seem like a daunting task, considering these factors will streamline the process and allow you to produce high-quality print versions of your Canva Designs.
Printing in High-Quality Mode
Printing in High-Quality Mode is a crucial component of bringing your Canva designs to life with impressive results. This involves using the finest level of detail and precision in printing processes to ensure maximum image clarity, color accuracy, and overall presentation. In Canva, High-Quality Mode refers to the optimization of your design's resolution for best printing results. This feature requires careful attention because the higher the design resolution, the more ink is used during the printing process. Achieving high-quality prints is generally a collaboration between the design software (in this case, Canva), your printer settings, and the quality of the printing paper used. When planning to print in High-Quality Mode in Canva, first ensure that your design's resolution is adequately set. Canva recommends a resolution of at least 300 dpi (dots per inch) for print jobs. This means that for every square inch of your design, there will be 300 dots of ink. This high concentration of ink dots results in crisp and clear images that accurately mirror your original design. Further, ensure that you have the correct printer setup. Many printers come with a high-quality mode within their settings. Make sure to select this option before starting your print job. It's important to note that printing in High-Quality Mode may take longer than standard printing due to the printer’s increased focus on detail. Therefore, patience is required to yield the highest quality prints. Lastly, consider using high-quality paper. The type of paper you select can significantly impact the overall look of your printed design. Glossy, matte, or high-quality photo paper can enhance the richness of colors and sharpness of images in your Canva design. In contrast, regular office paper may not render the same high-quality results due to its different absorption properties. In conclusion, to achieve the best possible print outcomes, you need to consider several factors, namely your design's resolution, your printer settings, and the type of paper you use. By optimizing these factors and printing in High-Quality Mode, your beautiful Canva designs can be replicated accurately and professionally, creating prints you'll be proud to display or distribute.
Using the Right Paper Type
of Successful Printing. Using the right paper type is instrumental in the printing process, particularly when printing your Canva design. The choice of paper contributes significantly to the realisation of the final work, with different paper types offering varied levels of vibrations and textures that interact uniquely with the printed materials. High-quality glossy paper adds a professional touch to your Canva designs, making them stand out with a vibrant and vivid aesthetic. It's an ideal choice for printing photo-based designs thanks to its high colour saturation and sharp image details. The paper's smooth, shiny surface also helps in reflecting light uniformly, ensuring an eye-catching look. However, it may not be the best fit for text-heavy prints, as its reflective gleam can lead to eye fatigue. On the other hand, matte paper is a superb option for designs that feature lots of text or line art. Matte paper minimizes the light reflection, providing a subtle, soft, and smooth appearance to your printed out design. Its low glare finish makes reading comfortable and easy on the eyes. Also, if your design contains intricate details or if you plan to write on the printed designs, such as invitations or business cards, you'd find a lot of value in using uncoated paper. It's easier to write on due to its textured surface, and it also offers a more traditional and professional look. Lastly, cardstock is a stiff, durable, and heavyweight paper type that's ideal for printing various Canva designs such as business cards, postcards, invitations, and menus. Its durability and quality feel offer a great first impression, which can be crucial for your brand’s identity. Every paper type behaves differently, absorbing ink in unique ways, affecting colour accuracy, brightness, and overall picture quality. Your paper choice will definitely reflect on the quality and professional look of your printed designs. The paper options discussed above such as glossy, matte, uncoated, and cardstock each have their strengths, and taking the time to assess their potential based on the nature of your design will make a huge difference. Remember, the essence of using the right paper type is not just about bringing your Canva design to life but also to create an impressible experience for the viewers.