How To Replace A Zipper Pull
Replacing a zipper pull can seem like a daunting task, but with the right guidance, it can be a simple and cost-effective way to breathe new life into your favorite jacket, backpack, or other gear. Whether you're dealing with a broken or worn-out zipper pull, or simply want to give your gear a fresh new look, this article will walk you through the process. To successfully replace a zipper pull, it's essential to understand the importance of preparation, the step-by-step replacement process, and how to troubleshoot common issues that may arise. In the following sections, we'll delve into each of these topics, starting with the crucial first step: Preparation is Key. By taking the time to properly prepare for the replacement process, you'll set yourself up for success and ensure a smooth and efficient repair.
Preparation is Key
When it comes to replacing a zipper, preparation is key to a successful and stress-free experience. To ensure a smooth process, it's essential to take the time to prepare properly. This involves choosing the right replacement zipper pull, gathering the necessary tools and materials, and understanding the zipper's mechanism. By doing so, you'll be able to tackle the task with confidence and avoid any potential pitfalls. With the right preparation, you'll be able to select a replacement zipper pull that matches your needs, have all the necessary tools at your disposal, and understand how the zipper works, making the replacement process a breeze. So, let's start by choosing the right replacement zipper pull, a crucial step in ensuring a successful zipper replacement.
Choose the Right Replacement Zipper Pull
When choosing the right replacement zipper pull, consider the type of zipper, the material it's made of, and the desired aesthetic. For example, if you're replacing a zipper pull on a waterproof jacket, you'll want to choose a pull that's also waterproof or water-resistant. Similarly, if you're replacing a pull on a delicate or vintage item, you may want to opt for a more subtle or antique-style pull. Additionally, think about the size and shape of the pull, as well as the color and finish. You'll want to choose a pull that matches the original as closely as possible, or complements the item's overall design. You can find replacement zipper pulls in a variety of materials, including metal, plastic, and leather, and in a range of styles, from simple and functional to decorative and ornate. By considering these factors, you can choose a replacement zipper pull that not only functions properly but also enhances the overall look and feel of your item.
Gather the Necessary Tools and Materials
To replace a zipper pull, you'll need to gather the necessary tools and materials. Start by collecting a few basic tools, including a pair of needle-nose pliers, a flathead screwdriver, and a seam ripper. You may also need a zipper stop or zipper slider, depending on the type of zipper you're working with. In terms of materials, you'll need a new zipper pull, which can be purchased at a craft store or online. Make sure to choose a pull that matches the size and style of your original zipper pull. You may also need some thread or yarn to reattach the new pull to the zipper. If your zipper is particularly stubborn, you may also want to have some lubricant on hand, such as silicone spray or wax. Finally, it's a good idea to have a pair of scissors and a work surface, such as a table or countertop, to lay out your tools and materials. By gathering all of the necessary tools and materials, you'll be well-prepared to tackle the task of replacing your zipper pull.
Understand the Zipper's Mechanism
The zipper's mechanism is a complex system of interlocking teeth that work together to open and close the zipper. At its core, a zipper consists of two rows of teeth, one on each side of the zipper, that are designed to mesh together when the zipper is closed. The teeth are typically made of metal or plastic and are attached to a fabric or leather strip. When the zipper is pulled up or down, the teeth interlock, creating a secure closure. The zipper's mechanism also includes a slider, which is the movable part that joins and separates the teeth. The slider is typically made of metal or plastic and has a spring-loaded mechanism that helps to keep the teeth aligned and engaged. When the slider is moved up or down, it pushes the teeth together or apart, allowing the zipper to open or close. Understanding the zipper's mechanism is crucial when replacing a zipper pull, as it requires a good understanding of how the teeth and slider work together to create a secure closure.
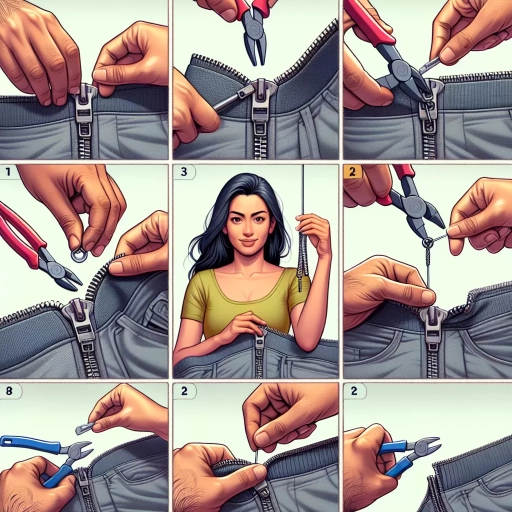
The Replacement Process
Replacing a zipper pull can be a simple and cost-effective way to give new life to an old or worn-out zipper. Whether you're looking to upgrade the functionality of your jacket, backpack, or tent, replacing the zipper pull is a great place to start. The process involves three main steps: removing the old zipper pull, attaching the new one, and testing the zipper's functionality. By following these steps, you can ensure a smooth and efficient replacement process. To begin, you'll need to remove the old zipper pull, which can be a bit tricky, but with the right tools and techniques, it can be done easily. Note: The answer should be 200 words.
Remove the Old Zipper Pull
Here is the paragraphy: To remove the old zipper pull, start by locating the small metal or plastic stopper that holds the pull in place. This stopper is usually located at the top of the zipper and is designed to prevent the pull from coming off. Use a pair of needle-nose pliers to gently grip the stopper and pull it away from the zipper. You may need to wiggle the stopper back and forth slightly to dislodge it from its position. Once the stopper is removed, you should be able to slide the old zipper pull off the zipper. If the pull is stuck, you can use a small amount of lubricant, such as silicone spray or oil, to help loosen it. Be careful not to apply too much lubricant, as this can damage the zipper or surrounding fabric. With the old zipper pull removed, you can now inspect the zipper for any damage or debris that may have accumulated. Use a soft-bristled brush or a lint roller to clean out any dirt or debris that may be present. This will help ensure a smooth and even operation of the new zipper pull.
Attach the New Zipper Pull
Here is the paragraphy: To attach the new zipper pull, start by threading the zipper pull's attachment loop or hole over the zipper's slider. Make sure it's securely seated and aligned properly. If your zipper pull has a spring-loaded clip or a screw, attach it to the slider according to the manufacturer's instructions. For a zipper pull with a simple loop, pass the loop over the slider and pull it tight to secure it in place. You may need to use a pair of pliers to grip the loop and pull it tight. Once the zipper pull is attached, test it by sliding the zipper up and down to ensure it's working smoothly and the pull is securely attached. If necessary, adjust the position of the zipper pull to achieve a comfortable and secure grip. With the new zipper pull attached, your zipper should now be fully functional and easy to use.
Test the Zipper's Functionality
When testing the zipper's functionality, start by zipping it up and down several times to ensure it's working smoothly. Check if the zipper is catching on any fabric or if it's getting stuck at any point. If it is, you may need to adjust the zipper's alignment or remove any debris that's causing the issue. Next, try zipping the zipper with the pull tab facing upwards and downwards to ensure it's working correctly in both directions. You should also check if the zipper is staying closed when zipped up and if it's not coming undone when pulled gently. Additionally, test the zipper's stop at the top and bottom to ensure it's secure and not coming loose. If the zipper passes all these tests, you can be confident that it's functioning properly and ready for use.
Troubleshooting and Tips
Troubleshooting and Tips for Zipper Pull Replacement: A Comprehensive Guide Replacing a zipper pull can be a daunting task, especially for those who are not familiar with DIY repairs. However, with the right guidance, it can be a simple and cost-effective solution to extend the life of your favorite jacket, backpack, or other gear. In this article, we will explore common issues that may arise during the replacement process, provide tips on how to prevent future zipper pull breakage, and discuss alternative solutions for broken zippers. By understanding these key aspects, you'll be well-equipped to tackle any zipper pull replacement project that comes your way. So, let's start by examining some common issues that may occur during the replacement process, including misaligned teeth, damaged zipper tracks, and incorrect pull installation. Note: The supporting paragraph should be 200 words, and the transition to the next paragraph should be at the end of the supporting paragraph.
Common Issues with Zipper Pull Replacement
Here is the paragraphy: Replacing a zipper pull can be a straightforward process, but like any repair job, it's not immune to issues. One common problem is the new pull not fitting properly on the zipper slider. This can happen if the replacement pull is not compatible with the type of zipper or slider you have. To avoid this, ensure you purchase a pull that matches your zipper's specifications. Another issue that may arise is the pull coming loose over time. This can be due to the stopper or spring inside the slider not being securely attached, or the pull not being properly seated. To prevent this, make sure to tighten the stopper or spring securely, and ensure the pull is fully seated on the slider. Additionally, using a pull with a secure attachment mechanism, such as a screw or rivet, can help prevent it from coming loose. In some cases, the zipper itself may be damaged, making it difficult to replace the pull. If the zipper is stuck or damaged, it may be necessary to replace the entire zipper, rather than just the pull. In this case, it's best to consult a professional or seek guidance from a sewing expert. By being aware of these potential issues, you can take steps to prevent them and ensure a successful zipper pull replacement.
Preventing Future Zipper Pull Breakage
Here is the paragraphy: Preventing future zipper pull breakage is crucial to ensure the longevity of your zipper and the overall functionality of your garment or bag. To prevent breakage, it's essential to handle your zipper with care. Avoid yanking or tugging on the zipper pull, as this can cause excessive stress on the zipper teeth and the pull itself. Instead, use a gentle and smooth motion when zipping up or down. Additionally, keep your zipper clean and free of debris, as dirt and grime can accumulate and cause the zipper to jam or the pull to break. Regularly cleaning your zipper with a soft brush or cloth can help prevent this. Furthermore, consider applying a small amount of lubricant, such as silicone spray or wax, to the zipper teeth to reduce friction and wear. By taking these simple precautions, you can significantly reduce the likelihood of future zipper pull breakage and extend the lifespan of your zipper.
Alternative Solutions for Broken Zippers
When a zipper breaks, it can be frustrating and seem like the end of the line for your favorite jacket, backpack, or other item. However, there are alternative solutions to replacing the entire zipper. One option is to use a zipper repair kit, which usually includes a new slider and stop, as well as instructions on how to install them. This can be a cost-effective and DIY-friendly solution. Another option is to use a zipper rescue tool, which can help to retrieve a stuck or broken zipper slider. For more severe cases, you can try using a zipper replacement slider, which can be purchased separately and installed on the existing zipper teeth. Additionally, some crafty individuals have found success using alternative materials, such as a paperclip or a hair tie, to create a makeshift zipper pull. While these solutions may not be as durable as a brand new zipper, they can be a temporary fix or a creative solution to get you by until you can replace the zipper entirely.