How To Remove Pot Lights
Here is the introduction paragraph: Removing pot lights can be a daunting task, especially if you're not familiar with electrical work. However, with the right guidance, you can safely and effectively remove these fixtures from your ceiling. To ensure a successful removal process, it's essential to approach the task with a clear understanding of the steps involved. Preparation is crucial, as it allows you to identify potential hazards and take necessary precautions. In this article, we'll walk you through the process of removing pot lights, from preparation to post-removal procedures. We'll start by discussing the importance of preparation, including turning off the power supply and gathering necessary tools. With the right mindset and preparation, you'll be well on your way to safely removing your pot lights. Let's begin with the first step: Preparation is Key.
Preparation is Key
When it comes to replacing pot lights, preparation is key to a successful and stress-free experience. To ensure a smooth process, it's essential to take the necessary steps before starting the project. This includes turning off the power to the pot lights, gathering the necessary tools and materials, and clearing the area around the pot lights. By doing so, you'll be able to work safely and efficiently, avoiding any potential hazards or setbacks. In this article, we'll dive deeper into each of these crucial steps, starting with the most critical one: turning off the power to the pot lights.
Turn Off the Power to the Pot Lights
To ensure a safe and successful removal process, it's essential to turn off the power to the pot lights before starting. Locate the main electrical panel or breaker box in your home and identify the circuit breaker or fuse that controls the power to the pot lights. Switch off the breaker or remove the fuse to cut off the power supply. Verify that the lights are completely dark before proceeding. If you're unsure which breaker or fuse controls the pot lights, turn off the main power switch or consult an electrician for assistance. Additionally, consider using a non-contact voltage tester to double-check that there's no electricity flowing to the lights. This crucial step will prevent any accidental electrical shocks or injuries, allowing you to focus on removing the pot lights safely and efficiently.
Gather the Necessary Tools and Materials
To remove pot lights, you'll need to gather the necessary tools and materials to ensure a safe and successful process. Start by turning off the power to the pot lights at the electrical panel or breaker box. Verify that the lights are completely dark before proceeding. Next, gather a ladder or step stool that is sturdy and tall enough to reach the pot lights. You'll also need a screwdriver, preferably a Phillips head, to remove the screws that hold the light fixture in place. Additionally, have a voltage tester on hand to ensure there is no electricity present in the wires. A pair of needle-nose pliers can be helpful for gripping small wires or screws. If you have a pot light with a glass or plastic cover, you may need a gentle prying tool, such as a flathead screwdriver or a plastic spudger, to carefully remove the cover without breaking it. Finally, have a drop cloth or old sheets ready to protect your floors and furniture from any debris that may fall during the removal process. By having all the necessary tools and materials within reach, you'll be able to efficiently and safely remove your pot lights.
Clear the Area Around the Pot Lights
Clear the area around the pot lights to ensure a safe and efficient removal process. Move any furniture, curtains, or rugs that may be obstructing access to the pot lights. Cover the floor and any surrounding surfaces with drop cloths or plastic sheets to protect them from debris and dust. Remove any light bulbs or glass covers to prevent them from breaking and causing injury. If the pot lights are recessed into the ceiling, use a vacuum cleaner or a damp cloth to remove any dust or debris that may have accumulated around the edges. This will help prevent any dust or debris from falling into the area below when the pot lights are removed. Additionally, turn off the power to the pot lights at the electrical panel or breaker box to prevent any accidental start-ups or electrical shocks. By clearing the area around the pot lights, you can ensure a safe and successful removal process.
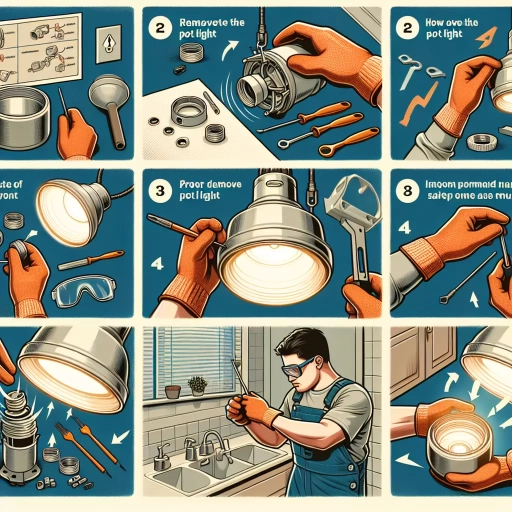
Removing the Pot Lights
Removing pot lights can be a daunting task, but with the right steps, it can be done efficiently and safely. To remove pot lights, you will need to start by removing the trim and glass cover, which will give you access to the electrical connections. Once you have removed the trim and glass cover, you will need to disconnect the electrical connections, taking care not to touch any of the wires. Finally, you will need to remove the pot light housing, which will allow you to completely remove the pot light from the ceiling. By following these steps, you can successfully remove your pot lights and make way for new lighting fixtures. To begin, let's start with the first step: removing the trim and glass cover.
Remove the Trim and Glass Cover
To remove the trim and glass cover from a pot light, start by turning off the power to the light fixture at the electrical panel or breaker box. Verify that the light is completely dark before proceeding. Next, locate the trim ring or bezel that surrounds the glass cover. This ring is usually held in place by small clips or screws. Gently pry the clips away from the ceiling or remove the screws using a screwdriver. Once the trim ring is removed, you should see the glass cover or lens. Some pot lights have a glass cover that is held in place by a spring clip or a small screw. Release the spring clip or remove the screw to access the glass cover. Carefully lift the glass cover out of the way, taking note of any wires or electrical components that may be attached to it. Set the glass cover aside in a safe place to avoid breaking it. With the trim and glass cover removed, you should now have access to the pot light's electrical components and the area around the light fixture.
Disconnect the Electrical Connections
Disconnect the electrical connections by locating the wires connected to the pot light. Identify the black (hot) wire, white (neutral) wire, and copper (ground) wire. Use a voltage tester to ensure the power is off. Remove the wire nuts or connectors holding the wires together. Gently pull the wires apart, taking care not to touch any internal components. Set the wires aside, ensuring they do not touch any other wires or metal objects. Verify the connections are completely disconnected before proceeding with the removal process.
Remove the Pot Light Housing
Removing the pot light housing is a crucial step in the process of taking down pot lights. To do this, you'll need to identify the type of pot light you have, as different models may have varying removal methods. Typically, pot lights have a spring-loaded or screw-based mechanism that holds the housing in place. For spring-loaded models, gently pry the housing away from the ceiling by inserting a flathead screwdriver or a specialized removal tool into the gap between the housing and the ceiling. You may need to apply some force, but be careful not to damage the surrounding drywall or the pot light itself. For screw-based models, locate the screws that hold the housing in place and remove them using a screwdriver. Once the screws are removed, the housing should come away from the ceiling easily. In some cases, you may need to rotate the housing counterclockwise to release it from the mounting bracket. With the housing removed, you'll have access to the electrical components and the pot light's mounting bracket, allowing you to proceed with the removal process.
Post-Removal Procedures
After removing pot lights, it's essential to follow post-removal procedures to ensure a safe and successful renovation. This involves inspecting and cleaning the area to remove any debris or dust, repairing any damages to the ceiling that may have occurred during the removal process, and disposing of the old pot lights properly to prevent environmental harm. By following these steps, homeowners can ensure a smooth transition to their new lighting fixtures and avoid any potential hazards. In this article, we will explore each of these post-removal procedures in detail, starting with the importance of inspecting and cleaning the area.
Inspect and Clean the Area
Inspect and clean the area thoroughly after removing the pot light to ensure a safe and efficient installation process. Begin by visually inspecting the area for any debris, dust, or old adhesive that may have been left behind. Use a soft-bristled brush or a vacuum cleaner to gently sweep away any loose particles, taking care not to scratch the surrounding surface. Next, dampen a clean cloth with water and gently wipe down the area to remove any remaining dirt or grime. Avoid using harsh chemicals or abrasive cleaners, as they can damage the surface or leave residues that may interfere with the new installation. If there are any stubborn stains or old adhesive, use a gentle adhesive remover or a mixture of equal parts water and white vinegar to help loosen and remove them. Once the area is clean and dry, use a dry cloth to wipe away any excess moisture and inspect the area again to ensure it is free from debris and ready for the new installation. By taking the time to thoroughly inspect and clean the area, you can ensure a smooth and successful installation process.
Repair Any Damages to the Ceiling
After removing the pot lights, it's essential to repair any damages to the ceiling to ensure a smooth and even surface. Start by inspecting the area where the pot lights were installed and identify any holes, cracks, or gaps. If the holes are small, you can use spackling compound to fill them in. Apply the compound to the hole, smooth it out with a putty knife, and let it dry completely. For larger holes or cracks, you may need to use a joint compound or a patching compound specifically designed for drywall repairs. Apply the compound to the affected area, smooth it out, and let it dry according to the manufacturer's instructions. Once the compound is dry, sand the area to smooth out any bumps or imperfections. If the damage is more extensive, you may need to replace the drywall entirely. In this case, cut out the damaged area, install a new piece of drywall, and secure it with drywall screws. Finish the repair by applying joint compound to the seams and sanding the area to a smooth finish. Additionally, if the pot lights were installed in a drop ceiling, you may need to replace the ceiling tile or repair any damaged gridwork. By repairing any damages to the ceiling, you'll be able to achieve a professional-looking finish and ensure that your ceiling is safe and secure.
Dispose of the Old Pot Lights Properly
When disposing of old pot lights, it's essential to do so in an environmentally responsible manner. Start by carefully removing any glass covers or shades, as these can be recycled separately. Next, disconnect the electrical connections and remove any screws or clips holding the light in place. Once the light is free, you can dispose of it through your local waste management's hazardous waste collection program. Many municipalities offer special collection days for hazardous waste, including old lighting fixtures. Be sure to check with your local government for specific guidelines on how to prepare and dispose of your old pot lights. Additionally, some hardware stores and home improvement centers may also offer take-back programs for old lighting fixtures, so it's worth inquiring about these options as well. By disposing of your old pot lights properly, you can help reduce waste and minimize the environmental impact of your renovation project.