How To Draw Earth
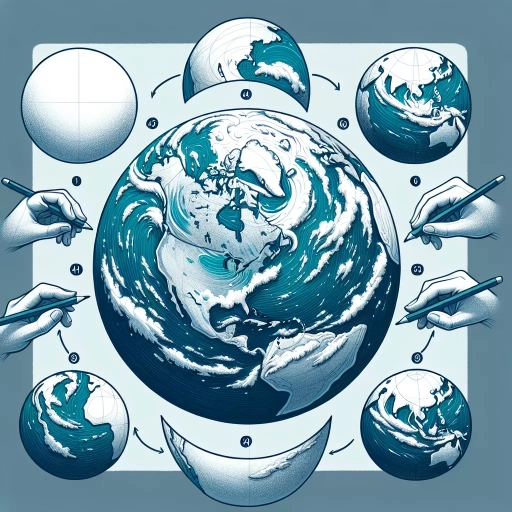 Immersing yourself in the intricate art of sketching our home planet can be an enriching experience. In our comprehensive guide on 'How to Draw Earth', we provide step-by-step instructions that will transform your blank canvas into a vibrant, detailed portrayal of earth. Firstly, we address and simplify the fundamentals of drawing the earth by breaking it down to basics to help you establish a strong foundation. Next, we delve into the second step, which involves sketching recognizable features and landmarks accurately, to give your rendering an authentic appeal. Lastly, we show you just how to weave life into your depiction by adding intricate details and texture to your earth portrait. So grab your art supplies and ready your creative spirit as we help you navigate the beguiling terrain of planet sketching, starting with understanding the basics of drawing the Earth.
Understanding the Basics of Drawing the Earth
The foundation for mastering a drawing of our planet starts with understanding and appreciating its basic components. Firstly, an artist needs to familiarize themselves with Earth's shape and proportions, comprehending how its roundness and tilted axis affect its visual representation. Secondly, an understanding of the different types of map projections is invaluable. This insight will help one depict the Earth accurately on a flat surface, as how we perceive the globe substantially changes with distinct projections. Lastly, the concept of scale and measurement is vital. It directly ties into how we portray Earth's size relative to its features - the continents, oceans, and the atmospheric layers. Getting the scale right can truly breathe life into your work, making it more realistic and engaging. With these foundational concepts, one is poised to accurately and creatively portray the Earth. Now, let's delve deeper into the first step – understanding the Earth's distinctive shape and proportions.
1. Familiarize yourself with the Earth's shape and proportions
Understanding the intricacies of the Earth's shape and proportions are fundamental steps in drawing an accurate representation. Contrary to popular belief, the Earth is not a perfect circle. It is an oblate spheroid—flatter at the poles and slightly wider at the Equator due to its rotation. The average diameter of Earth is about 12,742 kilometers (7,918 miles) with a minor fluctuation between the pole-to-pole diameter (12,714 kilometers) and the equatorial diameter (12,756 kilometers). Of course, these minute differences are not noticeable unless one is drawing Earth scientifically or at a large scale. When drawing the Earth, one must be mindful of this basic shape and the proportion of its various elements. It involves a ratio of depiction, where each part should be balanced in relation to the whole. For instance, the Earth's landmass coverage is approximately 29% compared to 71% water. Therefore, the depiction of land and water on your drawing should likewise reflect these ratios. Fidelity to proportion extends to the scale of specific elements like the continents. For example, Africa, the largest continent, must appear larger than Australia, the smallest. Meanwhile, the Earth's longitudinal lines, or meridians, and latitudinal lines, or parallels, are invaluable for orientation and proportion. They enable us to visualize Earth's hemispherical nature with the equator forming the horizontal midline, approximately equally dividing the Northern and Southern Hemispheres. Using these lines as reference points, you can position continents and countries in their right place, thereby giving them their proper dimension in relation to one another. The tilt of the Earth, about 23.5 degrees from vertical, is another fundamental aspect; this tilt triggers the change in seasons. However, in most drawings, unless the purpose is to depict specifically the season or the Earth's movement around the sun, usually, the tilt may not be a significant detail to consider. When drawing for general purposes, visualizing the Earth as direct-view or as a global map would suffice. In essence, having a basic understanding of Earth's shape and proportions does not just contribute to the accuracy of your drawing but it can also improve the overall quality and effectiveness of your artwork. It is this familiarization and careful observation that grants artists the ability to create realistic, three-dimensional, and engaging renditions of our planet.
2. Learn about the different types of map projections
Different types of map projections have been designed to address the inescapable conundrum of accurately representing the curved surface of the earth on flat surfaces - or in other words, drawing the globe as a map. Understanding these diverse map projections is crucial to accurately draw the Earth's surface. First, let's consider the Mercator projection, initially introduced by Flemish cartographer Gerardus Mercator in 1570. It portrays the earth by projecting its spherical shape onto a cylinder. A distinct feature of this projection is that it yields geometrically accurate shapes and maintains constant compass bearing between points, which made it a preferred choice for maritime navigation. However, it significantly distorts the sizes of the polar regions, making them look much larger than they are in reality. Next, we come to the Robinson projection, developed in 1963 by American cartographer Arthur H. Robinson. This projection paints a more balanced picture of size and shape of land masses, striving for a pleasant visual depiction instead of precision. Thus, it is commonly used for world maps meant for display purposes. Alas, measurements of distances, angles and areas are not accurate everywhere on the Robinson projection. The Mollweide projection, a pseudocylindrical projection designed by Carl Brandan Mollweide in 1805, deserves a mention. It’s beneficial for portraying global distributions due to its equal-area characteristic, ensuring regions retain their relative size. But it does distort shape and angle. The Goode’s Homolosine projection, on the other hand, introduced by John Paul Goode in 1923, is an “interrupted” pseudocylindrical, equal-area projection, reflecting both the shape and area proportions more accurately. However, the areas where the interruptions occur lose their continuity, making it less used for general world maps. Lastly, we encounter the Dymaxion Map, patented by Buckminster Fuller in 1946. This map is a flat view of an icosahedron, a polyhedron with 20 faces, which can then be unfolded in many different ways to display the surface of the Earth. This projection presents minimal distortion and accurately shows the relative sizes and proximities of the continents, though it’s not often used due to its irregular shape and unfamiliar orientation. In summary, each map projection has its strengths and weaknesses and is chosen based on the purpose of the map – whether it is to denote accurate distances for navigation, provide a credible representation of relative sizes for a fair worldview, or aim for a visually pleasing aesthetic but compromised accuracy. Understanding the principles behind these map projections is fundamental in the process of drawing the Earth.
3. Understand the concept of scale and measurement
Understanding the concept of scale and measurement is integral for the practical depiction of any object in a drawing, including drawing Earth. It's essential to identify the relative proportions of the picture that you're planning to sketch to maintain an accurate representation. This is where the concept of scale comes into play. In the context of drawing, the scale is the size relationship between an object’s actual size and the size of the drawing of the object. For instance, a smaller scale shows details on a limited basis, while a larger scale provides more room for detailed representation. When you're drawing Earth, scale becomes crucial due to the globe's multiple layers and complex network of continents and oceans. It helps maintain geographical accuracy and visual balance in the entire rendering. It's crucial to choose the right scale, which accurately depicts the Earth’s geographical features, such as the size of continents and oceans. Moreover, the placement of these continents and oceans with respect to each other should be true to their actual positions. In connection with this, understanding measurement is equally important. Measurement is the action of quantifying physical quantities such as length, breadth, diameter, radius etc. To draw Earth, you first need to decide on the size of the circle that will represent it. This circle's diameter or radius is crucial as all other proportions will relate to this fundamental measurement. This measurement will, in turn, affects the scale of the drawing. Understanding the unit of measurement you choose is vital. The measurement and scale must match each other. Since Earth is a sphere, attention to details such as the curvature, diameter, and circumference are essential. If painting a more detailed representation of Earth, additional considerations might include the size and relative locations of continents, the distance between distinct landforms, and even changes in color to represent the depth of the oceans and the height of the mountain ranges. To sum up, the scale aids in maintaining an accuracy in the overall drawing, while the measurements deal with the precision of individual parts and how they correlate with each other. These two concepts are crucial, interconnected, and must be understood and applied to successfully draw a realistic depiction of Earth. Through the effective use of scale and measurement, a complex and vast entity like the earth can be rendered in paper in an accurate and aesthetically pleasing manner.
Sketching the Earth's Features and Landmarks
The art and science of sketching the Earth's features and landmarks provide fascinating insights into our planet's topography. This meticulous practice requires a keen understanding of the world's continents and oceans, the impact of prominent mountain ranges and volcanoes, as well as the importance of notable rivers, lakes, and islands. Each of these elements contributes to the puzzle that forms the face of our Earth, painting a vivid picture of its unique physical characteristics. Starting with the accurate representation of the large land and water bodies, such as continents and oceans, we set the stage for a detailed map. Drawing them accurately is the bedrock upon which the other details are added. The precision in sketching these primary features sets the tone for the sub sequent inclusion of the more specific landmarks such as mountain ranges, volcanoes, rivers, lakes, and islands. A comprehensive and meticulous sketch captures the essence of our planet's physical features, sprouting an even deeper appreciation for its inherent diversity and complexity. Each stroke of the pencil harnesses the potential to bring forward an intriguing visual narrative of our Earth's topography.
1. Draw the continents and oceans with accuracy
Drawing the continents and oceans with accuracy is an important aspect of sketching the Earth's features and landmarks. To approach this, the first step one would take is to have a clear and detailed map of the earth. This serves as a guide, enabling one to correctly place and proportion the continents on the global sphere. Incorporating the right tools such as a compass and a straight edge helps in achieving precision in the drawing. The compass comes in handy during the drawing of the spherical circumference of the earth. Then, one should carefully, but distinctively, mark out the equator, dividing the sphere into the Northern and Southern Hemispheres. Next is to lightly sketch out the outline of the continents within the respective hemispheres. Here, careful consideration must be given to the size and shape of each continent as per the geographic data in the reference map. This task may appear daunting, but it is feasible with patience and close attention to detail. North and South America extend vertically at the leftmost side of the world map with Europe, Africa, and Asia branching out to the right. Further right across the Pacific, one finds Australia and the multitude of islands that make up Oceania. In between the loosely sketched continents, one must accommodate space for the oceans, which include the Atlantic, Pacific, Indian, Southern and Arctic oceans. The Pacific Ocean, being the largest, should occupy significant space compared to the other oceans. It's essential to depict these oceans effectively, as they also constitute a significant feature of the Earth's surface. Once the outlines are satisfactory, the lines can be darkened and the land and water bodies can be filled in with appropriate colors, typically green and blue respectively. Texturing and shading techniques can be applied to bring about depth and a 3D effect in the drawing. This process involves light sketching of the longitudinal and latitudinal lines, creating a grid. This grid supports the accurate placement of both physical and human-made landmarks which are the final finish to your globe. In conclusion, drawing the continents and oceans with accuracy comes down to your ability to keenly observe, interpret, and apply geographic details onto your canvas. Mastering this skill not only heightens your capacity for creative expression but can also boost your geographic knowledge, making this exercise both educational and enjoyable. Therefore, it’s beneficial to go an extra mile in striving for accuracy when sketching the Earth's features and landmarks. This will provide a fulfilling achievement in your artistic endeavours, and such efforts bring us one step closer to appreciating our planet in all its mapped-out beauty.
2. Add prominent mountain ranges and volcanoes
Understanding the Earth's topography is essential when illustrating it realistically. Two of the most prominent features that shape the Earth's surface are mountain ranges and volcanoes. These natural structures greatly influence landscapes, making them important details to include in sketches of the Earth's features and landmarks. The vast chain of mountains stretches across continents, adding a rugged appeal to the terrain. Take, for instance, the jagged peaks of the majestic Himalayas, which are the planet's highest and most dramatic. Stretching across five countries, it's notable how they decline gradually into the luscious green plains. In the Western Hemisphere, the Rocky Mountains and the Andes are equally impressive, with countless peaks and valleys that imprint a rich texture onto the terrain. When sketching these, it's important to understand the difference in their profiles, structure, and how they interact with the surrounding landscape. This will help your drawing convey the unique character of each range. Volcanoes, on the other hand, are splendid demonstrations of Earth's geothermal activity. From the iconic cone-shaped Mount Fuji in Japan, the active Kilauea in Hawaii, to the destructive Mount Vesuvius in Italy, each volcano has unique characteristics. Some have lush landscapes draped around their bases, while others lie dormant in desolate terrain. To capture their essence, study photographs or scientific illustrations to understand their distinct shapes, the composition of lava flows and eruption styles. These details are essential in portraying these remarkable landforms accurately. Moreover, these features don't exist in isolation. They subtly influence the surrounding environment, leaving visible signs like outflow rivers from melting mountain glaciers or ash deposits around volcanoes. These environmental markers help provide context and realism to these landmarks when incorporated in your sketch. In conclusion, rendering these awe-inspiring features of the Earth - mountain ranges and volcanoes - involves not just their physical appearance but also their interaction with the surroundings. It will require a careful study of their distinct traits and rendering them artistically onto your drawing canvas to create an accurate and convincing depiction of our world. This, along with other geologic features, will add depth and dynamism to your sketches and enhance your understanding and appreciation of Earth's intricate topography.
3. Include notable rivers, lakes, and islands
Sketching the Earth's features and landmarks involves a comprehensive understanding and appreciation of the remarkable rivers, lakes, and islands all around the globe. These natural formations play critical geographic roles and significantly contribute to sketching the earth's topography accurately. Firstly, rivers meander their way through continents, influencing the landscape with their ceaseless motion and vitality. Notable rivers such as the Nile in Africa, the Amazon in South America, and the Mississippi in North America are representative examples of this feature. The Nile, the longest river on earth, offers intricate details for an artist, with its serpentine path cutting through various terrains and country borders providing life-giving water to arid places. The Amazon, on the other hand, known as the "lungs of the Earth," is a dynamic eco-system. Sketching the Amazon would showcase the epitome of biodiversity, presenting a scene bustling with life. Lastly, the Mississippi River, affectionately termed as the 'Big Muddy' for its silty waters, presents a sense of tranquility and is a part of the iconic American landscape. Secondly, lakes offer a different aesthetic appeal, with their stillness reflecting the sky and surrounding landscape. They range from the Great Lakes of North America, the largest freshwater body on the planet, to the placid waters of Lake Baikal in Siberia, the deepest and oldest lake on Earth. These bodies of water present different challenges to an artist, with their variation of flora, fauna, and seasonal changes, providing an excellent opportunity to play with colors, light, and reflection perspectives. Lastly, islands form some of the most picturesque and exotic locations around the world. From the tropical paradise of the Maldives to the rugged landscape of Iceland or the unique Galapagos Islands, each offers its unique beauty and teeming biodiversity. Sketching the island's topography would involve capturing the beauty of surrounding water bodies, unique flora and fauna, and the varying altitudes of these landforms. By integrating these significant rivers, lakes, and islands into your portrayal of Earth's features and landmarks, you can bring your sketches to life, showing the vibrant diversity and remarkable beauty of our planet. Observing, understanding, and accurately capturing these features in your artwork can help establish a compelling narrative about Earth's geological transformations and biological evolution. Therefore, ultimately, these natural formations serve not only as subjects for an artist's canvas but also as the real-life embodiment of our extraordinary and ever-evolving planet.
Adding Details and Texture to Your Earth Drawing
The infusion of depth and realism into earth drawings can be achieved merely by an understanding and application of three crucial steps. Firstly, mastering the use of various shading techniques can generate a sense of depth and dimension in your drawings, making them both visually impressive and perceptively realistic. Secondly, by incorporating nuanced atmospheric effects such as clouds and sun glare, one's artwork can transgress from being simply a mere two-dimensional representation to a vibrant spatial panorama. Lastly, the clever use of textures can aid in creating a distinction between various landforms and geographical features, adding an intricate level of detail to your rendition of the earth. These three strategies converge to make the art of earth drawing an exercise in accuracy, realism, and depth, creating a piece that is not only visually stimulating but also reflects the diversity and subtleties in our world’s terrain. With these tools in an artist's kit, the first objective to tackle would be the mastering of different shading techniques to add depth and dimension to your drawing. As fundamental and straightforward as this concept may sound, the achieved impact is anything but simple, altering the flat drawing into a 3D representation of the earth surface.
1. Use different shading techniques to create depth and dimension
When it comes to adding details and texture to your earth drawing, an essential technique to employ is using different shading methods to create depth and dimension. Shading is a powerful tool in the hands of an artist looking to depict the earth's intricate patterns, contours, and surfaces realistically. It allows you to highlight the varied nature of the earth's surface, from the smooth, polished sheen of river rocks to the rough, ridged texture of bedrock. Achieving depth and dimension in your drawing necessitates mastering various shading techniques. Consider embracing techniques such as hatching, cross-hatching, stippling, and blending. Hatching involves creating parallel lines close together, while cross-hatching uses intersecting sets of parallel lines to give an impression of shadow. On the other hand, stippling uses tiny dots to build up tones and create texture. The closer the dots, the darker the area appears. Blending, on the other hand, mimics a smooth gradient by mixing and smoothing out the graphite or charcoal on the paper, implying smoother surfaces. When drawing bedrock, alternating between these techniques can offer an artistic representation of its rough texture. For example, you can employ hatching and cross-hatching techniques to portray the stone's hard and uneven surfaces. Adopt stippling to imitate the gritty texture of the rock and blending to denote aspects that appear relatively smoother or areas reflecting light. Remember, the art of drawing isn't about copying the exact visual appearance but rather rendering the impression of the world around us. Therefore, to portray the Earth's bedrock with depth and dimension, it's crucial to understand the interplay of light and shadow on its surface. Observe where lights hit the surface and where shadows fall. Light areas demand less intense shading and might benefit from slight stippling or blending. Contrastingly, shadowed sections need darker shading, possibly with heavier hatching or cross-hatching. Moreover, the pressure exerted on your drawing tool dramatically affects the resultant shading. A hard press results in darker shades, which could be advantageous for illustrating crevices or the darker regions of the bedrock. Conversely, a light hand is best for portraying lighter sections. In conclusion, mastering various shading techniques and understanding the principles of light and shadow can significantly enhance the depth and dimension in your earth drawing. It can transform your sketch from a mere flat representation to a rich, textured depiction of bedrock that effectively lures the viewer's sight into the drawing, creating an illusion of three-dimensionality and space.
2. Add atmospheric effects such as clouds and sun glare
As you continue to add detail and texture in your Earth drawing, it's important not to overlook the atmospheric effects such as clouds and sun glare that contribute significantly to the overall appearance of the Earth. These elements provide a real-life texture and context to your drawing, making it more realistic and immersive. Clouds, for instance, are a vital component of Earth's atmosphere. Strategically drawn, they can enhance the entire visual appeal and depth of the drawing. Studying pictures of earth taken from space can be enormously helpful when it comes to depicting the cloud coverage typical of different geographic regions. From thick, cumulus clouds over the equator to the swirling intensity of hurricanes, or even the wispy scatterings over deserts, accurate depiction of clouds adds a level of authenticity to your art. Moreover, remember that clouds are not merely white but, instead, reflect a multitude of colors depending on their density, the time of day, and their relative position to the sun. They can range from pure white to different shades of gray, and even vibrant hues of red, orange, and purple at sunrise or sunset. A solid grasp of cloud physiognomies and lighting effects will significantly enhance your yield. Simultaneously, illuminative effects like sun glare give your drawing the necessary lighting, helping to establish the time of day and direction of sunlight. Sun glare, or lens flare, is a unique effect that can either be subtle or dominant depending on the sun's position relative to the Earth. It adds an extraordinary touch to your detailed drawing, showcasing it as seen through the lens of a camera. Creating a glare effect can be as simple as smudging a soft yellow or white around the sun or as complicated as drawing radial streaks with an opacity change. Remember - the glare of the sun will influence the colors and shadows on the earth itself. Be painstaking when adding these as it will either enhance or mar your masterpiece. It’s good to keenly observe photographs of the planet to understand and imitate how light interacts with the earth's surface. Both atmospheric effects - clouds and sun glare, while seemingly minor details, play a critical role in amplifying the overall impression, depth, texture, and realism of your drawing. Harnessing their effect properly will help you achieve a masterfully detailed and textured representation of Earth. It's these minute details that can truly transmute a drawing from average to extraordinary. Therefore, understanding and implementing such atmospheric effects is crucial in your quest to learn how to create an impressive and detailed depiction of Earth.
3. Incorporate textures to represent different landforms and features
Incorporating textures into your Earth drawing can transform it from a flat, uninspiring image to a dynamic and lifelike portrait of our home planet. The role texture plays in breathing life and depth into an image cannot be underestimated. Different landforms and features are associated with different textures, which we will detail below. Firstly, consider mountains. Their surface is rugged and jagged, comprised of rocky outcrops and craggy peaks. To capture this, utilize sharp, irregular lines. Cross-hatching can also be helpful to portray mountains, considering that it can assist in generating the impression of shadows and deeper crevices. For mountainous terrains, a combination of fluctuating shades and lines can be applied to create the crumpled and spiked look. Grasslands and plains, on the other hand, offer a stark contrast. These areas are marked by gentle, smooth undulating surfaces. For these terrains, using softer, wavy lines and lighter shading can manifest the desired outcome. Incorporate minor variations to thunder out the hint of grass or vegetation to the viewer's mind. Meanwhile, deserts are characterized by sandy, wind-beaten look with dune structures. Use a range of tones and employ sandy textures with grainy stippling or scattered dots, flecks, and swirls to imply the shifting sands. Slight shadows can be added to indicate dunes in the sun’s sinking rays for a dramatic effect. Next, the ocean has a fluid, flowing form. Hence, the use of curvy lines and a softer touch is crucial in accurately representing oceans. One can use curvy lines and shade lightly to create a sense of movement in water adding a lively texture to it. Incorporating some white spaces would emulate the frothy waves or the sunlight reflected upon the water surface, giving it a gleaming appearance. Lastly, forested areas require a more complex approach. The dense tree cover can be replicated using a mixture of spots, squiggly lines, and shades to form a rich, leafy texture. In general, when aiming to portay geographical diversity, the key to success is the clever use and manipulation of line, shape, tone and texture. Experiment with different types and sizes of marks, and remember that it's not always about 100% accuracy, but instead about creating an impression and capturing the essence of the Earth's diverse and beautiful landscapes. Using texture to represent various landforms and features will not only improve the realism and aesthetic appeal of your earth drawing, it will also enhance the viewer's understanding of the earth's magnificent geology. It's a skill that requires practice, so don't be disheartened if your first attempts don't turn out exactly as you'd planned. With patience and persistence, you'll soon be able to create a stunning and textured earth drawing that's worthy of display.