How To Adjust Sprinkler Heads
A well-functioning sprinkler system is essential for maintaining a lush and healthy lawn. However, over time, sprinkler heads can become misaligned, clogged, or worn out, leading to inefficient water distribution and wasted resources. To ensure your lawn receives the right amount of water, it's crucial to adjust your sprinkler heads regularly. But before you start making adjustments, it's essential to understand how your sprinkler system works. In this article, we'll explore the basics of sprinkler systems, provide tips on adjusting sprinkler heads for optimal coverage, and troubleshoot common issues that may arise. By the end of this article, you'll be equipped with the knowledge to fine-tune your sprinkler system and keep your lawn looking its best. So, let's start by understanding the inner workings of your sprinkler system.
Understanding Your Sprinkler System
Understanding your sprinkler system is crucial for maintaining a healthy and lush lawn. A well-functioning sprinkler system can save you time, money, and water, while a malfunctioning one can lead to wasted resources and a brown lawn. To get the most out of your sprinkler system, it's essential to understand its components and how they work together. This includes identifying the type of sprinkler heads, locating the sprinkler heads and nozzles, and checking the system's pressure. By understanding these key aspects, you'll be able to troubleshoot common issues, make adjustments, and optimize your system's performance. In this article, we'll dive into the details of each of these topics, starting with the importance of identifying the type of sprinkler heads, which can vary significantly in terms of their spray patterns, flow rates, and installation requirements.
Identifying the Type of Sprinkler Heads
When it comes to identifying the type of sprinkler heads in your irrigation system, it's essential to know the different types and their characteristics. There are several types of sprinkler heads, including pop-up, fixed, and impact sprinklers. Pop-up sprinklers are the most common type and are known for their ability to retract into the ground when not in use, making them a popular choice for residential lawns. Fixed sprinklers, on the other hand, are stationary and do not retract, making them more suitable for areas with low foot traffic. Impact sprinklers are designed for larger areas and are known for their ability to distribute water in a circular pattern. Another type of sprinkler head is the rotor sprinkler, which is designed for medium to large-sized areas and is known for its ability to rotate and distribute water in a circular pattern. Drip irrigation sprinklers are also available, which deliver water directly to the roots of plants, reducing evaporation and runoff. By identifying the type of sprinkler heads in your system, you can determine the best way to adjust them for optimal water distribution and efficiency. Additionally, knowing the type of sprinkler heads can also help you to identify any potential issues or problems with your irrigation system, such as clogged nozzles or misaligned heads. By taking the time to identify the type of sprinkler heads in your system, you can ensure that your lawn and plants receive the right amount of water, while also saving water and reducing your water bill.
Locating the Sprinkler Heads and Nozzles
When it comes to adjusting your sprinkler heads, it's essential to locate them first. Sprinkler heads and nozzles are usually positioned at the end of the sprinkler pipes, and they can be found above or below ground, depending on the type of sprinkler system you have. For in-ground systems, the sprinkler heads are typically flush with the lawn, while for above-ground systems, they are visible and can be easily spotted. To locate the sprinkler heads, start by turning on the sprinkler system and observing the water spray patterns. This will help you identify the location of each head and nozzle. You can also check the sprinkler system's layout map or diagram, which is usually provided by the manufacturer or installer. Additionally, look for small flags or markers that may have been placed near the sprinkler heads during installation. Once you've located the sprinkler heads, you can begin to adjust them to ensure proper water coverage and prevent waste.
Checking the Sprinkler System's Pressure
Checking the sprinkler system's pressure is a crucial step in ensuring it operates efficiently and effectively. To do this, you'll need a pressure gauge, which can be attached to an outdoor hose bib or a drain valve on the backflow preventer. Turn off the main water supply and drain the system before attaching the gauge. Once attached, turn the water supply back on and take a reading. The ideal pressure range for most residential sprinkler systems is between 30-50 psi. If the pressure is too high, it can lead to excessive water waste, while low pressure can result in poor coverage and dry spots. If you find that your system's pressure is outside the ideal range, you may need to adjust the pressure-regulating valve or consider installing a pressure-boosting pump. Regularly checking the pressure can help you identify potential issues before they become major problems, ensuring your lawn and garden receive the right amount of water.
Adjusting Sprinkler Heads for Optimal Coverage
Adjusting sprinkler heads is a crucial step in ensuring optimal coverage for your lawn. Properly adjusted sprinkler heads can help prevent overwatering, underwatering, and uneven watering, which can lead to a range of problems including wasted water, dead spots, and an increased risk of disease and pests. To achieve optimal coverage, it's essential to adjust the sprinkler head's alignment, arc, and radius. This can be done by rotating the sprinkler head for proper alignment, adjusting the arc and radius of the sprinkler head, and tightening or loosening the sprinkler head's retainer ring. By making these adjustments, you can ensure that your sprinkler system is delivering water exactly where it's needed, resulting in a healthier, more vibrant lawn. To get started, let's take a closer look at the first step in adjusting your sprinkler heads: rotating the sprinkler head for proper alignment.
Rotating the Sprinkler Head for Proper Alignment
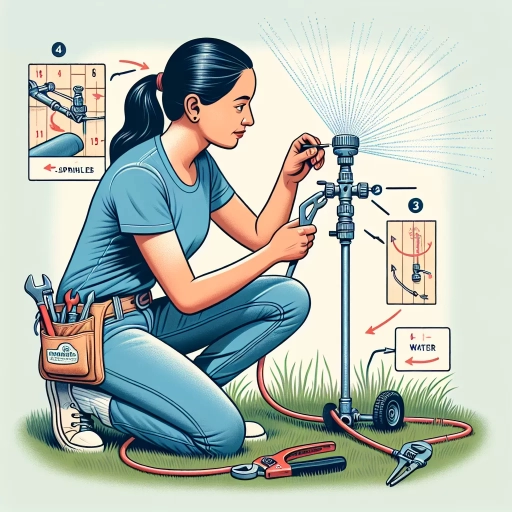
Rotating the sprinkler head is a crucial step in ensuring proper alignment and optimal coverage of your lawn. To rotate the sprinkler head, start by locating the adjustment screw or clip that holds the head in place. This is usually found at the base of the sprinkler head or on the side. Loosen the screw or clip by turning it counterclockwise, which will allow you to rotate the head freely. Next, identify the direction you want the water to spray and rotate the head accordingly. For example, if you want the water to spray towards a specific area of your lawn, rotate the head in that direction. Make sure to align the head with the desired spray pattern, taking into account any obstacles or uneven terrain. Once you have the head in the correct position, tighten the adjustment screw or clip by turning it clockwise to secure it in place. It's essential to check the spray pattern after rotating the head to ensure it's aligned correctly and providing the desired coverage. By rotating the sprinkler head, you can ensure that your lawn receives the right amount of water, reducing waste and promoting healthy growth. Regularly rotating the sprinkler head can also help prevent overwatering, which can lead to shallow root growth, disease, and pest issues. By taking the time to properly align your sprinkler heads, you can enjoy a lush, green lawn that's both beautiful and sustainable.
Adjusting the Arc and Radius of the Sprinkler Head
Adjusting the arc and radius of a sprinkler head is a crucial step in ensuring optimal coverage of your lawn or garden. The arc refers to the angle of the water spray, while the radius refers to the distance the water travels from the sprinkler head. To adjust the arc, locate the small screw or clip on the top of the sprinkler head, which controls the arc adjustment. Turn the screw clockwise to decrease the arc or counterclockwise to increase it. For example, if you want to water a narrow strip of lawn, you would decrease the arc to focus the water spray. On the other hand, if you want to water a wider area, you would increase the arc. To adjust the radius, locate the small screw or clip on the side of the sprinkler head, which controls the radius adjustment. Turn the screw clockwise to decrease the radius or counterclockwise to increase it. For instance, if you want to water a small area close to the sprinkler head, you would decrease the radius. Conversely, if you want to water a larger area farther away from the sprinkler head, you would increase the radius. It's essential to note that adjusting the arc and radius may affect the overall water pressure and flow rate, so it's crucial to check the sprinkler head's performance after making adjustments. Additionally, some sprinkler heads may have a fixed arc and radius, so it's essential to consult the manufacturer's instructions before making any adjustments. By adjusting the arc and radius of your sprinkler head, you can ensure that your lawn or garden receives the right amount of water, reducing waste and promoting healthy growth.
Tightening or Loosening the Sprinkler Head's Retainer Ring
Adjusting the retainer ring on a sprinkler head is a crucial step in ensuring optimal coverage and preventing water waste. To tighten or loosen the retainer ring, start by locating the ring, which is usually a small plastic or metal clip that holds the sprinkler head in place. Next, use a screwdriver or wrench to turn the ring clockwise to tighten or counterclockwise to loosen. Be careful not to overtighten, as this can damage the sprinkler head or restrict water flow. If the ring is stuck, use a gentle twisting motion to loosen it. Once the ring is adjusted, test the sprinkler head to ensure it is spraying water evenly and not leaking. By adjusting the retainer ring, you can fine-tune the sprinkler head's position and ensure your lawn is receiving the right amount of water. Regularly checking and adjusting the retainer ring can also help prevent clogging and extend the lifespan of your sprinkler system.
Troubleshooting Common Issues with Sprinkler Heads
Troubleshooting common issues with sprinkler heads is a crucial aspect of maintaining a healthy and efficient irrigation system. A well-functioning sprinkler head is essential for delivering the right amount of water to the right place at the right time. However, like any mechanical device, sprinkler heads can malfunction, leading to wasted water, reduced plant growth, and increased maintenance costs. To address these issues, it's essential to identify and fix problems promptly. Three common issues that can be easily resolved with some troubleshooting and maintenance are clogged nozzles and filters, improper elevation and tilt, and damaged or worn-out sprinkler heads. By understanding how to identify and fix these issues, homeowners and landscapers can save time, money, and water. In this article, we'll explore these common problems and provide step-by-step solutions, starting with identifying and fixing clogged nozzles and filters.
Identifying and Fixing Clogged Nozzles and Filters
Clogged nozzles and filters are common issues that can significantly impact the performance of your sprinkler system. To identify a clogged nozzle or filter, look for signs such as reduced water pressure, uneven water distribution, or a complete lack of water flow. Check the nozzle or filter for visible blockages, such as dirt, debris, or mineral buildup. If you suspect a clog, try cleaning the nozzle or filter with a soft brush or replacing it altogether. For more severe clogs, use a specialized cleaning tool or consult a professional. Regular maintenance, such as inspecting and cleaning nozzles and filters every 1-3 months, can help prevent clogs and ensure optimal system performance. Additionally, consider installing a filter screen or mesh to catch debris before it reaches the nozzle or filter, reducing the likelihood of clogs. By identifying and fixing clogged nozzles and filters, you can restore your sprinkler system to its full potential, ensuring your lawn and garden receive the right amount of water.
Adjusting the Sprinkler Head's Elevation and Tilt
Adjusting the sprinkler head's elevation and tilt is a crucial step in ensuring your lawn receives the right amount of water. To adjust the elevation, start by locating the adjustment screw or clip, usually found at the base of the sprinkler head. Turn the screw clockwise to lower the head or counterclockwise to raise it. Be cautious not to overtighten, as this can damage the head. Next, adjust the tilt by gently twisting the head back and forth. This will allow you to fine-tune the spray pattern to reach the desired area. For pop-up sprinkler heads, you may need to use a specialized tool to adjust the tilt. It's essential to check the manufacturer's instructions for specific guidance on adjusting your particular sprinkler head model. By making these adjustments, you can optimize the performance of your sprinkler system, ensuring your lawn receives the right amount of water and reducing waste. Regularly inspecting and adjusting your sprinkler heads will also help prevent common issues like overwatering, underwatering, and uneven coverage.
Replacing Damaged or Worn-Out Sprinkler Heads
Replacing damaged or worn-out sprinkler heads is a crucial step in maintaining a well-functioning irrigation system. Over time, sprinkler heads can become damaged due to various factors such as weather conditions, lawn mowers, or foot traffic. Worn-out sprinkler heads can lead to inefficient water distribution, resulting in overwatering or underwatering of certain areas. To replace a damaged or worn-out sprinkler head, start by turning off the main water supply to the irrigation system. Next, dig around the sprinkler head to expose the riser, taking care not to damage any surrounding pipes or wires. Remove the old sprinkler head by unscrewing it from the riser, and then discard it. Before installing the new sprinkler head, inspect the riser for any debris or mineral buildup and clean it out if necessary. Finally, screw the new sprinkler head onto the riser, making sure it is securely tightened, and turn the water supply back on to test the new head. It is recommended to replace sprinkler heads every 5-7 years or as needed to ensure optimal performance and water efficiency. By replacing damaged or worn-out sprinkler heads, homeowners can save water, reduce their water bills, and maintain a healthy and lush lawn.