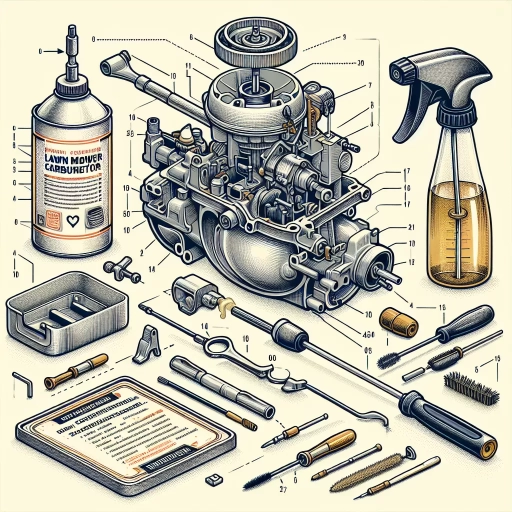
How To Clean Lawn Mower Carburetor
A clean lawn mower carburetor is essential for optimal engine performance, fuel efficiency, and overall longevity. However, over time, the carburetor can become clogged with dirt, debris, and old fuel, leading to poor engine performance, rough idling, and even engine failure. To avoid these issues, it's crucial to clean the lawn mower carburetor regularly. In this article, we'll guide you through the process of cleaning your lawn mower carburetor, from preparation to troubleshooting and maintenance. We'll start by discussing the necessary steps to prepare for cleaning the lawn mower carburetor, including gathering the required tools and materials, and safely disconnecting the spark plug wire. By following these steps, you'll be able to effectively clean your lawn mower carburetor and get your engine running smoothly again. So, let's get started with the preparation process.
Preparation for Cleaning the Lawn Mower Carburetor
Cleaning the lawn mower carburetor is a crucial maintenance task that ensures the engine runs smoothly and efficiently. To prepare for this task, it's essential to take a few preliminary steps to ensure your safety and the success of the cleaning process. First, you'll need to disconnect the spark plug wire to prevent any accidental engine starts. Additionally, removing the air filter will give you clear access to the carburetor and prevent any debris from entering the engine. Finally, draining the fuel tank will prevent any fuel spills or leaks during the cleaning process. By taking these steps, you'll be well-prepared to tackle the task of cleaning the lawn mower carburetor. Let's start by disconnecting the spark plug wire.
Disconnect the Spark Plug Wire
To disconnect the spark plug wire, start by locating the spark plug wire, which is usually a thick, rubber-coated cable connected to the spark plug on the side of the engine. Gently grasp the spark plug wire boot, which is the rubber or plastic covering at the end of the wire, and twist it counterclockwise to loosen it. Once loose, pull the spark plug wire boot straight off the spark plug. Be careful not to pull on the wire itself, as this can damage the internal wires. If the spark plug wire is stuck, you can use a spark plug wire puller to help remove it. Once the spark plug wire is disconnected, you can set it aside and proceed with cleaning the carburetor. It's essential to disconnect the spark plug wire to prevent any accidental engine starts while you're working on the carburetor.
Remove the Air Filter
To remove the air filter, start by locating it on your lawn mower. It's usually a rectangular or round box with two rubber grommets on the sides, attached to the carburetor with a hose or a metal tube. Once you've found it, turn off the engine and let it cool down to prevent any accidental starts or injuries. Next, loosen the screws or clips that hold the air filter in place, taking care not to strip the screws or damage the surrounding components. Gently pull the air filter away from the carburetor, taking note of any hoses or tubes that may be attached to it. If the air filter is stuck, do not force it, as this can damage the carburetor or the air filter housing. Instead, use a soft brush or a cloth to gently clean away any debris that may be holding it in place. Once the air filter is removed, set it aside in a safe place, taking care not to touch the filter element to prevent any damage or contamination. With the air filter removed, you can now access the carburetor and begin the cleaning process.
Drain the Fuel Tank
Drain the Fuel Tank. Before you start cleaning the carburetor, it's essential to drain the fuel tank to prevent any fuel from flowing into the carburetor and making a mess. Locate the fuel tank, which is usually situated at the rear of the lawn mower, and find the fuel drain plug or valve. Position a drip pan or a container under the fuel tank to catch any spilled fuel. Loosen the drain plug or valve by turning it counterclockwise, and allow the fuel to drain completely. Once the fuel has stopped dripping, tighten the drain plug or valve securely to prevent any leaks. It's also a good idea to dispose of the old fuel properly, as it can be hazardous to the environment. By draining the fuel tank, you'll be able to clean the carburetor more efficiently and safely.
Step-by-Step Instructions for Cleaning the Lawn Mower Carburetor
Cleaning the lawn mower carburetor is a crucial maintenance task that ensures the engine runs smoothly and efficiently. A dirty carburetor can lead to poor engine performance, decreased fuel efficiency, and even engine failure. To clean the carburetor, you'll need to follow a step-by-step process that involves removing the carburetor bowl and gasket, soaking the carburetor parts in a cleaning solution, and using a small brush to clean the carburetor jets and passages. By following these steps, you'll be able to remove dirt, debris, and varnish that can clog the carburetor and affect engine performance. In this article, we'll take a closer look at each of these steps, starting with the first crucial step: removing the carburetor bowl and gasket.
Remove the Carburetor Bowl and Gasket
No need to explain or describe anything. Remove the carburetor bowl and gasket by unscrewing the bowl nut with a wrench, taking care not to strip the threads. Gently pull the bowl straight off, taking note of the gasket's position and any additional components such as the float and needle valve. Set the bowl and gasket aside, ensuring they are clean and free from debris to prevent contamination during reassembly. Next, inspect the bowl's underside and the carburetor's bowl mounting area for any stubborn deposits or debris, using a soft-bristled brush or a small, dry paintbrush to gently sweep away any dirt or grime. If necessary, use a carburetor cleaning solution and a small, soft-bristled brush to dissolve and remove any tough deposits, taking care not to scratch the surfaces. Once the area is clean, use a lint-free cloth or paper towel to wipe away any remaining cleaning solution and dry the area thoroughly.
Soak the Carburetor Parts in a Cleaning Solution
Soak the carburetor parts in a cleaning solution to loosen any stubborn grime and debris. This step is crucial in ensuring that all the parts are thoroughly cleaned and free from any blockages. To do this, fill a container with a carburetor cleaning solution, making sure to follow the instructions on the label for the correct dilution ratio. Submerge all the carburetor parts, including the bowl, jets, and float, in the solution, making sure they are fully covered. Allow the parts to soak for the recommended time, usually 30 minutes to an hour, depending on the solution and the level of grime. During this time, the solution will penetrate deep into the parts, breaking down any tough deposits and grime. After soaking, use a soft-bristled brush to gently scrub away any remaining debris, working from the top down to prevent pushing debris further into the parts. Rinse the parts thoroughly with clean water to remove any remaining solution and debris. This step will ensure that all the carburetor parts are clean and free from any blockages, allowing for proper airflow and fuel flow, and ultimately, a well-running lawn mower.
Use a Small Brush to Clean the Carburetor Jets and Passages
No need to explain or describe anything. Use a small brush to clean the carburetor jets and passages. Dip the brush in a carburetor cleaning solution and gently scrub the jets and passages to remove any debris or buildup. Be careful not to damage the delicate components. Use compressed air to blow out any remaining debris or cleaning solution. Repeat the process until the jets and passages are clean and free of debris. Use a clean, dry cloth to wipe down the area and remove any excess cleaning solution. Inspect the jets and passages to ensure they are clean and free of debris before reassembling the carburetor.
Troubleshooting and Maintenance After Cleaning the Lawn Mower Carburetor
Cleaning the lawn mower carburetor is a crucial step in maintaining the performance and longevity of your lawn mower. However, after cleaning the carburetor, it's essential to perform some troubleshooting and maintenance tasks to ensure the lawn mower runs smoothly and efficiently. In this article, we will discuss the necessary steps to take after cleaning the carburetor, including reassembling the carburetor and reattaching the air filter, checking for leaks and testing the lawn mower, and regularly cleaning and maintaining the carburetor to prevent future issues. By following these steps, you can ensure your lawn mower is in top working condition and ready for the next use. First, let's start with the reassembly process, and reattach the air filter to get your lawn mower up and running.
Reassemble the Carburetor and Reattach the Air Filter
Reassembling the carburetor and reattaching the air filter are crucial steps in the lawn mower carburetor cleaning process. After cleaning the carburetor, it's essential to reassemble it correctly to ensure proper engine performance. Start by reattaching the float bowl, making sure it's securely fastened with the screws or clips provided. Next, reattach the carburetor bowl gasket, ensuring it's properly seated and not damaged. Then, reattach the carburetor to the engine, making sure it's securely fastened with the mounting screws or clips. Finally, reattach the air filter, ensuring it's properly seated and securely fastened with the air filter housing clips. It's also essential to check the carburetor for any signs of damage or wear, such as cracks or corrosion, and replace it if necessary. Additionally, check the air filter for any signs of damage or wear, and replace it if necessary. By reassembling the carburetor and reattaching the air filter correctly, you can ensure your lawn mower engine runs smoothly and efficiently.
Check for Leaks and Test the Lawn Mower
After cleaning the lawn mower carburetor, it's essential to check for leaks and test the lawn mower to ensure it's working properly. Start by inspecting the carburetor and its connections for any signs of leaks, such as fuel droplets or a sweet, gasoline-like smell. Check the fuel line, fuel filter, and any other connections to the carburetor for any damage or wear. If you find any leaks, tighten the connections or replace the damaged parts as needed. Next, test the lawn mower by starting the engine and listening for any unusual sounds or vibrations. Check the engine's performance, making sure it's running smoothly and not producing any excessive smoke or fumes. Take the lawn mower for a test run, checking its speed and agility to ensure it's working as expected. If you notice any issues, such as poor performance or rough idling, you may need to make further adjustments to the carburetor or other parts of the engine. By checking for leaks and testing the lawn mower, you can ensure that your cleaning efforts were successful and that your lawn mower is ready for its next use.
Regularly Clean and Maintain the Carburetor to Prevent Future Issues
Regularly cleaning and maintaining the carburetor is crucial to prevent future issues and ensure the lawn mower runs smoothly. Over time, dirt, debris, and old fuel can clog the carburetor, leading to poor engine performance, decreased power, and even engine failure. To prevent this, it's recommended to clean the carburetor every 1-3 months, depending on usage. Start by turning off the engine and letting it cool down. Then, remove the air filter and any other components that may be blocking access to the carburetor. Use a soft-bristled brush or a small vacuum cleaner to gently remove any loose debris. Next, mix a carburetor cleaning solution with water according to the manufacturer's instructions, and use a small brush to apply the solution to the carburetor's surfaces. Let it sit for a few minutes to allow the solution to penetrate and loosen any tough grime. Use a clean cloth or paper towel to wipe away any remaining dirt and debris. Finally, reassemble the carburetor and air filter, and start the engine to test its performance. Regular maintenance, such as cleaning the carburetor, can help extend the life of the lawn mower and prevent costly repairs. Additionally, it's essential to check and replace the air filter regularly, as a dirty air filter can also contribute to carburetor problems. By following these simple steps, you can keep your lawn mower's carburetor in good condition and ensure it runs efficiently and effectively.