How To Defrost Freezer
Here is the introduction paragraph: Defrosting your freezer is an essential maintenance task that helps remove ice buildup, reduces energy consumption, and prevents bacterial growth. However, it can be a daunting task, especially if you're not sure where to start. To make the process easier and more efficient, it's crucial to understand the steps involved in defrosting your freezer. In this article, we'll guide you through the process, starting with preparation before defrosting, where we'll discuss the importance of clearing out contents, covering floors, and unplugging the freezer. We'll then explore the different defrosting methods, including manual and automatic defrosting, and provide tips on how to speed up the process. Finally, we'll cover what to do after defrosting, including cleaning and sanitizing the freezer, and how to prevent future ice buildup. By following these steps, you'll be able to defrost your freezer safely and effectively. So, let's begin with the preparation before defrosting.
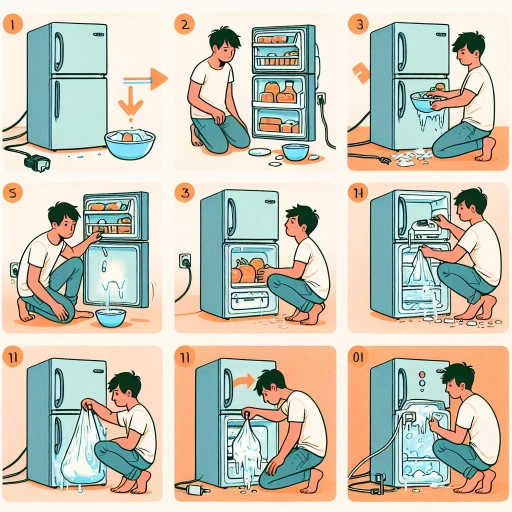
Preparation Before Defrosting
Defrosting your freezer can be a daunting task, but with the right preparation, it can be done efficiently and effectively. Before you start, it's essential to take a few steps to ensure a smooth process. First, you'll need to empty the freezer, removing all contents and sorting them into categories. This will give you a clear space to work with and prevent any food from getting damaged or contaminated. Additionally, you'll want to cover the floor and counters with drop cloths or old sheets to protect them from any water spills or messes. Finally, prepare a large container with ice to store any perishable items that you won't be able to cook or consume immediately. By taking these steps, you'll be well-prepared to tackle the defrosting process. Let's start with the first step: emptying the freezer.
Empty the Freezer
Emptying the freezer is a crucial step in the defrosting process. Before you start defrosting, it's essential to remove all contents from the freezer to prevent any food from getting damaged or contaminated during the process. Start by taking out all the frozen food, ice packs, and any other items stored in the freezer. Sort the items into categories, such as meat, vegetables, and leftovers, and place them in airtight containers or zip-top bags to prevent cross-contamination. If you have a lot of frozen food, consider using a cooler with ice packs to keep them frozen until you can transfer them to the refrigerator or cook them. Be sure to check the expiration dates of the frozen food and discard any items that are past their expiration date or show signs of spoilage. Additionally, take this opportunity to clean and sanitize any containers or shelves that were in the freezer to prevent the growth of bacteria and mold. By emptying the freezer, you'll be able to defrost it more efficiently and effectively, and you'll also have a chance to reorganize and declutter your freezer space.
Cover the Floor and Counters
When defrosting your freezer, it's essential to cover the floor and counters to prevent water damage and make the cleaning process easier. Start by laying down old towels, sheets, or a plastic tablecloth on the floor to catch any water that may leak out of the freezer during the defrosting process. You can also use a wet/dry vacuum to contain the water and prevent it from spreading to other areas of the room. Additionally, cover your counters with plastic wrap, aluminum foil, or a waterproof tablecloth to protect them from any water or debris that may fall from the freezer. This will also make it easier to clean up any spills or messes that may occur during the defrosting process. By taking these precautions, you can ensure a safe and efficient defrosting process that won't damage your floors or counters.
Prepare a Large Container with Ice
To prepare a large container with ice, start by selecting a container that is large enough to hold the contents of your freezer. A large, sturdy bin or bucket with a lid is ideal. Next, fill the container with ice to a depth of about 2-3 inches. You can use cubed ice or crushed ice, whichever is available. If you don't have access to ice, you can also use frozen gel packs or even frozen water bottles. The key is to create a cold environment that will keep your frozen food at a safe temperature while you defrost your freezer. Once the container is filled with ice, place it in a safe location, such as a garage or a shaded area, where it can remain cool. This will be your temporary storage container for your frozen food while you defrost your freezer. By preparing a large container with ice, you can ensure that your frozen food remains safe and frozen, even when it's not in the freezer.
Defrosting Methods
Defrosting frozen food can be a daunting task, especially when you're short on time. Fortunately, there are several methods to defrost food quickly and safely. Three common methods include using the defrost button on your microwave, submerging the food in hot water, or using a hair dryer or towel to speed up the process. Each of these methods has its own advantages and disadvantages, and the best approach will depend on the type of food you're defrosting and the equipment you have available. In this article, we'll explore each of these methods in more detail, starting with the most convenient option: defrosting with the defrost button.
Defrosting with the Defrost Button
Defrosting with the defrost button is a convenient and efficient method to thaw your freezer. This method is available in most modern freezers and is usually indicated by a defrost button or a defrost mode on the control panel. To defrost using this method, simply press the defrost button and let the freezer do the work for you. The defrost button works by reversing the flow of refrigerant in the freezer, allowing the frost and ice to melt away quickly and easily. This method is ideal for those who want to defrost their freezer quickly and with minimal effort. It's also a great option for those who don't have a lot of time to spend on defrosting, as it can be completed in a matter of hours. Additionally, defrosting with the defrost button helps to prevent the growth of bacteria and mold, which can occur when the freezer is not properly defrosted. Overall, defrosting with the defrost button is a convenient, efficient, and hygienic way to thaw your freezer.
Defrosting with Hot Water
Defrosting with hot water is a simple and effective method to remove ice and frost from your freezer. This technique is particularly useful for removing stubborn ice buildup and frost that has accumulated over time. To defrost with hot water, start by removing all contents from the freezer and placing them in a cooler or insulated bag to keep them frozen. Next, fill a large container or sink with hot water, and then place the freezer shelves and drawers in the water to soak. The hot water will help loosen the ice and frost, making it easier to remove. You can also use a soft-bristled brush or a non-abrasive scrubber to gently scrub away any remaining ice and frost. Once the shelves and drawers are clean, use a clean towel to dry them thoroughly before replacing them in the freezer. For the freezer walls and floor, you can use a mixture of hot water and a small amount of white vinegar in a spray bottle to help loosen the ice and frost. Simply spray the solution onto the affected areas and let it sit for a few minutes before wiping it clean with a soft cloth. This method is not only effective but also eco-friendly, as it eliminates the need for harsh chemicals or defrosting sprays. Additionally, defrosting with hot water can help remove any lingering odors or bacteria that may be present in the freezer, leaving it clean and fresh. Overall, defrosting with hot water is a quick, easy, and environmentally friendly way to keep your freezer in top condition.
Defrosting with a Hair Dryer or Towel
Defrosting with a hair dryer or towel is a popular method for quickly removing frost and ice from a freezer. This method is particularly useful for small to medium-sized freezers or for spot defrosting. To defrost with a hair dryer, simply set the dryer to a low or medium heat setting and hold it about 6-8 inches away from the frosty area. Move the dryer slowly back and forth to evenly distribute the heat. Be careful not to apply too much heat, as this can damage the freezer's finish or cause the plastic to warp. For tougher frost buildup, you can also use a towel soaked in hot water to help loosen the ice. Simply place the towel over the frosty area and let it sit for a few minutes before wiping away the ice with a clean cloth. This method is also effective for defrosting small areas, such as the freezer's drain or ice maker. However, it's essential to note that using a hair dryer or towel to defrost a freezer can be time-consuming and may not be as effective for large or heavily frosted areas. In such cases, it's recommended to use a more comprehensive defrosting method, such as leaving the freezer door open or using a defrosting spray.
After Defrosting
After defrosting your freezer, it's essential to take the necessary steps to ensure it's clean, safe, and ready for restocking. Defrosting can be a messy and time-consuming process, but the aftermath is just as crucial. Once you've removed all the contents and allowed the freezer to thaw, you'll need to clean the freezer thoroughly to remove any remaining ice, frost, and bacteria. Additionally, it's vital to check for any damage or wear on the freezer's walls, shelves, and seals to prevent future issues. Finally, you'll need to restock the freezer with fresh food and organize it efficiently to maintain optimal storage conditions. By following these steps, you'll be able to enjoy a clean, functional, and safe freezer. First, let's start with the most critical step: cleaning the freezer.
Clean the Freezer
Cleaning the freezer is an essential step after defrosting to remove any remaining dirt, grime, and bacteria that may have accumulated during the defrosting process. Start by removing any remaining ice and water from the freezer using a towel or a wet/dry vacuum. Next, mix a solution of equal parts water and white vinegar in a spray bottle. Spray the solution onto the freezer walls and floor, making sure to cover all surfaces. Let the solution sit for about 10-15 minutes to allow it to penetrate and loosen any tough stains. Use a soft-bristled brush or a non-abrasive scrubber to gently scrub away any stubborn stains or grime. Rinse the freezer with clean water to remove any remaining vinegar solution and debris. Use a clean towel to dry the freezer, paying extra attention to any areas with crevices or corners where moisture may collect. Finally, wipe down the freezer shelves and walls with a dry cloth to remove any remaining moisture and prevent water spots. By following these steps, you'll be able to clean your freezer effectively and keep it in good condition.
Check for Damage and Wear
After defrosting, it's essential to check your freezer for any damage or wear that may have occurred during the defrosting process. Inspect the freezer's walls, floor, and shelves for any signs of water damage, rust, or corrosion. Check the drain and drain hose for any blockages or mineral buildup, which can cause water to accumulate and lead to further damage. Also, inspect the freezer's door seals for any signs of wear or damage, as a faulty seal can cause cold air to escape and warm air to enter, reducing the freezer's efficiency. Additionally, check the freezer's electrical components, such as the thermostat and heating element, for any signs of damage or wear. If you notice any damage or wear, it's crucial to address it promptly to prevent further damage and ensure your freezer continues to function properly.
Restock the Freezer
Restock the Freezer. Once your freezer is clean and dry, it's time to restock it with your frozen foods. Start by checking the expiration dates of your frozen items and discarding any that are past their prime. Then, organize your freezer by grouping similar items together, such as meats, vegetables, and leftovers. Place the items you use most frequently in easy-to-reach locations, and consider using baskets or bins to keep smaller items, like frozen fruits and vegetables, organized. When restocking, make sure to leave enough space between items for air to circulate, which will help maintain a consistent freezer temperature and prevent the growth of bacteria. Finally, be sure to label and date each item so you can easily keep track of what you have and how long it's been in the freezer.