How To Draw A Rainbow
Drawing a rainbow is a fun and creative activity that can be enjoyed by people of all ages. Whether you're a seasoned artist or a beginner, learning how to draw a rainbow can be a great way to express yourself and add some color to your life. In this article, we'll take you through the process of drawing a rainbow, from understanding the basics to adding the finishing touches. First, we'll start with the fundamentals, exploring the basic shapes and colors that make up a rainbow. Then, we'll provide a step-by-step guide on how to draw a rainbow, covering the key elements and techniques you'll need to know. Finally, we'll show you how to add some extra details and finishing touches to make your rainbow drawing truly special. So, let's get started by understanding the basics of drawing a rainbow.
Understanding the Basics of Drawing a Rainbow
Drawing a rainbow can be a fun and creative activity, but it requires a basic understanding of the color spectrum, shape, and structure of a rainbow, as well as the right drawing tools and materials. To start, it's essential to understand the color spectrum of a rainbow, which is typically made up of seven colors: red, orange, yellow, green, blue, indigo, and violet. These colors always appear in the same order and are a result of the way light interacts with water droplets in the air. In addition to understanding the color spectrum, it's also important to identify the shape and structure of a rainbow, which is typically an arc shape with the colors gradating from one to another. Finally, having the right drawing tools and materials, such as colored pencils, markers, or paints, can make a big difference in the quality of the final drawing. By understanding these basics, anyone can create a beautiful and realistic drawing of a rainbow. To begin, let's take a closer look at the color spectrum of a rainbow.
Defining the Color Spectrum of a Rainbow
The color spectrum of a rainbow is a majestic display of colors that appear in the sky after a refreshing rain shower. The colors of the rainbow always appear in the same order: red, orange, yellow, green, blue, indigo, and violet. This specific order is due to the way that light behaves when it passes through water droplets in the air. When sunlight enters the Earth's atmosphere, it is refracted, or bent, and split into its individual colors, a process known as dispersion. The different colors have different wavelengths, with red having the longest wavelength and violet having the shortest. As the light is refracted through the water droplets, the colors are spread out and separated, creating the beautiful color spectrum of a rainbow. The colors of the rainbow can be remembered using the acronym ROYGBIV, with each letter standing for the name of a color. Understanding the color spectrum of a rainbow is essential for drawing a realistic and vibrant rainbow, as it allows artists to accurately depict the colors and their order. By grasping the science behind the color spectrum, artists can create stunning and colorful rainbows that capture the beauty of this natural phenomenon.
Identifying the Shape and Structure of a Rainbow
A rainbow is a stunning natural phenomenon that appears in the sky after a rain shower, characterized by its vibrant colors and majestic shape. To draw a realistic rainbow, it's essential to understand its shape and structure. A rainbow is essentially a circular arc of color that appears in the sky, with its center located below the horizon. The colors of the rainbow always appear in the same order: red, orange, yellow, green, blue, indigo, and violet. The shape of a rainbow can be divided into two main parts: the primary arc and the secondary arc. The primary arc is the brighter, outer arc of color, while the secondary arc is the fainter, inner arc. The primary arc is typically around 42 degrees wide, while the secondary arc is around 51 degrees wide. The colors of the secondary arc are usually reversed, with violet on the outside and red on the inside. By understanding the shape and structure of a rainbow, you can create a more accurate and visually appealing drawing.
Choosing the Right Drawing Tools and Materials
Choosing the right drawing tools and materials is essential to create a beautiful and vibrant rainbow. To start, you'll need a few basic drawing tools, including a pencil, eraser, and sharpener. A graphite pencil (#2) is ideal for sketching the outline of the rainbow, while a colored pencil or marker can be used to add color and depth. For a more realistic look, consider using a set of Prismacolor pencils or Copic markers, which offer a wide range of colors and blending capabilities. In addition to drawing tools, you'll also need a surface to draw on, such as paper or a sketchbook. Look for paper that is heavy enough to handle multiple layers of color and has a smooth texture to prevent bleeding or feathering. A sketchbook with a mix of blank and grid paper can be helpful for planning and sketching out your rainbow design. Finally, don't forget to have a few reference images on hand to inspire your drawing and ensure that your rainbow is proportional and visually appealing. By choosing the right tools and materials, you'll be well on your way to creating a stunning and colorful rainbow that showcases your artistic skills.
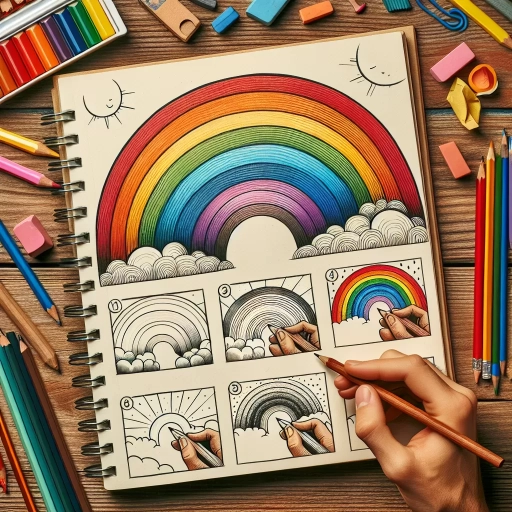
Step-by-Step Guide to Drawing a Rainbow
Drawing a rainbow can be a fun and creative activity for people of all ages. With a few simple steps, you can create a beautiful and vibrant rainbow that will brighten up any room. In this article, we will provide a step-by-step guide on how to draw a rainbow, covering the essential techniques and tips to help you achieve a stunning result. We will start by sketching the arc shape of the rainbow, which is the foundation of the entire drawing. Then, we will move on to adding colors to the rainbow in the correct order, using a specific sequence of colors to create a realistic and harmonious effect. Finally, we will learn how to blend and shade the colors to give the rainbow a three-dimensional appearance. By following these steps, you will be able to create a beautiful and realistic rainbow that will impress anyone. So, let's get started by sketching the arc shape of the rainbow.
Sketching the Arc Shape of the Rainbow
Drawing a rainbow is a fun and creative activity that can be enjoyed by people of all ages. To start, you'll need a few basic art supplies, including a pencil, a piece of paper, and some colored pencils or markers. Begin by sketching the arc shape of the rainbow, which is typically a smooth, curved line that spans across the sky. To create a realistic arc shape, start by drawing a gentle curve that begins at one end of the paper and ends at the other. Make sure the curve is smooth and even, with no sharp angles or bumps. As you draw the arc shape, imagine the rainbow stretching across the sky, with the colors gradating from one to another. You can also use a compass or a round object to help you draw a perfect arc shape. Once you have the basic arc shape drawn, you can start adding the colors of the rainbow, which typically include red, orange, yellow, green, blue, indigo, and violet. You can use colored pencils or markers to color in the arc shape, starting with the red color on the outermost part of the arc and working your way inwards. Remember to blend the colors together smoothly, so that the transition from one color to another is seamless. With a little practice and patience, you can create a beautiful and vibrant rainbow that will brighten up any room.
Adding Colors to the Rainbow in the Correct Order
When adding colors to the rainbow in the correct order, it's essential to remember the acronym ROYGBIV, which stands for Red, Orange, Yellow, Green, Blue, Indigo, and Violet. Start by drawing a gentle, sweeping arc for the red color, making sure to leave enough space for the subsequent colors. Next, add the orange color, blending it seamlessly into the red to create a smooth transition. The yellow color should be placed adjacent to the orange, with a slight overlap to maintain the gradient effect. Moving on, the green color should be added, followed by the blue, indigo, and finally, the violet color. It's crucial to maintain the correct order and proportions of the colors to achieve a realistic and visually appealing rainbow. To ensure accuracy, you can use a color wheel or a reference image to guide you. Additionally, consider using a range of shades and tints to add depth and dimension to your rainbow, making it more engaging and lifelike. By following these steps and paying attention to the correct color sequence, you'll be able to create a stunning and authentic rainbow that will add a pop of color to your artwork.
Blending and Shading the Colors for a Realistic Effect
Blending and shading the colors is a crucial step in creating a realistic rainbow drawing. To achieve a smooth and natural transition between colors, start by layering the colors in the correct order, from lightest to darkest. Begin with the lightest color, typically yellow, and gently blend it into the adjacent color, orange. Use a blending stump or tortillon to soften the edges and merge the colors seamlessly. Next, blend the orange into the red, and then the red into the violet, making sure to maintain a smooth gradient. To add depth and dimension to your rainbow, use shading techniques to create a sense of volume and curvature. Apply gentle shading to the underside of the rainbow, using a range of grays or the colors themselves, to create a soft, rounded appearance. Avoid harsh lines or abrupt transitions, instead opting for a subtle, nuanced approach that captures the ethereal quality of a real rainbow. By carefully blending and shading the colors, you can create a stunning, realistic rainbow that seems to leap off the page.
Adding Finishing Touches to Your Rainbow Drawing
Adding the finishing touches to your rainbow drawing can elevate it from a simple sketch to a stunning work of art. To take your drawing to the next level, consider adding a few key elements that will enhance its overall appearance. One way to do this is by creating a background that complements the colors of the rainbow, drawing the viewer's eye to the vibrant arc. You can also add clouds, sun, or other environmental elements to create a sense of depth and atmosphere. Finally, finalizing the drawing with outlines and details will help to define the shapes and add texture, making the rainbow feel more realistic and engaging. By incorporating these elements, you can create a beautiful and captivating rainbow drawing that showcases your artistic skills. So, let's start by exploring how to create a background that will enhance the beauty of your rainbow.
Creating a Background to Enhance the Rainbow
A beautiful background can elevate your rainbow drawing and make it even more visually appealing. To create a stunning background, start by considering the colors and textures that will complement your rainbow. A soft, white or light-colored background can provide a clean and simple contrast to the vibrant colors of the rainbow. Alternatively, you can opt for a more dramatic background, such as a dark blue or purple sky with fluffy white clouds, to create a sense of depth and atmosphere. If you want to add some extra texture and interest, you can also incorporate subtle patterns or shapes, such as gentle waves or soft, puffy clouds. When choosing a background, remember to keep it simple and unobtrusive, as you want the rainbow to remain the focal point of your drawing. By carefully selecting a background that enhances your rainbow, you can create a beautiful and eye-catching piece of art that showcases your creativity and skill.
Adding Clouds, Sun, or Other Environmental Elements
Adding clouds, sun, or other environmental elements to your rainbow drawing can elevate it from a simple, colorful arc to a vibrant and immersive scene. To add clouds, start by lightly sketching their shapes with a soft pencil, using gentle, sweeping motions to suggest their soft and puffy texture. You can also add some subtle shading to give your clouds some depth and dimension. For a sun, use a small circle or oval shape and add some rays extending out from it, using a ruler or a straightedge to help you draw straight lines. You can also add some texture to your sun to give it a more dynamic appearance. Other environmental elements you might consider adding include trees, hills, or even a body of water, such as a lake or ocean. These elements can help to ground your rainbow in a specific setting and add some visual interest to your drawing. When adding these elements, be sure to balance them with your rainbow, making sure that they don't overpower it. You can also experiment with different colors and textures to create a unique and captivating scene.
Finalizing the Drawing with Outlines and Details
Finalizing the drawing with outlines and details is a crucial step in bringing your rainbow to life. Start by using a fine-tip pen or a marker to create a bold outline around the entire rainbow, making sure to follow the gentle curves and contours of the arc. This will help define the shape and create a sense of depth. Next, add details to the rainbow by drawing short, curved lines that follow the direction of the arc, creating a sense of movement and energy. You can also add some texture to the rainbow by drawing short, hatching lines that follow the direction of the arc, giving it a soft, feathery appearance. Additionally, you can add some highlights to the rainbow by drawing small, white dots or lines along the top of the arc, creating a sense of shine and sparkle. Finally, use a black pen or marker to add some final details, such as drawing a few wispy clouds or a sun shining down on the rainbow, adding a sense of context and atmosphere to the drawing. By adding these final details, you can bring your rainbow to life and create a beautiful, eye-catching piece of art.