How To Factory Reset Iphone 11
 Whether you're planning to sell your iPhone 11, experiencing persisting technical issues, or simply want a fresh start, knowing how to carry out a factory reset is a crucial piece of knowledge. In this comprehensive and user-friendly guide, we will take you through a crystal-clear journey on how to factory reset your iPhone 11, ensure the complete removal of your data, and reload the software. The process is meticulously divided into three convenient sections to ensure absolute clarity. First, we'll delve into "Preparation Before Factory Resetting Your iPhone 11" to safeguard vital information before initiating the process. Next, the "Methods to Factory Reset Your iPhone 11" will be explored, providing you with different ways to accomplish the task. Finally, we'll guide you through "Post-Factory Reset: Setting Up Your iPhone 11 Again" — because what comes after is just as significant. Starting from this point, we will talk about the preparation process before factory resetting your device, which is essential to protect your important data and files.
Preparation Before Factory Resetting Your iPhone 11
At the heart of your iPhone 11 is important data like contacts, documents, photos, applications, and others that have, no doubt, become integral to your daily routine. With our increasing reliance on our smartphones for various tasks, ensuring we do not lose our precious data should be a top priority. This is especially true when you decide to factory reset your iPhone 11. To avoid data loss, this entails going through several crucial steps: backing up your iPhone 11 data, disabling the "Find My iPhone" feature, and signing out of iCloud, iTunes and App Store. Each of these steps is designed to protect your data and ensure a smooth factory reset process, mitigating the risk of encountering issues down the line. As we delve into each process, our first focus will be on the importance and the process of backing up your iPhone 11 data, a procedure that guarantees even after factory reset, your data will still be intact and retrievable.
Backup Your iPhone 11 Data
Before initiating the process of factory resetting your iPhone 11, creating a backup of all your digital data is an imperative step to safeguard your various documents, photos, contacts, and other files. Backing up your iPhone 11 data not only ensures that your information is secured but also allows for easy restoration of these files once the factory reset process is complete. Fortunately, Apple offers multiple ways to backup your iPhone 11 data. The first method to consider is by using iCloud, Apple's cloud service solution. Open your iPhone's “Settings,” scroll down and tap on your Apple ID (which typically displays your picture and name), then tap on 'iCloud' and finally 'iCloud Backup.' Ensure the iCloud Backup slider is on (green). After verifying a Wi-Fi connection, tap "Back Up Now." Bear in mind that while iCloud is simple and wireless, it only offers 5GB of free storage. If your data exceeds the free storage limit, you may opt for the second method which is through iTunes - a program readily available on any Mac and on PCs download-able from Apple's website. To backup through iTunes, connect your iPhone 11 to your computer, open iTunes, click on the 'Device' button then 'Summary,' finally click on 'This Computer' then 'Back Up Now.' This method provides limitless backup but it will require sufficient computer hard drive space. The third method is via Finder, especially if you have macOS Catalina (10.15) or later. Connect your iPhone 11 to your Mac, open Finder, and then select your iPhone 11 from the sidebar. Finally, click on 'General,' then 'Back up all of the data on your iPhone to this Mac,' and finally 'Back Up Now.' Like iTunes, this method necessitates enough computer hard drive space. In conclusion, backing up iPhone 11 data is a crucial practice ensuring that your information is shielded during a factory reset. Whichever method you opt for depends on your preferences and resources, but in all instances, it's a must-do before commencing the factory reset. Furnishing yourself with this knowledge guarantees smoother, worry-free execution of the factory reset process. It becomes less of deleting all, and much more about creating a fresh start, with your data safely tucked away, ready for post-reset retrieval.
Disable Find My iPhone
Before proceeding with a factory reset on your iPhone 11, it's crucial to disable the 'Find My iPhone' feature. Apple's 'Find My iPhone' is a security measure designed to protect your data in case of theft or loss. This feature works by linking your iPhone to your Apple ID, making it impossible for someone else to erase or reactivate your device without your credentials. However, if you're preparing to factory reset your iPhone 11, leaving this feature on could inadvertently prevent the operation from completing successfully. Thus, disabling 'Find My iPhone' is crucial in preparing your device for a factory reset. To disable this feature, first, navigate to the 'Settings' menu on your iPhone 11. Tap on your name at the top, which will refresh a new page with different options including 'Find My.' Tap on 'Find My,' and then, 'Find My iPhone.' This will open a new page where a green switch next to 'Find My iPhone' is seen, this indicates that the feature is enabled. To disable it, simply tap on the switch. You will be asked to enter your Apple ID password to confirm the action. Upon entering your password, the switch will turn gray indicating that the 'Find My iPhone' feature is turned off. Disabling 'Find My iPhone' does not diminish your device's security as it can be easily re-enabled once the factory reset has been completed. However, it is essential to note that with 'Find My iPhone' disabled, your device will not be traceable if it is lost or stolen during this period. Therefore, it's recommended to perform a factory reset in a secure environment to prevent unforeseen circumstances. It's worth mentioning that disabling 'Find My iPhone' also turns off 'Activation Lock,' a feature that stops anyone else from activating and using your iPhone even after it's factory reset. This protects your device even if it's not with you, offering peace of mind. Therefore, before selling, giving away, or factory resetting an iPhone, it's recommended to turn off 'Find My iPhone' to avoid future activation hassles. In conclusion, disabling the 'Find My iPhone' feature is an important stage in preparations for factory resetting your iPhone 11. This step ensures that the reset is completed successfully, without complications linked to Apple's security measures. Nonetheless, care should be taken to promptly re-enable the feature since its absence leaves your device vulnerable. Whether the reason for the factory reset is storage issues, performance mishaps, or an upgrade, disabling 'Find My iPhone' ensures a seamless and effective reset process.
Sign Out of iCloud and the iTunes & App Store
Before initiating the factory resetting process of your iPhone 11, there are certain essential steps that you need to execute diligently. Among these considerable actions, the primary ones include signing out of iCloud, iTunes, and the App Store. The importance of this step cannot be emphasized enough as it directly links to the security of your valuable data. When you make the decision to factory reset your iPhone, it is vitally essential to sign out from the iCloud. The Chief reason behind this is to disable the 'Find My iPhone' feature on your device. This particular aspect is auto-enabled when your iPhone is linked to an iCloud account. Therefore, if you go ahead with factory reset without signing out of iCloud, the phone may still be linked to your iCloud account, keeping the 'Find My iPhone' feature active. This scenario could lead to potential difficulties, particularly if you plan to sell, donate, or dispose of your iPhone. The device could remain locked to your iCloud account, making it unusable for the new user. Next, sign out of the iTunes and App Store. This is crucial because, just like iCloud, your iTunes and App Store accounts also carry personal information, including saved payment details. You don't want these sensitive details falling into wrong hands or even simply remaining on the device that you won't be using anymore. Furthermore, signing out of these services will also ensure that no more updates or downloads occur, saving system resources and internet bandwidth. It also guarantees a better experience for the person who might use the device next, providing them with a clean slate to set up their accounts and preferences. Both iCloud and iTunes & App Store have streamlined logging out processes. The sign-out procedures mainly require navigating through settings and pressing a few buttons. Signing out of these accounts is as easy as signing in but the peace of mind and security it provides is invaluable. So, before you move forward with wiping your iPhone 11, remember to take a few minutes to sign out of iCloud, iTunes, and the App Store. It's a simple step, yet it holds paramount importance when it comes to data protection and user security. This preparation will not only protect your sensitive information from potential misuse but also provide a hassle-free operating environment for the next user. Whether you plan to repurpose, resell or donate your iPhone, this critical step will ensure that your device is ready for its new journey while preserving your peace of mind.
Methods to Factory Reset Your iPhone 11
Unlocking, selling, or fixing any functionality issues in your iPhone 11 requires that you understand how to factory reset it. This article will equip you with three efficient tools to help you navigate your way through a factory reset safely and effortlessly. We'll delve into factory resetting your iPhone 11 via settings, iTunes, and even through the recovery mode. Whether you're a novice or a tech-savvy iPhone user, this comprehensive guide will walk you through concrete steps to ensure you reset your iPhone without any hassles. Now, starting with the most common method, let's explore the factory reset via settings; remember to back up all your data first, as this method will erase everything on your device, including messages, contacts, and photos. Get ready to have your iPhone 11 feeling brand new, just like when you first got your hands on it.
Factory Reset via Settings
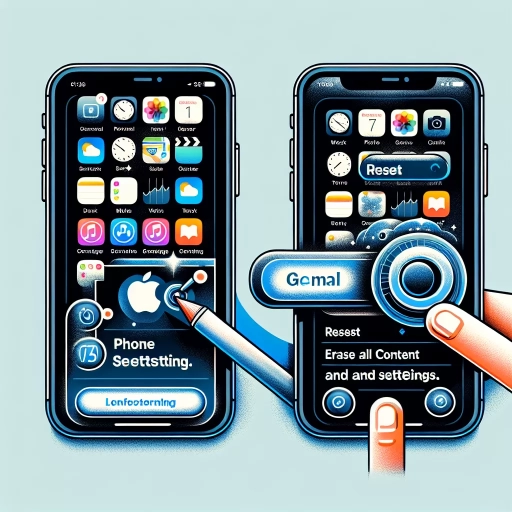
Factory resetting your iPhone 11 through its settings is one of the easiest and most effective methods. This is usually the preferred method if you are looking to solve common issues related to software glitches and also if you are preparing your iPhone for resale to ensure all personal data is completely wiped out. To begin with, make sure that your device is fully charged or is connected to power to avoid any interruptions. Moreover, it's important to take a full backup of your device before proceeding as the reset will erase all your data, including your downloads, apps, and personal settings. Start the reset process by first navigating to the "Settings" app on your iPhone screen. Once there, tap on the "General" menu, and scroll down to locate the "Reset" option. On clicking "Reset", you will find different options like "Reset All Settings", "Erase All Content and Settings", "Reset Network Settings", and so on. Select "Erase All Content and Settings". This option will wipe everything from your iPhone 11 and reset it back to its factory settings. A warning box will appear to ensure you understand the implications of this action. If you have made a recent backup and are sure about your decision, tap on "Erase Now". Depending upon your security settings, you might be asked to input your passcode or your Apple ID password to confirm the reset. Once given, your iPhone will take a few minutes to completely erase all data. You can see a progress circle on your screen during the process. When complete, your iPhone will restart and you will be greeted with the 'Hello' screen that you had seen on first starting up your device. This signifies your iPhone 11 has been restored to factory settings successfully. At this stage, you can either set up your iPhone as a new device or restore it from a previous backup, depending on your needs. It's worth noting that if you're looking to sell or give away your device, you should remove the iPhone from your list of trusted devices on your Apple ID account to fully disassociate it from your personal data. This can be done by going to appleid.apple.com, signing in, and removing your iPhone 11 from the device list under the 'Devices' section. A factory reset through settings is a simple and effective process. However, caution must be maintained as the action is irreversible. It's highly recommended to consult Apple's official support or knowledgeable experts before undertaking a factory reset, for a safe and successful operation.
Factory Reset via iTunes
Factory resetting your iPhone11 using iTunes is a reliable method often used when the device becomes unresponsive or shows persistent software errors that can't be fixed by standard troubleshooting. iTunes is a versatile tool provided by Apple itself, which not only serves as a media collection but also assists in various device management tasks. To perform a factory reset via iTunes, first ensure your computer has the latest installation of the iTunes application. If not, download the latest version from the official Apple website. Once you've confirmed your iTunes is up-to-date, the rest of the process is straightforward. Start with connecting your iPhone 11 to your computer using an Apple-certified USB cable. Following this, launch iTunes in your computer and wait for it to recognize your device. Once your device is recognized, go to the "Summary" page, where you can access all the primary settings for your iPhone. Look for the 'Restore iPhone' button and click it. You would then be prompted to back-up your data. It's highly recommended to back up your data before proceeding as the restore process wipes away all the existing data. But if your device is unresponsive or malfunctioning, you may skip this step. After this, a confirmation box will appear. Click 'Restore' to initiate the factory reset process. The actual process of factory resetting could take a few minutes to a few hours, depending on the amount of data on your device. Once the process is complete, your iPhone 11 will restart, and it will be restored to its factory settings. It's essential not to disconnect your device during the process, as doing so might lead to software corruption. Factory reset via iTunes is a practical method when you're unable to use other reset methods like settings on the phone or when your device isn't responding at all. However, since this process involves erasing all the data, ensure you have backed up all the crucial information. This method can handle both minor glitches and significant software screw ups, restoring your iPhone 11 to its original state, just like when it came fresh out of the box. Remember that resetting should be your last resort, only after exhausting all other possible fixes. If the problem persists even after the factory reset, it could be due to a hardware problem, in which case your last resort would be to contact Apple Support or visit an Apple store. Make sure to try the most simple solutions before going for the drastic ones. In conclusion, the factory reset via iTunes method is a powerful tool that can deal with the majority of software issues your iPhone 11 might be experiencing. With meticulous process steps and Apple's robust support, returning your iPhone 11 to its original factory settings becomes less painstaking and more efficient. Through this supportive guide, the task of handling iPhone software issues becomes less daunting, giving you more confidence in managing your device.
Factory Reset via Recovery Mode
Factory Reset via Recovery Mode is a reliable method to reset an iPhone, especially when there are issues that prevent you from performing a standard factory reset. This method can also be a lifesaver if you forget your passcode or if your iPhone 11 is unresponsive. That said, it's important to note that it's a more complex process and requires the use of a computer to work. Before you follow the steps to reset your iPhone, ensure that you have the latest version of iTunes installed if you're using a Mac with macOS Mojave or earlier, or a PC. For Mac users with macOS Catalina or later, you won't need iTunes and can instead work through Finder. To begin, connect your iPhone 11 to your computer and open iTunes or Finder. Immediately afterwards, perform a forced restart of your iPhone— to do this, press and release the volume up button, the volume down button, and then hold down the side button until the recovery mode screen appears. At this point, a window should pop up on your computer screen with the options to Restore or Update. Select 'Restore' to factory reset your device. Your computer will proceed to download software for your iPhone. If this process takes more than 15 minutes, your iPhone will exit recovery mode, and you will need to repeat the previous steps. Once the process is complete, you can set up your iPhone 11 afresh or restore it from a backup. It's crucial to understand that this method will erase all data and settings on your device, which require a backup to restore your iPhone after the reset. iCloud or iTunes can handle the backup, although alternative services are also available. This method may not be as straightforward as the direct device reset method, but it's essential when dealing with a non-responsive iPhone or bypassing a forgotten passcode. As always, ensure your device has sufficient power throughout the process or risk damaging the iOS installation, which could render your iPhone unusable. This process reflects the importance of prevention before cure. Regular device maintenance and software updates can reduce the likelihood of your iPhone needing drastic measures like a Factory Reset via Recovery Mode. Regular backups of your data will also temper the potential loss of personal data and allow you to revert it to its preferred state. While this method may seem daunting, following the steps cautiously will ensure you can continue using your iPhone 11 without further issues.
Post-Factory Reset: Setting Up Your iPhone 11 Again
After performing a successful factory reset on your iPhone 11, it's crucial to properly set up your device again. This task may seem challenging to many, but understanding the right steps can make it a cakewalk. This article aims to guide you through three mains steps of this process: restoring your iPhone 11 from a backup, setting up your device as new, and finally, updating your device to the latest iOS version, each having its own importance. Restoring your phone from a backup is an efficient way to recover your personal data and settings without losing anything significant. On the other hand, setting up your iPhone 11 as new helps you start afresh, removing any potential glitches brought about by previous settings or applications. Lastly, updating your iPhone 11 to the latest iOS ensures you can avail of the newest features and security updates. Now, let's delve into the nuances of the first step: restoring your iPhone 11 from a backup after a factory reset.
Restore Your iPhone 11 from a Backup
Once you've completed the initial system set-up of your iPhone 11 post-factory reset, restoring from a backup becomes your subsequent crucial step. Essentially, this process refers to the recovery of data and settings backed up from your previous iPhone to the newly-reset iPhone 11. The advantage of restoring from a backup is that it eases the transition process, allowing you to regain your contacts, calendars, notes, messages, and more, without the hassle of manually inputting this data all over again. You can restore the backup through either iCloud or iTunes, depending on where your previous backup is stored. If you've backed up your data on iCloud, ensure you're connected to a Wi-Fi network. Upon turning on your iPhone 11, you'll arrive at the Apps & Data screen during the set-up process. Here, make sure to pick "Restore from iCloud Backup" and sign in to your iCloud account. Once signed in, choose a backup. Ensure it's the correct one by checking the date and size of each. Keep your device connected to Wi-Fi and plugged into power until the process completes. If your backup is stored on iTunes, connect your iPhone 11 to the computer you've previously used to sync or back up your data. Open iTunes on your computer and select your device. Under the Summary tab, choose "Restore Backup", then pick the most relevant backup by looking at the date and size. Click 'Restore' and wait for the process to finish, keeping your device connected even if it restarts. Remember, restoring from a backup might overwrite the existing data on your iPhone 11 with that from the backup file. It's also worth noting that the restoration process might take some time to complete, depending on the size of the backup and the speed of your internet connection. After the restoration is complete, the rest of your settings and content will continue to restore in the background for a while. Be patient throughout this process and allow your iPhone sufficient time to properly restore all the backed-up content. Restoring your iPhone 11 from a backup ensures you don't lose your important data and settings during the factory reset process. It provides a seamless transition, allowing you to return to using your iPhone with ease and familiarity. Despite the apparent complexity, the restoration process is quite simple when appropriately followed. It's just a matter of inputting a few commands and allowing the system to handle the rest.
Set Up Your iPhone 11 as New
After successfully completing a factory reset, you must go through the process of setting up your iPhone 11 again as a brand new device. This process is a cake walk, even for users without any technical background. Begin by switching on your iPhone. You'll see a 'Hello' screen. If not, quickly press and hold the device's side button until the Apple logo appears. You're now ready to start the setup process. On the 'Hello’ screen, swipe up from the bottom of the screen or press the Home button to begin. Then, choose your preferred language and select your country or region, which optimizes your device to the standards and norms of your designated location. The Quick Start option emerges next. If you have another Apple device, you can use it to set up your new iPhone 11. However, this article focuses on setting it up as a new device. So, tap 'Set Up Manually' at the bottom of the ‘Quick Start’ screen. After the 'Set Up Manually' tap, your device will prompt you to select a Wi-Fi network. Choose your desired network, connect, and if requested, enter your Wi-Fi password. The device then checks for updates. If any available, download and install them. Now, it's time to set up your Data & Privacy, Face ID, and passcode. In the Data & Privacy screen, tap 'Continue' after reading the information. On the Face ID setup, follow the on-screen instructions to create a facial map. This adds an extra level of security to your iPhone 11. After the Face ID setup, you'll be asked to create a six-digit passcode. Make sure to choose a passcode you can remember easily but isn't easily guessable by others. Moving forward, you'll be presented with the Apps & Data screen. Since this setup is for a new device, select 'Don't Transfer Apps & Data.' iPhone 11 then prompts you to sign in with your Apple ID or create a new one. If you don't have or want to use an Apple ID, tap 'Forgot password or don't have an Apple ID?' and then 'Set Up Later in Settings.' Agree to the 'Terms and Conditions' to proceed to the 'Express Settings’ section. You can opt for the 'Customize Settings' option if you want but it's usually recommended for more advanced users. Finally, opt for the 'Set Up Later in Settings' option in both the Apple Pay and 'iPhone Analytics' sections, finish the setup with Siri and Screen Time preferences, and voila - your iPhone 11 is ready to use! Setting up your iPhone 11 as a new device post a factory reset ensures that you start afresh, minus any previously encountered glitches or malfunctions. It gives you a blank slate to customize your device exactly how you want, without any remnants of past use, making the device as good as new. The process is designed to be user-friendly and comprehensive, making your transition smooth and enjoyable. Remember, if you get stuck at any point in the process, Apple's support team is just a call away!
Update Your iPhone 11 to the Latest iOS
After performing a factory reset on your iPhone 11 and setting it up again, it's crucial to update to the latest iOS version to ensure optimal device performance. The iOS constantly undergoes updates and improvements to fix bugs, add new features, enhance security, and ensure that iPhone 11 users have the most streamlined and secure user experience possible. Here's how to go about it. Firstly, it's important to mention that before you start updating, remember to back up your device. That way, you'll have a copy of your data in case anything goes wrong during the update process. To back up, you can use iCloud or your computer. Once you've set up your iPhone 11 again after a factory reset, go to the settings app on your home screen. From there, scroll down and tap on "General," then "Software Update." If a new update is available, a notification will appear prompting you to download and install it. The menu will also display your current iOS version. Ensure you're connected to a Wi-Fi, as updates can be sizable and consume significant mobile data quickly. If your battery level is below 50%, access to a charging source is necessary to begin the update. Therefore, ensure your battery is fully charged or your device is charging before starting the update. After checking the essentials, start the download process by tapping "Download and Install." Depending on your internet speed and the size of the update, this may take a few minutes or several hours. After the download is complete, your phone will automatically prepare the update and notify you when it's time to install it. Upgrading to the latest iOS version will provide you with Apple's most recent advancements and features. Often, these updates contain security improvements that are vital to protecting your personal information. Neglecting to update, alas, means your phone is working harder than necessary and is more susceptible to security threats. Keeping your iPhone 11 up-to-date is therefore more than just about having access to the newest features. It's about ensuring your phone is as secure as possible and performing at its best. In following these steps, not only will you maximize the functionality of your device but also extend its lifespan. In conclusion, updating your iPhone 11 is a vital post-factory reset step. It ensures your phone is running the latest iOS and providing the best possible user experience. Remember, updating your iOS is not just for accessing the latest features, but also ensuring your device's security and optimal performance.