How To Add A Mailbox In Outlook
 As we strive for better organization and streamline communications, the necessity of managing multiple email accounts becomes imperative. Microsoft's Outlook offers the capacity to consolidate numerous accounts into one for a seamless email experience. This article provides a straightforward guide on how to add a mailbox in Outlook for an efficient and productivity-boosting email organization. Ensuring clear instructions and informed insight, it takes you on a learning journey in three main steps: Setting up your Outlook Account, Adding a Mailbox in Outlook, and finally Configuring your Mailbox Settings in Outlook for optimized usage. First off, we’ll start with the fundamental stage, which is the successful setting up of your Outlook account. Brace yourself for a smooth Outlook setup experience.
Step 1: Setting Up Your Outlook Account
In the contemporary age where digital communication is pivotal, having an Outlook account is a must. This article will guide you through the process of setting up your Outlook account by making it as straightforward as possible. To begin, traverse through three important phases to ensure the successful setup of your account— ensuring you have a legit email address, creating a new Outlook account or signing in to an existing one, and most importantly, affirming your account information. The initial step in setting up an Outlook account is confirming your email address, which forms the basis of all interactions. This crucial primary step plays a quintessential role in initiating the process. Having an authentic email address is paramount because it forms the groundwork for creating your Outlook account. Let's dive deep into the first phase: ensuring you have a valid email address.
1.1. Ensure You Have a Valid Email Address
The establishment of an email account via Outlook starts with 1.1. Ensuring You Have a Valid Email Address. This is critical since all correspondence and email services are anchored to this particular detail. It's noteworthy to mention that your email address functions as your unique identifier in the digital realm which should be both valid and active. If you don't already have an email address, you can easily obtain one by signing up with numerous free email providers such as Google's Gmail, Microsoft's Outlook, Yahoo mail, and more. To sign up, you'll need to provide some personal information and select a username that will form the first part of your email address. Be mindful of selecting a username as this will represent you in all your digital communications. Consider a username that is easy to remember, yet unique enough to be available. After selecting a username, you'll typically choose a password. It should be something hard for others to guess, but easy for you to remember. Generally, it's advisable to combine a mixture of letters, numbers, and symbols for enhanced security. Once your email account is set up, it's crucial to keep your login information secure. Your email inbox contains a considerable amount of personal and sensitive data, so it's not something you'd want others to have unchecked access to. Furthermore, you'd also be using this email to set up your Outlook account. Microsoft Outlook is a personal information manager software system from Microsoft, accessible as a part of the Microsoft Office suite. It's predominantly an email application but includes other features such as calendar, task manager, contact manager, note taking, journal, and web browsing. Before you add a mailbox in Outlook, your valid email address needs to be confirmed. Most email services will send a message to the email address you provided when you signed up. This email will contain either a link you must click on or a code you must enter somewhere on the account provider's website to confirm that you have access to the email account. It's a step to validate that the email registered and the individual creating the account are linked. To sum up, to successfully set up your Outlook account, and subsequently add a mailbox, ensuring you have a valid email address is the fundamental first step. It's not just about having an email address; it's about having one that you can access, which hasn't been compromised. As you embark on setting up your Outlook Account, keep all these considerations in mind to facilitate a smooth process.
1.2. Create a New Outlook Account or Sign In to an Existing One
After setting up your Outlook application, the next crucial step is creating a new Outlook account or signing into your existing one, which is a prerequisite to adding a mailbox. The process of creating an Outlook account is straightforward and user-friendly, suitable for any level of tech-savviness. If you're new to the platform, simply navigate to the official Outlook website and select "Create account." You'll then be prompted to fill out a form with your desired email address, password, and personal details such as your name and phone number. The privacy of your information is essential to Microsoft, and they ensure these details are always treated with utmost confidentiality. Once the form is correctly filled out, you'll need to verify your phone number or an alternate email. This additional security measure guarantees the protection of your account, by serving as a recovery method in case you ever forget your password or encounter issues with your account. Remember to create a strong, unique password to keep your account secure. Avoid easy-to-guess details like birthdays or names. Instead, a combination of letters, numbers, and symbols can dramatically increase the security of your account. For those that already have an existing Outlook account, the process is even simpler. Open the application or head to the website, hit "Sign In," then enter your email address and password. If you're using a private computer, you can check the box labelled "Keep me signed in" for easier access in the future. However, this is not advised if you're using a public or shared computer due to security concerns. After you've signed in to your account successfully, you'll be directed to your inbox- a sure sign that you're ready to add a mailbox. Also, you can customize your Outlook account settings to suit your preferences. For instance, you can set up email signature, automatic replies, personal folders, or modify the general outlook appearance. By successfully creating a new account or signing in to an existing one, you're a step closer to mastering the efficient organization of your emails. Your Outlook account serves as the backbone of your overall email management - a cornerstone to managing and adding mailboxes seamlessly.
1.3. Verify Your Account Information
1.3. Verify Your Account Information A crucial aspect of adding a mailbox in Outlook and setting up your account initially involves verifying your account information, arguably one of the most significant steps in the process. It ensures the security of your data and messages you will be receiving or sending in the future. The necessity of verification comes from the fact that, like any other tech entity, the Outlook platform has a duty to protect its users from potential security breaches and cyber threats. Firstly, after filling in your personal or professional details in the required fields of the account creating page, a confirmation email is sent to your secondary email address or a text message is sent to your phone number, depending on the information you provided. This email or text message will typically include a verification code. The purpose of this code is to ascertain that the details provided by you belong to you, lending a layer of authentication to your actions. You're required to carefully note the verification code and then enter it in the 'verification' dialog box displayed on your screen. An important point to remember is that these codes often have a short valid duration, so it needs to be entered promptly. Once the code is entered correctly, your account's verification status is approved, and Outlook acknowledges your authenticity. This verification also links your account to a personal device, enhancing the security of your account further as you will be notified if any different device attempts to log in. The process of verification shouldn't take very long and is an indispensable step towards setting up your mailbox in Outlook properly. It's a one-time effort for a continuous safety benefit. Not only does it fortify the security of your account on the platform, but it also verifies your ownership, adds credibility and lays the foundation of a safe digital communication environment for you. Once your account is verified, you won’t have to go through the process again unless you opt to reset your account or password, or if Outlook suspects suspicious activity on your account. Therefore, verifying your account information is a crucial checkpoint that shouldn’t be overlooked while setting up your Outlook Account.
Step 2: Adding a Mailbox in Outlook
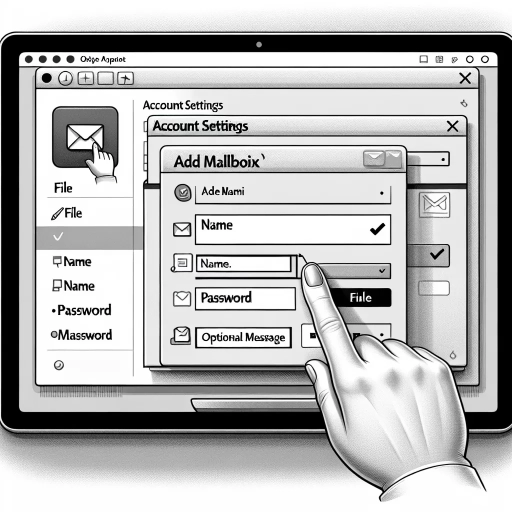
Adding a mailbox in Outlook can be accomplished in three relatively straight forward steps. In this article, we provide you with a thorough, comprehensive guide to ensure your email setup goes smoothly. Firstly, you will need to navigate to the "File" menu before selecting "Add account", initiating the mailbox addition procedure. The second part of the process involves selecting "Manual setup or additional server types", followed by opting for "POP or IMAP". This will start the configuration process for personalizing your email options. Finally, you will be required to input your email address and password to establish the mailbox completely. By following this step-by-step process, you can quickly and efficiently set up your mailbox in Outlook. So, let's delve into the first step and access the "File" menu, positioning our cursor over the "Add Account" option.
2.1. Access the "File" Menu and Click on "Add Account"
The process to add an additional mailbox in Outlook starts at the main menu, and it's simple to execute. First and foremost, you need to go to the "File" menu, which is typically situated in the upper-left part of your Outlook homepage. This menu serves as the cornerstone to perform myriad operations, including adding a mailbox, and is instrumental in configuring various Outlook account settings. To embark on the exercise of adding a mailbox, tap on this "File" menu and select the option that reads "Add Account". The "Add Account" option plays a pivotal role in this entire procedure as it initializes the process of integrating an additional mailbox to your Outlook environment. By clicking this option, you open the doors to enhance your Outlook usability by streamlining all your emails into one centralized destination, hence improving accessibility and productivity. The "Add Account" feature prompts Outlook to open a new dialogue box where you'll input crucial information regarding the mailbox you wish to add. This comprehensive feature signifies Outlook's adaptability and commitment to user customization. It allows users to better manage their emails by offering the opportunity to add multiple mailboxes, a feature that's particularly useful for individuals who want to keep their personal, professional, and miscellaneous emails separate but accessible within the same program. This simple yet effective method of clicking on the "File" menu and selecting "Add Account" sets the pace for the entire procedure, easing users into it gradually rather than overwhelming them with multiple steps at once. It establishes a strong foundation for subsequent steps, and ensures a seamless experience when trying to make the most of Outlook and its dynamic features. In conclusion, assessing the "File" menu and clicking on "Add Account" is a straightforward protocol that forms the first stage in adding a mailbox in Outlook. It denotes a vital step within the article on how to add a mailbox in the Outlook system, subtly pointing out its importance in the overall process. It signifies how Outlook values its user experience by making it a chore-free task to add a mailbox, thereby promoting enhanced email management.
2.2. Select "Manual Setup or Additional Server Types" and Choose "POP or IMAP"
Step 2: Adding a Mailbox in Outlook is a pivotal process in equipping your Outlook with an added mailbox. A vital sub-procedure in this step is the selection of 'Manual Setup or Additional Server Types' and opting for 'POP or IMAP'. This is an underlined direction that plays an instrumental role in customizing mail synchronization based on your preferred email settings and needs. It permits Outlook users the capability to manage how their emails are downloaded, retained, or deleted from the mail server, offering expansive control and flexibility compared to using default server synchronization settings. Selecting 'Manual Setup or Additional Server Types', a choice often found after clicking on 'File' then 'Add Account' on the main outlook navigation, paves the way for you to manually enter the set-up of your desired email account. Contrary to automatic email setups which limit personalized options, this selection diversifies what you can tweak, permitting you to select and input server information, log-on data, among others. Manual setup is particularly indispensable when you're configuring an account that Outlook can't automatically configure such as an account from an email service provider that is not pre-cataloged or an enterprise mail system. Afterward, choosing 'POP or IMAP' from the list of available service types in the manual setup facilitates you to decide how you want to access and manage your emails. If you opt for 'POP' or 'Post Office Protocol', this means your emails will be downloaded from your mail server to your computer, giving you the ability to access these messages even when offline. One can also choose to retain or remove these downloaded emails from the server. 'IMAP' or 'Internet Message Access Protocol', on the other hand, syncs your emails with your mail server. So, whatever actions you do with your emails (read, delete, move, etc.), they're immediately visible and mirrored on every device that you check them from. In conclusion, the choice of 'Manual Setup or Additional Server Types' and 'POP or IMAP' is a critical step when adding a mailbox in Outlook. This selection allows you to manually configure your email account, providing room for customized settings and a tailored approach to managing your emails. Whether you're a corporate employee trying to set up your workplace email or a private individual setting up a personal account, understanding the import of options such as 'POP or IMAP' can fundamentally improve your efficiency and effectiveness in handling, synchronizing, and preserving your emails on Outlook.
2.3. Enter Your Email Address and Password to Set Up the Mailbox
Adding a mailbox to your Outlook account not only permits a streamlined conversation and one-stop platform for all your diverse email accounts but also furnishes a more organized management of your critical and trivial communications. An integral part of this procedure is Step 2.3 - the stage where you enter your email address and password to set up the mailbox. This step is crucial because it is the initial access point that permits Outlook to connect with the desired mail server. When you arrive at Step 2.3, the application prompts you to furnish your account details. The email address you input must be valid, operational, and accessible by you since this will be used for communication services, and the password, on the other hand, should be the exact one linked to your email account. Outlook never stores your password; instead, it uses this access code as a key to establish a secure connection with your email server and import your emails. One of the main objectives of asking for these details is to establish a secure link between your email account and your mailbox in Outlook. A point to note is that while entering your credentials, ensure that the Caps Lock is disengaged to avoid errors during data entry. Typos or inaccurate information will lead to an unsuccessful setup, resulting in time wastage and possible frustration. Ensure that the information entered is correct before progressing to the next stage. Once you have successfully entered your correct email address and password, Outlook will establish a connection with the mail server. As part of this connection process, Outlook validates the credentials with the server to verify that the email address and password entered are correct, hence ensuring maximum security for your information. After successful verification, it sets up the mailbox by fetching your email messages, folders, other and related data, thereby establishing all you need for a fully functional mailbox in Outlook. Step 2.3 is thus fundamental to the course of adding a mailbox in Outlook. It serves as a bridge linking your virtual communication - your emails, and your strategic email management tool - the Mailbox. By entering your email address and password correctly, you permit a secure setup of your mailbox, paving the way for a more organized email management scenario. Just like a strong foundation that determines the stability of a house, entering your email address and password aptly invigorates the functionality and effectiveness of your mailbox.
Step 3: Configuring Your Mailbox Settings
Setting up your electronic mailbox efficiently involves three critical steps that ensure effective communication. The first phase involves the choice between IMAP or POP3 for mailbox setup. Both protocols exhibit unique performance capabilities in terms of accessing and managing emails. It's usually a choice between server-based IMAP that syncs changes across all devices and client-focused POP3 that prioritizes local action on a single device. Following the successful completion of this stage, the security of your correspondence is up next! Encryption via SSL/TLS takes the center stage at this point. Encryption ensures your sensitive mails are unreadable during transmission, offering an additional layer of security against unauthorized access. Finally, we focus on port numbers, which ultimately determines which part of your computer's internet system handles the incoming mails. This is vital as the selected port is sanctioned for your mail's routing. Understanding these steps is key to configuring your mailbox settings efficiently. In our detailed discourse, we kick off with the intriguing task of setting up your mailbox using either IMAP or POP3.
3.1. Set Up Your Mailbox to Use IMAP or POP3
When setting up a mailbox in Outlook, one of the critical steps is configuring your mailbox settings to use a specific protocol: IMAP or POP3. The Internet Message Access Protocol (IMAP) and Post Office Protocol (POP3) are the two primary protocols used by email applications to retrieve messages from a mail server. Your decision to use one over the other will largely depend on how and where you want to access your mail. Choosing the IMAP protocol allows multiple client applications to manage and manipulate the same set of email messages concurrently. This is because IMAP syncs the email with the server, hence every client mirrors the same data in real time. If you delete a mail on your smartphone, it gets deleted on the server and thus reflects on all other devices. This makes IMAP ideal if you're going to access your email box from different devices or locations. Contrastingly, POP3 downloads the email from the server onto your local machine, then often deletes it from the server. This means that after the email is downloaded, it is no longer available for access from any other device. Though this can help clear server space, it limits the flexibility of accessing your emails from multiple devices. However, one advantage of POP3 is that since emails get stored locally, you can still access your past emails even when you're offline or when the server crashes. On the other hand, since IMAP stores the emails on the server, you need to be online to access them, and in case of server issues, you might risk losing your emails. Before you proceed with configuring your mailbox settings on Outlook, you need the following details about your email account: the type of account (IMAP or POP3), incoming mail server address, outgoing mail server (SMTP) address, your email username (usually your email address), and your email password. Your email service provider should have provided these details. Once you have this information, open Outlook, select File from the menu, then click on Add Account. Enter the details as mentioned above, and Outlook will establish a connection with your server using the protocol you specified. If the connection is successful, you will be able to receive and send emails from your mailbox. Keep in mind that, due to the differences in how these protocols operate, moving from POP3 to IMAP (or vice versa) can be complicated if not impossible without causing significant disruptions to your email access. Therefore, it is recommended to carefully analyze your email usage habits and requirements before selecting the protocol. In conclusion, setting up your mailbox to utilize IMAP or POP3 is a crucial step in adding a mailbox in Outlook. It determines how you will be retrieving and manipulating your emails and can greatly affect your efficiency and convenience of email use. Above all, always ensure to use the correct server details to avoid connection failures or loss of emails.
3.2. Configure Your Mailbox to Use SSL/TLS Encryption
Configuring your mailbox to use SSL/TLS encryption is an integral part of setting up your mailbox in outlookBedrock. It provides an extra layer of security that ensures your mails and sensitive information are not easily accessed or compromised by unauthorized parties. To begin with, SSL, short for Secure Sockets Layer, and its successor, Transport Layer Security (TLS), are cryptographic protocols designed to provide a secure connection between an internet browser and a web server. They protect the transmission of sensitive information, such as credit card numbers, social security numbers, and login details. To configure your Mailbox settings to use SSL/TLS Encryption in outlookBedrock, you'll need to go through a few steps. First, open your outlookBedrock and go to the "File" tab. Scroll down and click on "Options," and then "Advanced". From there, scroll down through the options until you find ‘Mailbox Settings.’ Once you select this, you'll be led to a menu offering a variety of security and privacy settings. Now, look for the "Security" subsection. Within this section, you'll find options to encrypt data between outlookBedrock and Microsoft Exchange. Click on the checkbox next to "Use SSL/TLS to secure my data," and then click on "OK". Following this, Outlook will require you to restart it for the changes to take effect. Go ahead and restart your Outlook for the setup to be complete. By configuring your mailbox to use SSL/TLS encryption, you essentially protect your account and emails from being intercepted and possibly manipulated by cyber attackers. It's worth noting, however, that while SSL/TLS encryption significantly reduces security risks, it is not impervious to all forms of cyber attacks. Thus, always be vigilant of suspicious activities and ensure your antivirus software is up-to-date. As technology advances, new ways of securing data continue to emerge, addressing deficiencies in the existing security protocols and standards. While SSL was once the industry standard, it has notable security drawbacks that make it susceptible to certain cyber threats. As a result, its more advanced descendant, TLS, is often recommended as the more secure alternative. Both protocols, however, continue to be integral parts of secure web browsing and email communication, making the process of configuring your mailbox to use SSL/TLS encryption in outlookBedrock a critical step.
3.3. Set Up Your Mailbox to Use a Specific Port Number
Configuring your new mailbox in Outlook Bedrock involves not only a mere adding up of a mailbox, but also tweaking crucial mailbox settings such as setting up a specific port number. Setting up your mailbox to use a specific port number, also referred to as "port forwarding," is crucial in directing network traffic to a specific location. Port numbers are assigned to specific server processes to ensure that data sent over the internet always reaches its intended destination. This becomes especially important when you are dealing with emails, where a faulty port number can cause your messages not to be delivered accurately, or worse, lost in transit. During the setup process in Outlook Bedrock, you would typically choose between POP3 or IMAP servers. POP3 or Post Office Protocol version 3 uses port number 110 by default and would download your mail from the server to your device. IMAP or Internet Message Access Protocol, on the other hand, uses port number 143 and allows you to view your mails directly on the server without downloading them. Depending on your preference, you can choose either of these default port numbers or set up a specific port number. Setting up a specific port number can have unique benefits, such as enhancing your email security. For instance, if you are constantly dealing with sensitive or confidential information through emails, using a non-default port could create an additional layer of security. A hacker looking to intercept your mails would first need to determine the non-default port you're using, making it difficult for them to succeed. Also, you could bypass some network filters and firewalls by using a specific port number, thereby enhancing your connectivity options. To set up your mailbox to use a specific port number in Outlook Bedrock, go to the "Account Settings" within the "File" menu and then select "Advanced". Here you'll typically find the port number fields. Input your desired port number and then select "OK" to save your changes. Always remember to review your settings and ensure you've entered the correct port number. Using a wrong port number could lead to failed message delivery or possibly, loss of emails. Remember that proper port configuration is key to ensuring effective email communication. This makes Step 3: setting up your mailbox to use a specific port number, a vital part of the process in adding and configuring your new mailbox.