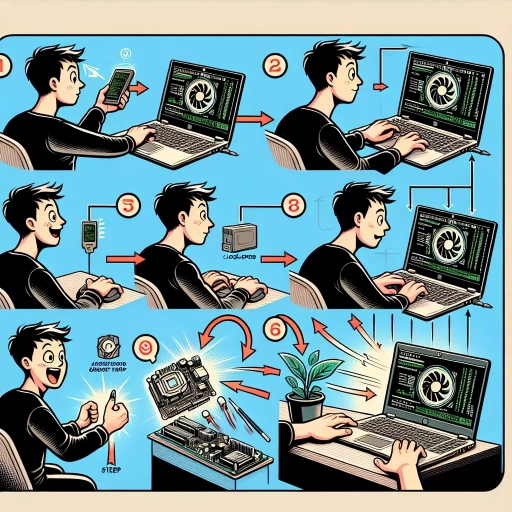
How To Overclock Laptop
Here is the introduction paragraph: Overclocking a laptop can be a daunting task, but with the right knowledge and preparation, it can be a great way to boost your device's performance. Before you start, it's essential to understand the basics of overclocking, including the risks and benefits involved. In this article, we'll take you through the process of overclocking your laptop, from preparing your device to actually overclocking your CPU and GPU. We'll start by understanding the basics of overclocking, including what it is, how it works, and what you need to know before you begin. By the end of this article, you'll have a comprehensive understanding of how to overclock your laptop and take your device to the next level. So, let's dive in and start with the fundamentals - understanding the basics of overclocking.
Understanding the Basics of Overclocking
Overclocking is a popular technique used to enhance the performance of computer hardware components, particularly the central processing unit (CPU) and graphics processing unit (GPU). By increasing the clock speed of these components, users can achieve faster processing times, improved gaming performance, and enhanced overall system efficiency. However, overclocking can be a complex and delicate process, requiring a thorough understanding of the underlying components and their limitations. To grasp the basics of overclocking, it's essential to understand what overclocking is and how it works, as well as the components involved in the process. Additionally, it's crucial to be aware of the risks and limitations associated with overclocking, particularly when it comes to laptops. By understanding these fundamental concepts, users can unlock the full potential of their hardware and achieve optimal performance. So, let's dive into the world of overclocking and start with the basics: what is overclocking and how does it work?
What is Overclocking and How Does it Work?
Overclocking is the process of increasing the clock speed of a computer's processor, graphics card, or memory to achieve better performance. It involves pushing the hardware components beyond their factory-set limits, allowing them to operate at higher frequencies and voltages. This can result in improved gaming performance, faster video editing, and enhanced overall system responsiveness. However, overclocking also increases the risk of overheating, system instability, and potential damage to the hardware. To overclock, users typically need to adjust the clock speed, voltage, and other settings in the system's BIOS or through specialized software. The goal is to find the optimal balance between performance and stability, as excessive overclocking can lead to system crashes and data loss. By understanding the basics of overclocking, users can unlock their hardware's full potential and enjoy improved performance, but it's essential to approach overclocking with caution and carefully monitor system temperatures and stability.
Understanding the Components Involved in Overclocking
Overclocking involves pushing your laptop's hardware components beyond their default speeds to achieve improved performance. To successfully overclock your laptop, it's essential to understand the key components involved in the process. The central processing unit (CPU) is the primary component that handles calculations and executes instructions. Overclocking the CPU increases its clock speed, allowing it to process more instructions per second. The graphics processing unit (GPU) is another critical component that handles graphics rendering and compute tasks. Overclocking the GPU enhances its performance, resulting in smoother graphics and faster rendering times. The memory (RAM) also plays a crucial role in overclocking, as it provides temporary storage for data the CPU uses to perform calculations. Increasing the RAM speed or adding more RAM can significantly improve system performance. Additionally, the motherboard and its chipset, which connect and manage the various hardware components, must be compatible with overclocking. The power supply unit (PSU) and cooling system are also vital, as they provide the necessary power and heat dissipation to support overclocked components. Understanding the interplay between these components and their roles in the overclocking process is crucial for achieving stable and optimal performance.
Risks and Limitations of Overclocking a Laptop
Overclocking a laptop can be a thrilling way to squeeze out extra performance, but it's essential to acknowledge the risks and limitations involved. One of the primary concerns is overheating, as laptops are designed to operate within a specific temperature range. Pushing the processor and graphics card beyond their recommended speeds can cause temperatures to soar, potentially leading to throttling, damage, or even a complete system failure. Additionally, overclocking can also increase power consumption, which may lead to reduced battery life and increased heat generation. Furthermore, laptops often have limited cooling systems, making it challenging to dissipate heat effectively, which can exacerbate the risk of overheating. Another significant limitation is the laptop's hardware and software constraints. Many laptops are not designed with overclocking in mind, and their components may not be capable of handling increased speeds. This can result in system instability, crashes, and data loss. Moreover, some laptops may have locked BIOS or UEFI settings, making it difficult or impossible to overclock. It's also important to note that overclocking can void a laptop's warranty, and manufacturers may not provide support for overclocked systems. Lastly, overclocking can also lead to reduced lifespan of the laptop's components, as they are subjected to increased stress and heat. Therefore, it's crucial to carefully weigh the potential benefits of overclocking against the risks and limitations before attempting to push your laptop's performance to the limit.
Preparing Your Laptop for Overclocking
Preparing your laptop for overclocking can be a daunting task, but with the right steps, you can unlock your device's full potential. To ensure a successful overclocking experience, it's essential to check the laptop's hardware and software compatibility, update the BIOS and drivers, and install overclocking software and tools. By following these steps, you can optimize your laptop's performance, increase its processing power, and enhance your overall computing experience. In this article, we'll explore the necessary steps to prepare your laptop for overclocking, starting with the crucial task of checking the laptop's hardware and software compatibility.
Checking the Laptop's Hardware and Software Compatibility
Before you start overclocking your laptop, it's essential to check the hardware and software compatibility to ensure a smooth and safe process. First, check your laptop's processor, as not all CPUs are overclockable. Look for processors with the "K" or "X" suffix, such as Intel Core i7-10700K or AMD Ryzen 9 5900X, which are designed for overclocking. Next, verify that your laptop's motherboard supports overclocking. Check the motherboard manual or manufacturer's website to see if it has features like adjustable CPU multipliers, voltage control, and overclocking profiles. Additionally, ensure that your laptop's cooling system can handle the increased heat generated by overclocking. Check if your laptop has a dedicated graphics card, as integrated graphics may not be suitable for overclocking. You should also check your laptop's RAM, as overclocking requires sufficient memory to handle the increased processing demands. Finally, check your laptop's operating system and software compatibility. Ensure that your operating system is 64-bit and that you have the necessary software tools, such as Intel Extreme Tuning Utility or AMD Overdrive, to monitor and control your laptop's overclocking settings. By checking your laptop's hardware and software compatibility, you can ensure a safe and successful overclocking experience.
Updating the BIOS and Drivers for Overclocking
Updating the BIOS and drivers is a crucial step in preparing your laptop for overclocking. The BIOS (Basic Input/Output System) is the firmware that controls the laptop's hardware components, and updating it can provide support for new features, improve performance, and fix bugs. To update the BIOS, you'll need to download the latest version from the manufacturer's website and follow their instructions for flashing the new version. Be cautious when updating the BIOS, as it can potentially brick your laptop if done incorrectly. Additionally, updating the drivers for your laptop's hardware components, such as the graphics card and processor, can also improve performance and stability. Outdated drivers can cause system crashes, slow performance, and other issues, so it's essential to keep them up-to-date. You can use software like Driver Talent or Driver Booster to scan for outdated drivers and update them automatically. Furthermore, updating the BIOS and drivers can also unlock new features and settings that can be used for overclocking, such as adjusting the CPU multiplier or voltage. By updating the BIOS and drivers, you'll be able to take full advantage of your laptop's hardware capabilities and push it to its limits. However, it's essential to note that updating the BIOS and drivers can also introduce new bugs or compatibility issues, so it's crucial to create a backup of your important files and data before making any changes. Overall, updating the BIOS and drivers is a necessary step in preparing your laptop for overclocking, and it can help you achieve better performance, stability, and overclocking results.
Installing Overclocking Software and Tools
Installing overclocking software and tools is a crucial step in preparing your laptop for overclocking. The first step is to download and install a reliable overclocking software, such as Intel Extreme Tuning Utility (XTU) or AMD Overdrive, depending on your laptop's processor. These software tools allow you to monitor and adjust your laptop's CPU, GPU, and RAM settings, enabling you to push your laptop's performance to its limits. Additionally, you may also want to install a stress testing tool, such as Prime95 or OCCT, to test your laptop's stability and identify any potential bottlenecks. Furthermore, a temperature monitoring tool, such as HWMonitor or GPU-Z, can help you keep track of your laptop's temperatures, ensuring that you don't overheat your components. It's also essential to install a driver update tool, such as Driver Booster or Snappy Driver Installer, to ensure that your laptop's drivers are up-to-date and compatible with the overclocking software. By installing these software tools, you'll be able to unlock your laptop's full potential, monitor its performance, and make adjustments to achieve optimal results.
Overclocking Your Laptop's CPU and GPU
Overclocking your laptop's CPU and GPU can be a great way to boost its performance and get more out of your device. However, it requires careful consideration and a thorough understanding of the process to avoid damaging your laptop's hardware. To successfully overclock your laptop, you'll need to use software to adjust the CPU and GPU settings, monitor temperatures to ensure they don't get too high, and test the overclocked laptop for stability and performance. By following these steps, you can unlock your laptop's full potential and enjoy improved gaming, video editing, and other resource-intensive activities. In this article, we'll explore the process of overclocking your laptop's CPU and GPU, starting with the first step: using software to overclock the CPU and GPU.
Using Software to Overclock the CPU and GPU
Overclocking your laptop's CPU and GPU can be done using software, which is a more convenient and safer method compared to manual overclocking. One popular software for overclocking is Intel Extreme Tuning Utility (XTU) for Intel processors and AMD Overdrive for AMD processors. These software allow you to adjust the CPU multiplier, voltage, and other settings to achieve higher clock speeds. Another software, MSI Afterburner, is a popular choice for overclocking NVIDIA graphics cards, allowing you to adjust the GPU clock speed, memory clock speed, and voltage. Other software like EVGA Precision XOC and Sapphire TriXX also offer similar features for overclocking NVIDIA and AMD graphics cards. When using software to overclock, it's essential to monitor the system's temperature, voltage, and performance to avoid overheating, instability, or damage to the components. You can use software like HWiNFO, GPU-Z, or AIDA64 to monitor the system's vital signs and adjust the overclocking settings accordingly. Additionally, it's crucial to save the overclocking profiles and settings to ensure that the system boots with the desired settings. By using software to overclock your laptop's CPU and GPU, you can achieve significant performance gains while minimizing the risk of damage or instability.
Monitoring Temperatures and Adjusting Overclocking Settings
Overclocking your laptop's CPU and GPU can be a delicate process, and monitoring temperatures is crucial to avoid overheating and potential damage. To monitor temperatures, you can use software such as HWiNFO, GPU-Z, or AIDA64, which provide real-time temperature readings for your CPU, GPU, and other components. It's essential to keep an eye on these temperatures, especially when pushing your laptop's components to their limits. If temperatures exceed safe levels, you may need to adjust your overclocking settings to prevent overheating. A safe temperature range for most laptops is between 70°C to 90°C, although this can vary depending on the specific model and components. If you notice temperatures consistently exceeding this range, it's time to dial back your overclocking settings. You can do this by reducing the CPU or GPU clock speed, voltage, or both. Additionally, you can also try adjusting the fan settings to increase airflow and help cool down your laptop's components. By monitoring temperatures and adjusting your overclocking settings accordingly, you can ensure a safe and stable overclocking experience.
Testing the Overclocked Laptop for Stability and Performance
When testing the overclocked laptop for stability and performance, it's essential to run a series of stress tests to ensure that the system can handle the increased clock speeds without throttling or crashing. Start by running a CPU stress test using tools like Prime95, OCCT, or IntelBurnTest, which will push the processor to its limits and help identify any stability issues. Next, run a GPU stress test using tools like FurMark, Unigine Heaven, or 3DMark, which will test the graphics card's performance and stability under heavy loads. Additionally, run a memory stress test using tools like MemTest86+ or Prime95, which will test the RAM's stability and performance. It's also crucial to monitor the system's temperatures, voltages, and power consumption during these tests to ensure that they are within safe limits. If the system passes these tests, it's a good indication that the overclock is stable and the laptop can handle the increased performance. However, if the system crashes or throttles during the tests, it may be necessary to adjust the overclock settings and re-run the tests until stability is achieved. Furthermore, it's also important to test the laptop's performance in real-world applications and games to ensure that the overclock is providing a noticeable performance boost. By thoroughly testing the overclocked laptop, you can ensure that the system is stable, efficient, and provides the best possible performance.