How To Make Butter From Milk
 In the vast realm of homegrown cooking arts, the transformation of simple, wholesome milk into creamy, rich butter remains one of the most intriguing and rewarding endeavors. This mystic process, that morphs a common ingredient into a gourmet delight, is steeped in tradition, yet, approachable for even the novice cook. This article aims to demystify the process, guiding you through the enchanting journey of turning fluid milk into creamy gold via our three comprehensive sections. We will start by laying a foundation with ‘Understanding the Basics of Butter Production’, walking you through the science behind this culinary metamorphosis. Next, in ‘Exploring Different Techniques in Making Butter’, we will delve into a myriad of methods, both modern and time-honored, ensuring you find a perfect fit for your own kitchen. Finally, we will adorn our buttery creation with an array of enhancements in ‘Enhancing Your Homemade Butter: Tips and Tricks’. Now, let's dive into the fascinating world of butter production and discover its delightful possibilities.
Understanding the Basics of Butter Production
Butter, a staple in virtually every kitchen, is more than just a delicious spread. As simple as it might seem, there's an intricate science behind its production that starts with a substance as common as milk. This article aims to demystify the process behind the making of butter, beginning with the fascinating science that turns milk into butter. It's a transformation that, surprisingly, you can replicate in your own home with a few simple ingredients. We'll shed light on essential materials you need to manufacture homemade butter. No fancy machinery required - just household items you likely already possess! We'll then dive into the actual steps involved in the churning process, breaking it down so you can attempt making your own delightfully creamy butter at home. So let's embark on this journey of understanding and appreciate the art of butter production that begins with the captivating science of turning milk into butter.
The Science Behind Turning Milk Into Butter
Understanding the basics of butter production requires a dive into the realms of science and food chemistry. At first glance, the process of turning milk into butter might seem simple enough: all it involves is churning cream until it forms a solid. Nevertheless, the science behind it is far more intricate and fascinating. From a scientific standpoint, butter production starts with milk, a colloid where fat globules are dispersed in water. These fat globules are enveloped by a membrane that prevents them from merging together. When you churn the milk, physical force breaks these protective membranes, enabling the fat globules to conglomerate into bigger clumps. This is the first step towards the solidification of the liquid milk into viscous butter. The transformation is influenced by several factors, which include the fat content and the temperature. Whole milk with a high-fat content yields more butter than skimmed or low-fat milk. Temperature plays a critical role too. If the churning process happens at room temperature (around 20°C or 68°F), the butter obtained is often soft and spreadable. But if conducted at a lower temperature (between 10°C and 15°C or 50°F and 60°F), it results in a firmer texture. What's even more riveting is that the transformation of milk into butter is an illustration of emulsion inversion. In milk, water is the continuous phase and fat is the dispersed phase. However, when it turns into butter, the roles get reversed - fat becomes the continuous phase and water becomes the dispersed one. This transition is not merely structural but also sensory. The fats in the butter trap the aromas, generating the distinct, rich, and creamy butter flavor we know and love. Moreover, the process of butter churning also allows for bacterial fermentation, which adds a certain tanginess to the butter. In conclusion, the marvel of turning milk into butter encapsulates both science and art with physics, chemistry, and microbiology playing vital roles in the process. An understanding of their interplay can significantly enhance butter production and quality, turning it from a plain edible fat into a culinary masterpiece. No less than what you'd expect from an everyday kitchen essential... or should we say, a model of scientific curiosity?
Materials Needed for Homemade Butter
In the quest to master the art of butter production at home, the primary elements that are essential are remarkably straightforward and easily accessible. Firstly, the core ingredient you'll need is heavy cream or milk, preferably from a cow or goat, which are, by far, the most common sources of dairy. The cream should be of high quality and fresh, as this significantly affects the taste and overall quality of the end product. Organic or raw cream holds the highest acclaim among seasoned butter makers, noted for delivering a robust, rich butter flavor. Secondly, it is necessary to have a jar with a secure lid or a churner to physically separate the butterfat from the liquid elements in the cream. A larger jar is recommended to make the process of shaking easier and to prevent the cream from sloshing out during the process. If a churner is used, the task is simplified, yet the time-honored tradition of using a jar also adds a layer of authenticity to this homemade experience. Salt is another potential material needed in the creation of homemade butter. While it is not a requirement, adding salt can enhance the taste of your homemade butter and also prolong its shelf life. Kosher salt or sea salt are often selected by culinary enthusiasts for their ability to evenly dissolve and their pure, untainted flavor profiles. Individuals who prefer richer, more elaborately flavored butter might also opt for the addition of herbs or spices. Additives such as garlic, rosemary, or chili flakes can elevate your homemade butter to an exquisite, restaurant-quality level. It's worth noting that any extra ingredients should be finely chopped or ground to ensure a smooth, uniform consistency. The final necessary material is a bowl and a strainer to separate the final product from the residual buttermilk and a storage container for your homemade butter. Glass or ceramic containers are the preference, as these materials keep the butter fresh for longer durations and repel other flavors present in your refrigerator from seeping into your handcrafted delight. The above tools and ingredients underscore that homemade butter production calls for simplicity paired with high-grade materials. By employing these, one can effectively harness and steer the process of turning cream into smooth, rich, and spreadable butter. You will find that the endeavor is worth the effort, yielding butter that possesses a depth of flavor store-bought varieties often lack, emblematic of the craftsmanship and quality ingredients it was born from.
Steps in Churning Milk Into Butter
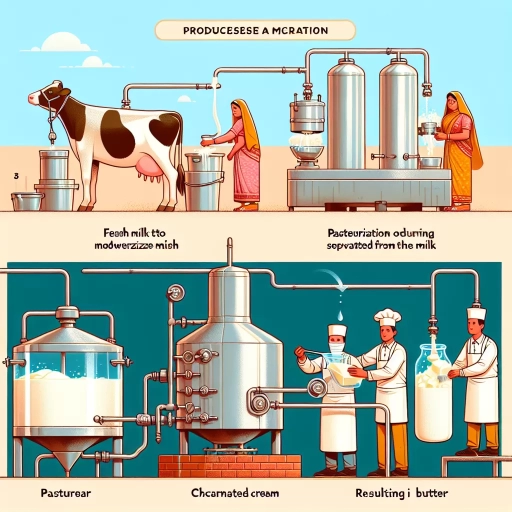
In the expansive realm of butter production, understanding the critical steps involved in churning milk into butter provides the keystone. Herein lays the convergence of chemistry, biology, and artistry, which transforms the simple liquid into a rich, creamy delight. It all begins with high-quality, fresh, whole milk, which possesses a natural cream layer. Primarily, the milk needs to be prepared and the cream separated in a process known as skimming. Following skimming, the cream obtained then undergoes pasteurization, a stage that involves heating it up to kill pathogens, thus ensuring the butter's safety and prolonging its shelf life. Thereafter, the cream is cooled down and left to ripen. In the ripening stage, you allow the cream to sour by introducing bacterial cultures, which matures the cream, offering it a distinct tangy flavor that is characteristic of high-quality artisanal butter. Churning, the most crucial part of the process, warrants special attention. The ripened cream is then transferred to a churn, and the transformation begins. During churning, the cream's consistent agitation causes it to thicken as the fat globules present break down and come together, first forming whipped cream and eventually churning into a firm, solid mass which is butter. The 'butter grains' that form during this process are washed and 'worked' to eliminate residual buttermilk and to improve the butter's texture. The penultimate step is flavoring and salting. While unsalted butter is perfectly fine, salt not only enhances the butter's taste but also acts as a preservative. Hence, most varieties seen in markets have salt added. But home producers have the chance to be creative, introducing herbs, spices, or even sweeteners at this stage. Finally, the butter needs to be packaged, preferably in airtight containers or wrapped in parchment paper. This stage determines the life of your butter. Store it in cool places, and it’s good to go for a few weeks. Liquor or vinegar can also be added to prolong the shelf life. These steps define the artistic journey of transforming milk into butter. It’s a process that requires attention, patience, and keenness but results in a culinary delight revered across the globe. Each step in the process offers a unique contribution, from the rich, creamy feel to the savory taste that makes butter a universal favorite.
Exploring Different Techniques in Making Butter
Embarking on a journey to discover the fascinating world of butter-making is an endeavour that brings together both history and innovation. This exploration will trot the three key domains in which butter can be created: the traditional churning method, modern methods facilitated by appliances, and experimental techniques attempting to make butter sans churning. The traditional churning method takes us back in time, reminding us of how our ancestors effectively produced butter with basic tools and undiluted patience. On the other hand, modern methods illustrate how technology has shortened and simplified the process without relinquishing the authentic taste of butter. Meanwhile, experimental techniques challenge conventions and bring out the creative side of food science. The first destination on our butter-making journey brings us face-to-face with an age-old practice – traditional churning. This method, seemingly simple yet teeming with nuance, gives us a taste of the timelessness of food production, guiding us back to the roots of butter-making.
Traditional Churning Method
Traditional Churning Method is one of the most ancient techniques hailing from the roots of our ancestors mastering dairy delights. It is a simple yet fascinating process that converts ordinary milk into the tantalizing texture and taste of fresh home-made butter. It is a process involving patience and attention to detail, often imbuing the result with a delightful flavour that industrial production can seldom mimic. Known to many cultures across the globe, the essence of traditional churn lies in the relentless agitation of cream separated from fresh cow milk. This physical motion breaks down the fat molecules wall, releasing the butterfat and converting the milk into a semi-solid, velvety substance also known as butter. Starting from raw, unpasteurized milk, the first step involves leaving the milk to rest. This resting phase, often between 12 to 24 hours, allows the cream to naturally rise to the top, separating itself from the skim milk. The cream is then collected and poured into a churn - a device that varies in design but is universally created to promote agitation. From the classic wooden dash churns used in ancient Europe to the rocking churns of Africa, the tool's primary function remains constant. Some churns come with paddles or plungers, while others could simply be a vessel with a tight lid to shake the cream inside. Regardless of design, they all serve a single purpose - to disturb the cream until it splits into butter and buttermilk. The churning process, which may last between 15 minutes to an hour, is considered a profound exercise of endurance, patience and technique. This delicate activity induces the fat in the cream to clump together, creating ‘butter grains’. These are then pressed together to form our ideal end product: butter. While traditional churning is laborious and time-consuming in comparison to modern automated techniques, the rewards are just as sweet. Butter produced this way often has a distinct, richer taste and texture. The process allows for complete control over the consistency and flavour of the butter, making it perfect for any discerning culinarian opting for a more personal touch in their creations. The Traditional Churning Method not only provides us with a delectable spread for our meals but also lets us delve into a historical practice in food culture. It allows us to appreciate the beauty of simplicity, labour and nature's bounty, delivering unmatched flavours that stand the test of time.
Modern Methods: Using Appliances
Modern Methods: Using Appliances
Innovative technology and modern appliances have significantly transformed various traditional practices, including the exquisite art of butter making. The essence of making butter from milk has been revolutionized with modern methods that ease the workload, streamline the process, and provide more precision. Today, by using appliances like food processors, stand mixers, or even an electric churn, making butter at home has become a swift, fail-proof task, that requires minimum physical effort. To begin with, a food processor, widely available in most households, can handle the churning of cream to a level that separates butter from buttermilk. This versatile appliance ensures the process is faster and highly efficient. The stand mixer, another implement at our disposal, performs equally efficiently. Usually equipped with multiple speed options, stand mixers allow you to have complete control over the churning pace, preventing accidental over-churning. An electric churn, on the other hand, designed specifically for butter making, lends an air of authenticity to the process. This modern appliance ensures high-quality yields by focusing solely on its prime function. Most electric churns come with an easy-to-use interface, making the process of turning cream into butter an enjoyable experience even for novices. Moreover, regardless of the appliance chosen, each offers varying degrees of convenience. They eliminate the manual labour traditionally required in the butter-making process and can offer results within minutes depending on the amount of cream used. However, achieving the perfect butter doesn't end with the churning. The appliance techniques aid in thorough washing of the butter - an often overlooked yet critical part of the process. They allow for careful extraction of all residual milk solids that could trigger spoilage, thus enhancing the butter's shelf life. In conclusion, the rise of modern appliances has succeeded in democratizing the process of butter making. By simplifying the process and increasing the precision of measurement and timing, these tools make homesteading aspirations like butter making more attainable and enjoyable. Amidst this diverse set of tools, the right appliance choice can make your butter-making experience both efficient and culturally enriching, and simultaneously give you an unbeatable sense of accomplishment.Experimental Techniques: Making Butter Without Churning
Exploring different techniques in creating butter provides a unique perspective on the process, one which doesn't limit you to the traditional method of churning milk or cream. An experimental method that has been growing in popularity involves making butter without the use of a churner. This ingenious technique relies on readily accessible tools and a little more patience to achieve the same buttery result. The first critical component in our butter making journey is the raw material - heavy cream or whole milk. The importance of this ingredient cannot be overstated, as a higher fat content results in a richer, creamier butter. Next, the cream or milk is poured into a tightly-sealed jar, instead of adding it to a churner. The jar should not be filled to the brim, but rather left halfway to allow room for the necessary agitation. Once securely sealed, the jar is shaken vigorously. The idea is to replicate the action of a churner manually. With enough time, you'll feel the contents of the jar begin to thicken. This shaking process can take anywhere between 15 to 30 minutes, depending on the amount of cream or milk and your shaking intensity. It's a true testament to patience and endurance that rewards you with a delicious, homemade product at the end. During this period of vigorous shaking, the fat molecules in the milk or cream begin to combine, forming solid clumps. As this happens, the liquid part, known as buttermilk, tends to separate. The mixture then undergoes a transformation into a lump of yellow butter and cloudy buttermilk. Once the butter has formed, it is removed from the jar, leaving the buttermilk behind. It's then essential to wash the butter several times in cold water, this removes any lingering buttermilk which can spoil the butter. Kneading the butter also assists in removing any remaining buttermilk and forms the butter into a uniform consistency. This method delivers incredibly fresh, homemade butter, crafted through a minimalist route that truly underscores the simplicity and elegance of the process. It also provides a fantastic way to acquaint children with food production methods, teaching the value of patience and perseverance in the process. By employing this technique, it's clear that making butter extends beyond a culinary necessity. It becomes a fascinating experiment, a narrative of transformation, and a testament to the incredible versatility found within the culinary world. The humble process of crafting butter without a churner offers lessons in patience, tenacity and the magic of simple science, weaving together a fascinating tale within the larger story of butter production.
Enhancing Your Homemade Butter: Tips and Tricks
Enhancing one's homemade butter involves more than just the churn. In this article, we journey through a world filled with milk varieties, unique flavor infusions, and smart storage strategies to amplify your butter creation experience. First, we explore the diverse field of milk options. Goat's milk, cow's milk, or the more adventurous sheep and buffalo milk can lend decidedly different outcomes to your homemade butter. Then, we unravel the art of infusing flavors. From robust garlic to aromatic herbs and spices, we'll decipher the delicate process of infusing your butter with your favorite palate-pleasing notes. Finally, we drive into well-preserved territories, acknowledging the importance of proper storage methods, and giving you vital tricks to ensure your butter stays fresh, flavorful, and food-safe. As you churn the butter out of your favorite types of milk, remember that the milk used sets the bassline for the taste, quality, and texture of your homemade dairy delight. Now, cue the first act, let's dive deep into the ocean of different milk types, staring the journey from goat's milk.
Using Different Types of Milk
Using different types of milk greatly impacts the results of your homemade butter, enhancing both the taste and texture. The subtlety of flavors hidden in milk types like cow, goat, sheep, and even buffalo milk can provide unique character to your home-churned butter, making it truly a signature creation. For a start, the most commonly used type, cow’s milk, gives a classic, rich and creamy butter. These characteristics comes from the fat globules present in cow's milk, making it an ideal choice for both beginner butter-makers and connoisseurs. Switch to goat's milk, and you'll discover slightly tangier notes, with a smooth and velvety texture that can shift the dynamic of dishes the butter is used in. Goat's milk is also easier to digest, making it an excellent option for those with dietary restrictions. The butter it produces tends to have a whiter appearance, retaining the milk's natural color. Sheep's milk, on the other hand, is the heavyweight in the realm of milk types. It has double the fat content of either cow's or goat's milk, yielding butter that's exceptionally rich, creamy and flavorful. Sheep's milk butter has a unique aroma, and adds a distinct depth to any dishes it graces. Exotic but increasingly available, buffalo milk can provide a luxurious experience. It yields butter that is significantly denser, with a slightly sweet flavor profile. The higher fat content gives the butter a robust, indulgent texture, making it perfect for adding a splash of decadence to your baked goods or sauces. Choosing organic milk options of these types guarantees butter free from artificial hormones or antibiotics, contributing to a healthier and tastier batch of butter. Furthermore, the type of feed the milking animal is given also impacts the flavor of the butter, often enhancing it with grassy or nutty notes. Hence, considering all these options allows you to craft butter that is not just an ingredient, but a star in itself. Modifying milk types while keeping the butter-making process consistent creates a space for experiment and discovery, essential for every food enthusiast. The type of milk you choose for butter-making can significantly enhance the dish you're whipping up, making this small decision an opportunity for a significant gastronomical impact. This simple tweak in ingredient can reshape the narrative of your homemade recipes, proving how exploration in the kitchen can truly turn the ordinary into extraordinary. So try each milk type, discover the unique flavors, and breathe life into your homemade butter creations.
Infusing Flavors Into Your Homemade Butter
Infusing flavors into your homemade butter can dramatically enhance its taste, elevating even the most straightforward meal into a culinary delight. If you can make butter from milk, you have the gateway to a world of flavor possibilities. You can create a fantastic array of unique flavored butters, from sweet to savory, to suit any meal or snack. To begin, let's focus on savory variations. Opt for herbs and aromatics like garlic, rosemary, thyme, or chives, which are all great options. Or, if you want something with a little more kick, mix in crushed chili peppers or zesty lemon zest. When infusing flavors, make sure the ingredients are finely chopped or crushed to help release their essences. You can add these directly to the butter during the final mixing stages. The key here is to start slowly and add to taste. Remember, you can always add more seasoning, but you can't take it out once it's incorporated! For those with a sweet tooth, experiment with ingredients such as honey, cinnamon, vanilla, or even sweet fruits like strawberries and passionfruit. When using fruits, ensure they are well pureed or finely chopped to blend seamlessly into the butter — chunky bits can disrupt the butter's smooth consistency. Similarly, if you prefer using chocolate or caramel, melt them first so they can blend in easily. Infusing flavors takes homemade butter to a whole new level and opens the door to experimentation. Whether you need a tangy citrus butter for fish, warm garlic butter for bread, or a sweet berry butter for pancakes, the options are endless! You’ll be amazed at the difference in taste and richness that flavored butter can bring to your meals, making this creative activity well worth your time and effort. Infusing flavors into your homemade butter is not just about the taste; it's about the joy in creating something uniquely yours and sharing it with the people you care about the most. The key to success lies in the balance - carefully choosing the flavors so that they complement, rather than overpower, the creamy richness of the butter. Keep in mind the texture of your chosen infusions and the dish they'll accompany when creating your flavored butter. Above all, let your culinary creativity run wild - the possibilities are endless!
Storing and Preserving Your Homemade Butter
Storing and Preserving Your Homemade Butter is an integral part of the butter making process that equally requires attention to detail. After spending time and effort in producing your delicious spread, there is nothing more fulfilling than knowing you can preserve that quality for further enjoyment and consumption. Essentially, proper storage and preservation prolong the freshness and enhance the rich, creamy flavor of your homemade butter. The first step in storing is the proper packaging. Butter, being fat-based, is immensely absorbent and can easily take on the flavor of items around it. Therefore, airtight containers are your best bet to avoid any unwelcome taste. Glass or plastic containers with secure lids are optimal for preventing any air exposure. If you are inclined towards a more eco-friendly option, beeswax wraps are a great alternative and are readily available in markets today. Preserving the homemade butter in the refrigerator is the most common method known to many. The low temperature not only slows down bacterial growth but also helps maintain the butter’s consistency. You should, however, be cautious about the shelf-life. Typically, the homemade butter stays fresh from 1 to 3 weeks in the refrigerator. However, for a longer shelf-life, storing your butter in the freezer can extend this to up to a year. The key is to freeze in small usable portions, which makes it convenient for you to defrost only what is needed. Also, adding a touch of salt to your homemade batch not only enhances its flavor but also acts as a natural preservative, helping extend the butter's life. Nonetheless, this tip should be used sparingly, but only if it aligns with your dietary intake. Lastly, the most efficient way to store butter is by canning, though this may require a bit more effort. By sealing it in sterilized jars and processing it in a water bath, you kill bacteria that could lead to spoilage, while also creating a vacuum seal that keeps exterior bacteria out. Regardless of which method you choose for Storing and Preserving Your Homemade Butter, it is essential to label your containers with the date of packaging. This will help you keep track of their shelf-life and ensure you consume them while they're still fresh. By using these storage and preservation guidelines, you can extend the enjoyment of your homemade butter, ensuring no morsel goes to waste.