How To Insert Check Box In Word
Here is the introduction paragraph: When working with Microsoft Word, there are various tools and features that can enhance the functionality and appearance of your documents. One such feature is the checkbox, which can be used to create interactive forms, surveys, and to-do lists. In this article, we will explore how to insert checkboxes in Word, including understanding the basics of checkboxes, inserting them into your documents, and customizing and managing them to suit your needs. To get started, it's essential to understand the basics of checkboxes in Word, including their types, uses, and limitations. By grasping these fundamental concepts, you'll be able to effectively utilize checkboxes in your Word documents. Let's begin by understanding the basics of checkboxes in Word.
Understanding the Basics of Checkboxes in Word
Checkboxes are a fundamental feature in Microsoft Word that can enhance the functionality and interactivity of a document. They allow users to select multiple options from a list, making it easier to create surveys, to-do lists, and other types of interactive content. In this article, we will delve into the basics of checkboxes in Word, exploring what they are and their uses, the different types of checkboxes available, and when to use them in a document. By understanding these basics, users can unlock the full potential of checkboxes and create more engaging and effective documents. So, let's start by exploring what checkboxes are and their uses.
What are Checkboxes and Their Uses
Checkboxes are interactive elements that allow users to select one or more options from a list. They are commonly used in digital forms, surveys, and documents to gather information, provide choices, and facilitate decision-making. In the context of Microsoft Word, checkboxes are used to create interactive documents, such as to-do lists, surveys, and questionnaires. When a checkbox is inserted into a Word document, it can be checked or unchecked by the user, allowing them to make selections or provide feedback. Checkboxes can be used in various ways, including creating a list of tasks or options, providing a rating system, or gathering feedback from users. They can also be used to create interactive templates, such as meeting agendas, sign-in sheets, or evaluation forms. Overall, checkboxes are a useful tool for creating interactive and engaging documents in Word.
Types of Checkboxes Available in Word
In Word, there are two primary types of checkboxes available: interactive checkboxes and non-interactive checkboxes. Interactive checkboxes are designed to be used in electronic forms, allowing users to select or deselect options by clicking on them. These checkboxes can be linked to other form elements, such as text boxes or drop-down menus, to create a dynamic and interactive form. On the other hand, non-interactive checkboxes are used for visual purposes only, such as in printed documents or static forms. They are not clickable and do not respond to user input. Additionally, Word also offers a third type of checkbox, known as a "legacy checkbox," which is a non-interactive checkbox that can be used in older versions of Word or in compatibility mode. Furthermore, Word also provides a range of checkbox styles and designs, including square, round, and diamond-shaped checkboxes, allowing users to customize the appearance of their checkboxes to suit their needs. Overall, the different types of checkboxes available in Word provide users with flexibility and options to create a wide range of forms and documents.
When to Use Checkboxes in a Document
When to use checkboxes in a document depends on the purpose and context of the content. Checkboxes are ideal for creating interactive documents, such as surveys, questionnaires, and to-do lists, where users need to select multiple options or indicate completion of tasks. They are also useful for creating forms, such as registration forms, feedback forms, and evaluation forms, where users need to provide specific information or make selections. Additionally, checkboxes can be used in instructional documents, such as tutorials and guides, to help users track their progress or indicate understanding of certain concepts. In general, checkboxes are suitable for any document that requires user input or interaction, and can help to make the content more engaging and user-friendly.
Inserting Checkboxes in Word Documents
Inserting checkboxes in Word documents can be a useful feature for creating interactive forms, surveys, and to-do lists. There are several ways to insert checkboxes in Word, each with its own advantages and disadvantages. In this article, we will explore three methods for inserting checkboxes in Word documents: using the Developer Tab, creating checkboxes from scratch with shapes, and converting text into checkboxes with shortcuts. By the end of this article, you will be able to choose the method that best suits your needs and create professional-looking checkboxes in your Word documents. One of the most straightforward methods for inserting checkboxes is by using the Developer Tab, which provides a built-in checkbox feature. Let's take a closer look at how to use the Developer Tab to insert checkboxes in Word documents.
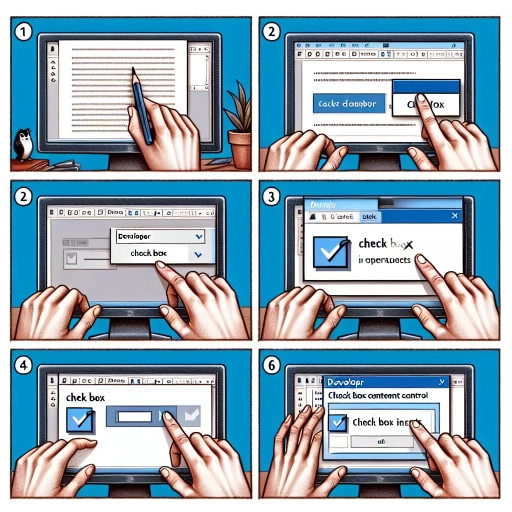
Using the Developer Tab to Insert Checkboxes
Using the Developer Tab to Insert Checkboxes is a straightforward process that can be completed in a few steps. To begin, you need to enable the Developer Tab in your Word document. To do this, go to the "File" tab, click on "Options," and then select "Customize Ribbon." In the "Customize the Ribbon" dialog box, check the box next to "Developer" and click "OK." Once the Developer Tab is enabled, you can access it by clicking on the "Developer" tab in the ribbon. To insert a checkbox, click on the "Check Box Content Control" button in the "Controls" group. This will insert a checkbox into your document. You can then click on the checkbox to select it and type a label next to it. If you want to create a group of checkboxes, you can insert multiple checkboxes and use the "Group" feature to group them together. To do this, select all the checkboxes you want to group, go to the "Developer" tab, and click on the "Group" button in the "Controls" group. This will create a group of checkboxes that can be used to select multiple options. You can also use the "Properties" button in the "Controls" group to customize the appearance and behavior of the checkboxes. For example, you can change the font, size, and color of the checkboxes, as well as add a default value or a tooltip. By using the Developer Tab to insert checkboxes, you can create interactive and dynamic Word documents that allow users to select options and provide feedback.
Creating Checkboxes from Scratch with Shapes
Creating checkboxes from scratch with shapes is a simple and effective way to add interactive elements to your Word documents. To start, go to the "Insert" tab and click on the "Shapes" button in the "Illustrations" group. From the drop-down menu, select the "Rectangle" shape and draw a small square on your document. This will serve as the base of your checkbox. Next, right-click on the rectangle and select "Format Shape" to open the "Format Shape" pane. In the "Fill" section, select "No fill" to remove any background color, and in the "Line" section, select a color and set the "Width" to a suitable value to create a border around the checkbox. You can also add a checkmark symbol by going to the "Insert" tab and clicking on the "Symbol" button in the "Symbols" group. Select the "Checkmark" symbol and resize it to fit inside the checkbox. To make the checkbox interactive, you can add a macro to it. Go to the "Developer" tab and click on the "Visual Basic" button in the "Code" group. In the Visual Basic Editor, insert a new module and paste the following code: `Sub CheckBox_Click() If ActiveDocument.Shapes("CheckBox").TextFrame.TextRange.Text = "Checked" Then ActiveDocument.Shapes("CheckBox").TextFrame.TextRange.Text = "Unchecked" Else ActiveDocument.Shapes("CheckBox").TextFrame.TextRange.Text = "Checked" End If End Sub`. This code will toggle the checkbox between "Checked" and "Unchecked" when clicked. Finally, go back to your document and right-click on the checkbox. Select "Assign Macro" and choose the "CheckBox_Click" macro. Now, when you click on the checkbox, it will toggle between "Checked" and "Unchecked".
Converting Text into Checkboxes with Shortcuts
Converting text into checkboxes with shortcuts is a convenient feature in Microsoft Word that allows users to quickly transform text into interactive checkboxes. To do this, users can select the text they want to convert and use the shortcut "Ctrl + Shift + C" (Windows) or "Command + Shift + C" (Mac). This shortcut will automatically convert the selected text into a checkbox. Alternatively, users can also use the "Developer" tab in the ribbon, which provides a "Check Box" button that can be used to insert a checkbox. However, using the shortcut is often faster and more efficient, especially when working with large documents. Once the text is converted into a checkbox, users can customize its appearance and behavior by using the "Properties" dialog box, which can be accessed by right-clicking on the checkbox. This feature is particularly useful for creating interactive documents, such as surveys, questionnaires, and to-do lists, where users need to select or check off items. By converting text into checkboxes with shortcuts, users can save time and effort, and create more engaging and interactive documents.
Customizing and Managing Checkboxes in Word
Here is the introduction paragraph: Customizing and managing checkboxes in Microsoft Word can significantly enhance the functionality and user experience of your documents. Whether you're creating surveys, to-do lists, or interactive forms, checkboxes can be a valuable tool. However, the default appearance and behavior of checkboxes may not always meet your needs. Fortunately, Word provides various options for customizing and managing checkboxes, allowing you to tailor them to your specific requirements. By changing the appearance and size of checkboxes, linking them to other document elements, and protecting and locking them for security, you can create more effective and engaging documents. In this article, we'll explore these options in more detail, starting with how to change the appearance and size of checkboxes.
Changing the Appearance and Size of Checkboxes
To change the appearance and size of checkboxes in Word, you can use the "Developer" tab in the ribbon. First, ensure that the "Developer" tab is visible by going to "File" > "Options" > "Customize Ribbon" and checking the box next to "Developer". Once the "Developer" tab is visible, click on it and then click on the "Check Box" icon in the "Controls" group. Right-click on the checkbox and select "Format Control" to open the "Format Control" dialog box. In the "Format Control" dialog box, you can change the appearance of the checkbox by selecting a different style from the "Style" dropdown menu. You can also change the size of the checkbox by entering a new value in the "Size" field. Additionally, you can change the font, color, and other formatting options to customize the appearance of the checkbox. To change the size of the checkbox, you can also use the "Size" button in the "Home" tab, which allows you to increase or decrease the size of the checkbox. Alternatively, you can use the "Font Size" button in the "Home" tab to change the font size of the checkbox, which will also affect its size. By using these options, you can customize the appearance and size of checkboxes in Word to suit your needs.
Linking Checkboxes to Other Document Elements
Linking checkboxes to other document elements in Word can significantly enhance the functionality and interactivity of your documents. By linking checkboxes to other elements, you can create dynamic and responsive documents that adapt to user input. To link a checkbox to another element, such as a text box or a graphic, you can use the "Bookmark" feature in Word. First, select the checkbox and go to the "Insert" tab, then click on "Bookmark" and assign a unique name to the checkbox. Next, select the element you want to link to the checkbox and go to the "Insert" tab, then click on "Hyperlink" and select "Bookmark" as the link type. Choose the bookmark name you assigned to the checkbox and click "OK". This will create a link between the checkbox and the other element, allowing you to control the visibility or behavior of the linked element based on the checkbox state. For example, you can use this technique to create a form that reveals additional information or options when a checkbox is selected. By linking checkboxes to other document elements, you can create complex and interactive documents that engage your audience and streamline your workflow.
Protecting and Locking Checkboxes for Security
Protecting and locking checkboxes is a crucial step in maintaining the security and integrity of your Word document, especially when sharing it with others or using it for official purposes. To protect your checkboxes, you can use the "Restrict Editing" feature in Word, which allows you to limit the types of changes that can be made to the document. To do this, go to the "Review" tab, click on "Restrict Editing," and select the "Allow only this type of editing in the document" option. From there, you can choose to allow only "Filling in forms" or "Comments" to be made to the document, which will prevent others from modifying the checkboxes. Additionally, you can also use the "Protect Document" feature to add a password to the document, which will require others to enter the password before they can make any changes. To lock the checkboxes themselves, you can use the "Group" feature, which allows you to group the checkboxes together and lock them in place. To do this, select the checkboxes, go to the "Home" tab, and click on "Group" in the "Drawing Tools" group. This will lock the checkboxes together and prevent them from being moved or modified. By protecting and locking your checkboxes, you can ensure that your Word document remains secure and tamper-proof.