How To Animate In Procreate
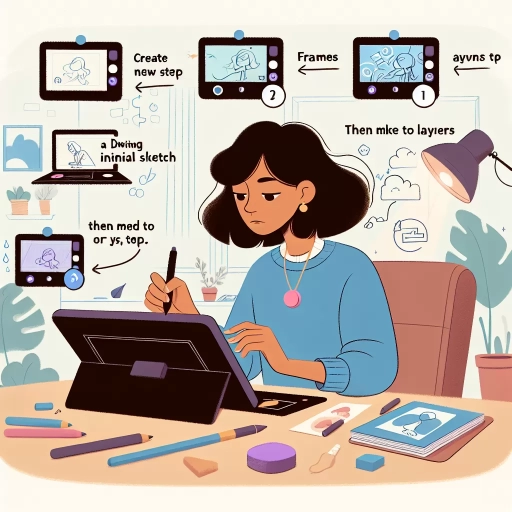
Here is a 200-word introduction paragraph for an article about animating in Procreate: Are you ready to unlock the full potential of Procreate and bring your artwork to life? With its powerful animation features, Procreate offers a world of creative possibilities for artists, designers, and animators. Whether you're a seasoned pro or just starting out, learning to animate in Procreate can take your skills to the next level. In this article, we'll take you on a journey to explore the world of animation in Procreate, from understanding its animation features to refining and polishing your final product. We'll dive into the process of setting up your animation project, designing and creating keyframes, and experimenting with various techniques and effects. By the end of this article, you'll be equipped with the knowledge and skills to create stunning animations that showcase your artistic vision. So, let's get started by understanding the foundation of Procreate's animation features, which will set the stage for our creative journey ahead. Understanding Procreate's Animation Features is the first step in unlocking the full potential of this powerful tool.
Understanding Procreate's Animation Features
Procreate's animation features are a game-changer for digital artists, offering a wide range of tools and techniques to bring their creations to life. To get the most out of Procreate's animation capabilities, it's essential to understand the basics of frame-by-frame animation, which involves creating a series of individual frames that are played back in sequence to create the illusion of movement. Additionally, Procreate's built-in animation tools, such as the animation assist panel, provide a wealth of options for customizing and refining animations. By exploring the animation assist panel, learning the basics of frame-by-frame animation, and discovering Procreate's built-in animation tools, artists can unlock the full potential of Procreate's animation features and take their digital art to the next level. With a solid understanding of these fundamental concepts, artists can dive into the world of Procreate animation with confidence, starting with the animation assist panel.
Exploring the Animation Assist Panel
Exploring the Animation Assist Panel in Procreate allows you to streamline your animation workflow and achieve professional-looking results. Located in the top toolbar, the Animation Assist Panel provides a range of features to help you create, edit, and refine your animations. The Onion Skin feature, for instance, enables you to see the previous and next frames in your animation, making it easier to create smooth transitions and maintain consistency. The Ghosting feature, on the other hand, allows you to see a faint outline of the previous frame, helping you to create a sense of movement and flow. Additionally, the Animation Assist Panel provides a range of playback controls, including play, pause, and loop, allowing you to review and refine your animation with ease. By leveraging these features, you can create complex animations with precision and control, and take your Procreate skills to the next level. Furthermore, the Animation Assist Panel also provides a range of customization options, including the ability to adjust the onion skin opacity and ghosting intensity, allowing you to tailor the features to your specific needs and preferences. With the Animation Assist Panel, you can unlock the full potential of Procreate's animation features and create stunning animations that bring your artwork to life.
Learning the Basics of Frame-by-Frame Animation
Learning the basics of frame-by-frame animation is a fundamental step in creating captivating animations in Procreate. To start, it's essential to understand the concept of frames and how they work together to create the illusion of movement. A frame is a single image or drawing that, when played in sequence with other frames, creates the animation. The number of frames per second (FPS) determines the smoothness and fluidity of the animation. Typically, animations range from 12 to 24 FPS, with higher FPS resulting in a more realistic and engaging animation. To create a frame-by-frame animation in Procreate, start by creating a new document with the desired dimensions and resolution. Then, set the frame rate and duration of the animation using the Animation Assist feature. Next, create the first frame by drawing or importing an image, and then duplicate the layer to create subsequent frames. Make subtle changes to each frame, such as moving a character's arm or changing the expression, to create the illusion of movement. As you work on each frame, use the Onion Skin feature to see the previous and next frames, allowing you to refine the animation and ensure a smooth transition between frames. By mastering the basics of frame-by-frame animation, you'll be able to create stunning animations that bring your artwork to life.
Discovering Procreate's Built-in Animation Tools
Discovering Procreate's Built-in Animation Tools Procreate offers a range of built-in animation tools that allow artists to bring their creations to life. The animation features are seamlessly integrated into the app, making it easy to experiment with different techniques and effects. To access the animation tools, users can navigate to the "Actions" panel, where they'll find a dedicated "Animation" section. From here, they can choose from a variety of options, including frame-by-frame animation, onion skinning, and time-lapse recording. The frame-by-frame animation feature allows artists to create individual frames and then play them back in sequence, while onion skinning enables them to see a ghostly overlay of the previous frame, making it easier to create smooth transitions. Time-lapse recording, on the other hand, allows users to capture their entire creative process, from start to finish, and then play it back as a fast-paced animation. Additionally, Procreate's animation tools also include features like loop, ping-pong, and reverse playback, giving artists even more control over their animations. By exploring these built-in animation tools, artists can unlock new creative possibilities and take their Procreate skills to the next level.
Setting Up Your Animation Project in Procreate
Setting up your animation project in Procreate is an exciting step in bringing your creative vision to life. To ensure a smooth and successful animation process, it's essential to start with a solid foundation. This involves creating a new animation document, configuring the animation settings and resolution, and importing and preparing your assets. By following these crucial steps, you'll be able to establish a clear direction for your project and avoid potential pitfalls down the line. In this article, we'll delve into the specifics of each step, starting with the basics of creating a new animation document. By the end of this article, you'll be well-equipped to set up your animation project in Procreate and start animating with confidence. So, let's begin by exploring how to create a new animation document, the first crucial step in setting up your project.
Creating a New Animation Document
When creating a new animation document in Procreate, it's essential to consider the project's requirements and settings to ensure a smooth and efficient workflow. To start, go to the Procreate homepage and tap the "+" icon to create a new document. In the "New Document" menu, select "Animation" as the document type. This will open the animation settings panel, where you can customize the document's properties. Set the resolution, frame rate, and duration according to your project's needs. For example, if you're creating a short animation for social media, you may want to set the resolution to 1080p, the frame rate to 30fps, and the duration to 10 seconds. You can also choose the color mode, either RGB or CMYK, depending on the intended output. Additionally, you can select the animation type, such as a looping animation or a one-time playback. Once you've set up your document, tap "Create" to start working on your animation. Procreate will then generate a new document with the specified settings, ready for you to begin creating your animation.
Configuring the Animation Settings and Resolution
Configuring the animation settings and resolution is a crucial step in setting up your animation project in Procreate. To start, go to the Actions menu and select "Animation" to open the Animation Settings panel. Here, you can set the frame rate, which determines how many frames per second your animation will play. A higher frame rate will result in a smoother animation, but it will also increase the file size. You can choose from a range of frame rates, including 24fps, 25fps, 30fps, and 60fps. Next, you can set the resolution of your animation, which will determine the size of the final output. Procreate allows you to choose from a range of resolutions, including HD, Full HD, and 4K. You can also set a custom resolution by entering the width and height in pixels. Additionally, you can set the aspect ratio of your animation, which will determine the shape of the final output. Procreate allows you to choose from a range of aspect ratios, including 16:9, 4:3, and 1:1. Finally, you can set the color mode of your animation, which will determine the color depth and gamut of the final output. Procreate allows you to choose from a range of color modes, including RGB, CMYK, and Greyscale. By configuring these animation settings and resolution, you can ensure that your animation is optimized for your desired output and looks its best.
Importing and Preparing Your Assets
When importing and preparing your assets for animation in Procreate, it's essential to consider the file format, resolution, and organization of your files. Procreate supports various file formats, including PSD, JPEG, PNG, and GIF, but it's recommended to use PNG or PSD for animation projects. This is because these formats allow for transparent backgrounds and layer support, making it easier to work with and animate your assets. When importing your assets, make sure to set the resolution to the desired size, taking into account the final output resolution of your animation. A higher resolution will result in a larger file size, but it will also provide a more detailed and crisp image. Organizing your assets in a logical and consistent manner is also crucial, as it will save you time and reduce confusion when working on your animation project. Consider creating separate folders for different types of assets, such as characters, backgrounds, and props, and use descriptive file names to help you quickly identify each asset. Additionally, it's a good idea to create a color script or mood board to help establish the visual style and color palette of your animation, ensuring consistency throughout the project. By carefully importing and preparing your assets, you'll be able to focus on the creative aspects of your animation project, knowing that your files are well-organized and ready to use.
Bringing Your Animation to Life in Procreate
Designing and Creating Keyframes
Experimenting with Animation Techniques and Effects
Refining and Polishing Your Animation
Bringing your animation to life in Procreate requires a combination of creativity, technical skills, and attention to detail. To achieve this, it's essential to start by designing and creating keyframes, which are the foundation of any animation. This involves sketching out your ideas, developing your characters and storyboards, and setting the pace and timing of your animation. Once you have your keyframes in place, you can begin experimenting with various animation techniques and effects, such as tweening, easing, and texture overlays, to add depth and visual interest to your animation. Finally, refining and polishing your animation is crucial to ensure that it flows smoothly and engages your audience. By following these steps, you can bring your animation to life in Procreate and create a captivating and professional-looking final product. In this article, we will explore each of these steps in more detail, starting with designing and creating keyframes.
Designing and Creating Keyframes
Experimenting with Animation Techniques and Effects
Refining and Polishing Your Animation
Designing and Creating Keyframes
Experimenting with Animation Techniques and Effects
Refining and Polishing Your Animation
Designing and Creating Keyframes
Experimenting with Animation Techniques and Effects
Refining and Polishing Your Animation
Designing and Creating Keyframes
Experimenting with Animation Techniques and Effects
Refining and Polishing Your Animation
Designing and Creating Keyframes
Experimenting with Animation Techniques and Effects
Refining and Polishing Your Animation
Designing and Creating Keyframes
Experimenting with Animation Techniques and Effects
Refining and Polishing Your Animation
Designing and Creating Keyframes
Experimenting with Animation Techniques and Effects
Refining and Polishing Your Animation
Designing and Creating Keyframes
Experimenting with Animation Techniques and Effects
Refining and Polishing Your Animation
Designing and Creating Keyframes
Experimenting with Animation Techniques and Effects
Refining and Polishing Your Animation
Designing and Creating Keyframes
Experimenting with Animation Techniques and Effects
Refining and Polishing Your Animation
Designing and Creating Keyframes
Experimenting with Animation Techniques and Effects
Refining and Polishing Your Animation
Designing and Creating Keyframes
Experimenting with Animation Techniques and Effects
Refining and Polishing Your Animation
Designing and Creating Keyframes
Experimenting with Animation Techniques and Effects
Refining and Polishing Your Animation
Designing and Creating Keyframes
Designing and Creating Keyframes
Here is the paragraphy: Designing and creating keyframes is a crucial step in bringing your animation to life in Procreate. A keyframe is a specific point in time where you define the position, scale, rotation, and other properties of an object or element. By setting keyframes, you can control the movement and behavior of your animation, creating a sense of fluidity and realism. To create a keyframe in Procreate, start by selecting the layer or object you want to animate, then go to the Animation tab and click on the "Add Keyframe" button. You can also use the shortcut "K" to add a keyframe. Once you've added a keyframe, you can adjust its properties, such as position, scale, and rotation, to create the desired movement. You can also experiment with different easing options, such as linear, ease-in, and ease-out, to control the speed and acceleration of your animation. By carefully designing and creating keyframes, you can create complex and engaging animations that capture the viewer's attention. Additionally, you can also use the onion skinning feature in Procreate to see the previous and next frames, making it easier to create smooth and fluid animations. With practice and patience, you can master the art of designing and creating keyframes, and take your animations to the next level.
Experimenting with Animation Techniques and Effects
Experimenting with animation techniques and effects is a crucial step in bringing your animation to life in Procreate. With a wide range of tools and features at your disposal, you can create unique and captivating animations that showcase your creativity. One technique to try is the use of layer blending modes, which can add depth and dimension to your animation. By combining different blending modes, you can achieve a range of effects, from subtle texture overlays to dramatic color shifts. Another technique to experiment with is the use of animation assistants, such as the onion skinning feature, which allows you to see the previous and next frames of your animation, making it easier to create smooth and fluid motion. You can also use the time-lapse feature to create a sense of speed and energy in your animation. Additionally, Procreate's animation features allow you to experiment with different frame rates, playback speeds, and loop options, giving you complete control over the pacing and timing of your animation. By pushing the boundaries of what's possible with Procreate's animation tools, you can create animations that are truly unique and engaging.