How To Delete A Blank Page In Google Docs
Here is the introduction paragraph: When working with Google Docs, one of the most frustrating issues users encounter is the presence of unwanted blank pages. These blank pages can disrupt the flow of your document, making it difficult to read and edit. If you're struggling with this issue, you're not alone. In this article, we'll explore the common problem of blank pages in Google Docs, discuss various methods to delete them, and provide advanced techniques for managing these pesky pages. First, let's dive into the root of the problem and understand why blank pages appear in Google Docs in the first place. By grasping the underlying causes, you'll be better equipped to tackle the issue and keep your documents organized and clutter-free. So, let's start by understanding the blank page issue in Google Docs.
Understanding the Blank Page Issue in Google Docs
The blank page issue in Google Docs can be frustrating, especially when you're working on an important document. It's not uncommon for users to encounter a mysterious blank page that seems to appear out of nowhere, disrupting the flow of their work. But what causes these unwanted blank pages to appear in the first place? To understand the blank page issue, it's essential to explore the common causes of this problem. By identifying the source of the blank page, you can take steps to prevent it from happening in the future. In this article, we'll delve into the reasons behind the blank page issue, including why blank pages appear in Google Docs, the common causes of unwanted blank pages, and how to identify the source of the problem. By understanding these factors, you'll be better equipped to tackle the blank page issue and ensure a smoother Google Docs experience. So, let's start by exploring why blank pages appear in Google Docs.
Why Blank Pages Appear in Google Docs
The appearance of blank pages in Google Docs can be attributed to several factors. One common reason is the presence of unnecessary page breaks, which can be inserted manually or automatically by the document's formatting. When a page break is inserted, it can create a blank page, especially if there is not enough content to fill the page. Another reason for blank pages is the use of section breaks, which can also create a new page. Additionally, if a document has a large font size or excessive spacing between paragraphs, it can cause the content to spill over onto a new page, resulting in a blank page. Furthermore, if a document has a lot of images or tables, they can also push the content onto a new page, creating a blank page. In some cases, blank pages can also be caused by formatting issues, such as incorrect margin settings or a mismatch between the document's layout and the printer's settings. Understanding the root cause of the blank page issue is essential to resolving it effectively.
Common Causes of Unwanted Blank Pages
When dealing with unwanted blank pages in Google Docs, it's essential to identify the root cause of the issue. One common cause is the presence of unnecessary page breaks. These breaks can be inserted manually or automatically by Google Docs when it encounters a large image, table, or other element that exceeds the page margin. To resolve this, users can try deleting the page break or adjusting the element's size to fit within the page margin. Another common cause is the use of incorrect section breaks. Section breaks can be used to separate different sections of a document, but if not used correctly, they can result in unwanted blank pages. To fix this, users can try deleting the section break or reformatting the document to use a different type of break. Additionally, formatting issues such as excessive spacing between paragraphs or incorrect margin settings can also lead to unwanted blank pages. Users can try adjusting the paragraph spacing or margin settings to resolve this issue. Furthermore, the use of tables or other layout elements can also cause unwanted blank pages. If a table or other element is too large to fit on a single page, Google Docs may insert a blank page to accommodate it. To resolve this, users can try resizing the table or element to fit within the page margin. By identifying and addressing these common causes, users can effectively delete unwanted blank pages in Google Docs and improve the overall formatting and appearance of their documents.
Identifying the Source of the Blank Page
When dealing with a blank page in Google Docs, it's essential to identify the source of the issue to resolve it effectively. The blank page can be caused by various factors, including formatting issues, incorrect page breaks, or even a single character or space that's not visible. To determine the source of the blank page, start by checking the document's layout and formatting. Look for any unnecessary page breaks, section breaks, or column breaks that might be causing the blank page. You can do this by going to the "View" menu and selecting "Show section breaks" or "Show page breaks." This will help you visualize the document's structure and identify any potential issues. Additionally, check the document's margins, headers, and footers to ensure they are not causing the blank page. If you're still unable to identify the source of the issue, try deleting the blank page and then re-inserting it to see if the problem persists. You can also try copying the content of the document into a new document to see if the blank page is specific to the original document. By methodically checking the document's layout, formatting, and content, you should be able to identify the source of the blank page and take the necessary steps to resolve the issue.
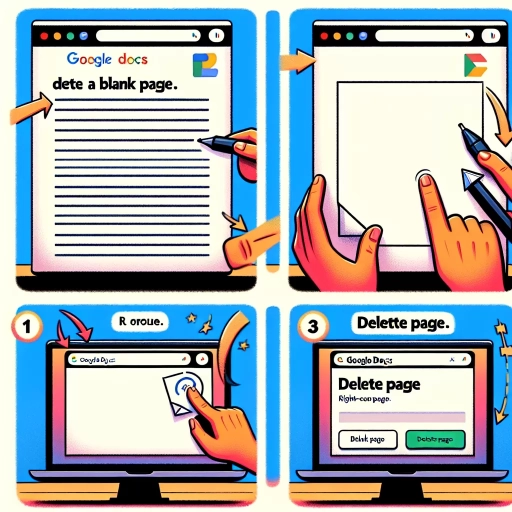
Methods to Delete a Blank Page in Google Docs
When working with Google Docs, it's not uncommon to encounter blank pages that can disrupt the flow of your document. Fortunately, there are several methods to delete a blank page in Google Docs, ensuring your document looks polished and professional. Three effective ways to remove blank pages include using the backspace or delete key, utilizing the "Edit" menu to remove a page, and adjusting page breaks to eliminate blank pages. By employing these techniques, you can efficiently eliminate unwanted blank pages and maintain a well-organized document. To start, one of the simplest methods is to use the backspace or delete key, which can be an effective way to remove a blank page, especially if it's located at the end of your document.
Using the Backspace or Delete Key
When it comes to deleting a blank page in Google Docs, using the backspace or delete key is a straightforward approach. To do this, place your cursor at the end of the text on the page preceding the blank page. Then, press the backspace key repeatedly until the cursor moves to the previous page, effectively deleting the blank page. Alternatively, you can also use the delete key to achieve the same result. Simply place your cursor at the beginning of the blank page and press the delete key until the page is removed. It's essential to note that this method only works if the blank page is at the end of your document. If the blank page is in the middle of your document, you may need to use a different method to delete it. Additionally, be cautious when using the backspace or delete key, as it can also delete other content in your document if not used carefully.
Utilizing the "Edit" Menu to Remove a Page
To remove a page in Google Docs, you can utilize the "Edit" menu. This method is particularly useful when you want to delete a blank page that is not at the end of your document. To do this, start by clicking on the page you want to delete. Then, go to the "Edit" menu and select "Delete page" from the drop-down list. Alternatively, you can also use the keyboard shortcut Ctrl+Shift+P (Windows) or Command+Shift+P (Mac) to delete the page. If you want to delete multiple pages, you can select the pages you want to delete by holding down the Ctrl key (Windows) or Command key (Mac) while clicking on the pages. Once you have selected the pages, go to the "Edit" menu and select "Delete page" to remove them. Note that this method will delete the entire page, including any content, headers, and footers. Therefore, make sure to review your document carefully before deleting a page to ensure that you are not removing any important information.
Adjusting Page Breaks to Eliminate Blank Pages
Adjusting page breaks is a simple and effective way to eliminate blank pages in Google Docs. To do this, go to the page break that is causing the blank page and click on it. You will see a blue line indicating the page break. Click on the blue line to select it, and then go to the "Format" tab in the top menu. From the drop-down menu, select "Line spacing" and then "Custom spacing." In the "Custom spacing" window, adjust the "Before" and "After" settings to 0, and then click "OK." This will remove the page break and eliminate the blank page. Alternatively, you can also use the "Page break before" and "Page break after" options in the "Format" tab to adjust the page breaks. By adjusting these settings, you can control where page breaks occur and eliminate blank pages. Additionally, you can also use the "Section break" option to start a new section on the same page, which can also help to eliminate blank pages. By using these methods, you can easily adjust page breaks and eliminate blank pages in Google Docs, making your document look more professional and polished.
Advanced Techniques for Managing Blank Pages
When working with documents, blank pages can be a frustrating and unnecessary addition, disrupting the flow and professionalism of the content. Advanced techniques for managing blank pages are essential for creating polished and well-structured documents. One approach to tackling this issue is by utilizing section breaks to control page layout, allowing for more precise control over page breaks and the elimination of unwanted blank pages. Additionally, customizing page settings can also play a crucial role in preventing blank pages from appearing in the first place. Furthermore, employing add-ons can automate the process of removing blank pages, saving time and effort. By exploring these techniques, individuals can refine their document management skills and produce high-quality documents. By understanding how to effectively use section breaks, individuals can take the first step towards mastering the art of blank page management.
Using Section Breaks to Control Page Layout
Using section breaks is an advanced technique to control page layout in Google Docs. A section break is a special type of break that allows you to divide your document into separate sections, each with its own page layout settings. By inserting a section break, you can change the page layout, margins, and other settings for a specific section of your document without affecting the rest of the document. To insert a section break, go to the "Insert" menu, select "Break," and then choose "Section break (next page)" or "Section break (continuous)." This will create a new section in your document, and you can then adjust the page layout settings for that section by going to the "Format" tab and selecting "Page setup." Section breaks are particularly useful when you need to create a document with different page layouts, such as a report with a title page, table of contents, and body. By using section breaks, you can easily switch between different page layouts and ensure that your document looks professional and well-organized. Additionally, section breaks can also help you to delete blank pages in your document. If you have a blank page at the end of a section, you can simply delete the section break to remove the blank page. Overall, using section breaks is a powerful technique for controlling page layout in Google Docs, and it can help you to create complex documents with ease.
Customizing Page Settings to Prevent Blank Pages
Customizing page settings is a crucial step in preventing blank pages in Google Docs. To do this, go to the "File" menu and select "Page setup." In the "Page setup" dialog box, you can adjust the page size, orientation, and margins to suit your needs. For example, if you're working on a document that requires a specific page size, such as A4 or Letter, you can select it from the "Page size" dropdown menu. Additionally, you can adjust the margins to ensure that your content is properly aligned and doesn't spill over onto the next page. By customizing your page settings, you can prevent unnecessary blank pages from appearing in your document. Furthermore, you can also use the "Section break" feature to divide your document into sections, each with its own page settings. This allows you to have different page settings for different parts of your document, which can be particularly useful for documents that require varying page layouts. By taking control of your page settings, you can ensure that your document looks professional and polished, and that blank pages are kept to a minimum.
Employing Add-ons to Automate Blank Page Removal
Employing add-ons to automate blank page removal is a game-changer for Google Docs users. By leveraging the power of third-party add-ons, you can streamline the process of deleting blank pages and save a significant amount of time. One popular add-on for this purpose is "Remove Blank Pages" which can be easily installed from the Google Workspace Marketplace. Once installed, this add-on allows you to automatically detect and remove blank pages from your document with just a few clicks. Another useful add-on is "DocuTools" which offers a range of features including blank page removal, making it an excellent choice for users who want to automate multiple tasks at once. By utilizing these add-ons, you can eliminate the tedious process of manually deleting blank pages and focus on more important aspects of your work. Additionally, these add-ons can also help you to maintain a clean and organized document, which is essential for professional and academic purposes. Overall, employing add-ons to automate blank page removal is a simple yet effective way to boost your productivity and efficiency in Google Docs.