How To Inject Ozempic In Stomach
 There's no denying that managing diabetes is an ongoing process that requires consistent care and attention. If your doctor has prescribed Ozempic – a medication known for its effectiveness in treating type 2 diabetes - you might be wondering how to administer it properly, primarily if it's through the stomach. This article provides a straightforward and practical guide about using the insulin pen, how to make this new routine less daunting, and avoid common mistakes. Dive into this comprehensive guide, as we explore "Preparation is Key," a segment that equips you with the essential prerequisites before beginning this new regimen. Following that, we unravel the "Step-by-Step Injection Guide," simplifying the process for you. Lastly, we detail out some "Common Injection Mistakes to Avoid" to assure your journey is smooth and without any hiccups. By grasping these points, you'll be better equipped to insert the Ozempic medication in the stomach accurately and comfortably. Now, let's unravel the first piece of the puzzle - Preparation is key.
Preparation is Key
The key to successful medical practices lies in the power of preparation. Emphasizing preparation routines enhances dexterity, precision and security, thus ensuring optimal patient care. Understanding this, we delve into three principal aspects of medical preparation: choosing the right equipment, preparing the injection site, and lastly, understanding the dosage and administration. Initially, the equipment used plays a pivotal role in determining the outcome of any medical procedure. It is crucial to understand that not all equipment is created equally; hence, making an informed decision is paramount. Secondly, preparing the injection site is not just about sanitation - rather, it is a combo of cleanliness, right observation to avoid visible veins and nerves, and the wise choice of the injection site to minimize discomfort. Lastly, understanding the dosage and administration is about knowing the right quantity of medication for each patient and how it should be administered. It is a critical balance to ensure effective treatment without causing unnecessary harm or side effects. Now, let's embark on the journey of understanding why choosing the right equipment can make a significant difference in medical practices.
Choosing the Right Equipment
When preparing to administer your Ozempic injection, a critical aspect is choosing the right equipment. This involves selecting the appropriate, FDA-approved injection pen and needle size for individual use. Ozempic comes in injection pens that carry either 0.5mg or 1mg of semaglutide in each dosage. An essential element to understand about these pens is that they are pre-filled with Ozempic, which eliminates the need for vials and syringes customarily seen with other injectable medications. Each pen is designed to deliver several doses, so you don't need a new pen with every injection. For an optimal experience, opt for a small gauge needle. Not only are smaller gauge needles less painful due to their size, but they also pose minimal risk of injecting the medication too deeply into the muscle. Most experts recommend a needle of 4-5mm in length, which substantially mitigates the risk of intramuscular injection. Once you have the right needle, you also have to consider its installation to the pen. The needles are separately packaged and must be carefully affixed to the pen for each injection. Unused needles should be replaced and properly disposed of after each shot to prevent cross-contamination or the spread of infections. Moreover, having a skinfold measuring device can also prove helpful, especially for those with limited experience injecting themselves. This device can assist in measuring the thickness of the skinfold in the stomach area, informing users of the accurate injection depth. Remember, Ozempic needs to be injected subcutaneously, that is, into fatty tissue and not into the muscular area. You also need to consider practical items such as alcohol swabs. These are not included with Ozempic but are necessary for proper pre-injection cleaning of your skin to avoid potential infections. Other optional items include latex-free gloves, a specialized sharps container for safe needle disposal, and a clean, well-lit area to conduct the injection. Choosing the correct equipment can make the process of injecting Ozempic into your stomach much smoother and less intimidating. It is crucial that these tools are utilized correctly and stored appropriately, maintaining hygiene and safety standards. Each component, although it may seem trivial, plays a vital role in making the injection process more seamless and comfortable. Therefore, these factors' consideration solidifies the significance of the statement, "preparation is key." Being well-informed about the appropriate equipment for Ozempic injection, how to use it, and the risk factors associated with it, ensures the administration process will be less daunting and more efficient. Consulting with healthcare providers or professionals for personalized advice can present more clarity if needed. At the end of the day, the goal is to make the treatment as manageable as possible, encouraging consistent usage for better health outcomes.
Preparing the Injection Site
Preparing the Injection Site
Before administering an injection like Ozempic, preparing the site is a critical step that can greatly influence the overall procedure’s efficacy and the patient’s comfort. This preparation is all about ensuring the injection area is safe, clean, and ready for the dose. The optimum site for Ozempic administration, as with most subcutaneous injections, is the abdomen or stomach area. However, it is essential to rotate sites with each administration to avoid skin thickening or pits. Beginning with washing hands thoroughly, preparation can reduce risks of infection. Use warm soapy water and scrub for at least 20 seconds to eliminate potential pathogens. Disposable gloves are also recommended if they are available. Next comes preparing the skin at the injection site. Remember, alcohol wipes should be used to clean the skin. Starting at the center of the injection site, wipe in a circular outward motion. This should cover an area larger than the injection point itself. It’s crucial to let this area air dry completely before proceeding with the injection. Care should be taken to ensure that the injection site is free from scars, wounds, rashes, or skin disorders. It may not only affect absorption of the medication but could also increase the risk of infection. If any such complications are present in the chosen site, it is better to select a different area. After the injection, a gentle massage can facilitate better absorption of the medication. However, do not rub harshly as this could lead to slight bruising. Instead, apply a gentle circular motion for about a minute following the injection. Lastly, it is important to carefully dispose of the used needles, prefilled pens, or syringes. These should never be reused. Always use a sharps container, marked and puncture-resistant, for disposal. This prevents accident and injury and helps maintain overall cleanliness and hygiene. Proper preparation and injection site maintenance encourages effective medication delivery into the body and reduces the risk of potential complications. Remember, it’s not just the mere process of injecting; preparation is key. It embodies concern for safety, cleanliness, attentiveness, and a comprehensive understanding of the procedure, bringing convenience and confidence into injecting medication like Ozempic. The efficacy of medication largely relies on these factors, thus supporting the notion that 'Preparation is Key'.Understanding the Dosage and Administration
An essential aspect of preparing for a successful Ozempic injection process is understanding the drug's dosage and administration guidelines. While the healthcare professionals provide a recommendation for your precise dose, it is important for you to fully comprehend these criteria to avoid potential complications and maximize the effectiveness of the treatment. Ozempic is typically prescribed in two starting doses: 0.25 mg or 0.5 mg per week. After starting on the lower dose for at least four weeks, your healthcare provider may increase your dose until the desired blood sugar control level is achieved. However, the timing and location of the injection are other critical facets of the administration process that might potentially affect the drug's effectiveness. It's recommended to inject Ozempic once a week on the same day, ensuring you don't confuse or forget about the routine. If you happen to miss a dose, it's better to take the missed dose as soon as you remember, provided there are at least two days before the next regularly scheduled dose. In terms of injection location, the stomach is generally the preferred site. For administering Ozempic in the stomach, ensure the area is clean, pinch a fold of skin, and inject the needle at a 90-degree angle. However, it is recommended to change the injection site each week to avoid skin issues. The abdomen, thigh, and upper arm (if someone else is administering the injection) are other potential sites. One other factor to keep in mind is the handling and storage of Ozempic. The pen should be stored in the refrigerator but not be in the freezer. For usage, let it come to room temperature, which usually takes about 15 minutes. Moreover, checking the solution for any particulates and ensuring it's clear and colorless before use is essential. While these guidelines provide a robust framework, always remember that each person's case can slightly vary, so it's important to follow your doctor's advice tailored to your health conditions. In case of any difficulty or experiencing side effects, do not hesitate to reach out to your healthcare provider or pharmacist. A thorough understanding of Ozempic's dosage and administration is a credible step toward an efficient and effortless injection routine, bringing you closer to better health.
Step-by-Step Injection Guide
Medical injections, whether self-administered or provided by a practitioner, are an integral part of many treatment plans. Ensuring these injections are done safely and effectively requires a careful process that is easy to understand and follow. This detailed, step-by-step guide outlines three crucial stages that promote safe and efficient injections: Step 1: Wash Your Hands and Prepare the Area, Step 2: Remove the Needle Cap and Attach the Needle, and Step 3: Pinch the Skin and Inject the Medication. By adhering to these steps, users can significantly reduce the risks associated with injections such as infection or incorrect application. The first of the three stages, crucial to establishing a clean, safe environment for the injection, emphasizes the importance of hand hygiene and preparing the injection site properly. Let's delve into this crucial first step – washing your hands and preparing the area.
Step 1: Wash Your Hands and Prepare the Area
The first and most crucial phase of the injection routine involves a critical tactic of maintaining cleanliness—hand washing—and organizing the injection area. Inadequate observance of this step might expose you to infections or impact the overall success of the injection process, explaining why "Washing Your Hands and Preparing the Area" commands a significant spotlight in the "Step-by-Step Injection Guide." As a starter, washing your hands is a significant health routine that cannot be overemphasized. Always use warm water combined with soap, scrub thoroughly for at least 20 seconds, focusing on the spaces between your fingers and under your nails, then rinse off the soap and dry off. This procedure ensures that you minimize the risk of injecting harmful germs or bacteria into your body during the injection process. Once the handwashing is thoroughly done, it's time to organize your working area. You can do so by choosing a flat, clean, well-lit area. A desk or tabletop would be an ideal choice for this purpose. Clean the surface with a disinfectant wipe to get rid of any possible bacteria that might contaminate your injection. On the clean surface, layout your Ozempic injector pen, a new needle, and discardable puncture-proof container within an arm's reach. Double-check to verify that all the materials necessary for the injection are available and that you have ample lighting to avoid any mistakes during the injection process. However, while washing your hands or cleaning the area around, make sure that you avoid using alcohol-based sanitizers or cleansing wipes since alcohol can adversely affect Ozempic's efficiency. Consider wearing disposable gloves if you'll assist someone else with their injection. It helps to limit the transfer of germs, and it's crucial they be discarded immediately after use. This step is simple, but its proper execution is foundational to the success of the entire injection process. It aids not only in minimizing possible contaminations but also in creating an orderly, calm, and anxiety-free environment necessary when self-administering medications like Ozempic.
Step 2: Remove the Needle Cap and Attach the Needle
The second step in your Step-by-Step Injection guide involves carefully removing the needle cap and attaching the needle onto your Ozempic injection pen. Now that you have your hands washed and your injection kit ready, get prepared to use the needle. Take note, even though the process is easy, it requires precision and focus. Let's walk through the steps carefully. Firstly, you need to remove the needle from its protective package. This will reveal the two needle caps - the outer cap, which is larger and typically has a vibrant colour, and the inner cap, which is smaller and usually transparent. Before you continue, engage in a short visual inspection of the needle. Make sure it's not damaged, bent, or rusty as any irregularities could potentially harm you. If you detect any form of imperfection, discard the needle safely and start the process again with a new needle. Upon confirming the needle's good condition, use the screw-on motion to attach it to your Ozempic pen. Spin it until it's firmly attached - a loose needle could lead to inaccurate dosage or even dangerous accidents if it falls off during the injection. However, be careful not to overtighten as this could damage the pen or needle threading. Once securely attached, pull off the outer needle cap and keep it aside but DO NOT dispose of it. It will be used later. Now, take off the inner needle cap to expose the needle, and voila! The needle is attached to your Ozempic injection pen, ready for use. Remember, this step needs to be carried out on a clean surface. Hygiene is a critical factor that can determine the success of your self-administered Ozempic injection. High standards of cleanliness will greatly diminish the risk of infections or complications. Keep the needle cap on until you're ready to administer the injection and always endeavour not to contact the needle when it's exposed. Thus, maintaining its sterility for the injection procedure. It's also essential to mention that ideal needle practice considers disposing of a needle immediately after one use. Sharing a needle or reusing it may lead to severe health issues and potential transmission of diseases. So, it's strictly non-negotiable; one needle, one use, no exceptions. Meticulously executing the needle-attaching sequence is vital in self-injection of medication like Ozempic. Don't rush the steps; take your time. The entire process is designed to maximize the efficacy of the medication. So, remember, remove, inspect, attach, and remove the caps in that particular order!
Step 3: Pinch the Skin and Inject the Medication
Step 3: Pinch the Skin and Inject the Medication
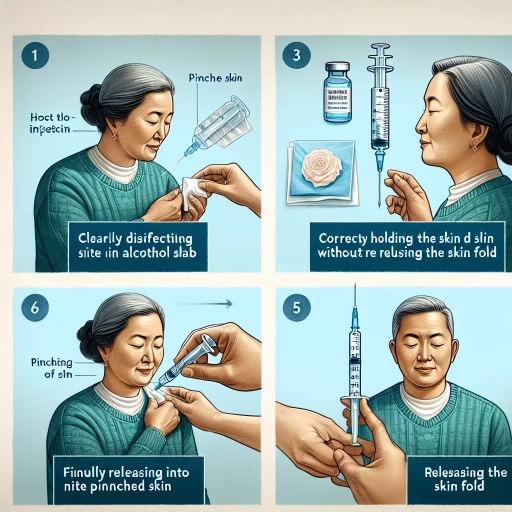
In the often daunting saga of self-injection, Step 3 is generally where apprehensions and doubts collide into full-blown reality. This step asks you to finally commit to the process by pinching your skin and injecting the medication. However, despite seeming overwhelming, with the proper guidance, it can be executed flawlessly, providing significant relief and health benefits. Before delving into the process, it's essential to understand what "pinching the skin" means in the context of injecting Ozempic, a type of GLP-1 receptor agonist, into the stomach. When you 'pinch' your skin, you're essentially creating a small mound which separates the skin layer from the vasculature underneath. This ensures that the injection only penetrates the skin and fatty tissue - not the muscle layer. It’s vital because Ozempic, which assists with blood sugar regulation, should only be injected subcutaneously, or under the skin, for effective absorption and resilience. Now, onto the actual process. Using your thumb and index finger, delicately elevate a small portion of the skin. Maintain this pinch throughout the injection process. Hold the Ozempic pen at a 90-degree angle to the pinched skin. Click the push-button at the top of the injection pen. You'll know the drug has been fully delivered when the dose counter returns to '0'. While executing this step, remember to relax your stomach muscles - tensed muscles can make the process more challenging and may result in discomfort. To make this process more manageable, try rotating the injection sites occasionally. The rationale behind this is simple - an area that has been recently penetrated may be more sensitive, so it’s advisable to give it time to heal. Though stomach is the most common site for injecting Ozempic, you can also select your thigh or the back of your upper arm for this purpose. Rectifying common misconceptions can also help ease this process. A common fear is that self-injecting a medication like Ozempic may cause significant pain. However, the needles used are generally very slender and designed to minimize discomfort as much as possible. In summary, Step 3 of this Step-by-Step Injection Guide - Pinch the Skin and Inject the Medicine - is a crucial stride in ensuring the efficacy of Ozempic. It's about overcoming apprehensions to realize health benefits. Through understanding and proper practice, it can be performed safely and smoothly, setting the foundation for better blood sugar control and overall health.Common Injection Mistakes to Avoid
Administering injections is a healthcare task commonly undertaken by various professionals and even by patients themselves in cases of chronic conditions like diabetes. However, it's not devoid of common mistakes which can severely affect the effectiveness of the drug and potentially lead to further health complications. The most frequently encountered errors include Incorrect Needle Depth and Angle, Not Pinching the Skin Properly, and Not Following the Recommended Dosage. These salient missteps are grave because they can lead to either the misplacement of medication or even to overdose, both of which can adversely influence the treatment process and the patient's health status. Navigating through these mistakes can drastically improve the efficiency of the self-drug administration regime, promoting positive health outcomes. This article will shed light upon each of these individual mistakes, starting with the incorrect needle depth and angle - a common error that can lead to major consequences such as painful injections or missed doses due to improper absorption. Grasping the essence of injecting at the right depth and angle is crucial to ensure safe and effective medication delivery, with little discomfort to the patient. It's paramount to master these administrative nuances to proactively safeguard our health.
Incorrect Needle Depth and Angle
When it comes to injecting Ozempic into the stomach area, one common error is incorrect needle depth and angle. Understanding the anatomy is key to correct needle placement. The stomach, specifically the abdominal fatty tissue, is an ideal site for Ozempic injection, as medicines get absorbed well here. However, inserting the needle too deeply can cause the medicine to venture into the muscle, which is not ideal as it can lead to discomfort, inaccurate absorption, and possible complications. For adults, a subcutaneous injection needle is typically 4 to 5 millimeters in length and the injection should be accomplished at a 90-degree angle. However, if a person is thin or lean, a 45-degree angle may be more suitable to avoid injecting into the muscle. Incorrect angle and depth can also affect the rate at which the medication is absorbed, potentially making it less effective. When the needle is inserted at the wrong angle or if it's too deep, it might miss the subcutaneous fatty layer. Conversely, if it's too shallow, it may not reach the subcutaneous fatty tissue, instead remaining in the skin layer. Both instances hamper proper medication absorption and reduce the effectiveness of the drug. Moreover, incorrect needle positioning can lead to injection pain, bruising, nodules under the skin, and skin injuries. The selection of the needle itself is also critical. Keep in mind that choosing a lengthy or larger gauge needle can increase the potential for unintentionally injecting into muscle tissue. Hence, it's recommended to use smaller or shorter needles to minimize complications. Typically, a 32-gauge 4mm or 6mm needle is the optimal choice for subcutaneous injections such as Ozempic. Therefore, recognizing correct needle depth and poke angle is crucial for maximum medicine utilization and minimal discomfort. It sounds simple but can make a significant difference to the effectiveness of the injection and the overall treatment strategy for managing diabetes. Practicing this technique and maintaining consistency will result in seamless and more comfortable injections, allowing for optimal diabetes management. Remember, when in doubt, always consult a healthcare professional or your diabetes care team, who can provide proper guidance and even demonstrate the correct technique for you. In summary, incorrect needle depth and angle is a common injection mistake that not only reduces the effectiveness of the medication but also can cause discomfort and possible complications. It can be avoided by understanding the correct technique for subcutaneous injections, choosing the right needle size, and consulting professionals when in doubt. This will ensure the maximum benefit from the injected Ozempic and contribute significantly to effective diabetes management.
Not Pinching the Skin Properly
Not Pinching the Skin Properly is a common injecting mistake to avoid and can be a variety of ramifications on a patient's well-being. For those administering injections like Ozempic, a drug utilized in the treatment of Type 2 diabetes, it's crucial to understand, implement and remember the importance of correctly pinching the skin during the injection procedure. Pinching the skin effectively plays a major role in preventing the needle from going too deep which then avoids the medication reaching muscle tissue rather than its intended target, the subcutaneous fat. This error can cause pain, potential muscle damage, and less effective medication delivery, affecting the overall therapeutic impact of the drug. For an individual injecting Ozempic or any other subcutaneous medications, the recommended injection sites are usually the abdomen or thighs, however, it's important to inject at least two inches away from the belly button when using the abdomen as a site. The patient should use a safe, two-handed technique to pinch their skin – using one hand to mold a 'pinch' of skin and fat, and the other to carefully administer the injection. While fine needles, such as those used with many insulin injections, are designed to decrease discomfort, correct skin pinching can also significantly reduce injection pain. Many might experience anxiety around self-injection and might rush the skin pinching process to get the injection over with or avoid it altogether due to concerns of increasing pain. However, pinching the skin isn’t a step to be skipped. Patients should be taught how to do it properly and supported throughout the process. Accurate education could significantly decrease the complications and side effects associated with incorrect pinching techniques. The patient should also receive training regarding the injection angle and depth, and correct needle disposal. Moreover, rotating the injection site is also part of this procedure to avoid the development of hard lumps or thickened skin areas, known as lipohypertrophy, which may affect the absorption rate of the medication and its overall effectiveness. In conclusion, not pinching the skin properly before injecting has several implications that could be detrimental to the patient’s treatment plan. It is necessary for both patients and healthcare professionals administering these injections to be aware of this, to ensure that the medication functions in its intended manner and supports the well-being of the person receiving the medication. Therefore, avoiding improper pinch is just one of the ways to make sure that injections are administered safely and effectively.
Not Following the Recommended Dosage
Regardless of the type of medication used, adhering to the recommended dosage is crucial, and Ozempic is no exception. Not following the recommended dosage is one common injection mistake that can lead to severe repercussions. Typically, Ozempic is injected once a week, and the dosage should neither be increased abruptly nor skipped without the doctor's consent. Not following these guidelines can result in an array of complications, including significant fluctuations in blood sugar levels. Increasing the dosage might lead to hypoglycemia (low blood sugar), which is potentially dangerous and may result in symptoms such as confusion, dizziness, hunger, and even loss of consciousness. In contrast, skipping doses may cause hyperglycemia (high blood sugar), a condition that can lead to long-term complications if not managed promptly, including heart disease, nerve damage, and kidney disease. Moreover, altering the dosage without expert guidance may reduce the effectiveness of Ozempic in managing diabetes and potentially lead to weight gain, disrupting the patient's efforts in maintaining a healthy weight. It can compromise the overall treatment plan, and it may increase the risk of the glucagon-like peptide-1 (GLP-1) analogue's side effects, such as gastrointestinal issues like nausea, vomiting, diarrhea, and abdominal discomfort. Furthermore, injecting a larger dose could exacerbate injection site reactions, including redness, swelling, itchiness, and pain. Patients might also experience symptoms similar to the flu, including headaches, sinus congestion, sore throat, or even an increase in pulse rate. Importantly, following the recommended dosage goes hand in hand with injecting the medication correctly. Several factors influence the effectiveness of the injection, and a common mistake patients make is injecting Ozempic in the wrong area of the stomach. The medication should be self-administered in the fatty tissues beneath the skin, known as subcutaneous tissues, rather than the muscle. The right place to inject is at least two inches away from the belly button. In conclusion, not following the recommended dosage and improper injection can greatly impact the effectiveness of Ozempic and lead to undesired side-effects. Hence, it should be vigilantly avoided. It's crucial for patients to communicate openly with their healthcare providers, ask questions, and express any concerns about their medication and its administration. This will ensure that patients are confident about their ability to handle and administer their diabetes medication correctly.