How To Do Mla Format On Google Docs
Here is the introduction paragraph: When it comes to writing academic papers, formatting is just as important as the content itself. One of the most widely used formatting styles is the Modern Language Association (MLA) format, which is commonly used in the humanities. To ensure that your paper is properly formatted, you need to know how to set up your document, format your content, and add citations and references correctly. In this article, we will guide you through the process of doing MLA format on Google Docs, starting with setting up your document. We will cover the essential steps to format your MLA-style document, including setting up your margins, font, and line spacing. Additionally, we will show you how to add citations and references in MLA format, making it easy to give credit to your sources. By the end of this article, you will be able to confidently format your MLA paper in Google Docs. First, let's start by setting up your Google Doc for MLA format.
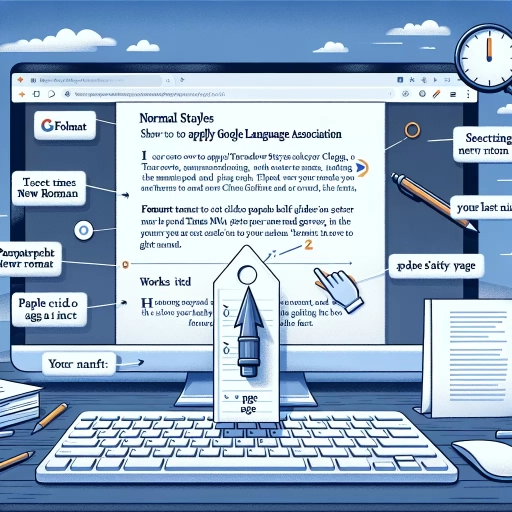
Setting Up Your Google Doc for MLA Format
When setting up your Google Doc for MLA format, there are several key elements to consider to ensure your document meets the required standards. To start, it's essential to choose the correct font and size, as this will set the tone for the rest of your document. Additionally, setting the margins and indentation correctly is crucial for maintaining a professional and organized appearance. Furthermore, enabling the ruler and gridlines can help you achieve precise alignment and formatting. By following these steps, you can ensure your Google Doc is properly set up for MLA format. In this article, we will explore each of these elements in more detail, starting with the importance of choosing the correct font and size.
Choosing the Correct Font and Size
When it comes to setting up your Google Doc for MLA format, choosing the correct font and size is crucial. The Modern Language Association (MLA) recommends using a legible font, typically a serif font, in size 12 points. The most commonly used font for MLA format is Times New Roman, as it is easy to read and provides a professional look. However, you can also use other serif fonts such as Garamond, Georgia, or Cambria. It's essential to avoid using sans-serif fonts like Arial, Calibri, or Helvetica, as they are not recommended for MLA format. Additionally, make sure to set the font size to 12 points, as this is the standard size for MLA format. You can adjust the font size in the toolbar or by using the keyboard shortcut Ctrl+Shift+> (Windows) or Command+Shift+> (Mac). It's also important to note that the font size should be consistent throughout the document, including the title page, headings, and body paragraphs. By choosing the correct font and size, you can ensure that your Google Doc meets the MLA format requirements and presents your work in a professional and readable manner.
Setting the Margins and Indentation
Setting the margins and indentation in a Google Doc is a crucial step in achieving the correct MLA format. To set the margins, go to the "File" menu and select "Page setup." In the "Page setup" dialog box, set the top, bottom, left, and right margins to 1 inch. This will ensure that your document has the required margin space on all sides. Next, to set the indentation, go to the "Format" tab and select "Align & indent." In the "Indentation options" section, select "First line" and set the indentation to 0.5 inches. This will create a half-inch indentation for the first line of each paragraph, which is a standard requirement in MLA format. Additionally, make sure to set the "Special indent" to "None" to avoid any unnecessary indentation. By setting the margins and indentation correctly, you will be able to create a well-formatted MLA document that meets the required standards.
Enabling the Ruler and Gridlines
To enable the ruler and gridlines in Google Docs, start by clicking on the "View" menu located at the top of the page. From the drop-down menu, select "Show ruler" to display the ruler at the top of the page. This will allow you to adjust the margins and tab stops as needed. Additionally, to enable gridlines, go back to the "View" menu and select "Gridlines." This will display a grid of lines on the page, helping you to align text and images more accurately. You can also customize the gridline settings by going to the "Format" tab and selecting "Page setup." From here, you can adjust the gridline spacing and style to suit your needs. By enabling the ruler and gridlines, you can ensure that your Google Doc is properly formatted and aligned, making it easier to work with and more visually appealing. This is especially important when working with MLA format, as it requires specific margins and formatting guidelines. By taking the time to set up your Google Doc with the ruler and gridlines, you can save time and effort in the long run and ensure that your document meets the necessary requirements.
Formatting Your MLA-Style Document in Google Docs
When it comes to formatting your MLA-style document in Google Docs, there are several key elements to consider. To ensure that your document meets the requirements of the Modern Language Association (MLA) style, you'll need to pay attention to the header, the first page, and the Works Cited page. One of the first steps in formatting your MLA-style document is to create a header with your last name and page number. This header will appear on every page of your document, and it's essential to get it right. In this article, we'll take a closer look at how to format your MLA-style document in Google Docs, starting with creating a header with your last name and page number. We'll also explore how to format the first page with a running head and set up the Works Cited page. By following these steps, you'll be able to create a well-formatted MLA-style document in Google Docs. So, let's get started with creating a header with your last name and page number.
Creating a Header with Your Last Name and Page Number
To create a header with your last name and page number in Google Docs, follow these steps. First, click on the "Insert" menu and select "Header" from the drop-down list. This will open the header section at the top of your document. Next, type your last name in the header section, making sure to leave a space between your last name and the page number. To insert the page number, click on the "Insert" menu again and select "Page number" from the drop-down list. Choose the "Top of page" option and select the "Right" alignment. This will insert the page number in the top right corner of your document, next to your last name. Make sure to check the "Different first page" box if you want to exclude the header from the first page of your document. Finally, click on the "Apply" button to save your changes. Your header should now display your last name and page number, formatted according to MLA style guidelines.
Formatting the First Page with a Running Head
When formatting the first page of your MLA-style document in Google Docs, it's essential to include a running head with your last name and page number. To do this, go to the "Insert" menu and select "Header." In the header section, type your last name, followed by a space, and then the page number. For example, if your last name is "Smith," your running head should look like this: "Smith 1." Make sure to leave a half-inch margin from the top of the page and align the running head to the right. You can also use the "Right align" feature in the toolbar to achieve this. Additionally, ensure that the font is in 12-point Times New Roman, which is the standard font for MLA formatting. As you continue to work on your document, the running head will automatically update the page number for you. It's also important to note that the running head should appear on every page of your document, except for the Works Cited page. By following these steps, you can easily format the first page of your MLA-style document in Google Docs and ensure that your running head is accurate and consistent throughout your paper.
Setting Up the Works Cited Page
Setting up the Works Cited page is a crucial step in formatting your MLA-style document in Google Docs. To start, create a new page by clicking on the "Insert" menu and selecting "Page break" or by pressing "Ctrl+Enter" on your keyboard. This will ensure that your Works Cited page is on a separate page from the rest of your document. Next, center the title "Works Cited" at the top of the page, using the "Center align" tool in the toolbar. Make sure to use title case, capitalizing the major words, and do not italicize or underline the title. Now, list your sources in alphabetical order, using a hanging indent for each entry. To create a hanging indent, select the text and go to the "Format" menu, then "Align & indent," and finally "Indentation options." In the "Indentation options" dialog box, select "Hanging indent" and set the indent to 0.5 inches. Each source entry should include the author's last name, first name, title of the source, publication date, and publication information, formatted according to MLA guidelines. For example, a book entry would include the author's name, title of the book, publication date, publisher, and page numbers, while a website entry would include the author's name, title of the webpage, publication date, and URL. Finally, double-space the entire Works Cited page, using the "Line spacing" tool in the toolbar, to ensure that it meets MLA formatting requirements. By following these steps, you can create a properly formatted Works Cited page in Google Docs that will help you earn top marks on your MLA-style document.
Adding Citations and References in MLA Format
When writing a research paper in MLA format, it is essential to properly cite sources to avoid plagiarism and give credit to the original authors. Adding citations and references in MLA format can seem daunting, but it is a crucial step in the research process. To effectively incorporate citations and references, it is necessary to understand how to insert in-text citations with parenthetical references, create a works cited entry for a source, and manage multiple sources and citations. By mastering these skills, writers can ensure the accuracy and credibility of their work. In this article, we will explore the process of adding citations and references in MLA format, starting with the basics of inserting in-text citations with parenthetical references.
Inserting In-Text Citations with Parenthetical References
When inserting in-text citations with parenthetical references in MLA format, it is essential to follow specific guidelines to ensure accuracy and consistency. In MLA style, in-text citations are used to credit sources within the text, and parenthetical references are used to provide additional information about the source. To insert an in-text citation with a parenthetical reference, start by placing the parenthetical reference at the end of the sentence or quotation, inside the punctuation mark. The parenthetical reference should include the author's last name and the page number(s) where the information can be found, separated by a space. For example, (Smith 24) or (Johnson 12-15). If the source has no author, use the title in the parenthetical reference, and if the source has no page numbers, omit them. It is also important to note that if the parenthetical reference is at the end of a sentence, the period should be placed after the reference, not before. Additionally, if the source is cited multiple times in the same paragraph, the parenthetical reference can be omitted after the first citation, as long as the source is clear from the context. By following these guidelines, writers can effectively use in-text citations with parenthetical references to credit their sources and maintain the integrity of their work.
Creating a Works Cited Entry for a Source
When creating a Works Cited entry for a source in MLA format, it is essential to provide accurate and detailed information to enable readers to locate the source. The general format for a Works Cited entry includes the author's last name, first name, title of the source in title case, publication date, publication medium, and page numbers if applicable. For example, a Works Cited entry for a book would include the author's name, title of the book in title case, publication date, publication medium, and page numbers if applicable. The entry would be formatted as follows: Lastname, Firstname. Title of Book. Publication Date. Publication Medium. Page Numbers. For instance, Smith, John. The History of Literature. 2020. Print. 23-45. In contrast, a Works Cited entry for a website would include the author's name, title of the webpage in title case, publication date, title of the website, publication medium, and URL. The entry would be formatted as follows: Lastname, Firstname. "Title of Webpage." Title of Website, Publication Date, URL. For example, Johnson, Mary. "The Impact of Climate Change." Environmental News, 10 Jan. 2022, www.environmentalnews.com/climate-change. It is crucial to note that the formatting of a Works Cited entry may vary depending on the type of source, and it is essential to consult the MLA Handbook or online resources for specific guidelines. By providing accurate and detailed information in a Works Cited entry, writers can ensure that their sources are properly credited and that readers can locate the sources with ease.
Managing Multiple Sources and Citations
Managing multiple sources and citations is a crucial aspect of academic writing, particularly when working with MLA format. As you conduct research and gather information from various sources, it's essential to keep track of each source's details, including the author's name, title, publication date, and page numbers. In Google Docs, you can use the built-in citation tool to help you manage your sources and format your citations correctly. To add a citation, simply click on the "Tools" menu, select "Citations," and choose the type of source you're citing. You can then enter the source's details, and Google Docs will automatically format the citation in MLA style. Additionally, you can use the "Citation" tool to create a bibliography or works cited page, which will list all the sources you've cited in your document. To manage multiple sources, you can also use the "Citation" tool to create separate citations for each source, and then use the "Insert citation" feature to insert the citations into your document. Furthermore, you can use the "Citation" tool to format your citations in different styles, such as APA or Chicago, if needed. By using the citation tool in Google Docs, you can easily manage multiple sources and citations, and ensure that your document is formatted correctly in MLA style.