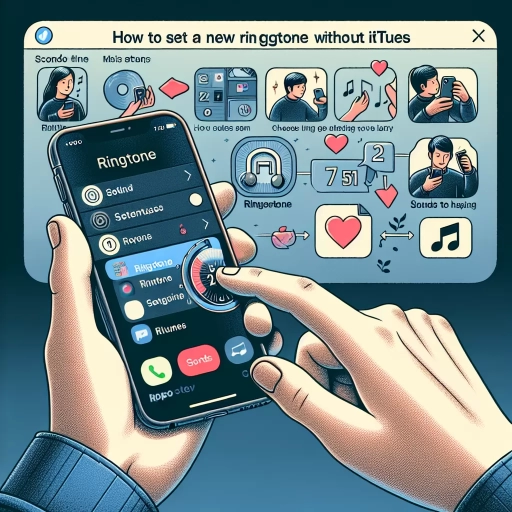
How To Set Ringtone In Iphone Without Itunes
 Have you ever experienced the monotony of the traditional iPhone ringtone and wished to personalize your ringtone? The common notion is that setting a personal ringtone in an iPhone would require iTunes and may even be a complicated process. We're here to debunk this myth and provide you with easier alternatives. Basing our discussion, we will delve into and detail three efficient ways to set your iPhone ringtone without using iTunes. Firstly, we'll examine creating a tone through the built-in GarageBand application. Secondly, we'll explore how you can master the utilization of a third-party application. Lastly, but definitely not the least, we'll peel the layers of using iCloud Drive and show how it can be an asset for this purpose. Hang on as we transition into the first method and welcome you to the world of GarageBand, a multifaceted application tool entrenched with astonishing features.
Method 1: Using GarageBand
Method 1: Using GarageBand, eloquently unravels the creative process one could harness to create a unique ringtone. This method introduces a versatile tool that not only promotes user engagement, but also compels exploration into the realm of sound manipulation. This article delineates three crucial steps consistent to the method: Downloading and Installing GarageBand, Importing a Song into GarageBand, and Trimming and Exporting the Song as a Ringtone. Initially, users are guided through the seamless process of setting up GarageBand. An integral part of iOS, this software’s installation is often already secured within Apple devices thus creating an uninterrupted environment for creativity. Next, users learn the art of importing a song into the software, transforming a mere music track into a potential ringtone. Finally, the song is meticulously refined, generating the perfect ringtone tailored uniquely for individuals. Now that we have broadly looked at the general process, let's delve deeper into the first step - Downloading and Installing GarageBand. This initial stage lays the groundwork for the entire procedure, setting the tone for the creative journey ahead.
Step 1: Download and Install GarageBand
GarageBand, designed by Apple Inc., is an innovative and creative platform that enables you to set your unique ringtone on your iPhone without the use of iTunes. It is the first step and the pillar on which the method of setting your ringtone relies on, therefore, not to be overlooked. Getting started, the downloading and installation process of GarageBand poses no complicated steps. With the application being freely available in the App Store, it becomes a breeze to download it. Access the App Store from your iPhone, look for GarageBand using the search bar located at the bottom of the screen, and then tap on the 'GET' button followed by the 'INSTALL' button. Apple might require your Apple ID password for initiating the download process - ensure to input it correctly. Sometimes, the download button may appear as a cloud icon with an arrow pointing downwards if you have previously downloaded the application. In such cases, tap the icon to start the download process. After successful completion of the process, the GarageBand icon will appear on the home screen of your iPhone. For the first time, you will need to wait for a few seconds for the initialization process, post which, the application will open. The GarageBand app comes loaded with numerous features and facilities which can seem complex at the onset, but the user-friendly interface ensures a smooth journey. The features incorporated within GarageBand are brilliantly arrayed, allowing users to create music or podcasts and personalize ringtones. The application, with its wide range of instrument options and pre-recorded loops, fosters creativity and provides a platter for you to choose from. Embracing GarageBand not only provides a seamless method to set ringtones but also opens the door for endless musical possibilities. It is a promising tool that guarantees to spark hidden creativity while also setting the stage for an exciting musical journey. Be it a professional artist or an individual who likes to explore new sounds - GarageBand is a priceless application that caters to every musical palette. Remember, downloading and installing GarageBand, the first step in this process, is the groundwork for your ringtone creation. It's a gateway to peep into your creativity, so dive into the enticing world of GarageBand and personalize your iPhone experience. Using GarageBand, the struggle to find the perfect ringtone ends as you are the creator of your symphony. This comprehensive flexibility and control make GarageBand the go-to solution for setting ringtones on your iPhone, leaving behind the days of traditional iTunes methods. Hence, embrace this step and move forward to customize your iPhone ringtones in your unique style.
Step 2: Import the Song into GarageBand
Step 2 for setting up a ringtone on iPhone without using iTunes involves importing the song into GarageBand, a default digital audio workhorse in iOS devices. While GarageBand may seem complex and intimidating, the process of importing a song into this application is relatively simple and straightforward. Once you have chosen the song you want to use as your ringtone, start by opening GarageBand. Meanwhile, keep the music file saved in your device's storage or in any accessible cloud storage like iCloud or Dropbox. Next, tap on the '+' icon on the top left corner to start a new project. Select the 'Audio Recorder' from the list of instruments. Once you're in the Audio Recorder interface, hit the 'grid' icon at the top, which will take you to the song arrangement view. Here, tap on the 'Loop' icon at the upper-right corner to open the 'Audio Files' folder. If your song isn't in the list, fret not. Tap on 'Browse items from the Files app...' at the bottom, which will redirect you to the Files app. Track down your desired song, select it, and it will be automatically added to the GarageBand’s Audio Files folder. After that, it's as simple as dragging the track onto the empty audio track space. You may need to pinch-zoom out to view the entire song. Remember, however, that GarageBand only allows up to 30 seconds for ringtones so select the portion of the song you wish carefully. Beside its role as a digital audio workstation, GarageBand is an essential tool for personalized ringtone crafting without resorting to iTunes. Not only does it allow iPhone users to round up their favorite melodies, but also offers full control over which part of the song to be cast as a ringtone, providing a genuinely tailor-made ringtone experience. Undoubtedly, the stepping stone for employing GarageBand in ringtone creation is the process of importing the desired song. By mastering this, iPhone users can purpose their cherished tunes into one-of-a-kind ringtones, bypassing the need for iTunes.
Step 3: Trim and Export the Song as a Ringtone
Step 3: In the procedure of setting a ringtone on an iPhone without iTunes using the GarageBand method, 'Trim and Export the Song as a Ringtone' is an essential step. After successfully importing the desired song into GarageBand, the real magic of personalization begins. This step allows you to trim the song, facilitating the creation of a unique ringtone from any part of the music piece that you prefer. Manipulate the yellow trimming bar to select up to 30-40 seconds of the song, which is the optimal length for a ringtone according to Apple’s default settings. However, if you wish for a shorter ringtone, feel free to shorten this time frame. The trimming process offers extreme versatility, allowing you to create a ringtone that fits your style and preference perfectly. Be it the burgeoning crescendo, the mellifluous melody, the captivating chorus, or the passionate hook; you decide what defines your ringtone. Use the Play button to preview your trimmed track until you hit upon the perfect segment. After being satisfied with your selection, the next step is to export the song as your new ringtone. To do this, tap on the downward arrow icon on the top left of the GarageBand app interface and then select 'My Songs.' The app will automatically save your project. Discover the song in the GarageBand's project browser, press and hold it, and tap the 'Share' button. Choose 'Ringtone' from the Share sheet, then name your ringtone, and finally hit 'Export.' This process is relatively straightforward and efficient as it provides substantial room for creativity and customization. Once exported successfully, the GarageBand app provides an option to set the ringtone straight away or do it later from the iPhone's sound settings. This way, GarageBand allows you to sidestep iTunes in your endeavor to create the perfect ringtone, offering an intuitive, flexible, and easy-to-navigate platform instead. All in all, 'Trim and Export the Song as a Ringtone' underlines the beauty of personalization, making your iPhone truly yours. By working with GarageBand, you can seamlessly design a ringtone that echoes your individual preference, a rhythm that resonates with your story. Beyond just being a melodic piece, your ringtone can now bring to the fore, your style, your flair, and even your narrative.
Method 2: Using a Third-Party App
Using a trustworthy third-party app is a reliable and simple method to personalize your phone's ringtone. This approach not only offers a wider range of options but also allows more intricate customization. This article will walk you through three main steps to simplify the process: Firstly, we'll guide you in selecting a reliable third-party app, ensuring you find one that allows for maximum customization and user-friendliness. Next, we'll proceed with importing your preferred song into the chosen app. This step will involve selecting from your device's audio files and successfully uploading it into the app. Lastly, we will guide you on how to customize your selected song and export it as your custom ringtone. This will allow you to select the particular part of the song you prefer and adjust it according to your taste. With these steps, you hold the power to transform your device’s auditory aesthetic. Now that you have an overview, let’s dive in deeper and start with step one: choosing a reliable third-party app.
Step 1: Choose a Reliable Third-Party App
Step 1: Choose a Reliable Third Party App
The first step in the process of setting a ringtone on your iPhone without using iTunes involves selecting a reliable third-party app. There is a vast multitude of apps available in the market, each boasting its unique features. However, the key to a smooth and successful process lies in picking an app that is highly recommended, user-friendly, and comes with a solid reputation in terms of functionality and reliability. Several apps have proven their worth in this context, some of which include Garageband, Zedge, and Ringtone Designer. GarageBand, created by Apple itself, is a comprehensive music creation studio that allows you to create your own unique ringtones. Zedge, on the other hand, is a highly popular tool with a rich database of countless ringtones and wallpapers. Ringtone Designer offers a simpler interface and functionality but is still powerful enough to create ringtones from your iPhone's music library. When it comes to choosing the right app, it's important to read app reviews and understand what existing users have to say about its functionality, bugs, and updates. Look for an app that supports the latest iOS version to avoid compatibility issues. Another factor to consider is whether the app offers the ability to create custom ringtones using your music files or allows you to directly download from an extensive ringtone collection. Further, some users may prefer an app that offers more than just ringtone functionality. For instance, apps like Zedge offer various customization features such as wallpapers, app icons, and even widgets. Yet, in the end, the main requirement should be an app that can efficiently create or provide appealing ringtones without resulting in a complicated process or risking the security of your device. Privacy policies should always be checked before installing third-party apps to ensure they don't infringe on your personal data. The functionality of third-party apps extends beyond offering a solution to set a ringtone on your iPhone without iTunes. They enable you to explore, experiment, and express your individuality by customizing your iPhone's soundscape. Making the right choice may require a bit of research and consideration, but it is worth it, as this forms the bedrock to personalize your iPhone's ecosystem. Remember, a high-quality app not only ensures a sturdy process but also provides an enhanced user experience making it a worthy substitute for iTunes.Step 2: Import the Song into the App
Once you have chosen your preferred third-party app for your ringtone creation journey, the second process to undertake is importing the song into the application. Depending on the specific app you have chosen, the procedural steps may slightly vary, however, the general procedure remains integrally similar. To begin, navigate to the library or the media section of the third-party app which often features a list of all the songs available on your iPhone. You don't have to worry about any data loss or syncing issues as these apps are expertly designed to maintain the integrity of your data. Then, select the song that you desire to fabricate into a ringtone. Ensure that you have a clear idea of which part of the song you want to use as your ringtone as these apps allow you to customize your selection down to the specific seconds. The user-friendly interface of most third-party applications enables easy navigation through the importation process. Remember, a quality ringtone shouldn't be too long. Standard ringtones usually run for approximately 30 seconds. Once your song is imported, the in-app editor feature of the chosen third-party app becomes particularly handy. It allows you to trim the imported song to the desired length. Some more advanced apps even feature a waveform interface that enables users to precisely cut their songs. Once you are done with the importation and editing process, you can then save your song. The third-party app will convert the tune into a ringtone format, effectively bypassing the need for iTunes involvement. Using a third-party app to create your ringtone is undeniably a practical and time-efficient method. Not only does it offer greater control and customization of your ringtone, but it spares you from the intricate procedures and iTunes synchronizing issues that are often faced by many iPhone users. However, in order to enjoy these features, choosing a legitimate and reliable third-party app is paramount in ensuring that your residency into the world of customized ringtones is smooth and stress-free. Once you have completed the step of importing the song into the app, you're one step closer to attaining your desired ringtone. The next step, naturally, would be to perfect the ringtone using the application's editing feature, which will be elaborated upon in subsequent steps. Overall, this process is a perfect blend of simplicity, creativity, and control.
Step 3: Customize and Export the Ringtone
After you have successfully downloaded and installed a third-party application on your iPhone, the next step in the ringtone setting process without using iTunes involves customizing and exporting the ringtone. This is the third step of the process and plays a crucial role in personalizing your mobile experience. Different apps provide various methods for accomplishing this task but commonly, you will find a "Sounds" section where you can choose the desired audio file. Upon choosing an audio file, it's time to tailor it to match your liking. Most apps will guide you through choosing a start and end point for your ringtone. Note that the ideal length for a ringtone is between 20 to 30 seconds. To make adjustments, you may need to drag the sliders along the sound wave until you are satisfied with the part of the song you want to use as your ringtone. You might also be able to add some special effects such as fading in or out to smooth the flow of the audio. Once you've made your desired changes, it's time to save your new ringtone. There should be an option to "Save" or "Export" the file. Generally, you'll need to assign a name to your creation and then hit the appropriate button. Remember that it's essential to save your ringtone in the right format, 'm4r' being the most common for iPhone ringtones. After this process, your new ringtone will be ready for use. There might be a direct option in some applications to set it as your ringtone immediately, while in others, this could be done manually through your iPhone settings. To do this, go to Settings > Sounds & Haptics > Ringtone, and then select your new ringtone. In conclusion, with the ease provided by third-party apps, customizing your ringtone and adding a personal touch is no longer a complex process as it used to be. Not only do these applications offer simple ways to cut and customize ringtones, but they also accommodate their quick integration into your iPhone's system. Do explore various applications to find the ones with the features best tailored to your preferences, as customizability can differ greatly between apps. Customizing and exporting a personalized ringtone is just a few taps away, transforming your iPhone user experience instantly.
Method 3: Using iCloud Drive
Utilizing iCloud Drive as a platform to manage your iPhone ringtones not only offers an effective method to restore memorable moments via favorite songs but also enhances customized user experience in a seamless manner. To achieve this, the process is logically divided into three easy steps. The first step involves uploading the desired song to your iCloud Drive; think of this process as paving the launchpad for ringtone customization. The follow-up step is to access this specific song from your iPhone. It's about ensuring that the necessary file, or in this case, your favorite musical memory, is within arm's reach. Finally, you set this song as your distinctive ringtone, enabling a recognizable and audibly pleasing alert for incoming calls or messages. Collectively, these steps represent the simplicity of how technology, more specifically the iCloud Drive, can be used as a tool to personalize your iPhone. As we'd extract the satisfying essence from our favorite song, let us dive deeper and examine the first step - uploading the song to the iCloud Drive.
Step 1: Upload the Song to iCloud Drive
Step 1: Upload the Song to iCloud Drive
iCloud Drive is a built-in storage space that Apple provides to its users for safely storing all types of files online. Considered one of the most vital steps in the process of setting a ringtone on your iPhone without using iTunes, uploading the song to your iCloud Drive involves a simple and straightforward process. To commence this framework, ensure to have an active iCloud account and enough storage space that will accommodate the song file you intend to use. Logging into your iCloud account via your iPhone provides the foundation for proceeding to the Drive. Once logged in, you'll find a 'Plus' icon at the top right-hand corner, indicating the option to add files. Click on it to select files from your phone's memory. Navigate to the location of the desired song file on your device and tap on it. Make sure it's in mp3 format because it's the most compatible with iOS systems. Choosing any other format may lead to compatibility issues, which can make things difficult down the road. Also, ensure the selected song is a reasonable length because fundamentally, it's being converted to a ringtone which shouldn't exceed forty seconds. After selecting the song, proceed to upload it to the iCloud Drive. This upload process depends largely on your internet connectivity. With a strong and stable internet connection, your song file gets uploaded in a matter of seconds. The progress can be monitored on the page where you would notice the file size gradually increasing until the bar confirms that the upload process is completed. When you have successfully uploaded your song, a confirmation symbol or a bold checkmark can be seen beside the song's title, ensuring that the file now resides safely in your iCloud Drive. This signifies the successful completion of the first step of setting ringtone in iPhone without iTunes. Thus, iCloud Drive not only serves as a secure storage location for the song but also lays the path for the subsequent steps, providing an efficient and effective method for personalizing your iPhone's ringtone. Remember, uploading your song to iCloud Drive does not mean the file is permanently stored. It is always possible to delete the file if it is no longer in use or if you want to free up some space in your Drive. Deletion has no impact on your device's memory or ringtone setting because the song is already set as a ringtone before the optional removal. This initial step of uploading the song to iCloud Drive underscores the convenience of not needing to rely on iTunes- it is an innovative method that respects the user's variety and style. This is a significant benefit of setting a ringtone on an iPhone without iTunes and provides a more accessible and flexible approach for users universally. Through iCloud Drive, you have the vital groundwork to set a melody of your liking as a ringtone, adding a personal touch to your iPhone gadget amidst the customization process.Step 2: Access the Song on Your iPhone
Step 2 in the process of setting a ringtone in your iPhone without iTunes involves accessing the song on your iPhone. This is after you have uploaded your preferred ringtone to the iCloud Drive. The iCloud Drive allows you to store files in Apple’s cloud space, thus ensuring that all your devices can access the files you upload. This means that you can upload a file on your iPad, and access it on your iPhone without having to transfer it directly. To access the song on your iPhone that you intend to use as your new ringtone, begin by launching the Files app. The Files app should be easily located on your home screen and it's where your iCloud Drive is housed. Once you have opened the Files app, navigate to the location where you uploaded your ringtone. You might have to search different folders depending on where you saved it. To simplify this process, consider saving the ringtone in a dedicated folder that you can easily locate. Once you have spotted the song, click on it to play to ensure it’s the correct ringtone. If it satisfies your preference, you're ready to begin the process of setting it as your ringtone. However, if the song isn't playing, you may need to download it for offline access. To do this, click on the ellipsis (…) under the song. A list of options will pop up and from it, select, 'Make Available Offline'. This should download your song to the device and you should be able to access it even without an internet connection. Remember, your iPhone only uses .m4R files as ringtones. Therefore, if your song isn’t in this format, you'll have to convert it first before proceeding with this process. There are numerous online tools that you can use to convert your file into the required format. The simplicity and flexibility of using iCloud Drive make this option appealing for many iPhone users. The convenience of accessing your uploaded media files across all your devices adds to the appeal. Additionally, there’s no requirement for any third-party applications, which often come with unnecessary approvals and permissions. The iCloud Drive comes as a default application in the iPhone, directly providing an avenue for your unique ringtone setting. So, enjoy the smooth experience of creating a ringtone without iTunes in your iPhone by utilizing iCloud Drive.
Step 3: Set the Song as a Ringtone
Step 3 is the step that we've all been waiting for - setting your chosen song as your ringtone. Now that your song has been uploaded to the iCloud Drive and has successfully synced with your iPhone, it is time to set this song as your ringtone. The beauty of this procedure is that it does not require iTunes at all. The first thing that you should do is go to the 'Settings' app on your iPhone. Scroll down to 'Sounds & Haptics' and click on this to access the sounds settings. Here, you will see a variety of options including 'Ringtone', 'Text Tone', and 'Vibration'. Click on 'Ringtone'. Now, in the ringtone settings, you must browse through and find the song you just uploaded to iCloud. It should appear under 'Ringtones'. After locating the song, you can simply select it to set it as your ringtone. If the song doesn't show up immediately, don't worry. Sometimes, it takes a few minutes for the song to sync from the iCloud Drive to the settings of the phone. In the rare case that the song does not appear even after waiting, you may need to restart your iPhone for the ringtone settings to update. After a successful set-up, your chosen song will play every time your phone rings, making each call unique and personal to you. This entire process is convenient, fast and hassle-free and allows for an endless range of possibilities when it comes to personalizing your ringtone. Different ringtones can also be set for different contacts, making it easier to identify who is calling even without looking at your phone. So go ahead and experiment with various songs, and animate your phone experience with this easy and simple method.