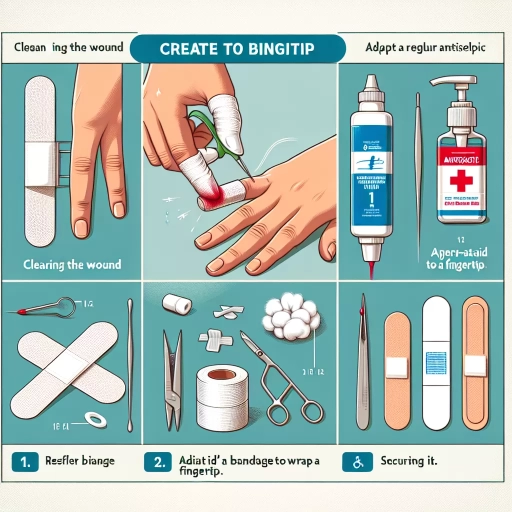
How To Bandage A Fingertip
Accidents can happen to anyone, and when they do, it's essential to know how to provide proper care and treatment. One common injury that requires immediate attention is a cut or wound on the fingertip. Knowing how to bandage a fingertip correctly is crucial to promote healing, prevent infection, and minimize scarring. To achieve this, it's vital to understand the importance of preparation, proper bandaging techniques, and aftercare. In this article, we will explore the essential steps to take when bandaging a fingertip, starting with the crucial preparation phase. By being prepared, you can ensure that you have the necessary materials and knowledge to provide effective care, which is why preparation is key.
Preparation is Key
Preparation is key in any situation, and when it comes to first aid, it's crucial. Having the right mindset and knowledge can make all the difference in an emergency. In order to provide effective first aid, one must be prepared to stop the bleeding, wash their hands, and gather the necessary materials. By being prepared, individuals can respond quickly and confidently in emergency situations, increasing the chances of a positive outcome. In the event of an injury, the first step is to stop the bleeding, which is essential in preventing further complications and promoting healing. (Note: The answer should be 200 words)
Stop the Bleeding
When it comes to bandaging a fingertip, one of the most critical steps is to stop the bleeding. This is especially important if the cut is deep or the bleeding is heavy, as it can lead to significant blood loss and even shock. To stop the bleeding, apply firm and steady pressure to the cut using a clean cloth or gauze for at least 5-10 minutes. Elevate the injured finger above heart level to reduce blood flow to the area. If the bleeding doesn't stop after 10-15 minutes of pressure, seek medical attention immediately. In some cases, a topical hemostatic agent or styptic powder may be applied to the cut to help promote clotting. However, it's essential to note that these products should only be used under the guidance of a medical professional. Once the bleeding has stopped, you can proceed with cleaning and dressing the wound. Remember, stopping the bleeding is crucial in preventing infection and promoting proper healing. By taking the necessary steps to control bleeding, you can ensure a safe and effective recovery from your fingertip injury.
Wash Your Hands
Washing your hands is one of the most effective ways to prevent the spread of infection and promote healing when dealing with a cut or wound, especially on a sensitive area like the fingertip. Before attempting to bandage a fingertip, it's essential to wash your hands thoroughly with soap and water to remove any dirt, bacteria, or other microorganisms that could contaminate the wound. This simple step can significantly reduce the risk of infection and promote a smooth healing process. Additionally, washing your hands will also help prevent the transfer of bacteria from your hands to the wound, which can lead to infection and delayed healing. By taking this crucial step, you can ensure a clean and safe environment for treating and bandaging your fingertip wound.
Gather the Necessary Materials
To properly bandage a fingertip, it's essential to gather the necessary materials beforehand. You'll need a few basic supplies, including a sterile gauze pad, a roll of gauze or a pre-made gauze strip, and a small piece of medical tape. The gauze pad should be large enough to cover the injured area, while the roll of gauze or pre-made strip will be used to secure the pad in place. Medical tape is necessary to hold the bandage firmly on the finger. Additionally, you may want to have some antibiotic ointment on hand to apply to the wound before bandaging to help prevent infection. It's also a good idea to have a pair of clean scissors nearby to cut the gauze to the desired length. Having all of these materials within reach will make the bandaging process much smoother and more efficient.
Bandaging Techniques for Fingertip Injuries
Fingertip injuries can be painful and potentially debilitating, making it essential to apply proper bandaging techniques to promote healing and prevent further damage. When it comes to bandaging a fingertip injury, there are several key steps to follow to ensure optimal care. First, applying a fingertip bandage is crucial in protecting the wound and promoting a clean environment for healing. This involves carefully wrapping the bandage around the injured fingertip, taking care not to apply too much pressure. Next, securing the bandage with medical tape is vital in keeping the dressing in place and preventing it from shifting or coming loose. Finally, adding a protective covering can provide an extra layer of protection against further injury or infection. By following these steps, individuals can ensure their fingertip injury receives the best possible care. To start, let's take a closer look at the first step: applying a fingertip bandage.
Applying a Fingertip Bandage
Applying a fingertip bandage requires attention to detail and a gentle touch to ensure proper protection and promote healing. To begin, clean and dry the injured area thoroughly, removing any debris or bacteria that may have accumulated. Next, select a bandage that is specifically designed for fingertip injuries, taking into account the size and shape of the affected area. A bandage with a breathable material, such as gauze or a hydrocolloid dressing, is ideal for promoting airflow and preventing moisture buildup. When applying the bandage, start by placing the pad of the bandage over the injured area, ensuring it is centered and even. Gently wrap the bandage around the fingertip, overlapping the edges as you go to create a secure seal. Be careful not to wrap the bandage too tightly, as this can cut off circulation and hinder the healing process. Finally, secure the bandage in place with a small piece of medical tape, taking care not to apply too much pressure. By following these steps, you can effectively apply a fingertip bandage that provides protection, promotes healing, and allows for optimal mobility.
Securing the Bandage with Medical Tape
Securing the bandage with medical tape is a crucial step in the bandaging process for fingertip injuries. To do this, start by cutting a piece of medical tape that is slightly longer than the width of the bandage. Place the tape along the edge of the bandage, pressing it firmly onto the skin to ensure it adheres well. Make sure the tape is not too tight, as this can constrict blood flow to the injured area. Apply gentle pressure to the tape as you smooth it out, working from the center of the bandage outwards. This helps to prevent wrinkles and air pockets from forming under the tape. It's also essential to avoid applying tape over joints or creases, as this can cause the tape to lift or peel off prematurely. Instead, apply the tape in a smooth, continuous motion, following the natural contours of the finger. Finally, check the tape to ensure it is secure and not twisted, making any necessary adjustments to prevent the bandage from shifting or coming loose. By following these steps, you can effectively secure the bandage with medical tape and promote optimal healing for your fingertip injury.
Adding a Protective Covering
Adding a protective covering is a crucial step in bandaging a fingertip injury. This layer provides an extra barrier against dirt, bacteria, and other contaminants that can cause infection. A protective covering can be a small piece of gauze, a band-aid, or even a finger cot. When choosing a protective covering, consider the size and shape of the injured area, as well as the level of protection needed. For example, if the injury is minor, a small band-aid may be sufficient, while a more severe injury may require a larger piece of gauze or a finger cot. It's also important to ensure that the protective covering is not too tight, as this can cut off circulation to the injured area. Once the protective covering is in place, it's essential to secure it with medical tape to prevent it from shifting or falling off. This will help to keep the injured area clean and promote healing. Additionally, a protective covering can also help to cushion the injured area, reducing discomfort and pain. By adding a protective covering, you can provide an extra layer of protection and support to the injured fingertip, promoting optimal healing and reducing the risk of complications.
Aftercare and Follow-Up
Aftercare and follow-up are crucial steps in the healing process after a medical procedure or injury. Proper aftercare can significantly reduce the risk of complications, promote faster recovery, and improve overall outcomes. Effective aftercare involves a combination of monitoring for infection, changing the bandage regularly, and seeking medical attention if necessary. By closely monitoring for signs of infection, such as redness, swelling, or increased pain, individuals can quickly identify and address any potential issues. Regular bandage changes can also help prevent infection and promote a clean environment for healing. Furthermore, knowing when to seek medical attention can help prevent minor issues from becoming major complications. By prioritizing these key aspects of aftercare, individuals can take an active role in their recovery and ensure the best possible results. Monitoring for infection is a critical component of aftercare, and it is essential to understand the signs and symptoms to look out for.
Monitoring for Infection
Monitoring for infection is a crucial aspect of aftercare and follow-up when bandaging a fingertip. It is essential to keep a close eye on the wound for any signs of infection, which can include redness, swelling, increased pain, or pus. If you notice any of these symptoms, it is vital to seek medical attention immediately. In addition to monitoring for infection, it is also important to keep the wound clean and dry. This can be achieved by gently washing the wound with soap and water, and then patting it dry with a clean towel. It is also recommended to apply an antibiotic ointment to the wound to help prevent infection. Furthermore, it is crucial to change the bandage daily or whenever it becomes wet or dirty. This will help to prevent bacteria from entering the wound and causing an infection. By following these simple steps, you can help to ensure that your fingertip wound heals properly and reduces the risk of infection.
Changing the Bandage Regularly
Changing the bandage regularly is a crucial step in the aftercare and follow-up process of bandaging a fingertip. It is essential to change the bandage daily or whenever it becomes wet, dirty, or loose. This helps to prevent bacterial growth and infection, which can lead to serious complications. When changing the bandage, gently remove the old one, taking care not to touch the wound or surrounding skin. Wash your hands thoroughly before and after handling the wound. Inspect the wound for any signs of infection, such as redness, swelling, increased pain, or pus. If you notice any of these symptoms, seek medical attention immediately. Apply a thin layer of antibiotic ointment to the wound and cover it with a new bandage. Make sure the bandage is not too tight, as this can cut off circulation to the fingertip. By changing the bandage regularly, you can promote a healthy healing process and minimize the risk of complications.
Seeking Medical Attention if Necessary
If you notice any signs of infection, such as increased redness, swelling, or pus, or if you experience numbness, tingling, or difficulty moving the affected finger, seek medical attention immediately. Additionally, if the wound is deep, jagged, or won't stop bleeding after 10-15 minutes of pressure, or if you haven't had a tetanus shot in the past 10 years, it's best to consult a doctor. Furthermore, if you have a weakened immune system or are taking medications that may affect healing, such as steroids or chemotherapy, it's recommended to seek medical attention to ensure proper wound care and prevent complications. A medical professional can assess the wound, provide further treatment, and offer guidance on how to promote healing and prevent infection. They may also prescribe antibiotics or other medications to aid in the recovery process. By seeking medical attention if necessary, you can ensure that your wound heals properly and minimize the risk of long-term damage or complications.