How To Winterize A Camper
As the winter months approach, it's essential to prepare your camper for the cold weather to ensure it remains in good condition and is ready for use when the warmer months return. Winterizing a camper involves a series of steps that help protect the vehicle from freezing temperatures, moisture, and other harsh winter conditions. To winterize a camper effectively, it's crucial to focus on three key areas: pre-winterization preparation, insulating and sealing the camper, and protecting the camper's systems and components. By following these steps, you can help prevent damage, reduce maintenance costs, and ensure your camper is ready for the next camping season. In this article, we'll explore each of these areas in detail, starting with the essential pre-winterization preparation that sets the stage for a successful winterization process.
Pre-Winterization Preparation
As the winter months approach, it's essential to prepare your home for the cold weather to prevent damage and ensure a safe and comfortable living space. Pre-winterization preparation is a crucial step in maintaining your home's integrity and avoiding costly repairs. To get started, there are three key areas to focus on: draining and flushing the water system, disconnecting and storing hoses and cables, and performing routine maintenance on appliances and systems. By addressing these critical tasks, you'll be able to protect your home from the harsh effects of winter. Let's begin with the first step: draining and flushing the water system, a crucial process that will help prevent pipes from freezing and bursting.
Drain and Flush the Water System
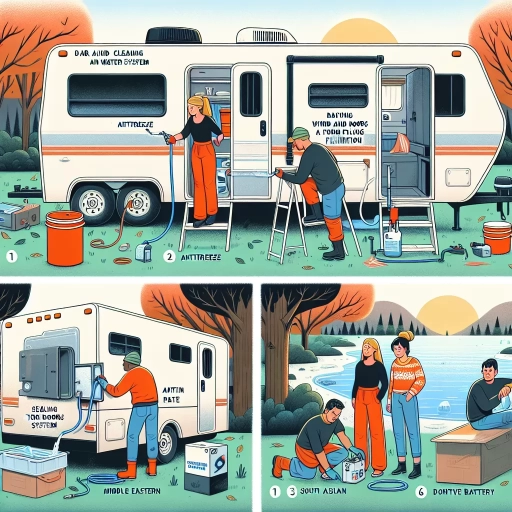
Drain and flush the water system to prevent water from freezing and causing damage to the pipes and plumbing fixtures. Start by locating the low-point drain valves, usually found near the water tank and water pump, and open them to allow the water to drain out. Next, open the drain valve on the water heater to release any remaining water. Use a water pump bypass kit to isolate the water heater from the rest of the plumbing system, if equipped. Then, use compressed air to blow out any remaining water from the pipes, starting from the highest point and working your way down. You can also use a blowout plug to help remove any remaining water from the pipes. Once the system is drained, flush the system with compressed air to remove any debris or sediment that may have accumulated. Finally, close all the drain valves and replace any drain plugs to ensure the system is secure and ready for winter storage.
Disconnect and Store Hoses and Cables
When it comes to pre-winterization preparation for your camper, one crucial step is to disconnect and store hoses and cables. This is essential to prevent damage from freezing temperatures and to ensure that your camper's systems remain in good working condition. Start by disconnecting the water hoses from the city water inlet and the water tank fill valve. Drain the hoses completely and store them in a protected area, such as a storage compartment or a designated hose storage container. Next, disconnect the electrical cables from the shore power connection and the generator, if applicable. Store the cables in a dry, protected area, away from direct sunlight and moisture. Additionally, consider using cable organizers or zip ties to keep the cables tidy and prevent tangles. It's also a good idea to inspect the hoses and cables for any signs of damage or wear, and replace them if necessary. By disconnecting and storing your hoses and cables properly, you'll be able to prevent costly repairs and ensure that your camper is ready for the next camping season.
Perform Routine Maintenance on Appliances and Systems
Performing routine maintenance on appliances and systems is a crucial step in pre-winterization preparation for your camper. This involves inspecting and servicing all appliances, including the refrigerator, stove, and air conditioning unit, to ensure they are in good working condition. Check the seals and gaskets for any signs of wear or damage, and replace them if necessary. Additionally, inspect the propane system, including the tank, hoses, and regulators, to ensure they are leak-free and functioning properly. The plumbing system should also be checked for any leaks or damage, and the water heater should be drained and prepared for winter storage. The electrical system, including the batteries and charging system, should be inspected and tested to ensure they are functioning properly. Furthermore, the roof and walls of the camper should be inspected for any signs of damage or wear, and repaired if necessary. By performing routine maintenance on appliances and systems, you can help prevent costly repairs and ensure your camper is ready for the winter season.
Insulating and Sealing the Camper
Insulating and sealing your camper is a crucial step in maintaining a comfortable and energy-efficient living space. Not only does it help regulate the temperature, but it also prevents moisture from entering the camper, reducing the risk of mold and mildew growth. To effectively insulate and seal your camper, there are several key areas to focus on. First, it's essential to seal gaps and cracks in the exterior of the camper to prevent cold air from entering and warm air from escaping. Additionally, insulating exposed pipes and fittings is vital to prevent them from freezing and bursting during cold weather. Finally, installing thermal window treatments can help reduce heat loss and keep the camper warm. By addressing these areas, you can significantly improve the overall insulation and sealing of your camper. Let's start by exploring the importance of sealing gaps and cracks in the exterior of your camper.
Seal Gaps and Cracks in the Exterior
Sealing gaps and cracks in the exterior of your camper is a crucial step in winterizing it. As the temperature drops, the materials used in the construction of your camper contract and expand, creating gaps and cracks that can let cold air in and warm air out. If left unsealed, these gaps and cracks can lead to a significant loss of heat, making your camper colder and more uncomfortable. Moreover, moisture can seep into these gaps and cracks, causing damage to the interior and exterior of your camper. To seal gaps and cracks, start by inspecting the exterior of your camper, paying particular attention to areas around windows, doors, vents, and any seams or joints. Use a sealant specifically designed for outdoor use, such as silicone or polyurethane-based caulk, to fill in any gaps or cracks you find. Make sure to clean the area thoroughly before applying the sealant to ensure a strong bond. Additionally, consider using weatherstripping around doors and windows to provide an extra layer of protection against the elements. By sealing gaps and cracks in the exterior of your camper, you can help keep it warm, dry, and comfortable, even in the coldest of temperatures.
Insulate Exposed Pipes and Fittings
Insulating exposed pipes and fittings is a crucial step in winterizing a camper. Exposed pipes are more susceptible to freezing temperatures, which can cause them to burst and lead to costly repairs. Insulating these pipes and fittings can help prevent this from happening. There are several types of insulation materials available, including foam pipe insulation, heat tape, and thermostatically controlled heat cables. Foam pipe insulation is a popular choice as it is easy to install and can be cut to fit around pipes of different sizes. Heat tape and thermostatically controlled heat cables can be wrapped around pipes to provide additional heat and protection. It's also important to insulate any exposed fittings, such as valves and faucets, as these can also be prone to freezing. By insulating exposed pipes and fittings, camper owners can help protect their plumbing system from freezing temperatures and ensure a safe and enjoyable camping experience. Additionally, insulating exposed pipes and fittings can also help to reduce heat loss and energy consumption, making it a cost-effective solution for camper owners.
Install Thermal Window Treatments
Installing thermal window treatments is a crucial step in winterizing a camper. Thermal window treatments are designed to reduce heat transfer through windows, keeping the cold air out and the warm air in. These treatments can be in the form of thermal curtains, shades, or window films. Thermal curtains are made of thick, insulating materials that can be hung over windows to block cold air and keep warmth in. Thermal shades are similar but are typically made of a more rigid material that can be raised and lowered like traditional shades. Window films, on the other hand, are applied directly to the window glass and can help to reflect heat rather than absorb it. By installing thermal window treatments, camper owners can significantly reduce heat loss through windows, which can account for up to 30% of a camper's total heat loss. This can help to keep the camper warm and cozy, even in extremely cold temperatures. Additionally, thermal window treatments can also help to reduce condensation and moisture buildup on windows, which can help to prevent mold and mildew growth. Overall, installing thermal window treatments is a simple and effective way to winterize a camper and keep it warm and comfortable all season long.
Protecting the Camper's Systems and Components
As the camping season comes to a close, it's essential to take the necessary steps to protect your camper's systems and components from the harsh winter conditions. Failing to do so can result in costly repairs and maintenance come springtime. To ensure your camper remains in top condition, it's crucial to focus on three key areas: the plumbing system, the battery and electrical system, and the propane system and appliances. By taking the time to properly drain and winterize the plumbing system, you'll prevent pipes from freezing and bursting, which can cause significant damage. Additionally, protecting the battery and electrical system will ensure your camper's electrical components remain functional and safe. Finally, winterizing the propane system and appliances will prevent corrosion and damage from moisture. In this article, we'll dive into each of these critical areas, starting with the importance of draining and winterizing the plumbing system.
Drain and Winterize the Plumbing System
When it comes to winterizing a camper, one of the most critical systems to protect is the plumbing system. Freezing temperatures can cause water to expand and burst pipes, leading to costly repairs and potential safety hazards. To drain and winterize the plumbing system, start by locating the low-point drain valves, usually found near the water tank and water pump. Open these valves to allow the water to drain from the pipes. Next, use a blowout adapter to connect an air compressor to the city water inlet, and blow out any remaining water from the pipes. Be sure to blow out the hot and cold water lines separately to ensure all water is removed. Once the pipes are drained, use a non-toxic RV antifreeze to fill the pipes and protect them from freezing temperatures. Pour the antifreeze into the drains and let it flow through the pipes, making sure to fill all the lines, including the water heater. Finally, disconnect and drain any hoses, and store them in a protected area to prevent damage. By following these steps, you can ensure your camper's plumbing system is properly winterized and protected from the harsh winter elements.
Protect the Battery and Electrical System
Protecting the battery and electrical system is a crucial step in winterizing a camper. Disconnect the negative battery cable to prevent any accidental starts or electrical surges. Next, check the battery's state of charge and top it off if necessary. If the battery is old or weak, consider replacing it to ensure reliable starting and electrical performance. Remove any battery terminals and clean them with a wire brush to prevent corrosion. Apply a thin layer of petroleum jelly or silicone-based lubricant to the terminals to protect them from moisture. Store the battery in a cool, dry place, away from any open flames or sparks. If you live in an extremely cold climate, consider using a battery warmer or heated storage bag to keep the battery from freezing. Additionally, inspect the electrical system for any signs of wear or damage, such as frayed wires or corroded connections. Make any necessary repairs or replacements to ensure the electrical system is functioning properly. Finally, consider using a battery maintainer or trickle charger to keep the battery charged and healthy during the winter months. By taking these steps, you can help protect the battery and electrical system from damage and ensure your camper is ready to go when the weather warms up.
Winterize the Propane System and Appliances
Winterizing the propane system and appliances is a crucial step in preparing your camper for the cold winter months. Start by turning off the propane tank and disconnecting the regulator, then drain the propane lines by opening the valves at the appliances and allowing the gas to escape. Next, use a propane system winterization kit to blow out any remaining propane and moisture from the lines. This kit usually includes a compressor, hoses, and fittings specifically designed for this purpose. Once the lines are clear, close the valves and reconnect the regulator. For appliances, such as the refrigerator, stove, and water heater, follow the manufacturer's instructions for winterization. Typically, this involves draining the fuel lines, cleaning the burners, and applying a protective coating to the exterior. Additionally, consider using a propane system antifreeze to prevent corrosion and damage from moisture. By properly winterizing your propane system and appliances, you'll help prevent damage from freezing temperatures, corrosion, and moisture, ensuring your camper is ready to go when the warmer weather returns.