How To Cancel Subscriptions On Iphone
Here is the introduction paragraph: Managing subscriptions on your iPhone can be a daunting task, especially with the numerous services and apps available. From streaming services to software subscriptions, it's easy to lose track of what you're paying for each month. To help you take control of your iPhone subscriptions, this article will guide you through the process of canceling unwanted subscriptions. First, we'll start by understanding what iPhone subscriptions are and how they work. Then, we'll show you how to locate and manage your subscriptions on your iPhone. Finally, we'll walk you through the steps to cancel subscriptions on your iPhone. By the end of this article, you'll be able to easily manage your subscriptions and avoid unwanted charges. Let's start by understanding iPhone subscriptions.
Understanding iPhone Subscriptions
iPhone subscriptions have become an essential part of the iPhone experience, offering users a range of benefits and services. But what exactly are iPhone subscriptions, and how do they work? There are several types of iPhone subscriptions available, each with its own unique features and advantages. Understanding the different types of subscriptions can help users make informed decisions about which ones to sign up for. Additionally, knowing why canceling iPhone subscriptions might be necessary can also be beneficial. In this article, we will delve into the world of iPhone subscriptions, exploring what they are, the different types available, and why canceling them might be necessary. So, let's start by understanding what iPhone subscriptions are.
What are iPhone subscriptions?
iPhone subscriptions refer to the various services and apps that users can subscribe to on their iPhone devices. These subscriptions can include music streaming services like Apple Music, video streaming services like Apple TV+, and app subscriptions like Apple Arcade. Additionally, iPhone users can also subscribe to third-party services like Netflix, Hulu, and Spotify, among others. These subscriptions often provide users with access to exclusive content, premium features, and regular updates. iPhone subscriptions can be managed through the App Store or the Settings app on the device, allowing users to easily view, modify, or cancel their subscriptions as needed. By understanding iPhone subscriptions, users can better manage their digital lives and make the most of their iPhone experience.
Types of iPhone subscriptions
There are several types of iPhone subscriptions that users can opt for, each with its own set of benefits and pricing plans. The most common types of iPhone subscriptions include Apple One, Apple Music, Apple TV+, Apple Arcade, Apple News+, and Apple Fitness+. Apple One is a bundled subscription that offers access to multiple Apple services, including Apple Music, Apple TV+, and Apple Arcade, at a discounted price. Apple Music is a music streaming service that provides access to millions of songs, playlists, and radio stations. Apple TV+ is a streaming service that offers exclusive original content, including TV shows and movies. Apple Arcade is a gaming subscription that provides access to a curated selection of games, with new titles added regularly. Apple News+ is a news and magazine subscription that offers access to thousands of publications, including newspapers, magazines, and online news sites. Apple Fitness+ is a fitness subscription that provides access to a library of workout videos and personalized fitness plans. Additionally, users can also subscribe to third-party services, such as Netflix, Hulu, and Spotify, directly through their iPhone. Each of these subscriptions offers a free trial period, allowing users to test the service before committing to a paid plan. Understanding the different types of iPhone subscriptions can help users make informed decisions about which services to subscribe to and how to manage their subscriptions effectively.
Why cancel iPhone subscriptions?
Here is the paragraphy: Canceling iPhone subscriptions can be a great way to save money and declutter your digital life. If you're not using a particular service or app, it's pointless to continue paying for it. By canceling unwanted subscriptions, you can free up some extra cash in your budget and reduce the number of recurring payments you need to keep track of. Additionally, canceling subscriptions can also help you avoid the frustration of being charged for something you no longer use or need. For example, if you signed up for a streaming service to watch a specific show, but you've already finished watching it, there's no need to continue paying for the service. By canceling your subscription, you can avoid wasting money and move on to other things. Furthermore, canceling iPhone subscriptions can also help you regain control over your digital life. With so many services and apps available, it's easy to get overwhelmed and lose track of what you're subscribed to. By canceling unwanted subscriptions, you can simplify your digital life and focus on the things that truly matter to you. Overall, canceling iPhone subscriptions is a great way to save money, reduce clutter, and regain control over your digital life.
Locating and Managing Subscriptions on iPhone
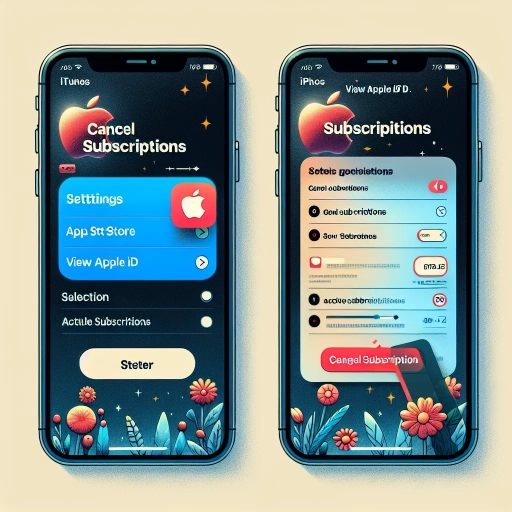
Locating and managing subscriptions on an iPhone can be a daunting task, especially with the numerous services and apps that offer subscription-based models. However, with the right steps, you can easily keep track of your subscriptions and make necessary changes. To start, you can access the Settings app on your iPhone to view a list of all your active subscriptions. Additionally, you can use the App Store to manage your subscriptions, which provides a centralized location to view and modify your subscription details. Furthermore, you can also view detailed information about each subscription, including the billing cycle and renewal date. By following these steps, you can take control of your iPhone subscriptions and avoid unwanted charges. To begin, let's start by accessing the Settings app.
Accessing the Settings app
To access the Settings app on your iPhone, locate the Settings icon on your home screen, which resembles a gray gear. Tap on the icon to open the app. Alternatively, you can use Siri to open the Settings app by saying "Hey Siri, open Settings." Once the app is open, you will see a list of various settings options, including Wi-Fi, Bluetooth, and Notifications. To locate the Subscriptions section, scroll down and tap on the "iTunes & App Store" option. Then, tap on your Apple ID at the top of the screen, followed by "View Apple ID" and "Subscriptions." This will take you to a list of all your active and expired subscriptions, where you can manage and cancel them as needed.
Using the App Store to manage subscriptions
Here is the paragraphy: Using the App Store to manage subscriptions is a convenient way to keep track of your recurring payments. To access your subscriptions, open the App Store and tap your profile icon in the top right corner. Then, tap "Subscriptions" to view a list of all your active and expired subscriptions. From here, you can see the subscription name, the next billing date, and the amount you'll be charged. You can also tap "Edit" next to each subscription to change your subscription plan or cancel it altogether. Additionally, you can use the App Store to request a refund for a subscription or report a problem with a subscription. If you're having trouble finding a specific subscription, you can use the search bar at the top of the page to search for the app or service. The App Store also allows you to manage your subscriptions across all your Apple devices, making it easy to keep track of your subscriptions no matter where you are.
Viewing subscription details
Viewing subscription details on your iPhone is a straightforward process that allows you to keep track of your active subscriptions, including the type of subscription, billing cycle, and renewal date. To view your subscription details, start by opening the Settings app on your iPhone. Then, tap on your name at the top of the screen, followed by "Subscriptions." This will take you to the Subscriptions page, where you'll see a list of all your active subscriptions, including Apple services like Apple Music, Apple TV+, and Apple Arcade, as well as third-party services like Netflix, Hulu, and Spotify. From this page, you can tap on any subscription to view more details, such as the subscription type, billing cycle, and renewal date. You can also use this page to manage your subscriptions, including canceling or changing your subscription plan. Additionally, you can view your subscription history, including past subscriptions and any refunds or credits you've received. By regularly viewing your subscription details, you can stay on top of your subscriptions and avoid any unexpected charges or renewals.
Canceling Subscriptions on iPhone
Here is the introduction paragraph: Canceling subscriptions on an iPhone can be a straightforward process, but it can be confusing for some users. Fortunately, there are multiple ways to cancel subscriptions, and this article will guide you through the steps. You can cancel subscriptions through the Settings app, the App Store, or by confirming the cancellation. In this article, we will explore each of these methods in detail. First, we will start with canceling subscriptions through the Settings app, which is often the most convenient option. Here is the supporting paragraph: When canceling subscriptions on your iPhone, it's essential to understand the different methods available to you. Canceling subscriptions through the Settings app is often the most convenient option, as it allows you to access all of your subscriptions in one place. This method is particularly useful if you have multiple subscriptions and want to manage them all at once. Additionally, canceling subscriptions through the Settings app can help you avoid accidental renewals, as you can easily see which subscriptions are set to auto-renew. By canceling subscriptions through the Settings app, you can take control of your subscriptions and avoid unwanted charges.
Canceling subscriptions through the Settings app
Canceling subscriptions through the Settings app is a straightforward process that can be completed in a few steps. To start, open the Settings app on your iPhone and tap on your name at the top of the screen. This will take you to your Apple ID settings page. From there, tap on "Subscriptions" to view a list of all your active subscriptions. Find the subscription you want to cancel and tap on it. You'll be taken to a new page with details about the subscription, including the option to cancel. Tap on "Cancel Subscription" and confirm that you want to cancel. You'll receive a confirmation message that the subscription has been canceled, and you won't be charged again. It's worth noting that canceling a subscription through the Settings app will not delete any content or data associated with the subscription. If you want to delete the app or content associated with the subscription, you'll need to do so separately. Additionally, if you're canceling a subscription that was purchased through a third-party app, you may need to cancel it through that app instead of the Settings app. Overall, canceling subscriptions through the Settings app is a quick and easy process that can help you manage your subscriptions and avoid unwanted charges.
Canceling subscriptions through the App Store
Canceling subscriptions through the App Store is a straightforward process that can be completed in just a few steps. To start, open the App Store on your iPhone and tap on your profile icon in the top right corner. From there, tap on "Subscriptions" to view a list of all your active subscriptions. Find the subscription you want to cancel and tap on it to open its details page. On this page, you'll see a "Cancel Subscription" button - tap on this to initiate the cancellation process. You'll be asked to confirm that you want to cancel, so tap "Confirm" to complete the process. Once you've canceled a subscription, you'll still be able to use the service until the end of the current billing period. After that, your subscription will be terminated, and you won't be charged again. It's worth noting that canceling a subscription through the App Store will not delete your account or remove any data associated with the service - it simply stops the recurring payment. If you want to delete your account or remove data, you'll need to contact the service provider directly. Additionally, if you're having trouble canceling a subscription through the App Store, you can also try canceling it through the service provider's website or contacting their customer support team for assistance.
Confirming subscription cancellation
Here is the paragraphy: Confirming subscription cancellation is a crucial step to ensure that you are no longer charged for a service you no longer want. Once you've followed the steps to cancel a subscription on your iPhone, you'll typically receive a confirmation message or email from the service provider. This message will confirm that your subscription has been cancelled and provide details on when the cancellation will take effect. It's essential to review this confirmation carefully to ensure that the cancellation was successful and that you won't be charged again. If you don't receive a confirmation message, you may want to contact the service provider directly to verify that your subscription has been cancelled. Additionally, you can also check your iPhone's subscription settings to confirm that the subscription has been removed from your list of active subscriptions. By taking these steps, you can ensure that your subscription cancellation is complete and that you won't be charged unexpectedly.