How To Sync A Wii Remote
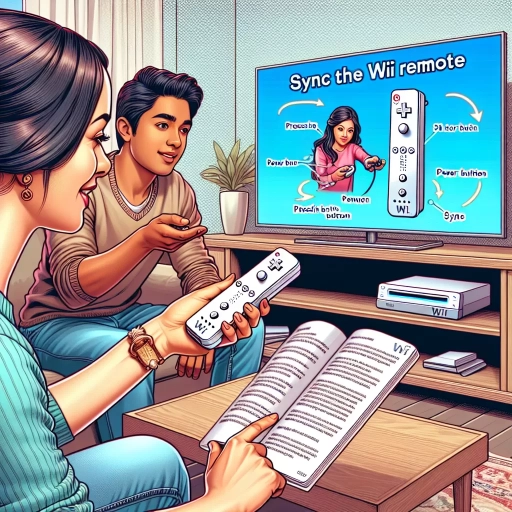
The Wii remote is a revolutionary gaming controller that has brought a new level of interactivity to the gaming world. However, to fully enjoy the Wii gaming experience, it is essential to sync the Wii remote with the Wii console. Syncing a Wii remote can be a straightforward process, but it requires some preparation and attention to detail. In this article, we will guide you through the process of syncing a Wii remote, from preparation to troubleshooting common issues. To start, it is crucial to prepare your Wii remote and console for syncing, which involves checking the battery level, ensuring the console is turned on, and removing any existing syncs. Once you have completed these steps, you can proceed to the syncing process, which involves pressing the sync buttons on both the remote and the console. If you encounter any issues during the syncing process, don't worry, we have got you covered with some troubleshooting tips to help you resolve common syncing problems. With these steps, you'll be able to sync your Wii remote in no time and enjoy your favorite Wii games. First, let's start with the preparation process.
Preparation for Syncing a Wii Remote
To sync a Wii Remote, preparation is key. Before you start the syncing process, it's essential to ensure that you have everything ready to go. This includes locating the SYNC button on the Wii Remote, ensuring the Wii console is turned on, and having the Wii Remote batteries fully charged. By taking these steps, you'll be able to sync your Wii Remote quickly and efficiently. In this article, we'll take a closer look at each of these preparation steps, starting with the first crucial step: locating the SYNC button on the Wii Remote.
Locate the SYNC Button on the Wii Remote
To locate the SYNC button on the Wii Remote, you need to look for a small, recessed button located at the top of the remote. The SYNC button is usually found on the top edge of the remote, near the battery compartment. It's a small, circular button that is slightly indented into the remote's casing. When you press the SYNC button, you'll hear a clicking sound, and the remote's LED lights will start to flash. This indicates that the remote is in syncing mode and is ready to be paired with your Wii console. Make sure to press the SYNC button firmly and hold it for a few seconds to ensure that it registers properly. If you're having trouble finding the SYNC button, you can refer to your Wii Remote's user manual or look for a diagram online that shows the location of the button.
Ensure the Wii Console is Turned On
To ensure the Wii console is turned on, locate the power button on the front of the console. It is usually a small, round button with a power symbol on it. Press the power button firmly until you hear a clicking sound and see the console's lights turn on. The Wii logo should appear on the screen, followed by the main menu. If the console does not turn on, check that it is properly plugged into a power outlet and that the outlet is working. Also, ensure that the Wii console is not in standby mode, as this can be mistaken for being turned off. If you are still having trouble, try unplugging the console from the power outlet, waiting for 30 seconds, and then plugging it back in. This can sometimes reset the console and resolve any issues. Once the Wii console is turned on, you can proceed with syncing your Wii remote.
Have the Wii Remote Batteries Fully Charged
To ensure a seamless syncing process, it's essential to have the Wii Remote batteries fully charged. A dead or low-battery Wii Remote can cause connectivity issues, making it difficult to sync with the Wii console. Nintendo recommends using alkaline batteries, which provide a longer battery life and more consistent power supply. If you're using rechargeable batteries, make sure they are fully charged before attempting to sync the Wii Remote. A fully charged Wii Remote will have a steady, bright LED light on the front, indicating that it's ready for syncing. If the LED light is dim or flashing, it may indicate low battery levels, and you should replace or recharge the batteries before proceeding. Having fully charged batteries will also help prevent any interruptions during the syncing process, ensuring a smooth and successful connection between the Wii Remote and the console. By taking this simple step, you can avoid any potential issues and ensure a hassle-free syncing experience.
The Syncing Process for a Wii Remote
The syncing process for a Wii Remote is a straightforward procedure that requires a few simple steps to complete. To sync your Wii Remote, you will need to start by pressing the SYNC button on the remote itself. Before you do this, however, it's essential to ensure that your Wii Console is properly prepared. This involves opening the SD card slot cover on the console, which will give you access to the SYNC button located underneath. Once you have opened the SD card slot cover, you can then proceed to press the SYNC button on the Wii Console. By following these steps, you will be able to successfully sync your Wii Remote and enjoy uninterrupted gaming. To begin the syncing process, start by pressing the SYNC button on the Wii Remote.
Press the SYNC Button on the Wii Remote
To sync a Wii Remote, start by pressing the SYNC button on the remote. This button is usually located on the back of the remote, near the battery compartment. Pressing the SYNC button will initiate the syncing process, allowing the Wii Remote to communicate with the Wii console. Once you've pressed the SYNC button, the Wii Remote's LED lights will begin to flash, indicating that it's searching for a connection. Next, open the SD card slot on the front of the Wii console and press the SYNC button on the console. This will allow the Wii console to recognize the Wii Remote and establish a connection. The syncing process should only take a few seconds, and once it's complete, the LED lights on the Wii Remote will stop flashing and remain steady, indicating that the remote is now synced and ready for use.
Open the SD Card Slot Cover on the Wii Console
To sync a Wii Remote, you need to open the SD Card Slot Cover on the Wii Console. This cover is located on the top of the console, and it's held in place by a small clip. To open it, simply slide the clip to the right, and the cover will pop open. Inside, you'll find the SD Card Slot, which is used for storing game data and other content. However, for syncing a Wii Remote, you'll need to access the SYNC button, which is located next to the SD Card Slot. Pressing this button will initiate the syncing process, allowing you to pair your Wii Remote with the console. Make sure to press the SYNC button on the Wii Remote at the same time to complete the syncing process. Once the syncing is complete, the Wii Remote's LED lights will stop blinking, and you'll be ready to start playing your favorite games.
Press the SYNC Button on the Wii Console
To sync a Wii Remote, start by pressing the SYNC button on the Wii console. This button is usually located under the SD card slot, and it's a small, rectangular button. Pressing this button will initiate the syncing process. Once you've pressed the SYNC button, the Wii console will begin to search for nearby Wii Remotes that are in sync mode. Make sure that the Wii Remote you want to sync is turned on and that the batteries are not low. If the batteries are low, the syncing process may not work properly. After pressing the SYNC button, the Wii console will display a message on the screen indicating that it's searching for a Wii Remote. This process usually takes a few seconds. If the Wii Remote is successfully synced, the Wii console will display a confirmation message, and the Wii Remote will be ready to use. If the syncing process fails, you may need to try again or check the batteries in the Wii Remote.
Troubleshooting Common Syncing Issues
Troubleshooting common syncing issues with your Wii console can be a frustrating experience, but there are several steps you can take to resolve the problem. If your Wii remote is not syncing with your console, there are a few potential causes to consider. First, it's possible that other devices in the vicinity are interfering with the signal. Second, the issue may be with the console itself, and a simple restart may be all that's needed. Finally, the problem could be with the remote's batteries, which may need to be replaced. To start the troubleshooting process, let's first check for interference from other devices.
Check for Interference from Other Devices
When troubleshooting syncing issues with your Wii remote, it's essential to check for interference from other devices. Other electronic devices in your vicinity can disrupt the wireless signal between your Wii remote and the console, causing syncing problems. Devices such as cordless phones, microwaves, and neighboring Wi-Fi routers can emit signals that interfere with the Wii remote's frequency. To minimize interference, try moving these devices away from your Wii console and remote. You can also switch off devices that are not in use to reduce electromagnetic interference. Additionally, physical barriers like walls and furniture can also impact the signal strength, so try repositioning your Wii console and remote to achieve a clear line of sight. By reducing interference from other devices, you can improve the chances of successful syncing and enjoy uninterrupted gaming with your Wii remote.
Restart the Wii Console and Try Syncing Again
If restarting the Wii console and trying to sync again doesn't work, there are a few other troubleshooting steps you can take. First, ensure that the Wii Remote is properly paired with the console. To do this, go to the Wii Settings menu, select "Wii Remote Settings," and then choose "Re-sync Wii Remotes." Follow the on-screen instructions to complete the pairing process. If the issue persists, try resetting the Wii Remote by pressing the red "Sync" button located on the back of the remote, then immediately pressing and holding the "B" button while pointing the remote at the Wii console. This will reset the remote and allow you to try syncing again. Additionally, check that the Wii Remote's batteries are not low, as weak batteries can cause syncing issues. If none of these steps resolve the issue, it's possible that there's a problem with the Wii Remote itself, and you may need to replace it.
Replace the Batteries in the Wii Remote
To replace the batteries in the Wii Remote, start by locating the battery compartment, which is usually found on the back of the remote. Open the compartment by sliding the cover downwards, and you will see the two AA batteries inside. Remove the old batteries and dispose of them properly. Next, insert the new batteries, making sure to align the + and - terminals correctly. Replace the battery cover and slide it back up to secure it in place. Your Wii Remote should now be ready to use. If you're using rechargeable batteries, make sure to charge them according to the manufacturer's instructions before inserting them into the remote. It's also a good idea to check the battery contacts for any corrosion or dirt, and clean them gently with a soft cloth if necessary. By replacing the batteries, you should be able to resolve any syncing issues caused by low battery power.