How To Extend Background In Photoshop
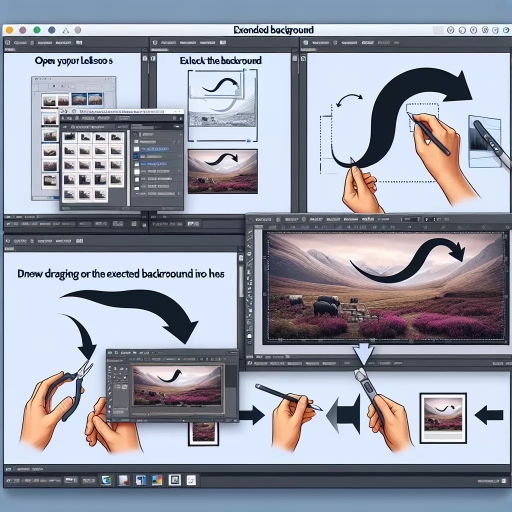
Here is the introduction paragraph: Extending a background in Photoshop can be a game-changer for photographers, graphic designers, and digital artists. Whether you're looking to create a seamless panorama, remove distractions, or simply add more context to your image, extending the background can elevate your work to the next level. But where do you start? To master this technique, it's essential to understand the basics of background extension in Photoshop, including the tools and techniques involved. From there, you can explore various methods for extending the background, such as using the Content-Aware Fill tool or the Clone Stamp tool. Finally, refining and finalizing the extended background is crucial to achieving a natural-looking result. In this article, we'll dive into the world of background extension in Photoshop, starting with the fundamentals. Let's begin by understanding the basics of background extension in Photoshop.
Understanding the Basics of Background Extension in Photoshop
Here is the introduction paragraph: When working with images in Photoshop, one of the most common tasks is extending the background to create a seamless and visually appealing composition. Background extension is a fundamental technique that can make or break the overall look of an image. To master this skill, it's essential to understand the basics of background extension, including the key tools and features used, the preparation steps required, and the importance of this technique in the first place. In this article, we'll delve into the world of background extension, starting with the basics: what is background extension and why is it important? By understanding the fundamentals, you'll be able to take your image editing skills to the next level and create stunning visuals that capture the viewer's attention. Please let me know if you need any further assistance.
What is Background Extension and Why is it Important
Background extension is a fundamental technique in Photoshop that allows users to increase the size of an image's background while maintaining its original content and proportions. This is particularly useful when working with images that have a limited background area, such as product photography or portraits, where the subject is centered and the background is minimal. By extending the background, users can create a more balanced composition, add context to the image, or simply make the subject stand out more. Background extension is also essential in various industries, including advertising, e-commerce, and graphic design, where images need to be adapted to different formats and resolutions. Moreover, extending the background can help to remove distractions, improve the overall aesthetic, and enhance the visual impact of the image. In Photoshop, background extension can be achieved through various techniques, including content-aware fill, clone stamp, and layer masking, making it a versatile and powerful tool for photographers, designers, and artists.
Key Tools and Features Used for Background Extension
When it comes to extending a background in Photoshop, there are several key tools and features that can help you achieve a seamless and professional-looking result. One of the most essential tools is the Clone Stamp Tool, which allows you to duplicate and blend pixels from one area of the image to another. This tool is particularly useful for extending a background that has a repeating pattern or texture. Another crucial tool is the Healing Brush Tool, which enables you to remove blemishes and imperfections while maintaining the texture and tone of the surrounding area. The Content-Aware Fill feature is also a game-changer, as it allows you to fill a selected area with a matching pattern or texture, making it perfect for extending a background. Additionally, the Perspective Warp Tool and the Transform Tool can be used to adjust the perspective and scale of the extended background, ensuring a realistic and cohesive look. Furthermore, the use of layers and masks can help you to work non-destructively and make adjustments to the extended background without affecting the original image. By mastering these tools and features, you can extend a background in Photoshop with ease and achieve a professional-looking result.
Preparation Steps Before Extending the Background
When extending a background in Photoshop, preparation is key to achieving a seamless and natural-looking result. Before you start extending the background, take the time to prepare your image by following these essential steps. First, open your image in Photoshop and duplicate the layer by going to Layer > Duplicate Layer or using the shortcut Ctrl+J (Windows) or Command+J (Mac). This will create a copy of the original layer, allowing you to work on the duplicate without affecting the original image. Next, select the duplicated layer and go to Image > Image Size to check the resolution and dimensions of your image. Ensure that the resolution is set to 300 pixels per inch (PPI) and the dimensions are suitable for your intended use. If necessary, adjust the image size to meet your requirements. Additionally, check the color mode of your image by going to Image > Mode. If your image is in a color mode other than RGB, convert it to RGB by selecting RGB Color from the drop-down menu. This will ensure that your image is in the correct color mode for editing and extension. Finally, save your image as a PSD file to preserve the layers and editing history. By following these preparation steps, you'll be able to extend your background with confidence, knowing that your image is ready for editing and manipulation.
Methods for Extending the Background in Photoshop
When it comes to extending the background in Photoshop, there are several methods that can be employed to achieve a seamless and natural-looking result. Three of the most effective techniques include using the Content-Aware Fill Tool, applying the Clone Stamp Tool, and utilizing the Perspective Warp Tool. Each of these methods offers a unique approach to background extension, allowing users to choose the best tool for their specific needs. For instance, the Content-Aware Fill Tool is ideal for extending simple backgrounds with minimal details, while the Clone Stamp Tool is better suited for more complex backgrounds with intricate patterns. On the other hand, the Perspective Warp Tool is perfect for extending backgrounds with unique perspectives or angles. By mastering these three techniques, users can extend their backgrounds with ease and achieve professional-looking results. In this article, we will explore each of these methods in detail, starting with the Content-Aware Fill Tool for seamless extension.
Using the Content-Aware Fill Tool for Seamless Extension
Using the Content-Aware Fill Tool for Seamless Extension The Content-Aware Fill Tool is a powerful feature in Photoshop that allows you to seamlessly extend the background of an image by filling in the desired area with matching content. To use this tool, select the area you want to extend using the Marquee Tool or the Lasso Tool, then go to Edit > Fill > Content-Aware Fill. In the Content-Aware Fill dialog box, you can adjust the settings to fine-tune the fill, such as the sampling area, the fill mode, and the opacity. The tool will then analyze the surrounding area and fill in the selected area with matching content, creating a seamless extension of the background. This tool is particularly useful for extending simple backgrounds, such as skies, walls, or textures, and can save you a significant amount of time and effort compared to manual cloning or painting. Additionally, the Content-Aware Fill Tool can also be used to remove unwanted objects or blemishes from an image, making it a versatile and essential tool in any Photoshop workflow.
Applying the Clone Stamp Tool for Detailed Background Extension
Applying the Clone Stamp Tool for Detailed Background Extension The Clone Stamp Tool is a powerful feature in Photoshop that allows for detailed background extension by duplicating and blending pixels from one area of the image to another. To apply the Clone Stamp Tool, start by selecting the tool from the toolbar or pressing the 'S' key on your keyboard. Next, choose a suitable brush size and hardness, depending on the level of detail you want to achieve. It's essential to work with a soft brush to avoid creating harsh edges. Then, Alt-click (Windows) or Option-click (Mac) on an area of the image that you want to clone, which will set the source point. Now, click and drag the brush over the area you want to extend, and the Clone Stamp Tool will duplicate the pixels from the source point, blending them seamlessly with the surrounding area. To achieve a more realistic extension, use the 'Aligned' option, which allows you to clone pixels in a continuous motion, maintaining the same offset from the source point. Additionally, you can use the 'Sample' option to clone pixels from multiple layers or the current layer, giving you more flexibility in your background extension. By carefully applying the Clone Stamp Tool, you can achieve a detailed and realistic background extension that enhances the overall composition of your image.
Utilizing the Perspective Warp Tool for Complex Backgrounds
Utilizing the Perspective Warp Tool for Complex Backgrounds When dealing with complex backgrounds that require precise adjustments, the Perspective Warp Tool is an invaluable asset in Photoshop. This tool allows you to manipulate and extend the background while maintaining its original perspective, making it ideal for images with multiple vanishing points or intricate details. To use the Perspective Warp Tool, start by selecting the tool from the toolbar or pressing the 'W' key. Then, click and drag the tool over the area of the background you want to extend, creating a grid that defines the perspective plane. You can adjust the grid's size and shape by dragging the corners or edges, ensuring it accurately matches the background's perspective. Once the grid is in place, use the handles to extend the background, maintaining the original perspective and proportions. The Perspective Warp Tool also allows you to adjust the grid's orientation and position, enabling you to fine-tune the extension and achieve a seamless blend with the original image. By utilizing the Perspective Warp Tool, you can efficiently extend complex backgrounds in Photoshop, preserving the original perspective and details, and achieving professional-looking results.
Refining and Finalizing the Extended Background
Refining and finalizing the extended background is a crucial step in creating a seamless and realistic image. To achieve this, it's essential to focus on three key aspects: blending modes and layer styles for a natural look, adjusting colors and contrast for a cohesive appearance, and adding final touches with sharpening and noise reduction. By mastering these techniques, you can ensure that your extended background blends perfectly with the rest of the image, creating a visually stunning and professional-looking result. In this article, we'll delve into each of these aspects, starting with the importance of blending modes and layer styles in achieving a natural look. By applying the right blending modes and layer styles, you can create a seamless transition between the extended background and the rest of the image, setting the stage for a polished and refined final result.
Blending Modes and Layer Styles for a Natural Look
Blending modes and layer styles are essential tools in Photoshop for achieving a natural look when extending a background. By experimenting with different blending modes, you can seamlessly merge the extended area with the original image. The "Multiply" blending mode is particularly useful for darkening the extended area and creating a sense of depth, while the "Screen" mode can be used to lighten the area and create a more subtle transition. Additionally, layer styles such as "Drop Shadow" and "Inner Shadow" can be used to add depth and dimension to the extended area, creating a more realistic and natural look. To apply a blending mode, simply select the layer containing the extended area and choose the desired mode from the "Blending Mode" dropdown menu in the Layers panel. To apply a layer style, select the layer and click on the "Layer Style" button at the bottom of the Layers panel, then choose the desired style from the menu. By combining blending modes and layer styles, you can create a seamless and natural-looking extension of your background.
Adjusting Colors and Contrast for a Cohesive Appearance
Adjusting colors and contrast is a crucial step in achieving a cohesive appearance when extending a background in Photoshop. To start, select the entire extended background by pressing Ctrl+A (Windows) or Command+A (Mac), and then go to Image > Adjustments > Hue/Saturation. In the Hue/Saturation dialog box, adjust the Hue and Saturation sliders to match the colors of the original background. You can also use the Colorize option to apply a uniform color tone to the entire background. Next, go to Image > Adjustments > Levels to adjust the contrast of the extended background. In the Levels dialog box, adjust the Black, Gray, and White sliders to balance the contrast and make the background look more natural. Additionally, you can use the Curves tool to fine-tune the contrast and make adjustments to specific areas of the background. To do this, go to Image > Adjustments > Curves, and use the curve to adjust the contrast and brightness of the background. By making these adjustments, you can create a seamless and cohesive appearance that blends the extended background with the original image.
Final Touches with Sharpening and Noise Reduction
Here is the paragraphy: Refining and finalizing the extended background involves making a few final touches to enhance the overall image. One of the most important steps is sharpening, which helps to define the details and textures in the image. To sharpen the image, go to Filter > Sharpen > Smart Sharpen, and adjust the settings to your liking. You can also use the Unsharp Mask filter, which allows for more precise control over the sharpening process. Another important step is noise reduction, which helps to eliminate any unwanted grain or digital noise in the image. To reduce noise, go to Filter > Noise > Reduce Noise, and adjust the settings to your liking. You can also use the Camera Raw filter, which has a built-in noise reduction tool. By applying these final touches, you can take your extended background to the next level and create a more polished and professional-looking image.