How To Clean Vicks Humidifier
Here is the introduction paragraph: Cleaning your Vicks humidifier regularly is essential to ensure it continues to function effectively and efficiently. A dirty humidifier can harbor bacteria and mold, which can be released into the air and exacerbate respiratory issues. To keep your humidifier in good working condition, it's crucial to clean it regularly. In this article, we'll guide you through the process of cleaning your Vicks humidifier, covering preparation for cleaning, disassembling and cleaning the parts, and drying and reassembling the humidifier. By following these steps, you'll be able to keep your humidifier clean and running smoothly. To get started, let's begin with the preparation for cleaning, which involves gathering the necessary materials and understanding the cleaning process.
Preparation for Cleaning
Cleaning a humidifier is an essential task to ensure it continues to function effectively and efficiently. To prepare for cleaning, there are several steps you should take to guarantee a safe and successful process. Firstly, it is crucial to turn off and unplug the humidifier to prevent any accidental start-ups or electrical shocks. Additionally, emptying the water tank and removing any accessories, such as filters or misting nozzles, will make the cleaning process more manageable. Furthermore, wearing protective gloves and goggles will safeguard you against any harsh cleaning chemicals or bacteria that may be present in the humidifier. By taking these precautions, you can ensure a thorough and safe cleaning of your humidifier. To begin, start by turning off and unplugging the humidifier.
Turn Off and Unplug the Humidifier
To ensure a safe and effective cleaning process, it's essential to turn off and unplug the Vicks humidifier before you start. This step is crucial in preventing any accidental start-ups or electrical shocks during the cleaning process. Begin by locating the power button or switch, usually found on the back or side of the humidifier, and press it to turn off the device. Next, unplug the humidifier from the power outlet to completely disconnect it from the electrical supply. This will prevent any electrical currents from flowing through the device, allowing you to clean it safely and efficiently. Additionally, unplugging the humidifier will also help prevent any damage to the device's electrical components during the cleaning process. By turning off and unplugging the humidifier, you'll be able to focus on cleaning the device without any distractions or safety concerns, ensuring a thorough and effective cleaning process.
Empty the Water Tank and Remove Any Accessories
To ensure a thorough cleaning of your Vicks humidifier, it's essential to start by emptying the water tank and removing any accessories. Begin by unplugging the humidifier from the power source to prevent any accidental start-ups. Next, carefully lift the water tank off the base of the humidifier and pour out any remaining water into a sink or drain. If there are any mineral deposits or visible signs of bacterial growth, you may want to rinse the tank with warm water to loosen them. Remove any filters, misting trays, or other accessories from the humidifier, as these will need to be cleaned separately. For filters, check the manufacturer's instructions to see if they can be washed and reused or if they need to be replaced. Set aside any removable parts, such as the humidistat or nightlight, to be cleaned later. By emptying the water tank and removing accessories, you'll be able to access all areas of the humidifier and give it a deep clean. This step is crucial in preventing the growth of bacteria and mold, which can be harmful to your health and affect the performance of the humidifier.
Wear Protective Gloves and Goggles
When it comes to cleaning your Vicks humidifier, safety should always be your top priority. Before you start the cleaning process, make sure to wear protective gloves and goggles to shield yourself from any potential harm. The gloves will protect your hands from harsh chemicals, hot water, and any sharp edges or points on the humidifier's components. Goggles, on the other hand, will safeguard your eyes from splashes of cleaning solution or debris that may be dislodged during the cleaning process. By wearing these protective gear, you can ensure a safe and injury-free cleaning experience. Additionally, wearing gloves and goggles will also prevent the transfer of bacteria and other microorganisms from your hands and face to the humidifier, which can help prevent the growth of mold and mildew. This is especially important when cleaning a humidifier, as it can harbor bacteria and other microorganisms that can be released into the air and exacerbate respiratory issues. By taking this simple precaution, you can ensure that your Vicks humidifier is not only clean but also safe to use.
Disassembling and Cleaning the Parts
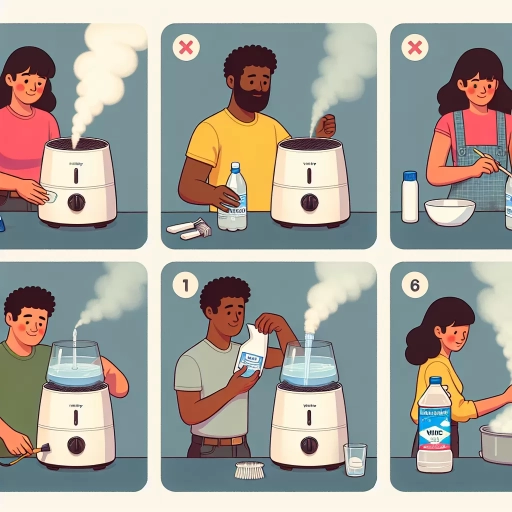
To disassemble and clean the parts of your humidifier, it's essential to follow a step-by-step approach to ensure that every component is thoroughly cleaned and free of mineral deposits and bacteria. The process involves several key steps, including removing and soaking the filter in a mixture of water and vinegar, using a soft-bristled brush to clean the humidifier's exterior and interior, and soaking the water tank and other removable parts in warm soapy water. By following these steps, you'll be able to restore your humidifier to its original condition and ensure that it continues to provide clean and healthy air for your home. To start, let's begin with the first step: removing and soaking the filter in a mixture of water and vinegar.
Remove and Soak the Filter in a Mixture of Water and Vinegar
To remove and soak the filter in a mixture of water and vinegar, start by carefully lifting the filter out of the humidifier and placing it in a bowl or sink. Next, mix equal parts of water and white vinegar in the bowl, making sure the filter is fully submerged in the solution. Allow the filter to soak for at least 30 minutes to an hour, which will help loosen any mineral deposits and debris that may have accumulated. The acid in the vinegar will break down and dissolve these deposits, making it easier to clean the filter. After soaking, use a soft-bristled brush or cloth to gently scrub away any remaining debris or stains. Rinse the filter thoroughly with clean water to remove any remaining vinegar solution and debris. This process will help restore the filter's effectiveness and ensure your humidifier continues to run efficiently. By regularly soaking and cleaning the filter, you can help extend the life of your Vicks humidifier and maintain its performance.
Use a Soft-Bristled Brush to Clean the Humidifier's Exterior and Interior
To maintain your Vicks humidifier's performance and hygiene, it's essential to clean both its exterior and interior regularly. A soft-bristled brush is an ideal tool for this task. Start by gently sweeping the exterior of the humidifier with the soft-bristled brush to remove any visible dust, dirt, or debris that may have accumulated on the surface. This will prevent any dirt or grime from entering the humidifier's interior during the cleaning process. Next, use the soft-bristled brush to clean the interior of the humidifier, paying particular attention to any areas with visible mineral deposits or buildup. The soft bristles will help dislodge any stubborn debris without scratching the humidifier's surfaces. Be sure to clean all accessible areas, including the water tank, misting mechanism, and any other parts that come into contact with water. By using a soft-bristled brush to clean the humidifier's exterior and interior, you'll be able to remove any dirt, dust, or debris that may be affecting its performance, and help keep your humidifier running efficiently and effectively.
Soak the Water Tank and Other Removable Parts in Warm Soapy Water
Soak the water tank and other removable parts in warm soapy water to loosen any mineral deposits and debris. Fill a sink or a large container with enough warm water to cover the parts, and add a small amount of mild dish soap. Submerge the parts and let them soak for about 30 minutes to an hour. This will help break down any tough stains and grime, making it easier to scrub them clean. You can also use a soft-bristled brush to gently scrub away any stubborn stains or mineral deposits. After soaking, rinse the parts thoroughly with clean water to remove any soap residue. This step is crucial in removing any bacteria, mold, or mildew that may have accumulated on the parts, ensuring your humidifier runs efficiently and safely.
Drying and Reassembling the Humidifier
To properly dry and reassemble a humidifier, it's essential to follow a step-by-step process to ensure it's clean, dry, and functioning correctly. First, use a clean towel to dry the humidifier's exterior and interior, paying extra attention to any areas with visible mineral deposits or moisture accumulation. Next, allow the water tank and other removable parts to air dry, which will help prevent bacterial growth and mineral buildup. Finally, reassemble the humidifier and plug it back in, making sure all parts are securely in place and the device is working properly. By following these steps, you'll be able to dry and reassemble your humidifier effectively, ensuring it continues to provide clean and healthy air for your home. Use a clean towel to dry the humidifier's exterior and interior.
Use a Clean Towel to Dry the Humidifier's Exterior and Interior
To ensure your Vicks humidifier remains in good working condition and prevents the growth of bacteria and mold, it's essential to dry it thoroughly after cleaning. Start by using a clean towel to dry the exterior and interior of the humidifier. Gently pat the exterior with the towel, paying extra attention to any areas with visible mineral deposits or moisture accumulation. For the interior, use the towel to wipe down the tank, misting mechanism, and any other components that came into contact with water. Be sure to remove any excess moisture from the interior to prevent bacterial growth. By drying the humidifier's exterior and interior with a clean towel, you'll help prevent water spots and mineral deposits from forming, keeping your humidifier in good working condition and ready for its next use.
Allow the Water Tank and Other Removable Parts to Air Dry
After cleaning and rinsing the water tank and other removable parts, it's essential to allow them to air dry. This step is crucial in preventing bacterial growth and mineral buildup. To air dry, place the parts on a clean towel, making sure they are not touching each other. You can also use a drying rack or a wire mesh tray to improve airflow. Allow the parts to air dry for at least 30 minutes to an hour. This will help to evaporate any remaining moisture, making it difficult for bacteria and mold to grow. Additionally, air drying will also help to prevent mineral deposits from forming, which can affect the performance of your humidifier. By allowing the water tank and other removable parts to air dry, you'll be able to reassemble your Vicks humidifier with confidence, knowing that it's clean, dry, and ready for use.
Reassemble the Humidifier and Plug it Back In
Reassembling the humidifier is a straightforward process that requires attention to detail to ensure all parts are properly secured. Start by attaching the water tank to the base of the humidifier, making sure it clicks into place securely. Next, reattach the misting mechanism, ensuring it is properly aligned with the water tank. If your humidifier has a filter, replace it with a new one or reattach the cleaned filter, making sure it is securely locked in place. Finally, plug the humidifier back in and turn it on to test that it is working properly. It's essential to ensure all parts are securely attached to prevent any leaks or damage to the humidifier. Additionally, make sure to refer to the user manual for specific reassembly instructions, as different models may have varying requirements. By following these steps, you can successfully reassemble your humidifier and have it up and running in no time.