How To Draw A Moon
 Drawing the moon may seem intricate and confusing, but with a systematic approach, even novices can master the art. This informative and engaging article aims to demystify the process of sketching the moon, transforming it from an intimidating task, into a series of manageable steps. Our step-by-step guide will provide meticulous details on how to create the perfect moon drawing, accentuating important aspects like light, shadow, and texture. Before delving into the intricacies of the tutorial, we will commence by understanding the basics of drawing—a foundation that is essential not just for sketching a moon, but any artistic endeavor. As we progress, you'll discover how to infuse your artwork with additional details to make your moon more realistic and visually appealing. Let's illuminate our artistic journey by first comprehending the fundamental principles of drawing.
Understanding the Basics of Drawing
Understanding the Basics of Drawing is not just about putting pencil to paper. It’s an intricate process, dictated by nuance and guided by foundational concepts. This journey begins with an overview of the requisite tools for drawing, progresses to an introduction to basic drawing techniques, and culminates in a deep dive into the world of shading and highlights. Albeit drawing might seem tricky initially, with the right guidance and persistence, anyone can master this creative form of expression. Armed with a variety of materials, knowledge of fundamental techniques, and an understanding of the play of light and shadow, the canvas can truly become your oyster. Stay tuned as we embark on this artistic voyage, beginning with an exploration of the tools of the trade. In our next section, "An Overview of the Tools Required for Drawing", we'll be delving into the different types of drawing tools, and how each one can affect your artwork. Knowing the right tool for the right need is the very first step to mastering the art of drawing. So get ready to equip yourself with all the necessary tools that can help unlock your creativity. Stay tuned as we dive into the thrilling, expansive universe of artistic tools.
An Overview of the Tools Required for Drawing
Drawing a moon might appear simple and rudimentary, but achieving a professional and realistic look requires certain essential tools, techniques, and practices that artists of all levels should understand. Foremost, acquiring the correct drawing tools is imperative. One of the most fundamental tools for drawing is a set of high-quality pencils, ranging from hard pencils, like an H or 2H, which yield lighter lines, to the softer B pencils, like 5B or 6B, which can generate darker shadows and bold outlines. Moreover, erasers are not only useful for fixing mistakes but also crucial for creating various effects. Primarily utilized is a kneaded eraser, which can be molded into different shapes enabling the artist to produce precise light effects, subtle shadows, and clean lines. For gentle erasing over large areas without damaging the paper, a vinyl eraser becomes handy. Additionally, your drawing toolkit should comprise of blending tools such as tortillons or stumps, perfect for smoothly blending shadows and highlights to render a natural, three-dimensional feel to the moon. They are typically employed to eliminate hard lines, offering a smoother finish to the drawing surface. Furthermore, for detailing purposes, consider goose quills or dip pens that can generate a beautiful hatching or cross-hatching pattern, which supplies texture and depth to your moon, making it more realistic and visually striking. Lastly, incorporating a high-grade drawing paper makes a considerable difference. Heavier, thicker papers with a slight texture can hold pencil much better, offering superior control and fostering an enhanced final appearance. To encapsulate, understanding not only how each tool is used but also the myriad of effects each can generate will significantly improve the drawing expertise. From pencils and erasers to blending tools and quality paper, each tool holds unique capabilities in the process of drawing a moon. It is the mastery of these tools that contribute to fulfilling the desired result -- a profound, three-dimensional moon with distinctive shadows and highlights.
Introduction to Basic Drawing Techniques
Introduction to Basic Drawing Techniques
Mastering the art of drawing involves understanding and harnessing an array of fundamental techniques. These foundational methodologies form the bedrock upon which all types of art are built, regardless of the medium being deployed. The basic drawing techniques provide a repertoire of skills that all artists—from the neophyte sketcher to the professional illustrator—can deploy to enrich their artistry. The first absolutely essential skill to master is the correct holding of the pencil. The grip of the pencil affects the control and type of lines an artist can produce. Precise firm lines for detailed work necessitate a closer grip to the pencil's point, while broader, free-flowing strokes benefit from a held further back. Another fundamental and underestimated component of drawing is the understanding of light and shadows. By accurately representing the dimensions of light and its interplay with objects, artists can infuse their creations with an unparalleled degree of depth and authenticity. Observing how light falls on various forms and surfaces in real life and interpreting it into our work is an integral part of drawing. Furthermore, getting to grips with lines and shapes is another fundamental basic of drawing. They are the building blocks of all images, and learning to use and manipulate lines and shapes to depict what you see or envision is vital. There are myriad types of lines available, such as contour lines, gesture lines, and implied lines, and a skilled artist will employ a mix to breathe life into their drawings. Lastly, the technique of using texture should not be underestimated. Texture brings an additional dimension to your drawings, lending them an almost tactile realism, particularly crucial when trying to recreate nature's intricacy, such as the moon's craters in our endeavor here. Imbibing these basic drawing techniques serves not only to improve one's artistic capabilities but also lay the foundation for higher studies in art. With consistent practice and application of these fundamentals, even the most challenging subjects become surmountable, and drawing the moon will seem a lighter task than ever. This way, artists can capture not just the visible elements but the unseen essence imbuing the subject with greater beauty and realism.Understanding Shading and Highlights in Drawing
In understanding the essentials of drawing, mastering the right blend of shading and highlights is critical. It's a shading technique that bestows vitality to images, imparting meaning and life, forging a transformative path from mere sketches to artistry with depth. Shading captivates the viewer by creating an illusion of light and depth in the artwork. Successful use of this technique can add both contour and perspective, morphing two-dimensional diagrams into three-dimensional marvels. Meanwhile, seemingly negligible at first glance, highlights are the 'cherry on top' that intensify the illusion of texture and volume. They exemplify the areas where light is directly hitting your subject, like the moon, creating a stark contrast against the shaded areas. In the process of drawing the moon, for instance, observe the images in photography or reality where the sunlight illuminates its surface, producing bright moonlit areas - the highlights. Practice using your drawing medium lightly for these areas, with progressively more force for the more subtly lit curved spaces. To achieve a realistic texture, shade the cratered areas with darker tones. Subtle shifts between your shadows, mid-tones, and highlights will be the determining factors in the success of your drawing's lifelike presence. Moreover, mastering shading and highlights isn't merely about mechanical application; it's knowing the science of light. Understanding how light affects an object, where it casts shadows, and how it emphasizes certain areas is crucial. It encourages the artist to perceive the world from a keenly observant perspective, training the eye to see subtle interplays of light and shadow that the untrained eye might miss. In a nutshell, incorporating shading and highlights correctly can drastically shape the overall impression and impact of any art piece. It anchors the artwork with depth, form, and orientation. The adroit application helps to capture the moon's textured façade and uneven surface, enriching the drawing's detail and complexity. To hone your skills, understand the interplay of light and shadow on your subject, reproduce these in your artwork with patience and precision, and watch as your drawings come to life, imbued with the beauty of realism.
Step-by-Step Guide to Drawing a Moon
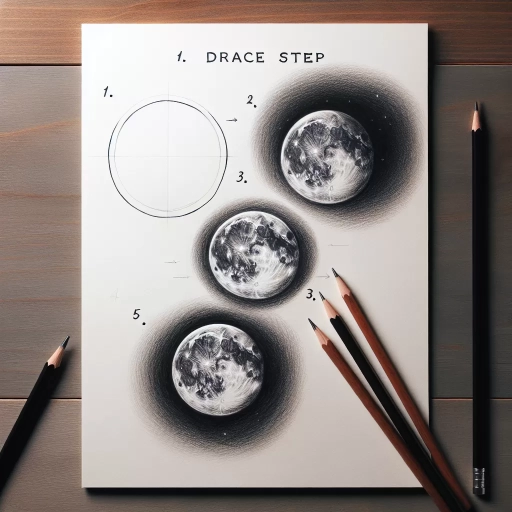
Creating an evocative and detailed illustration of the moon doesn't have to be rocket science. Through this comprehensive step-by-step guide to drawing a moon, anyone - from an amateur sketcher to a professional artist - will find actionable insights and transformative techniques to improve their craft. This riveting guide will unravel the secrets behind creating a compelling lunar sketch, stretching into three main support areas. The first phase takes you on a celestial journey, where you establish the very foundation of your moon illustration by creating the outline of the moon. The voyage continues deeper, leading to the second section, where you foster depth in your drawing by applying shading to depict the grit and craters of the lunar surface. Finally, the expedition culminates with the third part, where you'll master the art of adding highlights for a realistic look, taking your moon beyond the confines of a two-dimensional paper. The magic begins with mere lines and circles, applied aptly to construct the outline of the moon. Don't worry; it's as thrilling yet straightforward as it sounds. Let's get started.
Creating the Outline of the Moon
Creating the outline of the moon is an integral part of the entire process of drawing one, bringing to life the celestial body we often admire in our night sky. This step lends the moon its overall shape and character, therefore, it is essential to approach this step with patience and precision. Begin by deciding on the size of your moon and gently drawing a circle using a faint, easily erasable line. It might be useful to use a compass or a circular object as a guide for a smooth, rounded contour. Ensuring the circle is evenly shaped is important as it forms the basic silhouette of your moon. Once you're satisfied with the general outline, it's time to introduce a bit of cosmic realism. The moon isn't a perfect sphere; it has craters, crevices, and inconsistencies from thousands of years of meteoric impacts and dust accumulation. Illustrated subtly, these can add a three-dimensional feel and character to your moon. Gentle, undulating curves at the edges can suggest the presence of craters, and varied line weight can help add depth to the drawing. In this initial phase, remember that your lines should remain light so they can be effortlessly altered or erased as you refine your moon's contour. Keep in mind, the moon's silhouette isn't just about a perfect circle; it's about the perfect imperfections that make the moon captivating and unique. A thoughtful approach to creating the outline will contribute to a more believable and captivating depiction of the moon. Creating an arresting moon illustration needs more than just technique - it demands observation, imagination and a sense of wonder. In drawing the moon, we're not merely mapping a celestial object; we’re crafting a visual narrative of human fascination with the cosmos. This underscores the importance of investing in this initial paradigm-shaping phase. A solid, meticulously crafted outline promises an engaging, life-like illustration. Don’t rush through this process, enjoy it. As Vincent Van Gogh once highlighted-"The sight of stars makes me dream." Indeed, may the sight of your moon stir dreams in the beholder, even as its creation has in you. The first stroke that begins the outline is the first step towards making an enchanting space come alive on your canvas.
Applying Shading to Depict Lunar surface
Applying shading to depict the lunar surface is a vital step in enhancing the realistic features of your moon sketch. It allows the artist to capture the intricate design of the Moon's external appearance, featuring a mesh of craters and ridges. This process rightly imitates the shadows formed as a result of the Sun’s light hitting the Moon's surface. The first step in shading the moon’s surface is to consider the light source, and it's typically the Sun. The areas closest to the light source are the brightest, getting gradually darker as they extend away from the source. This light-distribution analysis lends a three-dimensionality effect to the craters and gives an impression of the moon's unique rough and uneven surface. Once you have defined the areas of light and shadow on your moon, the method of applying the shade commences. A softer graphite pencil, like a 2B or 4B, is excellent for depicting darker shadows, while a harder pencil, like a H or 2H, can reproduce lighter, more subtle shadows. Start at dark spots, making small circular motions to mimic the rough texture. Consider using a blending stump or q-tip for smudging out hard lines, creating the moon's characteristic hazy atmosphere. As you continue to apply more shade, differentiate the exposure levels by increasing the graphite deposit in some areas and softening it in others. This trick will help you illustrate an array of craters on the moon with different levels of depth and size. To create the illusion of smaller, far away craters, use less pressure and make tiny dots. Larger, closer craters require more pressure and more extensive shading. If an area becomes too dark, a kneaded eraser can lightly lift some of the excess graphite. Tiny bright specks can mimic impact rays, which are streaks of debris that radiate from some large lunar craters. For a more realistic moon drawing, studying actual photos of the moon beforehand can be quite beneficial. It helps in understanding the placements of the craters and shadows, thereby adding a higher level of detail and credibility to your work. In conclusion, shading is an essential tool in drawing, especially when capturing the mystifying gaze of lunar surface. It injects depth, creates texture, highlights, and lowlights, making the sketch come to life. By mastering this technique, your moon drawing would not be just another round object, but a reflection of its celestial beauty.
Adding Highlights for a Realistic Look
The secret to achieving a realistic portrayal of the moon lies largely in the details, especially when incorporating highlights into your drawing. Highlights are the lighter areas that the light source directly hits. When done correctly, they provide depth and dimension to your depiction, leading to a more accurate, visually impressive representation of the moon. Admittedly, integrating highlights into your drawing can be a tricky business. However, once you grasp the know-how, amazing things will start to happen on your canvas. Let's get started. Firstly, remember that the moon is a spherical body – it is not flat. Hence, adding highlights to your moon drawing will mostly follow a specific illuminance pattern. The portion of the moon that is closest to your light source (in most scenarios, the Sun) should exhibit the highest concentration of highlights. Likewise, areas farther away from the light source should display fewer highlights. Once you've established where the highlights will go, it's time to add them to your drawing. A common method among artists is to use an eraser or white charcoal pencil to achieve this effect. By lightly dabbing or drawing on the zones that need illumination, a beautifully contrasted image slowly begins to emerge. However, your work doesn't stop there. To achieve a truly realistic look, you must replicate the moon's distinctive craters. After all, these unique characteristics are what make the moon so visually compelling. Little hints of shadow and highlight help to suggest the dimensional contours of the moon. Next, think about the quality of your lines. The unique texture of the moon's surface is a blend of soft gradations and rough textures. To replicate these elements, practice applying soft and smooth strokes for larger areas, while using more rough, layered, and crisscrossing lines for those closer details. Finally, be patient with your work. The magic of a realistic moon drawing lies within the intricate blend of subtle shadows and striking highlights — a process that may require a playback of steps now and then. But with time and practice, your moon will take on an uncanny likeness to the real thing, vividly capturing its majestic beauty and solitude. So there you have it — an informative guide for adding highlights to a moon for a realistic look. This technique is not only a fundamental aspect of drawing but also an extremely rewarding one. Keep refining and practicing, and soon, you'll master the art of depicting the moon in all its celestial glory.
Enhancing Your Moon Drawing with Extra Details
Drawing the moon in meticulous detail can be a truly enjoyable, rewarding experience. This carefully crafted jigsaw puzzle of art requires patience, skill, and a keen eye for details. To enhance your lunar creation, a thorough understanding of the moon's unique features and the surroundings can be crucial. In this article, we will illuminate three specific techniques to bolster your moon artistry: Incorporating the lunar craters in your drawing, adding a starry sky as a backdrop, and providing structure by framing your moon drawing. By exploring these techniques you can transform your drawings from amazing sketches into a tangible slice of our universe. Mastering the portrayal of the moon's craters is our first step. These celestial cavities give character to the otherwise unblemished spherical surface, offering depth to your work. By deliberately incorporating lunar craters into your drawing, you can transform a simple sketch into a picture that speaks a thousand words...
Incorporating the Lunar Craters in Your Drawing
Incorporating lunar craters into your moon drawing can greatly enhance its authenticity and add an element of intrigue to your masterpiece. It taps into the unique beauty found in the Moon's apparent imperfections and reflects the celestial body's geologic history. Drawing these lunar cratères aren’t as complicated as it seems, you simply need to understand their contour and structure to render them effectively on paper. To start, these craters are formed from cosmic collisions, giving them a circular or oval shape. Different sizes and degrees of depth contribute to their distinct shadow play, which is an essential characteristic to note – the most vivid aspect of lunar craters. Depending on the light source in your drawing, subtle variation in the shading of these craters can give your Moon a three-dimensional appearance. To effectively incorporate them into your drawing, you will need to include a variety of crater sizes. Remember, the Moon's surface isn't uniformly saturated with craters – some areas may have a higher density whereas others are more sparse. For more realistic depiction, apply randomized placements when detailing your celestial body. The highest density of craters is typically seen near the Moon's southern and northern hemispheres - an intriguing detail you may wish to incorporate. Capturing the shadows within the craters is a delicate task, but crucial for delivering a sense of depth. Take note of a light source (in most cases the Sun) and ensure the shadows fall logically in that direction. A darker shadow at the rim leading to a gradually lighter base can define each crater and lend your drawing a realistic edge. Adding lunar craters to your moon drawing is no simple task, but through capturing their details such as size, density, and depth, you can drastically enhance your depiction. Just remember, each crater tells a story of a celestial impact long ago, and by including these details, you’re, in fact, delivering a captivating narrative of the Moon's astronomical journey visually. Thus, lunar craters embody more than just static details on the Moon's surface; they’re a testament to its dynamic cosmic history. Happy drawing!
Adding a Starry Sky as a Backdrop
In the pursuit of enhancing your moon drawing with extra details, one can hardly ignore the magnetic allure of a starry sky backdrop. This addition raises the aesthetic appeal of your creation, bringing it to life with an alluring depiction of the cosmos that fascinatingly mirrors reality. The starry sky has forever enthralled humans, carrying them towards poetic contemplations and scientific advancements alike. In the visual arts, it carries significant weight, lending an atmospheric context to the focal elements and harmoniously binding the entire composition. A star-speckled background gives your moon symbol a vibrant neighborhood, churning a narrative of cosmic solitude and boundless exploration. To begin incorporating a starry sky, start with a dark base. A gradient of black to deep blue or even purple can mimic the expansive night space. The black conveys the abyss while the depth of the blue or purple suggests vast distance. Your stars, simplistic as they might seem, hold the power to make or break this representation. It's not about dotting your canvas without restraint, the idea is to show the diversity of the universe. Vary your stars in size and brightness. Not every star shines with the same intensity, and their scattered placement will create an illusion of depth and distance. Where the moon is in your piece, give the stars discrete glimmers or faint auras, creating a halo effect. This subtle change can lay the foundation of the moon’s unmistakable shine. To further accentuate, create clusters of stars or a spectacular rendition of a galaxy. Stars streaking across the sky as shooting stars or comets can foster movement in your piece. But remember, less is often more. Retain the serenity of space. Colors have magic too. As you detail your sky, consider infusing cooler colors like blues and purples and warmer hues like a touch of pink or orange at the horizon line, presenting the remains of a sunset or the dawn breaking. These colors, when contrasted against the dominant darkness, can bring about the splendid luminescence of the sky. Adding a starry sky as a backdrop in your moon drawing enriches your artwork, providing depth and context. It tells a story beyond the moon and activates an emotional response from the viewers. From the choice of colors to star placement and constellation formation, every element collectively enhances the visual narrative, bringing the universe onto your canvas. With these methods, your perfect moon is no longer floating in a monopolized space, but it is a beautiful part of an infinite cosmos that significantly adds to the allure and depth of your artwork.
Framing Your Moon Drawing
As an artist, adding the extra elements of depth and detail can truly enrich the aesthetic appeal of your moon drawings, and framing them properly properly can significantly contribute to this goal. Framing essentially serves as the environment, mood, or context in which your moon is placed, highlighting your work's grandeur and making it stand out splendidly. Imagine how ethereal a vivid full moon would look, adorned with twinkling stars in the backdrop of a dark sky. Picture the glow of the moon as it hovers over a tranquil sea, casting a silver pathway across the water. Visualizing framing scenarios such as these is the first step to transforming your moon drawing from simple to exquisite. Beginning the process involves considering the moon's phase and position in your drawing. The phase can influence the intensity and direction of light that shapes how you bring out its texture and depth. Remember to replicate the moon's crater details accurately depending on the chosen phase, as areas of shadow and light vary. Next, deciding your moon's position in the frame can stimulate your creativity on its surrounding elements. If the moon is low, you could draw tall silhouettes of trees stretching towards it. If high, the vast expanse of the night sky becomes your canvas to sprinkle stars, constellations, or far-off galaxies. A crucial component of your frame would be the color scheme. Night scenes usually resonate with shades of blue, black, and grey. However, you can certainly experiment with warmer hues for twilight scenes or for an onyx sky illuminated by a fiery red moon. Note that these elements of framing are not just static backgrounds. They tell a story, stir emotions, and amplify the beauty of your moon. For instance, a lone wolf howling at a glowing full moon evokes feelings of solitude and radiates mystery, while a shooting star passing by the moon can evoke a sense of wonder and enchantment. In conclusion, framing your moon drawing doesn't just enhance your artwork; it adds gravity and visual interest, potentially bringing viewers into the very scene you've drawn. Evaluating the moon phase and position, exploring surrounding elements, experimenting with color schemes, and incorporating emotions into your frame can significantly enrich your moon drawing. By merging the moon with its ethereal environment, you're one step closer to transforming your drawing into an immersive piece of art. Enjoy the process, as every small detail you add creates not just a drawing, but a captivating visual narrative.