How To Caulk A Shower
 Home maintenance doesn’t always necessitate a professional touch; sometimes it involves relatively simple tasks you can, at the comfort of your home, perform to keep it in pristine condition. One such task is caulking your shower—an essential measure to keep your bathroom neat and prevent unnecessary damages due to water leaks. Did you know that understanding how to effectively caulk a shower could save you unnecessary repair costs, maintain your shower's aesthetic appeal, and even extend its lifespan? This article seeks to elaborate on this indispensable home maintenance activity, separated into three critical aspects: preparing your shower for caulking (Preparation is Key), the caulking process (Applying the Caulk), and ensuring the job is well done (Finishing Touches). Let’s dive right into the first steps of this process under 'Preparation is Key'.
Preparation is Key
foundation of any home improvement project is proper preparation. This principle is especially significant when it comes to handling a task like bathroom upkeep, particularly re-caulking your shower stall. In order to do this task flawlessly, there are three key steps to follow, all of which revolve around thorough preparation. Firstly, you must choose the right caulk to ensure that it can effectively seal gaps, withstand exposure to moisture, and resist mold growth. The next step involves meticulously cleaning the shower area to remove any left-over grime, mold, or old caulk which might prevent the new caulk from adhering correctly. Lastly, but equally important, is protecting any surrounding surfaces to avoid unintentional damage or unnecessary clean-up. Armed with these proactive measures, you're set to begin the project with confidence. Let's start off by looking into how to choose the right caulk for your bathroom.
Choosing the Right Caulk
If you want to succeed in caulking your shower, choosing the right caulk is of the utmost importance. The job begins with doing your homework to ensure you select the appropriate product for your project. It's vital to remember that caulk is not a one-size-fits-all solution. Different variants serve different purposes, and understanding these can make a significant difference in the longevity and appearance of your caulking job. A primary decision you'll face is whether to go with silicone or acrylic latex caulk. Silicone is typically preferred for showers due to its superior water-resistant qualities and longer lifespan. Though it can be slightly more challenging to work with, its increased durability is often worth it, especially in a high-moisture environment like the shower. However, it's worth noting that silicone caulk cannot be painted, so if aesthetics are a high priority, you may want to consider acrylic latex or a hybrid. The acrylic latex caulk, on the other hand, is easier to apply, and it can be painted to match your shower or bathroom decor. Although not as durable as silicone, it still offers decent mildew resistance and flexibility, which can be bolstered with additives. Acrylic latex often appears smoother and cleaner, making it the aesthetically superior option. But beyond just silicone versus acrylic latex, you should consider whether the caulk you're choosing is mildew-resistant. This is especially crucial for showers, where the constant wet-dry cycle can provide the perfect breeding ground for mildew. Some caulks also have a quicker curing time, which can be useful if you need your shower up and running again faster. Lastly, consider color options and how they will fit in with your overall design. Clear caulks are often a suitable option for showers, as they contribute to a clean, seamless look. However, you can also opt for white or colored caulk to match your tiles or fixtures. In essence, choosing the right caulk goes beyond simply picking up the first or cheapest tube you find in your local hardware store. From the type of caulk to its mildew-resistant and aesthetic properties, several factors need to be considered for a successful caulking job. Remember, good preparation is key, and making an informed decision about the right caulk significantly contributes to that preparedness.
Cleaning the Shower Area
Cleaning the shower area is a crucial stage in preparation for caulking your shower. Firstly, you'll need all the surfaces and corners to be free from dirt, grime, mildew, and soap scum. This is because the cleanliness and dryness of the site significantly impact the effectiveness and longevity of the caulk. Often, people ignore this step, which results in the caulk failing prematurely. The cleaning process of the shower area is simple, yet it requires focused attention. Start by gently scrubbing the surfaces using a soft sponge and warm water. Pay extra attention to the corners and seams where grime tends to accumulate. After the initial scrubbing, apply a mixture of equal parts white vinegar and water to the surfaces to cut through the soap scum. Vinegar has impressive cleaning properties that leave your surfaces spotless without necessitating heavy scrubbing that may damage your shower. Once you've cleaned with vinegar, assess your shower for traces of mildew. Mildew, a kind of fungus, has a penchant for thriving in warm damp areas, just like your shower. If you identify any presence of mildew, clean using a solution of one part bleach and ten parts water. Remember, bleach is corrosive; therefore, it's prudent to protect your skin by wearing gloves and ensure your space is well ventilated to prevent inhalation of fumes. After ensuring your shower area is dirt and mildew-free, give it another pass with warm water to wash off the cleaning solutions. Then, dry it thoroughly. You can use a towel to blot off visible moisture, then leave the area to air dry. A tip to hasten the drying process is to switch on a fan or dehumidifier, if available. Ensure the area is completely dry before proceeding as moisture compromises the tonicity and adhesion of new caulk. In summary, cleaning the shower area entails scrubbing the surfaces, treating for soap scum with vinegar, addressing any mildew with a diluted bleach solution, and thoroughly drying. This process ensures a pristine and fresh surface that allows caulk to adhere correctly and provides a foundation for a lasting seal. Proper preparation of the shower area is the bedrock of a flawless caulking job.
Protecting Surrounding Surfaces
Protecting Surrounding Surfaces Preparation is often hailed as the absolute key to ensure an impeccable caulking job, and in the shower, a significant aspect of this preparatory stage includes protecting the surrounding surfaces. This step is crucial in maintaining the aesthetic and functionality of your bathroom elements while ensuring a clean, professional outcome. It's not just about the surfaces that meet the caulking gun but every surface that lies in the splash zone too. Whether it's the tiles, fixtures, or other bathroom accessories, unattended materials can be subjected to potential damage from caulk or even from the tools you use. Whether you're using a silicone or acrylic caulk, these materials tend to be sticky and not easy to remove once dried. Think of them as paint, once they've splattered on an undesired area, removing it might be a challenge, and there's a risk you might harm the original surface. So, it's wise to take preventive measures by covering the surfaces adjacent to the caulk line with a strip of painter’s tape. This way, any stray material will land on the tape, not your tiles or fixtures. The same goes for your bathroom tools too. Any accidental contact with the caulking gun can lead to unwanted caulk smears. Moreover, to ensure an effective caulking process, the area must be free from any previous signs of sealants, mold, mildew, or any other underlying damage. A clean, dry surface guarantees that the new caulk will adhere effectively, acting as a waterproof seal. Using a utility knife, scrapers or chemical caulk remover, you can remove the old caulk, ensuring to get rid of stubborn residuals. Once complete, scrub the area with a brush dipped in a solution of 1-part bleach to 10-parts water. This sterilizes the surface, removing any remaining traces of mold and mildew that might affect the efficiency and durability of the new caulk. Remember, though, that it's not enough to merely cover surrounding surfaces. It's also important to wait until the surfaces are dry before starting the caulking process. Wet areas do not support good adhesion, leading to premature failure of the caulk. Therefore, after cleaning and sterilizing, allow the area to dry completely. You can use a fan or heater to accelerate the drying process, but barring any shortcuts, a 24-hour wait is usually adequate. With careful preparation and protection of surrounding areas, you change the game entirely. You convert an otherwise messy, tiring clean-up chore into a task that’s simple, neat, and hassle-free. This results in a highly satisfying, almost effortless DIY project that will make your shower, not just functional, but waterproof and aesthetically pleasing. This meticulous care of your bathroom elements, paired with appropriate preparation, is a key to a durable, professional-looking caulk job. The value of protecting surrounding surfaces in your caulking endeavor cannot be overstated because, indeed, preparation is key.
Applying the Caulk
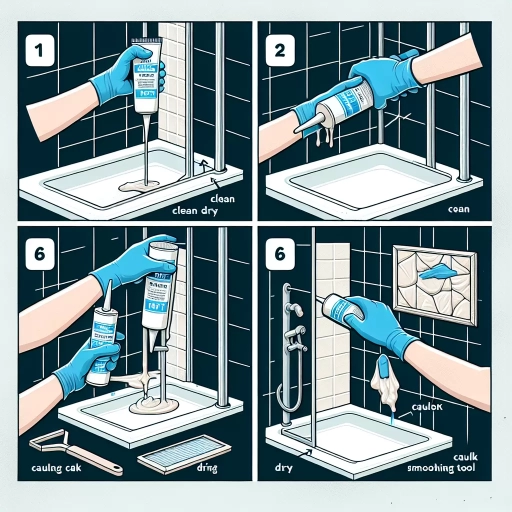
Applying caulk is an essential DIY task that, if done correctly, can greatly improve the appearance and longevity of your fixtures and fittings. This methodical process is divided into three main steps, each with its own significance. First and foremost is preparing the caulk tube, a critical phase ensuring smooth and effective application of caulk. The second step involves applying the caulk in a continual, steady motion to achieve a clean, consistent bead. Finally, to give our work a professional touch, we need to learn the art of smoothing out the caulk. By mastering these steps, you can efficiently seal cracks, joints, and gaps, keeping your homes safe from moisture, dust, and insects. Now, let's dive deeper into the process, starting with the vital first step: preparing the caulk tube.
Preparing the Caulk Tube
Before the process of applying shower caulk can commence, proper preparation of the caulk tube is fundamentally essential. This preparation necessitates the undertaking of a few simple steps which contribute greatly to achieving a neat and professional finish. This preparatory stage should not be underestimated or overlooked, as it directly impacts the overall caulking process and results. In preparing the caulk tube, the first thing you need to do is to cut the tip of the tube. The dimension of this cut determines the bead size; a smaller cut generally results in a finer bead that is suitable for small, narrow gaps, while a larger cut would yield a thicker bead ideal for broader gaps. If you're new to caulking, you might want to practice first on a piece of cardboard to get a feel for how the caulk flows out of the tube. After the tip has been cut, a metal rod, often attached to the caulk gun, should be inserted into the tube to pierce the seal within. This ensures the caulk is adequately mixed and ready to be dispensed smoothly. It is advisable to lightly squeeze the trigger to test for a smooth flow of the caulk. Remember to release the pressure rod or trigger after testing to prevent unwanted oozing of the caulk prior to the actual application. Next, you need to ensure the caulk tube is inserted into the caulk gun correctly. This process appears straightforward; however, it's essential to follow the appropriate steps. The tube should be placed at an angle into the gun until it is securely seated, with the bottom positioned first into the cradle of the gun followed by the nozzle. Ensure the notched edge of the rod lines up with the ratchet teeth on the gun to prevent slipping during the application process. Furthermore, climate or the room's temperature can influence the viscosity of the caulk and consequently affect how it dispenses from the tube. The ideal application temperature for most caulks ranges from 40°F to 80°F. If the caulk has been stored in a cold environment, warming it up to room temperature can significantly improve its flow and adhesion properties. Through taking the time to adequately prepare your caulk tube, the application process evolves to become smoother, more precise, and ultimately more successful. Well-prepared caulk ensures a waterproof seal that can safeguard your shower against potential water damage, thereby guaranteeing the longevity of your investment. Considering the importance of this step, and placing the due diligence to ensure its effectiveness, sets you up for a seamless and satisfactory caulking experience. A well-prepared caulk tube is indeed the first step toward a efficiently sealed shower. Don't rush this first crucial step in preventing water leakage at the source, thus ensuring a cleaner, drier shower experience for many years to come.
Applying the Caulk in a Continuous Motion
Applying caulk in a continuous motion is a fundamental step in the caulking process and plays a significant role in ensuring the long-term effectiveness and aesthetic appeal of the waterproof seal. To achieve an optimal application, one would need a steady hand, proper understanding of the technique, and the right tools such as a caulking gun and a sharp utility knife. The process starts with loading the caulk tube into the gun. Cut the tube at a 45-degree angle to create a small hole that will help control the amount of caulk coming out, making the application more precise and uniform. The overall aim here is to apply the caulk in a smooth, continuous line along the seams without any breaks. Interrupting the flow can result in an uneven application and may compromise the seal's efficiency. To apply the caulk in a continuous motion, position the caulk gun at the beginning of the surface joint, parallel to it, and with the cut hole facing down. Regularly apply pressure to the gun's trigger, advancing the caulk down the joint. As you move the gun forward, caulk should extrude in a steady stream. This process should be performed consistently without letting up off the trigger until you reach the end of the seam. If you must stop, ensure that you release the pressure on the trigger to prevent excess caulk from oozing out. Controlling the speed at which you move the gun is critical to avoiding gaps in the caulk line. If moved too fast, the caulk line might break, resulting in areas without enough sealant. On the other hand, if moved too slowly, you might apply too much caulk, leading to wastage and a messier finish. After applying the caulk, use a smoothing tool or your finger to smooth the line of caulk, ensuring it's flat and neat. This not only enhances the look of the seam but also presses the caulk firmly into the joint for a waterproof seal. In conclusion, mastering the technique of applying caulk in a continuous motion determines the final output's functionality and aesthetic appeal. The secret lies in perfecting the balance in the pressure, speed, and motion during the application. Skilled application and proper curing result in a professional, clean finish, an effective seal, and a prolonged lifespan of your shower bedrock.
Smoothing Out the Caulk
Smoothing out the caulk is an integral part of the overall caulk application process, which significantly impacts the finished look of the shower bedrock. Once the caulk has been applied efficiently along the seams of the shower bedrock, the next step is to smooth it out to ensure a finished, professional, and polished look. This part of the process can often appear insignificant, but in reality, offers an array of significant benefits, ranging from aesthetic appeal to enhanced durability and longevity of the shower bedrock. The process of smoothing out the caulk involves creating a smooth, even, and tidy line of caulk along the seam of the shower bedrock. This is typically done using a caulk smoothing tool or a finger, the latter being covered with soapy water to facilitate a smooth glide over the applied caulk. Smoothing out the caulk not only gives the finish a clean, professional appearance but also helps in ensuring that the caulk adheres well to the surface, which enhances its waterproofing abilities. By carefully and meticulously smoothing out the caulk, you can eliminate excess caulk and ensure none is wasted, which therefore leads to cost effectiveness. Also, when the excess caulk is removed appropriately, it reduces the chances of mildew growth and the subsequent deterioration of the caulk due to the trapped moisture. Furthermore, it is during this smoothing process that any gaps or holes that could potentially lead to water leaks can be identified and immediately sealed with additional caulk. Thus, smoothing out the caulk is not only key to the overall visual appeal but also contributes significantly to the durability, functionality, and lifespan of the caulked area. In summary, the process of smoothing out the caulk, though it may seem mundane and not as vital, should not be overlooked or hastily done. A well-performed smoothing process results in a tidy and professional finish that enhances the aesthetic appeal of the shower bedrock. Moreover, it adds to its durability by efficiently sealing off potential leakage points and inhibiting the growth of damaging mildew. It comes as no surprise, then, that it is a critical supporting stage in the broader context of applying the caulk to a shower bedrock.
Finishing Touches
Home improvement tasks can be broken down into meticulous steps, each deserving of attention to ensure a polished final result. The finishing touches particularly play a pivotal role in the richness of any task, such as caulking. It involves a systemized engagement starting with removing the excess caulk; a crucial step toward achieving a neat, seamless line around your bathtub, flooring, or windows. This procedure calls for the right techniques to remove any blob or smear, which may mar the sophisticated look you desire. Following the removal, it is essential to allow the caulk enough time to dry, which forms a strong, durable seal. Ignore this, and you risk ruining the entire task with saggy, sticky caulk that refuses to maintain a smooth line. The final segment of the process is inspecting and touching up - it will ensure any missed spots or imperfections are promptly corrected. Each part of this process is a fundamental building block that contributes towards the end product. We commence our discourse with the first step – removing excess caulk, a task that requires a delicate balance of precision and urgency to obtain desirable results.
Removing Excess Caulk
Caulking is an essential part of shower maintenance that ensures water-tightness and prevents moisture seepage, which could potentially lead to costly water damages. However, it's not uncommon to find instances of excess caulk after application, mainly due to errors from inexperience or getting too carried away. Thus, removing excess caulk is a vital step in the Finishing Touches stage to ensure a neat, clean, and professional appearance. This step can also be a corrective measure when repairing old, worn-out caulk. After applying the caulk along joints or seams in the shower, use a caulk smoothing tool or your finger (dipped in water or a caulk smoothing agent) to make a neat bead. This action should naturally remove excess caulk and push it towards the edge. If there is still a substantial amount of extra product, it is advisable to address this immediately while the caulk is still wet. A wet cloth or sponge can be used to wipe away the excess, using a delicate touch to avoid disturbing the line of caulk. In instances where the caulk has dried with excess material, a more rigorous method is needed. A utility knife or a specially designed caulk remover tool can be used for this purpose. Moreover, it is crucial to exercise extreme care when using sharp objects to avoid damaging surrounding surfaces or inflicting personal injuries. A gentle scraping motion should be employed to peel off the extra caulk gradually. Patience is key in this process, as rushed movements can lead to uneven results or unnecessary damages. It is also worth mentioning that vinegar can be used as a natural caulk remover for silicone-based caulk. By applying a fair amount of undiluted vinegar to the excess caulk and leaving it for about two hours, the caulk will soften, making it easier to remove. After getting rid of the extra caulk, it's essential to clean the area thoroughly to ensure no residues are left behind. Both moistened cloth and rubbing alcohol are efficient for this cleanup routine. Once done, inspect the area to make sure the caulk is smoothly applied and no overages are left. Afterward, give the caulk ample time to cure before exposing the shower to moisture. In conclusion, removing excess caulk is not only necessary for aesthetic purposes but also facilitates proper sealing and adhesion. By effectively managing this step, you can achieve a professional-grade shower caulking job, ensuring the longevity of your shower and bathroom overall.
Allowing the Caulk to Dry
After successfully applying the caulk to the necessary areas in your shower bedrock, it is important to allow sufficient time for it to dry. This stage is crucial because rushing to use your shower before the caulk is completely dry can ruin your hard work, leading to a poorly sealed shower which in turn could result in water damage and mold growth. There is no universal drying time for all types of caulk since drying time depends on the brand, humidity levels, and temperature in your bathroom. Typically, it takes about 24 hours for the caulk to dry fully. Even if the exterior seems dry, remember that the layer of caulk underneath may still be wet. Consider waiting for an extended time, such as 36 or 48 hours, for the best outcome. Paying heed to this aids the caulk to not only dry but also to properly adhere to the surfaces, thus providing a robust, long-lasting watertight seal. In the interim, take measures to maintain optimal conditions for the caulk to dry. If the humidity is too high in the bathroom, employ a dehumidifier to maintain a conducive environment. Try to keep the temperature at a standard room condition as extremely cold or hot conditions can affect the drying process. If possible, avoid using the bathroom during this period to prevent any accidental contact with the fresh caulk. How you can tell the caulk is completely dry? Look out for a uniform color and texture throughout. If you notice any wet spots or discoloration, give it more time. If you hurry and apply pressure to the caulk before it has dried up completely, it could shift, creating gaps that may allow water to seep in your shower bedrock, defeating the purpose of the whole caulking process. In conclusion, allowing the caulk to dry properly is a significant part of the finishing touches of caulking your shower. The waiting might feel like a test of patience, but it is worth it. It saves you from potential damage to your shower bedrock and from re-doing this process prematurely. Comprehending this non-theatrical phase, exhibiting patience, and giving the caulk enough time to dry results in a well-sealed, water-resistant shower that is built to last for a considerable amount of time.
Inspecting and Touching Up
A considerable part of how to caulk a shower includes inspecting and touching up the sealant. This process is vital as it defines the longevity of the caulk and ensures a watertight seal that protects against damages caused by water leaks. Imagine spending so much time applying new caulk, only for it to fail after a short time due to a lack of inspection and fixing the necessary touchups. After you've applied the caulk, a critical step follows - inspecting the bead. The bead should look even and smooth. Any inconsistency in the thickness or smoothness of the applied caulk could create pockets where water could gather and seep into. Using a fine-toothed comb, guide your way across the line of caulk, looking for any uneven application. Also, remember to pay attention to the corners or where two tiles meet, as these areas are notorious for trapping excess water. Taking your time to correctly assess the bead's evenness prevents mildew, mold, and further damage to your shower. Touching up is another vital step. It's quite normal to make errors or miss some spots while caulking. During the touching up phase, address the inconsistencies and weak spots detected in your caulking application. Fill any voids or gaps with a small amount of caulk, taking care to apply just enough to seal the area without overdoing it. Be meticulous in this process, ensuring that the new and old sealant merge seamlessly. Remember, the goal is to improve the longevity of your sealant and create a neat, professional-looking finish. Using a caulk finishing tool or your finger (with a little bit of soapy water) can help you achieve a smooth finish. Also, assess whether the color of the caulk matches the surrounding area. A mismatch could make your shower look unattractive and draw attention to the caulk line instead of the shower itself. If there's a need for color correction, now is the perfect time to make that happen. For best results, allow the caulk to dry properly before using the shower. In some cases, the sealant might need a full 24 hours to cure completely. Whether you are caulking your shower for the first time or already experienced in the task, inspecting and touching up are essential stages that should not be rushed. The process may seem tedious, but a thorough inspection and careful touching up significantly impact the long-term effectiveness of the sealant. Besides ensuring a water-tight seal, they enhance the aesthetic appeal of your shower, giving the finishing touch a sleek, professional look. TLC given to these stages show in the quality of your work and the duration of the caulk's life. Hence, it is a non-negotiable step if you desire a high-quality, durable, and professional-looking finish.