How To Resize On Canva
Here is the introduction paragraph: When it comes to creating stunning visual content, Canva is one of the most popular and user-friendly design platforms out there. However, one of the most common challenges users face is resizing their designs to fit different formats and dimensions. Whether you're creating social media graphics, presentations, or marketing materials, resizing is an essential skill to master. In this article, we'll take you through the process of resizing on Canva, from understanding the platform's resizing options to providing a step-by-step guide on how to do it effectively. We'll also share some best practices to keep in mind when resizing your designs. By the end of this article, you'll be able to resize your Canva designs with confidence and precision. So, let's start by understanding Canva's resizing options and how they can help you achieve your design goals.
Understanding Canva's Resizing Options
Canva is a popular graphic design platform that offers a wide range of features and tools to help users create stunning visual content. One of the key features that sets Canva apart from other design platforms is its resizing options. With Canva, users can easily resize their designs to fit various formats and dimensions, making it an ideal tool for creating social media graphics, presentations, and marketing materials. However, understanding Canva's resizing options can be overwhelming, especially for beginners. To get the most out of Canva's resizing features, it's essential to explore the resize tool, understand the impact of aspect ratio, and choose the right resize option for your design. In this article, we'll delve into these topics, starting with a closer look at the resize tool and how it can help you achieve your design goals.
Exploring the Resize Tool
Exploring the Resize Tool is a crucial step in mastering Canva's resizing options. The Resize Tool is a powerful feature that allows users to adjust the dimensions of their designs with ease. To access the Resize Tool, simply click on the "Resize" button located in the top toolbar or use the keyboard shortcut "Ctrl + Shift + R" (Windows) or "Cmd + Shift + R" (Mac). Once activated, the Resize Tool will display a dialog box with various options to customize the resizing process. Users can choose from a range of preset dimensions, including popular social media sizes, or enter custom dimensions to fit their specific needs. Additionally, the Resize Tool allows users to lock the aspect ratio, ensuring that their design remains proportionate during the resizing process. This feature is particularly useful when working with images or graphics that require precise scaling. By exploring the Resize Tool and its various options, users can efficiently resize their designs and achieve professional-looking results.
Understanding Aspect Ratio and Its Impact
When it comes to resizing designs on Canva, understanding aspect ratio is crucial to ensure that your graphics look professional and visually appealing. Aspect ratio refers to the proportional relationship between the width and height of an image or design. It is usually expressed as a ratio of two numbers, such as 16:9 or 4:3. The aspect ratio of a design determines how it will be displayed on different devices and platforms, and it can greatly impact the overall look and feel of your graphics. For instance, a design with a 16:9 aspect ratio is ideal for widescreen displays, such as laptops and TVs, while a 4:3 aspect ratio is better suited for standard screens, like smartphones and tablets. If you resize a design without considering its aspect ratio, it may become distorted, stretched, or cropped, which can compromise its overall quality and effectiveness. Therefore, it is essential to understand the aspect ratio of your design and adjust it accordingly when resizing on Canva to ensure that it looks great on various devices and platforms. By doing so, you can maintain the integrity of your design and create visually appealing graphics that engage your audience.
Choosing the Right Resize Option for Your Design
When it comes to resizing your design in Canva, choosing the right option can be a bit overwhelming, especially with the numerous options available. To make the right choice, it's essential to consider the purpose of your design and the platform where it will be used. If you're creating a social media post, for instance, you'll want to choose a resize option that maintains the aspect ratio and ensures your design looks great on various devices. In this case, the "Social Media" resize option would be the best choice. On the other hand, if you're designing a presentation or a document, you may want to opt for the "Custom Dimensions" resize option, which allows you to specify the exact width and height of your design. Additionally, if you're working on a design that requires a specific resolution, such as a print-ready file, you'll want to choose the "Custom DPI" resize option. By taking the time to choose the right resize option, you can ensure that your design looks professional and polished, regardless of where it's used. Canva's resize options also include "Website," "Blog Post," "Email Header," and "Infographic," among others, making it easy to find the perfect fit for your design needs. By selecting the right resize option, you can save time and effort in the long run, and focus on creating stunning designs that capture your audience's attention.
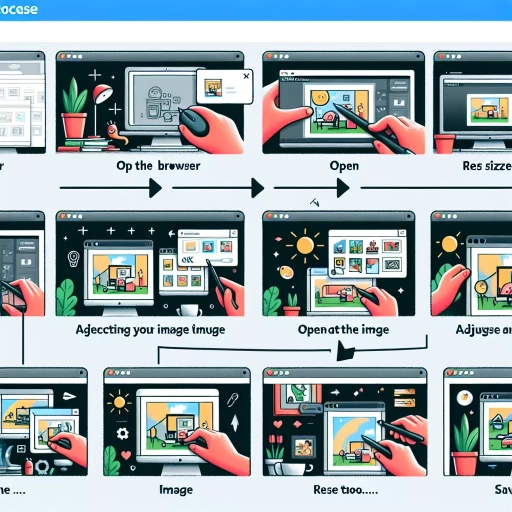
Step-by-Step Guide to Resizing on Canva
Here is the introduction paragraph: Resizing a design on Canva can be a daunting task, especially for those who are new to the platform. However, with the right guidance, you can easily resize your designs to fit any platform or medium. In this article, we will provide a step-by-step guide on how to resize on Canva, covering the essential steps to achieve professional-looking results. We will start by accessing the resize feature, where you can select from pre-set dimensions or enter custom sizes. Next, we will explore how to enter custom dimensions and resize your design with precision. Finally, we will discuss how to preview and adjust your resized design to ensure it meets your expectations. By following these simple steps, you can resize your designs with confidence and achieve the desired outcome. So, let's get started by accessing the resize feature on Canva.
Accessing the Resize Feature
To access the resize feature on Canva, start by logging into your account and selecting the design you want to resize. Once you're in the editor, click on the "Resize" button located in the top toolbar. This will open the resize panel, where you can choose from a variety of preset dimensions or enter your own custom size. You can also select the unit of measurement, such as pixels, inches, or centimeters, to ensure your design is resized accurately. Additionally, you can choose to resize your design based on a specific aspect ratio, such as 1:1, 4:3, or 16:9, to maintain its original proportions. If you want to resize your design for a specific social media platform, Canva also offers pre-set dimensions for popular platforms like Facebook, Instagram, and Twitter. Simply select the platform you want to resize for, and Canva will automatically adjust the dimensions for you. By accessing the resize feature, you can easily adjust the size of your design to fit your needs, whether you're creating a social media post, a presentation, or a marketing material.
Entering Custom Dimensions and Resizing
When entering custom dimensions and resizing on Canva, it's essential to understand the different units of measurement and how to apply them effectively. To enter custom dimensions, click on the "Custom dimensions" button in the top toolbar and input your desired width and height in pixels, inches, or centimeters. You can also select from a range of preset dimensions, such as A4, A3, or US Letter, to save time. When resizing, you can choose to lock the aspect ratio to maintain the original proportions of your design, or unlock it to freely adjust the width and height. Additionally, you can use the "Scale" feature to resize your design by a specific percentage, making it easy to create multiple versions of the same design at different sizes. To resize a specific element, select it and use the resize handles to drag it to the desired size, or enter the exact dimensions in the "Element size" field. Canva also allows you to resize multiple elements at once by selecting them and using the "Group resize" feature. By mastering the art of entering custom dimensions and resizing on Canva, you can create professional-looking designs that are tailored to your specific needs and requirements.
Previewing and Adjusting Your Resized Design
When you've resized your design in Canva, it's essential to preview and adjust it to ensure everything looks perfect. To preview your resized design, click on the "Preview" button at the top right corner of the editor. This will give you a clear view of how your design will look in its new dimensions. Check if all the elements, including text, images, and graphics, are properly aligned and proportionate. If you notice any issues, you can make adjustments by clicking on the "Edit" button. You can also use the zoom tool to get a closer look at specific areas of your design. Additionally, you can use the "Rulers" feature to ensure that your design is symmetrical and aligned properly. If you need to make any further adjustments, you can use the "Undo" and "Redo" buttons to experiment with different changes. Once you're satisfied with your resized design, you can download it or share it directly from Canva. By previewing and adjusting your resized design, you can ensure that it looks professional and polished, regardless of the new dimensions.
Best Practices for Resizing on Canva
When it comes to resizing designs on Canva, there are several best practices to keep in mind to ensure your designs look great in any size. One of the most important considerations is optimizing image quality for different sizes, as this will help prevent pixelation and ensure your design looks sharp and clear. Another key best practice is using Canva's built-in templates for easy resizing, which can save you time and effort. Finally, it's also important to consider how you'll export and share your resized design, as this can affect the final quality of the image. By following these best practices, you can ensure that your designs look great in any size and are easily shareable. In this article, we'll dive deeper into these best practices, starting with the importance of optimizing image quality for different sizes.
Optimizing Image Quality for Different Sizes
When optimizing image quality for different sizes, it's essential to consider the intended use and platform of the image. For web use, images should be optimized for fast loading times and clear display on various devices. This can be achieved by saving images in the correct file format, such as JPEG for photographs and PNG for graphics, and compressing them to reduce file size without compromising quality. For social media platforms, images should be optimized for the specific platform's recommended dimensions and file size limits. For example, Facebook recommends images with a minimum width of 600 pixels, while Instagram recommends a 1:1 aspect ratio. When resizing images for print, it's crucial to maintain a high resolution to ensure clear and crisp details. A minimum resolution of 300 DPI is recommended for most print materials, such as business cards, brochures, and posters. Additionally, images should be saved in a format that supports CMYK color mode, such as TIFF or PSD, to ensure accurate color representation. By optimizing image quality for different sizes and platforms, you can ensure that your images look their best and effectively communicate your message.
Using Canva's Built-in Templates for Easy Resizing
Using Canva's built-in templates is a great way to ensure easy resizing of your designs. Canva offers a wide range of pre-made templates for various design types, including social media graphics, presentations, infographics, and more. These templates are designed to be easily customizable and resizable, allowing you to quickly adapt your design to different dimensions and formats. When using a Canva template, you can simply select the template you want to use, customize it with your content, and then resize it to fit your desired dimensions. Canva's templates are also optimized for different devices and platforms, so you can be sure that your design will look great on desktop, tablet, or mobile. Additionally, Canva's templates are often designed with best practices in mind, so you can trust that your design will be visually appealing and effective. By using Canva's built-in templates, you can save time and effort, and focus on creating high-quality designs that resonate with your audience. Whether you're creating a social media post, a presentation, or an infographic, Canva's templates make it easy to resize your design and get it looking great in no time.
Exporting and Sharing Your Resized Design
When you've finalized your resized design, it's time to export and share it with the world. Canva provides various export options to cater to different file formats and use cases. To export your design, click on the "Download" or "Export" button, depending on your Canva version. You can choose from popular file formats like PNG, JPG, PDF, and GIF, as well as more specialized formats like SVG and EPS. If you need to export your design for web use, select the "Web" option, which will automatically optimize your file for online use. For print materials, choose the "Print" option, which will ensure your design is exported in high resolution. You can also customize the export settings, such as resolution, color mode, and compression level, to suit your specific needs. Once you've exported your design, you can share it directly from Canva to social media platforms, email, or messaging apps. Alternatively, you can upload your design to your website, blog, or online storage services like Google Drive or Dropbox. Canva also allows you to create a shareable link, which enables others to view and edit your design without needing a Canva account. By exporting and sharing your resized design, you can easily collaborate with team members, clients, or stakeholders, and ensure that your design looks great across various platforms and devices.