How To Remove A Toilet
 With a bevy of reasons prompting homeowners to take up DIY projects, one particular task has been increasingly popular – toilet removal. This venture might sound daunting, but in reality, with a systematic approach and understanding, you can successfully accomplish it. In this comprehensive guide, we will cover three fundamental aspects of toilet removal. First, we'll educate you about the basics of toilet removal, from why to how. Then, we'll walk you through a detailed step-by-step process of removing a toilet, simplifying the task down to one any handy homeowner can tackle with confidence. Lastly, we will discuss crucial precautionary measures and elaborate on efficient ways to clean-up after the removal process. It's imperative to take into account safety and sanitization, especially in bathroom-related tasks. Before we plunge into the practical steps of toilet removal, let's grasp the underlying basics to facilitate a smoother operation.
Hence, unbolt any trepidations and get ready as we plunge down your path towards becoming a confident DIY enthusiast, beginning with understanding the basics of toilet removal.
With a bevy of reasons prompting homeowners to take up DIY projects, one particular task has been increasingly popular – toilet removal. This venture might sound daunting, but in reality, with a systematic approach and understanding, you can successfully accomplish it. In this comprehensive guide, we will cover three fundamental aspects of toilet removal. First, we'll educate you about the basics of toilet removal, from why to how. Then, we'll walk you through a detailed step-by-step process of removing a toilet, simplifying the task down to one any handy homeowner can tackle with confidence. Lastly, we will discuss crucial precautionary measures and elaborate on efficient ways to clean-up after the removal process. It's imperative to take into account safety and sanitization, especially in bathroom-related tasks. Before we plunge into the practical steps of toilet removal, let's grasp the underlying basics to facilitate a smoother operation.
Hence, unbolt any trepidations and get ready as we plunge down your path towards becoming a confident DIY enthusiast, beginning with understanding the basics of toilet removal.Understanding the Basics of Toilet Removal
Understanding the basics of toilet removal can seem daunting, but with the right knowledge and tools at your disposal, it can become a hassle-free task. This high-quality, informative, and engaging article aims to deconstruct the intricacies of this process, providing you with foundational insights so you can tackle this household chore with confidence. Firstly, it's necessary to recognize the importance of proper toilet removal, which entails understanding the potential risks and consequences of mishandling - a compelling reason for doing it correctly. Secondly, acquiring the essential tools for toilet removal is vital, as having the right resources will not only ease your task but also help prevent unwanted accidents and damages. Lastly, preparation always predates execution. Hence, equipping yourself with handy preparation tips before launching into the toilet removal process can turn you from a nervous beginner into a home-repair pro. Armed with these insights, let's delve into understanding why appropriate toilet removal is more than just a homeownership requirement; it's a skill that champions environmental responsibility and household hygiene. So, let’s dive into the importance of proper toilet removal and why it’s crucial for any homeowner.
Recognizing the Importance of Proper Toilet Removal
Recognizing the importance of proper toilet removal is a vital aspect of understanding the basics of toilet removal. This process is not just about physically detaching the unit from the plumbing system but involves a comprehensive procedure that ensures both hygiene and environmental integrity. Employing the correct techniques and precautions can significantly minimize the risk of water damage and bacterial contamination, which might result in costly repairs or health issues. When removing a toilet, understanding the importance of breaking the seal correctly, detaching the tank, and properly disposing the bowl is critical. A properly removed toilet translates to less risk of spillage, less water wastage, and less chance of causing damage to the bathroom floor or the toilet unit itself. Additionally, it can prevent possible injury to the person doing the work. Remember, a toilet is made from heavy, brittle porcelain that can caus serious harm if not handled cautiously. Apart from these physical concerns, proper toilet removal also considers the environmental implications. A toilet that is not correctly removed could potentially leak harmful waste materials into the environment, contaminating groundwater and causing ecological damage. Moreover, certain parts of the toilet, including metal or plastic components, are recyclable and should be disposed of responsibly. The safe and effective removal of the toilet is an essential skill, especially for homeowners who want to upgrade their facility or those dealing with a faulty fixture. It protects both their well-being and supports ecological sustainability. Indeed, recognizing the importance of proper toilet removal extends even beyond our homes, impacting positively on public health and the environment. Therefore, it is a process worth understanding and executing correctly.
Essential Tools for Toilet Removal
As you venture into the task of toilet removal, familiarizing yourself with essential tools can be key to a seamless process. This undertaking, while seemingly daunting, can be accomplished with relative ease with the right tools and guidance. To start with, one of the most important tools to have on hand is a pair of sturdy, water-resistant gloves, both for hygienic reasons and to protect your hands from any sharp objects or rough surfaces. As toilets deal with waste, these gloves are an absolute must-have for your safety. Next, a good plumber's wrench or adjustable wrench is crucial. This tool will allow you to loosen and remove the nuts and bolts that secure the toilet to the floor and the tank to the bowl. In fact, a set of wrenches in different sizes might prove beneficial, as the size of these elements may vary. Similarly, a screwdriver is typically necessary to remove the screws holding the seat onto the bowl. Some toilet seats may be affixed with a simple flat-head screw, while others may require a Philips-head screwdriver. A plunger can also be very handy. It might seem strange at first, but in case there's water left in the bowl or trap, you'll want a way to push it out before proceeding with the removal. Plunging can help ensure minimal spillage when removing the toilet. If you'll be installing a new toilet after removal, a putty knife can be useful to scrape any remaining wax or debris from the flange on the floor. This will help guarantee a clean, smooth surface for your new wax ring during the installation process. Don't forget about a bucket and rags or towels. There will inevitably be remaining water in the toilet after shutting off the water supply and again, to avoid any unnecessary mess, having a means to contain and clean up this water will be helpful. Last, but certainly not least, it's essential to have safety glasses. Toilets can be heavy, and if dropped, can shatter, chip or break, causing pieces to fly. These glasses will protect your eyes from any potential danger. By equipping yourself with these tools, not only will you ensure your own safety, but you'll also streamline and simplify the toilet removal process. A successful project is within reach.
Preparation Tips before Launching into the Toilet Removal Process
Before launching headfirst into the process of toilet removal, thoughtful and thorough preparation is paramount. This doesn't only maximize efficiency, but also minimizes potential mishaps and issues that can arise during the process. Begin by taking stock of the tools needed for the toilet removals, which may include a wrench, plunger, utility knife, and a sponge. Additionally, have a bucket at hand to handle any residual water. One must also consider the water supply. This may seem trivial but is indeed a step that can't be overlooked. Always ensure to turn off your water supply before starting the removal process to preemptively deal with any possible accidents related to water overflow. This can be typically done by turning the shut-off valve commonly located behind the toilet. Another critical point in the preparation process includes creating a clean and safe workspace. Clear the area around the toilet to avoid damaging any items or slipping on loose objects. It’s also beneficial to lay down old towels or sheets to absorb any water spillage that might occur. Being mentally prepared is another essential factor to consider. Understand that while toilet removal may seem straightforward, unforeseen issues can arise, and one must be patient and ready to adapt to these changes. Whether the toilet is stuck, unbolted, or sealed incorrectly, knowing these possibilities will help you mentally predict and manage any sudden circumstances. The final tip in preparation is having a plan in place for disposing of the old toilet. Make arrangements with your local recycling center or waste management facility. In certain areas, you might be able to leave it out for curbside pickup. The journey of toilet removal begins long before the wrench meets the bolt; it starts with preparation. The tips provided here ought to remove some of the guesswork from the process, allowing for a more streamlined and successful toilet removal venture.
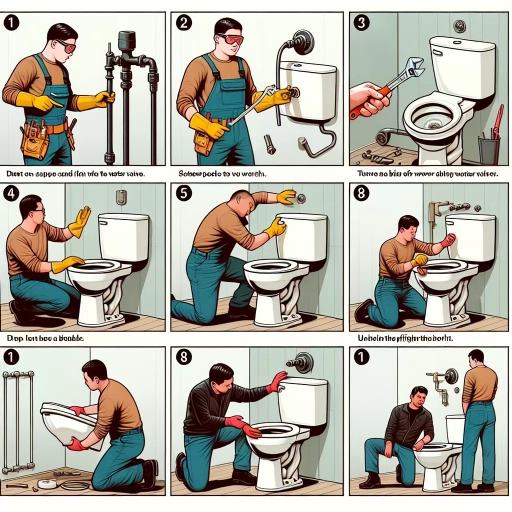
Step-by-Step Guide to Removing a Toilet
When approaching the formidable task of removing a toilet, it becomes crucial to navigate the process systematically to avoid any messy blunders. This high-quality, engaging, and systematically ordered article will provide you with a comprehensive step-by-step guide on how to safely and effectively remove a toilet. The three essential steps to accomplish this include; firstly, draining the toilet tank and unplugging water supply lines, secondly, dismantling the toilet by carefully removing the toilet bowl and tank, and finally, addressing the wax ring and flange post toilet removal. These steps were conceived to ensure an orderly procedure that mitigates any room for error, providing you with a seamless DIY toilet removal experience. Embarking on this journey may seem overwhelming at first glance but fear not, as each of these phases will be elaborated on in a detailed yet easy-to-grasp manner. Our first order of business is addressing the crucial process of draining the toilet tank and unplugging the water supply lines, thereby ensuring a dry, manageable toilet ready to be disassembled.
Draining the Toilet Tank and Unplugging Water Supply Lines
Draining the Toilet Tank and Unplugging Water Supply Lines When removing a toilet, it's crucial not to overlook the process of draining the toilet tank and unplugging the water supply lines, key steps within our step-by-step guide. Initial investigations into your toilet structure can lead you to the water supply valve, usually located at the base on the side. First, you must turn off this valve to prevent water flow, ensuring a safe, clean space with minimized risks of water leakage. Take note that in some cases, valves considered aged or unused for extended periods may be stiff. If difficulties arise, the application of lubricants or utilising a wrench can aid in turning the valve off. Once the water supply is successfully cut off, you must drain the toilet tank. This can be performed by giving your toilet one ambitious flush. Water level reduction in the tank post-flush leaves a minimal amount that could easily be soaked up with a sponge or old towels, helping keep your work area dry and safe. Larger pieces of debris in the tank can be manually removed with gloves on. The subsequent step involves disconnecting the water supply lines. Having a bucket nearby proves handy at this stage, capturing any residual water escaping as you unscrew the supply line from the underside of the tank with a suitable wrench. Make sure you do this gently, applying too much force may result in damage. By diligently following this procedure, the toilet tank would be efficiently emptied and water supply lines unplugged, preparing your toilet for removal safely and effectively. This step not only eases the whole removal process but also helps in cutting down any potential hazards that might unexpectedly occur. With the right tools, knowledge, and a little patience, you can navigate this process successfully, underlining the benefits of self-reliance while saving cost on hiring professionals. Remember, comprehensive understanding and careful execution are crucial to this DIY project.
Dismantling the Toilet by Removing the Toilet Bowl and Tank
When it comes to removing a toilet, dismantling it into manageable parts, namely the toilet bowl and the tank, can facilitate the process and minimize potential damages. This step-by-step procedure is critical in the execution of toilet removal, and understanding how to handle each part can make an impact. To begin dismantling the toilet, it is crucial to start with the bowl for safety purposes. The bowl is the larger part of the toilet and can prove to be quite unwieldy if not handled properly, leading to potential risks such as breaking the bowl or causing bodily harm. Start by unscrewing the bolts that secure it to the floor. These bolts are typically located at the base of the toilet and are covered with caps for aesthetic purposes. Once removed, you should be able to lift the toilet bowl with some effort. Before removing the toilet tank, ensure that you have drained it completely to avoid unnecessary spills and complications. Begin by shutting off the water supply and flushing the toilet to remove any residual water. Once the tank is relatively dry, proceed to detach it from the bowl. The tank is typically attached to the bowl through a series of bolts located underneath it. You may need to reach behind the toilet to find these bolts, then unscrew them using an appropriate wrench or pair of pliers. Once both the toilet bowl and tank have been removed, you have successfully dismantled the toilet. However, be aware that it's not just about taking things apart; you also need to know where to safely and appropriately dispose of these parts or how to store them temporarily if you plan on reinstalling the toilet later. This knowledge plays an essential role in maintaining the integrity of your home's sanitary system and ensuring the appropriate handling of bathroom fixtures. By following these guidelines, you're one step closer to successfully removing a toilet. Remember, a comprehensive understanding of these steps can go a long way in ensuring the process is carried out effectively and safely. Knowledge about dismantling a toilet isn't just useful for those looking to replace their fixture; it's also an invaluable tool for those faced with a plumbing emergency or those looking to better understand the workings of their bathroom fixtures.
Addressing the Wax Ring and Flange Post Toilet Removal
When it comes to removing a toilet, one essential step often overlooked is addressing the wax ring and flange post toilet removal. The wax ring, located between the toilet base and the flange, plays a crucial role in ensuring a watertight seal and preventing sewer gases and water from leaking into your bathroom. Equally important is the flange, a plumbing fitting that connects the toilet to the drainpipe in the floor. In the process of toilet removal, you may find that the wax ring is damaged or the flange is cracked or broken. Such issues should be addressed immediately before proceeding with the reinstallation of a new toilet to avoid potential complications, including unpleasant odors and leakage. Used wax rings should, ideally, be replaced every time you remove a toilet. They tend to deform once installed and will likely not form an effective seal if reused. When removing the wax ring, personal protective equipment, such as gloves and glasses, are essential due to the unpleasant nature of the job and the propensity for bacteria. Usually, it can easily be scraped off from the flange using a putty knife. However, the procedure demands carefulness to avoid scratching or damaging the flange. The conditions of the flange, on the other hand, are equally significant. Ensure the area is clean, smooth and free of any rust or debris that can compromise the new seal's efficacy. If the flange is broken or corroded, it might require replacement. This may seem like a daunting task, but with the right tools and guidance, it surely is manageable. Keep in mind, working on the wax ring and flange requires knowledge and care to create an effective seal that'll ensure your new toilet works efficiently and remains leak-free. Every tiny detail matters in the process, and therefore it's crucial to do it right for long-term payoff. Through this step, despite being somewhat unsavory, you'll be able to ensure the proper removal and reinstallation of your toilet, leading to an upgraded and healthier bathroom environment.
Effective Precautionary Measures and Clean-up Techniques After Toilet Removal
Removal of a toilet may seem like a daunting task to many, but by adhering to effective precautionary measures and clean-up techniques, it can be made less overwhelming and more manageable. This article delves into the methods that ensure safety during the toilet removal process, highlight effective techniques for cleaning up post removal, and cover strategic management and disposal of the removed toilet materials. Toilet removal, when done with care, can be a smooth process. Safety is paramount during the process, and there are certain practices and habits that would ensure a hazard-free environment while disposing of an old toilet. Then comes post-removal clean-up, which is as important as the removal itself. It not only affects the aesthetic appeal of your space but also impacts the hygiene levels, thus requiring an effective and efficient approach. Moreover, rightly managing and disposing of removed toilet materials is crucial for the environment's safety; this article sheds light on how to keep it eco-friendly. Now, let us begin by understanding the importance and techniques of ensuring safety during the toilet removal process.
Ensuring Safety During the Toilet Removal Process
Ensuring safety during a toilet removal process is a paramount step often overlooked or undervalued, but it shouldn't be. Mishandling during the removal process can not only cause physical harm but also lead to expensive repairs or replacements. The first critical precautionary step starts with using the right tools for the job. These tools include a wrench, plunger, bucket, and gloves, all essential in preventing accidents such as cuts, slips, and bacterial infections. For instance, using a wrench properly would ensure the bolts connecting the toilet to the floor are carefully removed without causing breakages. Additionally, wearing protective gloves safeguards one from harmful germs and reduces the risk of cuts from possible sharp edges on the toilet parts. Furthermore, turning off the water source before beginning the removal process prevents flooding, accidental slips and the associated risks. It's also equally vital to drain the remaining water in the toilet tank into a bucket. This minimizes the chances of water spillage which not only creates a mess but also increases the risk of slips and falls. Moreover, proper handling of the toilet pieces during the disassembly process ensures the safety of not just the individual carrying out the process, but also those around. Carefully lifting and moving the heavy pieces mitigates the risk of muscle strains or related injuries. It's advisable to seek assistance when handling the heavier parts such as the toilet bowl or tank especially for those not accustomed to heavy lifting. Lastly, safety during toilet removal also encompasses taking care of the environment. Ensuring the old toilet parts are disposed of in an environmentally friendly manner prevents pollution. In many areas, local recycling facilities accept old porcelain toilets. However, if all these precautions feel overwhelming, hiring a professional to undertake the task is a wise move. They’ve been trained for these tasks, familiar with the process, and equipped with the necessary protective gear. Therefore, their chances of being injured or causing property damage are significantly low. Incorporating these preventive measures elevates the safety standards during toilet removal, allowing you to continue with your bathroom renovation without hitches.
Effective Methods for Cleaning Up After Toilet Removal
Effective proper cleaning procedures after removing a toilet are pivotal to ensuring the space is safe, clean, and ready for the installation of a new unit or for general renovation. Failing to properly clean the area can lead to unpleasant odors, bacterial growth, and potential damage to your flooring or wastewater system. Firstly, start by removing the old wax ring, as it is a primary source of potential downtime. It's a dirty job but has to be done. A putty knife will be your tool of choice for this task. Stay cautious not to damage the underlying flange or your flooring. Remember to wear appropriate gloves and discard the wax immediately to prevent bacterial growth. Next, thoroughly clean the flange and the area around it using a general surface cleaner or a mixture of vinegar and baking soda to naturally eradicate bacteria and grime. Mildew-resistant cleaners are also a great choice, especially in damp bathrooms. This step ensures that the area is clean and free from any residual waste materials which might hinder the installation of a new toilet or cause unpleasant odors. Once the flange area is clean, it's recommended to plug the open sewer pipe with a rag to prevent sewer gases from entering your home. This is a precautionary measure to ensure that your workspace remains healthy and livable. However, remember to remove this plug before installing the new toilet. Lastly, mop or vacuum the entire bathroom floor, paying special attention to the area around the old toilet site. Old wax, dust, and potential health hazards can spread throughout the bathroom during removal. So, a thorough floor clean-up is essential. While this process may seem overwhelming, breaking it down into these manageable steps helps ensure you do not miss out on any important steps. Following these clean-up methods after toilet removal, not only ensures a spotless work environment but also prepares your bathroom for further renovation or upgrades more efficiently and effectively.
Management and Disposal of Removed Toilet Materials
Proper management and disposal of removed toilet materials is a critical aspect to consider when undertaking a toilet removal exercise. Throughout the removal process, a variety of materials such as old wax rings, bolts, and possibly damaged porcelain parts are likely to surface. Because of their association with waste material, these materials can pose both environmental and health risks if not correctly managed and disposed of. First, it's essential to understand that a high degree of care is required to handle these materials. Always use protective gear, including gloves and masks, to prevent direct contact with waste remnants. In addition, ensure the surrounding area is clear to prevent cross-contamination. As for disposal, many regions have specific laws and regulations around discarding toilet materials. Therefore, familiarize yourself with these stipulations before initiating the process. Often, old toilets and related parts should be taken to a designated recycling or disposal facility rather than being dumped in an ordinary landfill. In addition to protecting the environment, proper disposal of toilet materials can safeguard human health. Ceramic parts, in particular, can be sharp and pose a hazard if left lying around. For any reusable elements such as bolts or flanges, you should clean them thoroughly using approved disinfectants before reuse. Considering the potential risks and care needed in this process, you may opt to hire a professional waste management company. These professionals have the knowledge and equipment to handle these materials safely and responsibly, reducing any associated stresses. In conclusion, correctly managing and disposing of removed toilet materials may seem like a challenging task, but with sufficient precautions, knowledge of local waste disposal regulations, and potential support from waste handling professionals, you can ensure a safe and tidy clean-up after toilet removal. The result is not only a successful toilet removal but also a maintained, clean, and safe environment.