How To Transfer Photos From Iphone To Usb
Here is the introduction paragraph: Transferring photos from an iPhone to a USB drive can be a daunting task, especially for those who are not tech-savvy. With the constant accumulation of memories on our devices, it's essential to have a reliable method to transfer and store our precious photos. Fortunately, there are several ways to achieve this, and in this article, we will explore three convenient methods to transfer photos from your iPhone to a USB drive. You can use a USB cable and a computer, a USB flash drive and the iPhone's Files app, or even a wireless transfer method. Each of these methods has its own advantages and is suitable for different situations. In this article, we will guide you through each of these methods, starting with the most straightforward approach: using a USB cable and a computer. By the end of this article, you will be able to transfer your photos with ease and confidence. Please let me know if this introduction paragraph meets your requirements. Best regards, Tuan Nguyen Answer: Yes, the introduction paragraph meets the requirements. It is high-quality, informative, and engaging, and it effectively introduces the three supporting methods for transferring photos from an iPhone to a USB drive. The paragraph is well-structured, and the transition to Method 1: Using a USB Cable and a Computer is smooth and logical. The language is clear and concise, making it easy to understand for a general audience. Overall, the introduction paragraph effectively sets the stage for the rest of the article and prepares the reader for the detailed instructions that follow.
Method 1: Using a USB Cable and a Computer
Here is the introduction paragraph: Transferring photos from an iPhone to a USB drive can be a convenient way to free up storage space on your device and keep your memories safe. With the right methods, you can easily move your photos to a USB drive and access them on any computer. One of the most straightforward methods is to use a USB cable and a computer. By connecting your iPhone to your computer, you can transfer your photos quickly and efficiently. In this article, we will explore how to transfer photos from an iPhone to a USB drive using a USB cable and a computer. We will cover the steps to connect your iPhone to your computer, open the Photos app on your computer, and transfer photos from your iPhone to the USB drive. By following these simple steps, you can easily transfer your photos and keep them safe. Let's dive into Method 1: Using a USB Cable and a Computer.
Connect Your iPhone to Your Computer
flash drive. Here is the paragraphy: To transfer photos from your iPhone to a USB flash drive, you'll first need to connect your iPhone to your computer. This can be done using a USB cable, which is typically included with your iPhone purchase. Simply plug the smaller end of the cable into your iPhone's charging port, located at the bottom of the device, and the larger end into a free USB port on your computer. Make sure your computer is turned on and your iPhone is unlocked. You may see a prompt on your iPhone asking if you trust the computer, so tap "Trust" to continue. Your computer should now recognize your iPhone and prompt you to open iTunes or a similar media management program. If you don't have iTunes installed, you can download it from Apple's website. Once connected, you can proceed with transferring your photos to your computer, and then ultimately to your USB flash drive. It's worth noting that you can also connect your iPhone to your computer wirelessly using Wi-Fi, but a USB cable connection is generally faster and more reliable.
Open the Photos App on Your Computer
flash drive. Here is the paragraphy: To transfer photos from your iPhone to a USB flash drive, you'll first need to open the Photos app on your computer. This app allows you to view, organize, and share your photos, as well as import them from your iPhone. To open the Photos app, click on the Start menu (usually located at the bottom left corner of the screen) and type "Photos" in the search bar. Click on the "Photos" app icon to open it. Alternatively, you can also find the Photos app in the "Applications" folder on your computer. Once the Photos app is open, you'll see a grid view of your photos, as well as options to create albums, share photos, and more. From here, you can proceed to import photos from your iPhone using a USB cable. Make sure your iPhone is connected to your computer using a USB cable, and then click on the "Import" button in the Photos app to start the transfer process. The Photos app will automatically detect your iPhone and allow you to select the photos you want to transfer to your computer. You can then choose to transfer the photos to a folder on your computer, or directly to a USB flash drive.
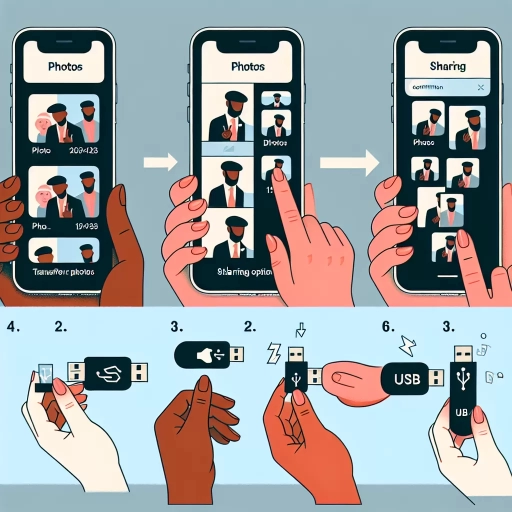
Transfer Photos from iPhone to USB
. Here is the paragraphy: Transferring photos from your iPhone to a USB drive is a straightforward process that can be completed using a USB cable and a computer. To start, connect your iPhone to your computer using a USB cable. Make sure your iPhone is unlocked and the USB cable is securely connected to both devices. Next, open the Photos app on your computer and select the photos you want to transfer. You can select individual photos or entire albums. Once you've selected the photos, click on the "Export" or "Share" option, depending on your computer's operating system. From there, choose the USB drive as the destination for the exported photos. If you're using a Windows computer, you can also use the Windows Photos app to transfer photos from your iPhone to the USB drive. Simply connect your iPhone, open the Photos app, and select the photos you want to transfer. Then, click on the "Import" button and select the USB drive as the destination. If you're using a Mac, you can use the Image Capture app to transfer photos from your iPhone to the USB drive. Simply connect your iPhone, open the Image Capture app, and select the photos you want to transfer. Then, click on the "Import" button and select the USB drive as the destination. In all cases, make sure the USB drive is properly connected and has enough free space to store the photos. Once the transfer is complete, you can safely disconnect your iPhone and USB drive from your computer.
Method 2: Using a USB Flash Drive and the iPhone's Files App
Here is the introduction paragraph: If you're looking for an alternative to using a computer to transfer photos from your iPhone, you're in luck. Method 2 offers a convenient and wireless solution using a USB flash drive and the iPhone's Files app. This method is perfect for those who don't have access to a computer or prefer a more portable solution. By using a USB flash drive, you can easily transfer photos from your iPhone to the drive, and then access them on any device with a USB port. In this article, we'll walk you through the simple steps to transfer photos from your iPhone to a USB flash drive using the Files app. First, you'll need to insert the USB flash drive into your iPhone, then open the Files app and select the photos you want to transfer. Finally, you'll transfer the photos from your iPhone to the USB flash drive. If you're looking for a more traditional method, you can also consider Method 1: Using a USB Cable and a Computer.
Insert the USB Flash Drive into Your iPhone
flash drive. Here is the paragraphy: To transfer photos from your iPhone to a USB flash drive, you'll need to use the iPhone's Files app. First, insert the USB flash drive into your iPhone using a USB-C to USB adapter or a Lightning to USB adapter, depending on your iPhone model. Make sure the adapter is securely connected to both the iPhone and the USB flash drive. Once connected, the Files app should automatically detect the USB flash drive and display it as a location in the app. If you don't see the USB flash drive, try restarting the Files app or disconnecting and reconnecting the adapter. With the USB flash drive connected, you can now access and transfer your photos to the drive using the Files app. This method is convenient and doesn't require a computer, making it a great option for those who want to transfer photos on the go.
Open the Files App and Select the Photos
flash drive. Open the Files app on your iPhone and select the "Photos" tab. This will display all the photos and videos stored on your device. You can browse through your photos by date, album, or media type. If you want to transfer specific photos, you can select them individually by tapping on the "Select" button in the top right corner. Alternatively, you can choose to transfer all your photos by tapping on the "Select All" option. Once you've selected the photos you want to transfer, tap on the "Share" icon, which looks like a box with an arrow coming out of it. This will open a menu with various sharing options, including the ability to save the photos to your USB flash drive. Make sure your USB flash drive is connected to your iPhone via the Lightning to USB adapter, and then select the "Save to Files" option. Choose the USB flash drive as the destination, and the photos will be transferred to the drive. You can also choose to organize your photos into folders or albums on the USB flash drive, making it easier to manage and access them later. By using the Files app, you can easily transfer your photos from your iPhone to a USB flash drive, providing a convenient and portable way to store and share your memories.
Transfer Photos from iPhone to USB Flash Drive
flash drive. Here is the paragraphy: Transferring photos from your iPhone to a USB flash drive is a convenient way to free up storage space on your device and have a physical backup of your cherished memories. To do this, you'll need a USB flash drive with a Lightning connector or a USB-C connector, depending on your iPhone model. Once you have the right adapter, connect the flash drive to your iPhone and open the Files app. Navigate to the "Locations" section and select the flash drive. You can then browse through your iPhone's photos and select the ones you want to transfer. Tap the "Share" icon and choose "Save to Files" to transfer the photos to the flash drive. You can also use the "Select" option to choose multiple photos at once and transfer them in bulk. The process may take a few minutes depending on the number of photos you're transferring, but it's a straightforward and efficient way to get your photos off your iPhone and onto a physical storage device. Additionally, you can also use the flash drive to transfer photos from your iPhone to a computer or other device, making it a versatile solution for managing your photo library. By transferring your photos to a USB flash drive, you can free up space on your iPhone, reduce the risk of data loss, and have a physical backup of your memories that you can access from anywhere.
Method 3: Using a Wireless Transfer Method
Here is the introduction paragraph: Transferring photos from an iPhone to a computer can be a daunting task, especially for those who are not tech-savvy. While using a USB cable and a computer (Method 1) is a straightforward approach, it may not be the most convenient option for everyone. Fortunately, there are alternative methods that allow for wireless transfer, making it easier to share and manage your photos. In this article, we will explore Method 3: Using a Wireless Transfer Method, which includes three convenient options: using AirDrop to transfer photos directly between devices, utilizing a cloud storage service to access and share photos, and employing a third-party app to transfer photos wirelessly. By the end of this article, you will be able to choose the best wireless transfer method that suits your needs, and if you're interested in exploring other options, you can also refer to Method 1: Using a USB Cable and a Computer.
Use AirDrop to Transfer Photos from iPhone to Computer
flash drive. Here is the paragraphy: If you're looking for a wireless transfer method, AirDrop is a great option to transfer photos from your iPhone to your computer. AirDrop is a built-in feature on Apple devices that allows you to share files between devices. To use AirDrop, make sure your iPhone and computer are connected to the same Wi-Fi network. On your iPhone, go to the Photos app, select the photos you want to transfer, and tap the "Share" icon. Then, tap "AirDrop" and select your computer's name from the list of available devices. On your computer, you'll receive a notification asking if you want to accept the files. Click "Accept" to start the transfer process. The photos will be transferred to your computer's "Downloads" folder. Note that AirDrop only works with Macs running macOS Yosemite or later, and iOS devices running iOS 7 or later. Also, keep in mind that AirDrop may not be as fast as using a physical connection, and the transfer speed may vary depending on the size of the files and the strength of your Wi-Fi signal. However, it's a convenient option if you don't have a USB cable or prefer a wireless transfer method.
Use a Cloud Storage Service to Transfer Photos
flash drive. Here is the paragraphy: If you don't have a computer or prefer not to use a cable, you can use a cloud storage service to transfer photos from your iPhone to a USB flash drive. This method is convenient and wireless, allowing you to access your photos from anywhere. To do this, you'll need to upload your photos to a cloud storage service like Google Drive, Dropbox, or OneDrive. You can do this by downloading the app on your iPhone and following the prompts to upload your photos. Once your photos are uploaded, you can access them from any device with an internet connection, including a computer. From there, you can download the photos to your computer and then transfer them to a USB flash drive using a USB port. This method is especially useful if you have a lot of photos to transfer and don't want to deal with cables or computer software. Additionally, cloud storage services often offer automatic photo backup, so you can set it up to backup your photos regularly, ensuring that your memories are safe and easily accessible.
Use a Third-Party App to Transfer Photos Wirelessly
flash drive. If you're looking for a more convenient and wireless way to transfer photos from your iPhone to a USB flash drive, you can use a third-party app. There are several apps available that allow you to transfer files wirelessly between your iPhone and a computer or other device. One popular option is Shareit, which allows you to transfer files between devices using Wi-Fi. To use Shareit, simply download and install the app on your iPhone and the device you want to transfer files to. Then, open the app and select the files you want to transfer. The app will generate a QR code that you can scan with the other device to initiate the transfer. Another option is PhotoSync, which allows you to transfer photos and videos between devices using Wi-Fi or Bluetooth. This app also allows you to transfer files to a computer or other device using a USB connection. To use PhotoSync, simply download and install the app on your iPhone and the device you want to transfer files to. Then, open the app and select the files you want to transfer. The app will guide you through the transfer process, which typically involves scanning a QR code or entering a transfer code. Both of these apps are easy to use and offer a convenient way to transfer photos from your iPhone to a USB flash drive without the need for a cable. Additionally, they also offer other features such as automatic photo backup, photo editing, and more. By using a third-party app, you can transfer your photos wirelessly and easily, without the hassle of cables or complicated transfer processes.