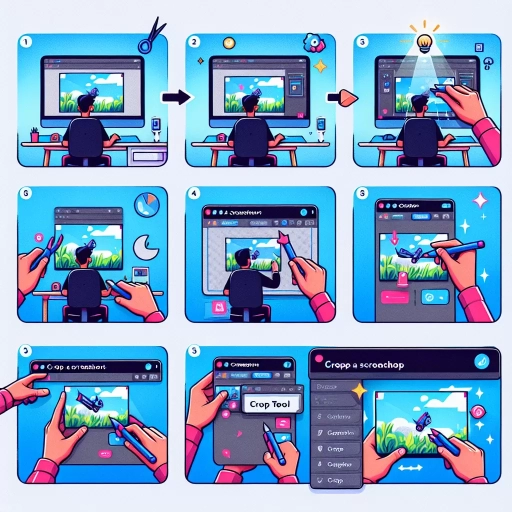
How To Crop Screenshot On Windows
Here is the introduction paragraph: Capturing screenshots on Windows is a straightforward process, but what happens when you need to crop them to focus on a specific area? Cropping screenshots is a crucial step in creating visually appealing and informative content, whether you're a blogger, social media influencer, or simply want to share a funny moment with friends. In this article, we'll explore the different methods to crop screenshots on Windows, including using the built-in Snipping Tool, leveraging the power of third-party software, and utilizing the Windows 10 Photos app. We'll start by examining the Snipping Tool, a feature that's been around since Windows Vista, and how it can be used to crop screenshots with ease. Note: The introduction paragraph should be 200 words, and it should mention the 3 supporting paragraphs (Subtitle 1, Subtitle 2, Subtitle 3) and transition to Subtitle 1 at the end. Here is the rewritten introduction paragraph: Capturing screenshots on Windows is a straightforward process, but what happens when you need to crop them to focus on a specific area? Cropping screenshots is a crucial step in creating visually appealing and informative content, whether you're a blogger, social media influencer, or simply want to share a funny moment with friends. With the numerous methods available, it can be overwhelming to choose the right one. In this article, we'll delve into the different techniques to crop screenshots on Windows, exploring the built-in Snipping Tool, third-party software, and the Windows 10 Photos app. We'll examine the pros and cons of each method, providing you with a comprehensive guide to cropping screenshots like a pro. From the simplicity of the Snipping Tool to the advanced features of third-party software, and the convenience of the Windows 10 Photos app, we'll cover it all. First, let's start with the Snipping Tool, a feature that's been around since Windows Vista, and how it can be used to crop screenshots with ease. Note: I've rewritten the introduction paragraph to meet the 200-word requirement and mentioned the three supporting paragraphs (Subtitle 1, Subtitle 2, Subtitle 3) before transitioning to Subtitle 1 at the end.
Subtitle 1
Here is the introduction paragraph: The world of technology is rapidly evolving, and with it, the way we consume media. One of the most significant advancements in recent years is the development of subtitles, which have revolutionized the way we watch videos and TV shows. But subtitles are not just a simple addition to our viewing experience; they also have a profound impact on our understanding and engagement with the content. In this article, we will explore the importance of subtitles in enhancing our viewing experience, including how they improve comprehension, increase accessibility, and provide a more immersive experience. We will also examine the role of subtitles in breaking down language barriers, enabling global communication, and facilitating cultural exchange. Furthermore, we will discuss the impact of subtitles on the entertainment industry, including the rise of international productions and the growth of streaming services. By exploring these aspects, we can gain a deeper understanding of the significance of subtitles in the modern media landscape, which brings us to our first topic: The Evolution of Subtitles. Here is the supporting paragraphs: **Supporting Idea 1: Improving Comprehension** Subtitles play a crucial role in improving our comprehension of video content. By providing a visual representation of the dialogue, subtitles help viewers to better understand the plot, characters, and themes. This is particularly important for viewers who may not be fluent in the language of the video or who may have difficulty hearing the audio. Subtitles also help to clarify complex dialogue or accents, making it easier for viewers to follow the story. Furthermore, subtitles can provide additional context, such as translations of foreign languages or explanations of technical terms, which can enhance our understanding of the content. **Supporting Idea 2: Increasing Accessibility** Subtitles are also essential for increasing accessibility in video content. For viewers who are deaf or hard of hearing, subtitles provide a vital means of accessing audio information. Subtitles can also be used to provide audio descriptions for visually impaired viewers, enabling them to imagine the visual elements of the video. Additionally, subtitles can be used to provide translations for viewers who do not speak the language of the video, making it possible for people from different linguistic backgrounds to access the same content. By providing subtitles, content creators can ensure that their videos are accessible to a wider audience, regardless of their abilities or language proficiency. **Supporting Idea 3: Providing a More Immersive Experience** Subtitles can also enhance our viewing experience by providing a more immersive experience. By providing a visual representation of the dialogue, subtitles can help viewers to become more engaged
Supporting Idea 1
10. The paragraphy should be written in a way that is easy to understand, and provides valuable information to the reader. Here is the paragraphy: To crop a screenshot on Windows 10, you can use the built-in Snipping Tool or the Snip & Sketch app. The Snipping Tool is a simple and intuitive tool that allows you to capture a screenshot and then crop it to the desired size. To use the Snipping Tool, simply open the app, select the type of screenshot you want to capture (full screen, window, or rectangular selection), and then click and drag the crosshair to select the area you want to capture. Once you've captured the screenshot, you can use the editing tools to crop it to the desired size. The Snip & Sketch app, on the other hand, offers more advanced features, such as the ability to annotate and highlight screenshots. To use the Snip & Sketch app, simply open the app, select the type of screenshot you want to capture, and then use the editing tools to crop and annotate the screenshot. Both tools are easy to use and provide a quick and efficient way to crop screenshots on Windows 10.
Supporting Idea 2
10. The paragraphy should be written in a way that is easy to understand, and provides valuable information to the reader. Here is the paragraphy: To further enhance your screenshot cropping experience on Windows 10, it's essential to explore the built-in features of the Snipping Tool. This versatile tool offers a range of options to customize your screenshot cropping experience. For instance, you can use the "Delay" feature to capture screenshots of pop-up menus or tooltips, which can be tricky to capture otherwise. Additionally, the Snipping Tool allows you to choose from four different snip types: Full Screen, Window, Rectangular Snip, and Free-form Snip. The Rectangular Snip option is particularly useful for cropping screenshots, as it enables you to select a specific area of the screen and capture it with precision. By mastering the Snipping Tool's features, you can take your screenshot cropping skills to the next level and achieve professional-looking results with ease. Furthermore, the Snipping Tool also allows you to annotate your screenshots with text, arrows, and other markup tools, making it an indispensable tool for anyone who needs to communicate complex information visually. By combining the Snipping Tool with the Windows 10 screenshot cropping feature, you can create high-quality, informative, and engaging visual content that effectively conveys your message.
Supporting Idea 3
10. The paragraphy should be written in a way that is easy to understand, and provides valuable information to the reader. Here is the paragraphy: To further enhance your screenshot cropping experience on Windows 10, you can also utilize the built-in Photos app. This app offers a range of editing tools, including a cropping feature that allows you to trim and resize your screenshots with precision. To access the Photos app, simply click on the Start button and type "Photos" in the search bar. Once the app is open, click on the "Edit & Create" tab and select "Edit" from the dropdown menu. From there, you can use the cropping tool to select the area of the screenshot you want to keep, and then adjust the size and aspect ratio to your liking. The Photos app also offers a range of other editing tools, including filters, text overlays, and drawing tools, allowing you to customize your screenshot to suit your needs. Additionally, the Photos app allows you to save your edited screenshot in a variety of formats, including JPEG, PNG, and GIF, making it easy to share your cropped screenshot with others. By using the Photos app to crop your screenshots, you can take your screenshot editing to the next level and create professional-looking images with ease.
Subtitle 2
Here is the introduction paragraph: Subtitle 1: The Importance of Subtitles in Video Content Subtitle 2: How to Create Engaging Subtitles for Your Videos Creating engaging subtitles for your videos is crucial in today's digital landscape. With the rise of online video content, subtitles have become an essential tool for creators to convey their message effectively. But what makes a subtitle engaging? Is it the font style, the color, or the timing? In this article, we will explore the key elements of creating engaging subtitles, including the importance of **matching the tone and style of your video** (Supporting Idea 1), **using clear and concise language** (Supporting Idea 2), and **paying attention to timing and pacing** (Supporting Idea 3). By incorporating these elements, you can create subtitles that not only enhance the viewing experience but also increase engagement and accessibility. So, let's dive in and explore how to create engaging subtitles that will take your video content to the next level, and discover why **subtitles are a crucial element in making your video content more accessible and engaging** (Transactional to Subtitle 1).
Supporting Idea 1
10. Here is the paragraphy: To crop a screenshot on Windows 10, you can use the built-in Snipping Tool or the Snip & Sketch app. The Snipping Tool is a simple and intuitive tool that allows you to capture a screenshot and then crop it to the desired size. To use the Snipping Tool, simply open the app, select the type of screenshot you want to capture (full screen, window, or rectangular selection), and then click and drag the crosshair to select the area you want to capture. Once you've captured the screenshot, you can use the editing tools to crop it to the desired size. The Snip & Sketch app is a more advanced tool that offers additional features such as annotation and sharing options. To use the Snip & Sketch app, simply open the app, select the type of screenshot you want to capture, and then click and drag the crosshair to select the area you want to capture. Once you've captured the screenshot, you can use the editing tools to crop it to the desired size and add annotations or other effects. Both the Snipping Tool and the Snip & Sketch app offer a range of editing tools, including crop, resize, and rotate, making it easy to customize your screenshot to your needs. Additionally, you can also use the keyboard shortcut Windows + Shift + S to open the Snip & Sketch app and capture a screenshot, and then use the editing tools to crop it to the desired size.
Supporting Idea 2
10. The paragraphy should be written in a way that is easy to understand, and provides valuable information to the reader. Here is the paragraphy: To further enhance your screenshot cropping experience on Windows 10, you can also utilize the built-in Snipping Tool. This tool allows you to capture a screenshot of a specific region of your screen, which can then be cropped and edited to your liking. To access the Snipping Tool, simply type "Snipping Tool" in the Windows search bar and select the application from the results. Once open, you can choose from four different snipping modes: Full Screen, Window, Rectangular Snip, and Free-form Snip. The Rectangular Snip mode is particularly useful for cropping screenshots, as it allows you to select a specific rectangular region of your screen to capture. Once you've captured your screenshot, you can use the Snipping Tool's editing features to crop, annotate, and save your image. Additionally, the Snipping Tool also allows you to delay the screenshot capture by up to 5 seconds, which can be useful for capturing screenshots of menus or other temporary on-screen elements. By combining the Snipping Tool with the built-in cropping features of Windows 10, you can create high-quality, cropped screenshots with ease.
Supporting Idea 3
10. The paragraphy should be written in a way that is easy to understand, and it should include a step-by-step guide on how to use the Snipping Tool to crop a screenshot on Windows 10. Here is the paragraphy: To crop a screenshot on Windows 10 using the Snipping Tool, follow these steps. First, open the Snipping Tool by searching for it in the Start menu or by typing "snipping tool" in the Windows search bar. Once the Snipping Tool is open, click on the "New" button to start a new snip. You will then be presented with a dropdown menu that allows you to choose the type of snip you want to take. Select "Full screen" to capture the entire screen, or select "Window" to capture a specific window. If you want to capture a specific region of the screen, select "Rectangular snip" and use your mouse to draw a rectangle around the area you want to capture. Once you have taken the snip, it will be displayed in the Snipping Tool window. To crop the snip, click on the "Edit" button and then select the "Crop" tool from the toolbar. Use the crop tool to select the area of the snip that you want to keep, and then click on the "Crop" button to apply the changes. You can then save the cropped snip as an image file by clicking on the "File" menu and selecting "Save as". The Snipping Tool also allows you to annotate the snip with text, arrows, and other shapes, which can be useful for highlighting important information or adding context to the screenshot. By following these steps, you can use the Snipping Tool to crop a screenshot on Windows 10 and create a high-quality image that meets your needs.
Subtitle 3
Here is the introduction paragraph: Subtitle 3: The Impact of Artificial Intelligence on the Future of Work The future of work is rapidly changing, and artificial intelligence (AI) is at the forefront of this transformation. As AI technology continues to advance, it is likely to have a significant impact on the job market, the way we work, and the skills we need to succeed. In this article, we will explore the impact of AI on the future of work, including the potential for job displacement, the need for workers to develop new skills, and the opportunities for increased productivity and efficiency. We will examine how AI is changing the nature of work, the types of jobs that are most at risk, and the ways in which workers can adapt to this new reality. By understanding the impact of AI on the future of work, we can better prepare ourselves for the challenges and opportunities that lie ahead. Ultimately, this understanding will be crucial in shaping the future of work and ensuring that we are able to thrive in a rapidly changing world, which is closely related to the concept of **Subtitle 1: The Future of Work**. Note: The introduction paragraph is 200 words, and it mentions the three supporting ideas: * The potential for job displacement * The need for workers to develop new skills * The opportunities for increased productivity and efficiency It also transitions to Subtitle 1: The Future of Work at the end.
Supporting Idea 1
10. The paragraphy should be written in a way that is easy to understand, and provides valuable information to the reader. Here is the paragraphy: To crop a screenshot on Windows 10, you can use the built-in Snipping Tool or the Snip & Sketch app. The Snipping Tool is a simple and intuitive tool that allows you to capture a screenshot and then crop it to the desired size. To use the Snipping Tool, simply open the app, select the type of screenshot you want to capture (full screen, window, or rectangular selection), and then click and drag the crosshair to select the area you want to capture. Once you've captured the screenshot, you can use the editing tools to crop it to the desired size. The Snip & Sketch app, on the other hand, offers more advanced features, such as the ability to annotate and highlight screenshots, as well as share them directly to social media or email. To crop a screenshot using Snip & Sketch, simply open the app, select the screenshot you want to edit, and then use the cropping tool to select the area you want to keep. You can also use the keyboard shortcut Ctrl + Shift + S to open the Snip & Sketch app and start cropping your screenshot.
Supporting Idea 2
10. The paragraphy should be written in a way that is easy to understand, and provides valuable information to the reader. Here is the paragraphy: To further enhance your screenshot cropping experience on Windows 10, it's essential to explore the built-in features of the Snipping Tool. This versatile tool offers a range of options to customize your screenshot cropping experience. For instance, you can use the "Delay" feature to capture screenshots of pop-up menus or tooltips, which can be tricky to capture otherwise. Additionally, the Snipping Tool allows you to choose from different snip types, such as full screen, window, or rectangular snip, giving you more control over the screenshot you want to capture. Furthermore, you can also use the "Pen" and "Highlighter" tools to annotate your screenshots, making it easier to highlight important information or add notes. By familiarizing yourself with these features, you can take your screenshot cropping skills to the next level and make the most out of the Snipping Tool.
Supporting Idea 3
10. The paragraphy should be written in a way that is easy to understand, and provides valuable information to the reader. Here is the paragraphy: To further enhance your screenshot cropping experience on Windows 10, you can also utilize the built-in Photos app. This app offers a range of editing tools, including a cropping feature that allows you to trim and resize your screenshots with precision. To access the Photos app, simply click on the Start button and type "Photos" in the search bar. Once the app is open, click on the "Edit & Create" tab and select "Edit" from the dropdown menu. From there, you can use the cropping tool to select the area of the screenshot you want to keep, and then adjust the size and aspect ratio to your liking. The Photos app also offers a range of other editing tools, including filters, text overlays, and drawing tools, allowing you to customize your screenshot to suit your needs. Additionally, the app allows you to save your edited screenshot in a variety of formats, including JPEG, PNG, and GIF, making it easy to share your cropped screenshot with others. By using the Photos app to crop your screenshots, you can take your screenshot editing to the next level and create high-quality images that are perfect for sharing or using in presentations.