How To Add Gif To Google Slides
Adding GIFs to Google Slides can elevate your presentations and make them more engaging for your audience. With the ability to add animations and visual effects, GIFs can help convey complex information in a more dynamic and interactive way. But how do you add GIFs to Google Slides? In this article, we will explore the process of adding GIFs to Google Slides, from uploading them to customizing and animating them. We will start by discussing the process of uploading GIFs to Google Slides, including the different file formats and sizes that are supported. Then, we will move on to inserting GIFs into your slides and customizing their appearance. Finally, we will explore the various options for animating GIFs in Google Slides, including adding transitions and effects. By the end of this article, you will have a comprehensive understanding of how to add GIFs to Google Slides and take your presentations to the next level. So, let's get started by uploading GIFs to Google Slides.
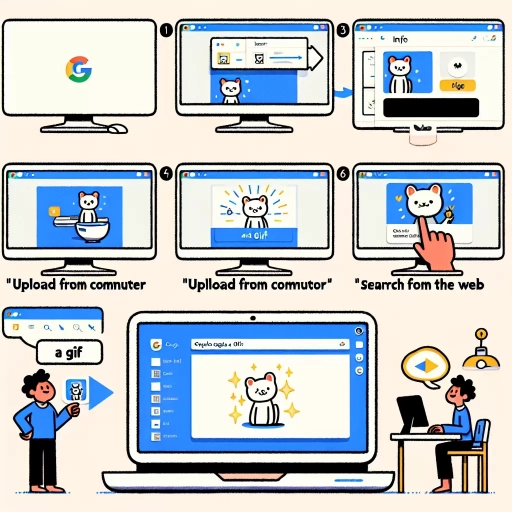
Uploading GIFs to Google Slides
Adding GIFs to your Google Slides presentation can be a great way to make it more engaging and interactive. There are several ways to upload GIFs to Google Slides, and in this article, we will explore three of them. You can upload GIFs from your computer, drag and drop them into the presentation, or search for them on the web. Each of these methods has its own advantages and can be used depending on your specific needs. For example, if you have a GIF saved on your computer, you can use the "Upload from computer" feature to add it to your presentation. This method is quick and easy, and allows you to use GIFs that you have created or downloaded from other sources. In the next section, we will take a closer look at how to use the "Upload from computer" feature to add GIFs to your Google Slides presentation.
Using the "Upload from computer" feature
To upload a GIF from your computer to Google Slides, you can use the "Upload from computer" feature. This feature allows you to select a GIF file from your computer and upload it directly to your Google Slides presentation. To use this feature, start by clicking on the "Insert" menu in the top navigation bar of your Google Slides presentation. From the drop-down menu, select "Image" and then click on "Upload from computer." This will open a file dialog box that allows you to select the GIF file you want to upload. Navigate to the location of the GIF file on your computer, select it, and click "Open." The GIF file will then be uploaded to your Google Slides presentation, and you can insert it into your slide by clicking on the "Insert" button. Once the GIF is inserted, you can resize it, move it around, and add animations to it just like any other image in your presentation. The "Upload from computer" feature is a convenient way to add GIFs to your Google Slides presentation, especially if you have a large collection of GIFs stored on your computer. By uploading your GIFs directly from your computer, you can avoid having to search for them online or use a third-party service to host them. This feature also gives you more control over the GIFs you use in your presentation, allowing you to choose the exact file you want to use and ensure that it is the correct size and format. Overall, the "Upload from computer" feature is a useful tool for adding GIFs to your Google Slides presentation, and it can help you create more engaging and dynamic presentations.
Dragging and dropping GIFs into the presentation
Adding GIFs to your Google Slides presentation can be a fantastic way to make it more engaging and interactive. One of the easiest ways to do this is by dragging and dropping GIFs directly into your presentation. To start, simply open your Google Slides presentation and navigate to the slide where you want to add the GIF. Next, find the GIF you want to use and save it to your computer. You can do this by right-clicking on the GIF and selecting "Save image as" or by dragging and dropping it into a folder on your computer. Once the GIF is saved, go back to your Google Slides presentation and click on the slide where you want to add the GIF. Then, simply drag and drop the GIF from your computer into the slide. You'll see a blue line appear as you drag the GIF over the slide, indicating where it will be placed. Release the mouse button to drop the GIF into the slide. The GIF will be added to the slide and will be ready to use. You can then resize it, move it around, and add text or other elements to the slide as needed. Dragging and dropping GIFs is a quick and easy way to add some visual interest to your presentation and make it more engaging for your audience.
Using the "Search the web" feature to find GIFs
Using the "Search the web" feature is a convenient way to find GIFs to add to your Google Slides presentation. To do this, open your Google Slides presentation and click on the "Insert" tab in the top menu bar. From the drop-down menu, select "Image" and then click on "Search the web." This will open a search bar where you can type in keywords related to the GIF you're looking for. You can also use the "Tools" menu to filter your search results by size, color, and usage rights. Once you've found a GIF you like, click on it to select it, and then click the "Insert" button to add it to your slide. The GIF will be inserted into your slide, and you can resize it or move it around as needed. You can also use the "Search the web" feature to find GIFs from specific websites, such as Giphy or Imgur, by typing in the website's name along with your keywords. This feature is a great way to find a wide variety of GIFs to add some visual interest to your presentation.
Inserting GIFs into Google Slides
Adding GIFs to Google Slides can be a great way to make your presentations more engaging and fun. There are several ways to insert GIFs into Google Slides, and in this article, we will explore three of them. You can use the "Insert image" feature to upload a GIF from your computer, the "Insert link" feature to link to a GIF hosted online, or the "Insert from drive" feature to insert a GIF from your Google Drive account. Each of these methods has its own advantages and can be used in different situations. For example, if you have a GIF saved on your computer, using the "Insert image" feature is a quick and easy way to add it to your slide. In this article, we will take a closer look at each of these methods, starting with the "Insert image" feature.
Using the "Insert image" feature
To add visual interest and enhance the overall presentation, using the "Insert image" feature in Google Slides is a great way to incorporate relevant and engaging images into your slides. This feature allows you to upload images from your computer, search for images online, or even take a snapshot using your webcam. To use the "Insert image" feature, simply click on the "Insert" tab in the top menu bar, then select "Image" from the drop-down menu. From there, you can choose to upload an image from your computer, search for an image online using Google's search engine, or take a snapshot using your webcam. Once you've selected your image, you can resize it, crop it, and adjust its position on the slide to fit your needs. Additionally, you can also add a link to the image, allowing viewers to click on it and access more information. By using the "Insert image" feature, you can add a professional touch to your presentation and make it more engaging for your audience. Furthermore, using images can also help to break up large blocks of text and make your slides more visually appealing. Overall, the "Insert image" feature is a powerful tool that can help you create a more effective and engaging presentation.
Using the "Insert link" feature to link to a GIF
To add a GIF to Google Slides using the "Insert link" feature, start by finding the URL of the GIF you want to use. You can search for GIFs on websites like Giphy or Imgur, or use a GIF you've created yourself. Once you have the URL, go to your Google Slides presentation and click on the "Insert" menu. From the drop-down menu, select "Link." A new window will open where you can paste the URL of the GIF. Make sure to select the "By URL" option and paste the link in the designated field. You can also add a title to the link if you want. After pasting the link, click on the "Apply" button. The GIF will now be inserted into your slide as a link. When you click on the link, the GIF will open in a new window. If you want the GIF to play directly in the slide, you can use the "Insert image" feature instead. However, using the "Insert link" feature can be useful if you want to link to a GIF that is too large to upload to Google Slides or if you want to link to a GIF that is hosted on a different website. Additionally, using the "Insert link" feature can help you avoid any copyright issues related to using GIFs in your presentation.
Using the "Insert from drive" feature to insert a GIF from Google Drive
To insert a GIF from Google Drive into your Google Slides presentation, you can use the "Insert from drive" feature. This feature allows you to easily access and insert files stored in your Google Drive account directly into your presentation. To use this feature, start by clicking on the "Insert" menu in the top navigation bar of your Google Slides presentation. From the drop-down menu, select "Image" and then click on "Insert from drive." This will open a new window that displays the contents of your Google Drive account. Navigate to the folder where your GIF is stored, select the GIF file, and click on the "Insert" button. The GIF will be inserted into your presentation, and you can resize it as needed by dragging the corners or edges of the image. You can also use the "Wrap text" feature to wrap text around the GIF or use the "Align" feature to align the GIF with other elements on the slide. Additionally, you can use the "Link" feature to link the GIF to a URL or email address, allowing viewers to click on the GIF to access more information. By using the "Insert from drive" feature, you can easily add GIFs from your Google Drive account to your Google Slides presentation, enhancing the visual appeal and engagement of your presentation.
Customizing and Animating GIFs in Google Slides
Customizing and animating GIFs in Google Slides can elevate your presentations and make them more engaging for your audience. With a few simple steps, you can take your GIFs to the next level and make them an integral part of your presentation. To start, you can resize and crop your GIFs to fit perfectly within your slides, ensuring they don't overwhelm the other content. Additionally, you can add animations and transitions to your GIFs to make them more dynamic and attention-grabbing. Furthermore, you can use the "Format options" feature to customize the appearance of your GIFs, such as changing their opacity or adding a border. By mastering these techniques, you can create visually stunning and interactive presentations that will leave a lasting impression on your audience. In this article, we will explore the first step in customizing your GIFs: resizing and cropping them to fit your presentation.
Resizing and cropping GIFs to fit the presentation
When it comes to adding GIFs to your Google Slides presentation, resizing and cropping them to fit your content is crucial for a polished and professional look. To resize a GIF, simply click on it and drag the corners to adjust its size. You can also use the "Format" tab to enter specific dimensions or scale the GIF proportionally. However, be cautious not to over-compress or stretch the GIF, as this can compromise its quality. If you need to crop a GIF, you can use the "Crop" tool in the "Format" tab to trim unwanted edges or focus on a specific part of the animation. To do this, select the GIF, go to the "Format" tab, and click on the "Crop" button. Then, drag the crop handles to define the new boundaries of the GIF. You can also use the "Aspect ratio" dropdown menu to maintain the original proportions of the GIF while cropping. Additionally, you can use the "Reset" button to revert to the original size and shape of the GIF. By resizing and cropping your GIFs effectively, you can ensure that they complement your presentation's content and design, rather than overwhelming it. This attention to detail will help you create a visually appealing and engaging presentation that captures your audience's attention.
Adding animations and transitions to GIFs
Adding animations and transitions to GIFs in Google Slides can elevate the visual appeal of your presentation and make it more engaging for your audience. To add animations to a GIF, select the GIF and go to the "Transitions" tab in the top menu. From there, you can choose from a variety of animation options, such as "Fade in," "Fly in," or "Zoom in." You can also customize the animation by adjusting the duration, delay, and timing. Additionally, you can add transitions between slides to create a seamless flow of content. To do this, select the slide with the GIF and go to the "Transitions" tab. Choose a transition effect, such as "Slide" or "Fade," and adjust the duration and timing as needed. You can also add animations to individual elements within the GIF, such as text or images, by selecting the element and applying an animation effect. By adding animations and transitions to your GIFs, you can create a more dynamic and engaging presentation that captures your audience's attention.
Using the "Format options" feature to customize GIF appearance
To customize the appearance of a GIF in Google Slides, you can use the "Format options" feature. This feature allows you to make adjustments to the GIF's size, position, and style, giving you more control over how it looks in your presentation. To access the "Format options" feature, select the GIF by clicking on it, then click on the "Format" tab in the top menu. From there, you can choose from a variety of options to customize the GIF's appearance. For example, you can adjust the GIF's size by dragging the corners or edges, or by entering a specific width and height in the "Size & position" section. You can also change the GIF's position on the slide by dragging it to a new location or by entering specific coordinates. Additionally, you can use the "Format options" feature to add a border or shadow to the GIF, or to change its transparency. By using the "Format options" feature, you can customize the appearance of your GIF and make it fit seamlessly into your presentation.