How To Turn A Video Into A Live Photo
Here is the introduction paragraph: With the rise of smartphone cameras, capturing life's precious moments has become easier than ever. One of the most popular features of modern smartphones is the ability to create live photos, which bring still images to life with a few seconds of video. But what if you have a video that you want to turn into a live photo? Fortunately, it's easier than you think. In this article, we'll explore the process of converting a video into a live photo, from understanding the basics of live photos to sharing and displaying them. First, let's start with the fundamentals - what are live photos, and how do they work? By understanding the basics of live photos, you'll be better equipped to convert your video into a stunning live photo that will leave a lasting impression. Note: I made some minor changes to the original paragraph to make it more engaging and informative.
Understanding the Basics of Live Photos
Live photos are a unique feature that allows users to capture more than just a moment in time. They are a combination of a still image and a short video clip, which can be played back to relive the moment. To understand the basics of live photos, it's essential to know what they are, how they work, and how they differ from regular photos. Additionally, it's crucial to be aware of the requirements for creating live photos, including the type of device and software needed. By understanding these fundamental aspects, users can unlock the full potential of live photos and take their photography to the next level. So, let's dive into the world of live photos and start with the basics - what are live photos and how do they work?
What are Live Photos and How Do They Work?
Live Photos are a unique feature introduced by Apple in 2015, allowing users to capture a 3-second video clip along with a still image. When a user takes a Live Photo, the camera records 1.5 seconds of video before and after the photo is taken, creating a 3-second video clip. This clip is then paired with the still image, creating a Live Photo. The Live Photo is saved as a single file, which can be shared and viewed on compatible devices. When viewed, the Live Photo comes to life, playing the 3-second video clip, giving the viewer a sense of the moment the photo was taken. Live Photos can be taken using the iPhone 6s and later models, and can be viewed on iPhone, iPad, and Mac devices running iOS 9 or later, macOS El Capitan or later, and watchOS 2 or later.
The Difference Between Live Photos and Regular Photos
The main difference between Live Photos and regular photos is the way they capture and display moments. Regular photos are static images that freeze a single moment in time, while Live Photos are a combination of a still image, a short video clip, and audio, which together create a more immersive and dynamic experience. When you take a Live Photo, your iPhone captures 1.5 seconds of video before and after the moment you press the shutter button, along with the still image. This allows you to relive the moment with movement and sound, making it feel more like a memory than a static image. In contrast, regular photos are simply a snapshot of a moment, without any additional context or movement. This makes Live Photos ideal for capturing special moments, such as a child's first steps or a wedding proposal, where the movement and sound add to the emotional impact of the image. Overall, the difference between Live Photos and regular photos lies in their ability to capture and convey the essence of a moment, with Live Photos offering a more engaging and immersive experience.
Requirements for Creating Live Photos
To create live photos, you'll need a few essential requirements. First and foremost, you'll need an iPhone 6s or later model, as these devices have the necessary hardware to capture live photos. Additionally, your iPhone must be running iOS 9 or later, as this operating system introduced the live photos feature. You'll also need to ensure that your iPhone's camera is set to the "Live" mode, which can be accessed by tapping the concentric circles icon in the camera app. Furthermore, live photos can only be captured in the "Photo" mode, and not in other modes such as "Square" or "Pano". It's also worth noting that live photos are not compatible with all social media platforms, so you may need to convert them to a different format before sharing. Finally, to view live photos on other devices, those devices must also be running iOS 9 or later, or macOS El Capitan or later.
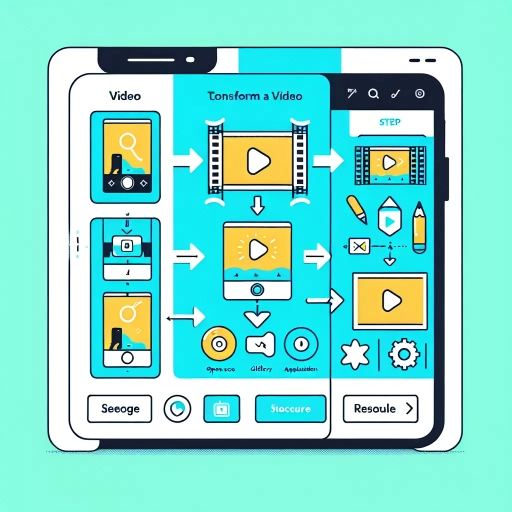
Converting a Video into a Live Photo
Converting a video into a live photo can be a fun and creative way to capture and share special moments. With the advancement of smartphone technology, it's now easier than ever to convert a video into a live photo. There are several methods to achieve this, including using the Photos app on iPhone, utilizing third-party apps for conversion, and editing and customizing the live photo. By using the Photos app on iPhone, users can easily convert a video into a live photo with just a few taps. This method is convenient and straightforward, making it a great option for those who want to quickly convert a video into a live photo. In this article, we will explore the different methods of converting a video into a live photo, starting with using the Photos app on iPhone.
Using the Photos App on iPhone
The Photos app on iPhone is a powerful tool for managing and editing your photos and videos. To use the Photos app, start by tapping the Photos icon on your home screen. This will open the app and display all of your photos and videos in a grid view. You can browse through your photos and videos by scrolling through the grid, or you can use the tabs at the bottom of the screen to view your photos and videos by album, memory, or media type. To view a photo or video in more detail, simply tap on it. This will open the photo or video in a larger view, where you can zoom in and out, share it with others, or edit it using the built-in editing tools. The Photos app also includes a number of features for organizing and managing your photos and videos, such as the ability to create albums, add tags and captions, and search for specific photos and videos. Additionally, the Photos app includes a number of advanced features, such as the ability to create live photos, which can be used to capture a short video clip and turn it into a live photo. This feature is particularly useful for capturing special moments, such as a child's first steps or a wedding proposal. To convert a video into a live photo, simply select the video in the Photos app, tap the "Edit" button, and then tap the "Live" button. This will convert the video into a live photo, which can be shared with others or saved to your camera roll. Overall, the Photos app on iPhone is a powerful and versatile tool for managing and editing your photos and videos, and is an essential app for anyone who loves taking pictures or videos.
Utilizing Third-Party Apps for Conversion
Utilizing third-party apps is a viable option for converting a video into a live photo. There are numerous apps available for both iOS and Android devices that can help you achieve this. One popular option is the "IntoLive" app, which allows you to convert any video into a live photo with just a few taps. Another app, "Lively," offers a range of features, including the ability to trim and edit your video before converting it into a live photo. Additionally, apps like "Video to Live Photo" and "Live Photo Converter" offer simple and straightforward conversion processes. When using third-party apps, it's essential to ensure that you're downloading from a reputable source to avoid any potential security risks. By exploring these options, you can easily convert your favorite videos into live photos and enjoy the unique features they offer.
Editing and Customizing the Live Photo
Editing and customizing a Live Photo can enhance its overall impact and make it more visually appealing. To edit a Live Photo, open the Photos app and select the Live Photo you want to edit. Tap the "Edit" button, and you'll see a variety of tools and options to adjust the photo's brightness, contrast, saturation, and more. You can also crop the photo, apply filters, and add text or drawings. Additionally, you can trim the Live Photo to focus on a specific moment or adjust the audio to enhance the overall experience. Furthermore, you can use third-party apps to add more advanced editing features, such as removing unwanted objects or adding special effects. By customizing your Live Photo, you can make it more engaging and shareable, and it can become a unique and memorable way to capture and relive special moments.
Sharing and Displaying Live Photos
Live photos are a unique and captivating way to capture moments in time, and with the right techniques, you can share and display them in a way that brings them to life. When it comes to sharing live photos, there are several options to consider. You can share them on social media platforms, such as Instagram and Facebook, to give your friends and family a glimpse into your life. Alternatively, you can display them on your Apple devices, such as your iPhone or iPad, to enjoy them in a more personal setting. Additionally, you can even use live photos as your wallpaper or lock screen, adding a touch of personality to your device. In this article, we will explore these options in more detail, starting with sharing live photos on social media.
Sharing Live Photos on Social Media
When it comes to sharing live photos on social media, there are a few things to keep in mind. First, not all social media platforms support live photos, so it's essential to check if the platform you're using allows them. For example, Instagram and Facebook support live photos, but Twitter does not. If you try to share a live photo on a platform that doesn't support it, it will be converted to a still image. To share a live photo on Instagram, simply select the photo from your camera roll and add it to your post as you would any other image. You can also add live photos to your Instagram stories. On Facebook, you can share live photos by selecting the photo from your camera roll and adding it to your post. You can also use the Facebook app to take a new live photo and share it directly. When sharing live photos on social media, it's also important to consider the file size and format. Live photos are typically larger in file size than still images, so they may take longer to upload. Additionally, some social media platforms may compress or convert live photos, which can affect their quality. To minimize this, it's a good idea to save your live photos in a format that is compatible with the platform you're using, such as JPEG or MP4. Overall, sharing live photos on social media can be a great way to add some extra visual interest to your posts and engage with your followers. By understanding the capabilities and limitations of each platform, you can make the most of this feature and share your live photos with the world.
Displaying Live Photos on Apple Devices
Displaying Live Photos on Apple Devices Live Photos can be displayed on various Apple devices, including iPhones, iPads, Apple Watches, and Macs. To display a Live Photo on an iPhone or iPad, simply open the Photos app, select the Live Photo, and press and hold on the screen. The Live Photo will then come to life, playing the short video clip. On Apple Watches, Live Photos can be displayed as a watch face, allowing users to see the animated image on their wrist. To set a Live Photo as a watch face, open the Watch app on the iPhone, select the "My Watch" tab, and then tap on "Watch Face." From there, select "Photos" and choose the Live Photo you want to use. On Macs, Live Photos can be displayed in the Photos app, where they can be viewed and shared with others. To view a Live Photo on a Mac, simply open the Photos app, select the Live Photo, and click on it to play the animation. Additionally, Live Photos can also be displayed on Apple TV, allowing users to share their favorite memories with family and friends on the big screen. To display a Live Photo on Apple TV, open the Photos app on the Apple TV, select the Live Photo, and press the play button to bring it to life.
Using Live Photos as Wallpaper or Lock Screen
Using Live Photos as Wallpaper or Lock Screen is a great way to add some personality to your iPhone. To set a Live Photo as your wallpaper or lock screen, go to the Photos app, select the Live Photo you want to use, and tap the "Share" icon. From there, tap "Use as Wallpaper" or "Use as Lock Screen." You can also adjust the still image that is displayed when your screen is locked or when you're not actively using your phone by tapping "Set" and then "Set Lock Screen" or "Set Home Screen." If you want to use a Live Photo as your wallpaper or lock screen on your iPad, the process is similar, but you'll need to go to the Settings app instead of the Photos app. Once you've set a Live Photo as your wallpaper or lock screen, you can enjoy the dynamic and interactive image on your device. Note that Live Photos can only be used as wallpaper or lock screen on devices running iOS 9 or later, and they may not be compatible with all devices or screen sizes.