How To Deselect In Photoshop
Here is the introduction paragraph: When working with selections in Photoshop, it's just as important to know how to deselect as it is to know how to select. Deselecting allows you to remove unwanted selections, start fresh, and work more efficiently. In this article, we'll explore the various methods for deselecting in Photoshop, from the basics of the Deselect tool to advanced techniques for refining your selections. We'll start by understanding the Deselect tool in Photoshop, including its location and functionality. From there, we'll dive into the different methods for deselecting, including keyboard shortcuts and menu options. Finally, we'll cover advanced deselecting techniques, such as using layers and masking to refine your selections. By the end of this article, you'll have a solid understanding of how to deselect in Photoshop and be able to work more efficiently in your editing workflow. Let's start by understanding the Deselect tool in Photoshop.
Understanding the Deselect Tool in Photoshop
The Deselect Tool in Photoshop is a fundamental feature that allows users to remove selections from their images, giving them more control over their editing process. Understanding how to use this tool effectively can greatly enhance one's productivity and creativity in the application. In this article, we will delve into the world of the Deselect Tool, exploring its purpose, location in the Photoshop interface, and basic functionality. We will start by examining what the Deselect Tool is and its purpose, which will provide a solid foundation for understanding its role in the editing process. By grasping the fundamentals of this tool, users can unlock new possibilities for their images and take their editing skills to the next level. With this knowledge, users can confidently navigate the Photoshop interface, locate the Deselect Tool, and utilize its basic functionality to achieve their desired results. So, let's begin by exploring what the Deselect Tool is and its purpose.
What is the Deselect Tool and its Purpose
The Deselect Tool, also known as the "Deselect" or "Deselect All" tool, is a fundamental feature in Adobe Photoshop that allows users to quickly and easily remove a selection from an image. Its primary purpose is to cancel or undo a selection, returning the image to its original state. When a selection is made, Photoshop creates a temporary boundary around the chosen area, which can be edited, moved, or manipulated. However, if the user decides they no longer want to work with the selected area, the Deselect Tool comes into play. By clicking on the Deselect Tool or using the keyboard shortcut Ctrl+D (Windows) or Command+D (Mac), the selection is instantly removed, and the image returns to its original state. This tool is particularly useful when working on complex projects, where multiple selections are made, and the user needs to quickly switch between different areas of the image. The Deselect Tool saves time and streamlines the editing process, allowing users to focus on the creative aspects of image manipulation.
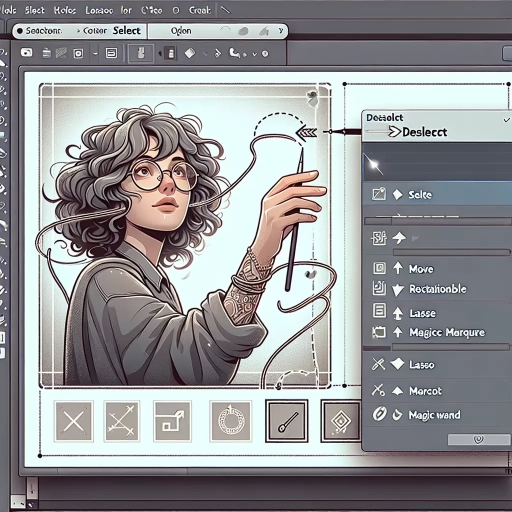
Locating the Deselect Tool in the Photoshop Interface
The Deselect Tool is a crucial feature in Photoshop that allows users to remove a selection and start fresh. To locate the Deselect Tool in the Photoshop interface, users can follow these steps. First, ensure that the toolbar is visible by going to Window > Tools or pressing the shortcut key "T" on the keyboard. Once the toolbar is open, look for the "Select and Mask" section, which is usually located on the left-hand side of the screen. Within this section, users will find the Deselect Tool, represented by a small icon that resembles a rectangle with a diagonal line through it. Alternatively, users can also access the Deselect Tool by going to Select > Deselect or by using the shortcut key "Ctrl+D" (Windows) or "Command+D" (Mac). By familiarizing themselves with the location of the Deselect Tool, users can quickly and easily remove unwanted selections and continue working on their projects.
Basic Functionality of the Deselect Tool
The Deselect Tool in Photoshop is a fundamental feature that allows users to remove a selection from an image, effectively "deselecting" it. The basic functionality of the Deselect Tool is straightforward: it cancels the current selection, allowing users to start fresh or make new selections. When a selection is active, the Deselect Tool can be accessed by clicking on the "Deselect" button in the toolbar or by using the keyboard shortcut Ctrl+D (Windows) or Command+D (Mac). This action immediately removes the selection, and the image returns to its normal state. The Deselect Tool is particularly useful when working with complex selections or when a user needs to quickly switch between different selection tools. By deselecting a selection, users can avoid accidentally modifying or deleting parts of the image, ensuring a more precise and controlled editing process. Additionally, the Deselect Tool can be used in conjunction with other selection tools, such as the Marquee or Lasso tools, to refine and adjust selections with greater accuracy. Overall, the Deselect Tool is an essential component of the Photoshop workflow, providing a simple yet powerful way to manage selections and maintain control over the editing process.
Methods for Deselecting in Photoshop
In Photoshop, selecting and deselecting objects or areas is a crucial part of the editing process. There are several methods for deselecting in Photoshop, each with its own unique benefits and uses. Three of the most common methods include using the Deselect Tool via keyboard shortcut, selecting and deselecting with the Marquee Tool, and deselecting with the Lasso Tool and other selection tools. By mastering these methods, users can streamline their workflow and achieve more precise control over their selections. One of the quickest and most efficient ways to deselect an object or area is by using the Deselect Tool via keyboard shortcut.
Using the Deselect Tool via Keyboard Shortcut
Using the Deselect Tool via Keyboard Shortcut is a quick and efficient method to deselect a selection in Photoshop. To do this, simply press the "Ctrl+D" keys on a Windows computer or "Command+D" keys on a Mac. This keyboard shortcut will immediately deselect any active selection, allowing you to start fresh and make new selections as needed. The Deselect Tool via Keyboard Shortcut is particularly useful when working on complex projects that require frequent selection and deselection of different elements. By using this shortcut, you can quickly switch between selections and focus on other aspects of your project, such as editing or retouching. Additionally, this method is also helpful when you need to deselect a selection that is no longer needed, but you don't want to delete it entirely. By pressing the keyboard shortcut, you can simply remove the selection and move on to the next step in your workflow. Overall, the Deselect Tool via Keyboard Shortcut is a simple yet powerful tool that can save you time and increase your productivity in Photoshop.
Selecting and Deselecting with the Marquee Tool
When working with the Marquee Tool in Photoshop, selecting and deselecting areas of an image is a crucial part of the editing process. To select an area using the Marquee Tool, simply click and drag the tool over the desired region. The tool will create a rectangular or elliptical selection, depending on the type of Marquee Tool used. To add to an existing selection, hold down the Shift key while dragging the tool. This allows you to select multiple areas of the image without deselecting the previously selected area. To subtract from a selection, hold down the Alt (Option on a Mac) key while dragging the tool. This will remove the selected area from the existing selection. To intersect with a selection, hold down the Shift and Alt (Option on a Mac) keys simultaneously while dragging the tool. This will select only the area where the new selection overlaps with the existing selection. To deselect an area, simply press the Ctrl (Command on a Mac) key and click outside of the selected area. Alternatively, you can go to Select > Deselect or press Ctrl+D (Command+D on a Mac) to deselect the entire selection. By mastering the Marquee Tool's selecting and deselecting capabilities, you can efficiently edit and manipulate your images in Photoshop.
Deselecting with the Lasso Tool and Other Selection Tools
When working with the Lasso Tool and other selection tools in Photoshop, deselecting can be a bit tricky, but there are a few methods to achieve this. One way to deselect with the Lasso Tool is to press the "Ctrl+D" keys on Windows or "Command+D" on Mac while the tool is active. This will immediately deselect the current selection, allowing you to start fresh. Alternatively, you can also use the "Select" menu and choose "Deselect" to achieve the same result. Another method is to click on the "Deselect" button in the Options bar, which is located at the top of the screen. If you're using the Magnetic Lasso Tool or the Polygonal Lasso Tool, you can also press the "Esc" key to deselect the current selection. Additionally, if you're using the Lasso Tool in conjunction with other selection tools, such as the Marquee Tool or the Magic Wand Tool, you can press the "Ctrl+Shift+D" keys on Windows or "Command+Shift+D" on Mac to deselect all selections. By mastering these methods, you can efficiently deselect with the Lasso Tool and other selection tools in Photoshop, allowing you to work more efficiently and effectively.
Advanced Deselecting Techniques in Photoshop
When working with complex images in Photoshop, selecting and deselecting specific areas can be a daunting task. Advanced deselecting techniques are essential for achieving professional-looking results, especially when dealing with intricate designs or multi-layered compositions. In this article, we will explore three powerful methods for refining your selection skills: using layers to deselect and re-select objects, combining selections to deselect complex areas, and utilizing the "Select and Mask" workspace for precise deselection. By mastering these techniques, you'll be able to work more efficiently and effectively, even with the most challenging images. Let's start by examining how using layers can simplify the process of deselecting and re-selecting objects, allowing you to work with greater precision and control.
Using Layers to Deselect and Re-select Objects
Using layers to deselect and re-select objects is a powerful technique in Photoshop that allows for greater control and flexibility when working with complex compositions. By organizing objects into separate layers, you can easily isolate and manipulate individual elements without affecting the rest of the image. To use layers for deselecting, start by selecting the object you want to work with and then go to the "Layer" menu and choose "New Layer" or use the keyboard shortcut Ctrl+Shift+N (Windows) or Command+Shift+N (Mac). This will create a new layer containing only the selected object. Next, use the "Layer" menu to select the layer containing the object you want to deselect, and then use the "Select" menu to choose "Deselect" or use the keyboard shortcut Ctrl+D (Windows) or Command+D (Mac). This will remove the selection from the object, allowing you to work on other parts of the image without affecting it. To re-select the object, simply go back to the layer containing the object and use the "Select" menu to choose "Select All" or use the keyboard shortcut Ctrl+A (Windows) or Command+A (Mac). This will re-select the object, allowing you to continue working on it. By using layers to deselect and re-select objects, you can work more efficiently and effectively, making it easier to achieve the desired results in your Photoshop projects. Additionally, using layers also allows you to work on multiple objects simultaneously, making it easier to compare and adjust different elements in your composition. Overall, using layers to deselect and re-select objects is a valuable technique that can help you to work more efficiently and effectively in Photoshop.
Combining Selections to Deselect Complex Areas
Combining selections to deselect complex areas in Photoshop is a powerful technique that allows you to isolate specific parts of an image while excluding others. This method involves creating multiple selections and then combining them to achieve the desired result. To start, create a new selection using the Select and Mask workspace or the Quick Selection tool, focusing on the area you want to keep. Next, use the Subtract from Selection option to remove any unwanted parts from the initial selection. You can also use the Intersect with Selection option to refine the selection by intersecting it with another selection. Additionally, you can use the Add to Selection option to include more areas in the selection. By combining these options, you can create a complex selection that accurately isolates the desired area. To further refine the selection, use the Refine Edge Brush tool to paint over the edges of the selection, allowing you to make precise adjustments. Finally, use the Output option to output the selection as a mask, which can be used to apply adjustments or effects to the selected area. By mastering the technique of combining selections to deselect complex areas, you can achieve precise control over your selections and take your Photoshop skills to the next level.
Utilizing the "Select and Mask" Workspace for Precise Deselection
The "Select and Mask" workspace in Photoshop is a powerful tool for precise deselection, allowing users to refine their selections with ease. To access this workspace, go to "Select" > "Select and Mask" or use the keyboard shortcut "Ctrl+Shift+R" (Windows) or "Command+Shift+R" (Mac). Once in the workspace, you'll see a variety of tools and options that enable you to fine-tune your selection. The "Refine Edge" tool, for example, uses advanced algorithms to detect and refine the edges of your selection, while the "Radius" and "Threshold" sliders allow you to adjust the sensitivity and accuracy of the selection. Additionally, the "Edge Detection" option enables you to specify the type of edge you want to detect, such as "Smart Radius" or "Radius". The "Select and Mask" workspace also includes a "Refine Radius" tool, which allows you to paint over areas of the image to refine the selection. This tool is particularly useful for selecting complex or intricate objects. Furthermore, the "Output" options enable you to choose how you want to output your selection, such as a new layer, a layer mask, or a selection. By utilizing the "Select and Mask" workspace, you can achieve precise deselection and refine your selections with ease, saving you time and effort in the editing process.