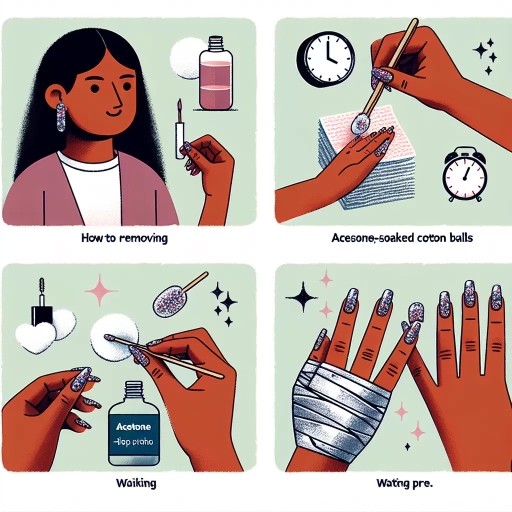
How To Remove Fake Nails Glued On
Removing fake nails that have been glued on can be a delicate process, requiring patience and care to avoid damaging your natural nails. Whether you've enjoyed a set of glamorous acrylics or opted for press-on nails for a special occasion, knowing how to properly remove them is essential for maintaining healthy nails. This article will guide you through the process of safely removing fake nails, ensuring your natural nails remain intact and ready for their next beautification. We'll explore three key steps to successful fake nail removal: preparing for the process, softening and loosening the adhesive, and safely removing the fake nails followed by proper aftercare. By following these steps, you'll be able to bid farewell to your artificial nails without causing harm to your natural ones. Understanding the importance of each stage will help you achieve the best results and keep your nails in prime condition. Let's begin by discussing how to prepare for fake nail removal, setting the stage for a smooth and effective process.
Preparing for Fake Nail Removal
Fake nails have become a popular beauty trend, offering a quick and stylish way to enhance one's appearance. However, when it's time to remove them, proper preparation is crucial to ensure a safe and effective process that minimizes damage to your natural nails. This article will guide you through the essential steps of preparing for fake nail removal, focusing on three key aspects. First, we'll discuss the importance of gathering necessary supplies and tools, ensuring you have everything at hand for a smooth removal process. Next, we'll explore how to create a comfortable workspace, allowing you to focus on the task without distractions or discomfort. Finally, we'll delve into the significance of assessing the type of adhesive used, as different adhesives require different removal techniques. By addressing these three critical areas, you'll be well-equipped to tackle the removal process with confidence and care. Whether you're a seasoned fake nail enthusiast or a first-time user, understanding how to properly prepare for fake nail removal is essential for maintaining the health and beauty of your natural nails. Let's dive into the details of how to effectively prepare for fake nail removal.
Gathering necessary supplies and tools
Before embarking on the process of removing fake nails glued on, it's crucial to gather all the necessary supplies and tools to ensure a smooth and efficient removal process. Having everything at hand will not only save time but also minimize the risk of damaging your natural nails. Start by setting up a comfortable workspace with good lighting, preferably near a sink for easy access to water. The most essential item you'll need is acetone, the primary solvent used to break down nail glue. Opt for 100% pure acetone rather than regular nail polish remover, as it's more effective for this task. You'll also need cotton balls or pads to apply the acetone. For a more eco-friendly option, consider reusable felt pads specifically designed for nail care. To protect the skin around your nails from drying out due to acetone exposure, gather cuticle oil or petroleum jelly. Next, collect tools for gently lifting and removing the fake nails. A wooden orange stick or a metal cuticle pusher will be invaluable for this purpose. If your fake nails are particularly stubborn, you might need a pair of nail clippers to carefully trim them down before removal. Don't forget to have a nail file on hand to smooth any rough edges that may remain after the fake nails are off. To make the removal process more comfortable and protect your work surface, lay out a soft towel or paper towels. You'll also want to have a small bowl or container to hold the acetone for soaking your nails if needed. For those who prefer the foil method, gather some aluminum foil cut into small squares. Safety should always be a priority, so include a pair of disposable gloves to protect your hands from prolonged acetone exposure. If you have sensitive skin or are prone to irritation, consider having some hand cream or moisturizer nearby to apply after the removal process. Lastly, prepare some aftercare items to nourish your natural nails post-removal. This may include a strengthening base coat, cuticle cream, and a gentle nail buffer to smooth out any remaining roughness. By assembling all these supplies and tools beforehand, you'll be well-prepared to tackle the fake nail removal process efficiently and with minimal stress to your natural nails.
Creating a comfortable workspace
Creating a comfortable workspace is an essential step in preparing for fake nail removal, as it can significantly impact the efficiency and safety of the process. A well-organized and ergonomic setup not only enhances your comfort but also minimizes the risk of accidents or damage to your natural nails. Begin by selecting a well-lit area in your home, preferably near a window for natural light or with a bright overhead lamp. Adequate lighting is crucial for seeing the details of your nails and ensuring precise removal. Choose a sturdy table or desk that provides ample space for all your tools and supplies. Ensure the surface is clean and clutter-free to prevent any contamination or accidental spills. Place a soft, clean towel on the table to protect it from potential acetone drips and to provide a comfortable resting place for your hands. Consider using a nail-specific arm rest or cushion to support your arms and wrists, reducing strain during the removal process. Gather all necessary tools and materials before starting, including acetone, cotton balls or pads, aluminum foil, a nail file, cuticle pusher, and hand moisturizer. Arrange these items within easy reach to avoid unnecessary movements once you begin. Keep a small trash bin nearby for disposing of used materials, maintaining a tidy workspace throughout the process. Proper ventilation is crucial when working with acetone, so open a window or use a small fan to circulate air and minimize fume inhalation. If possible, set up your workspace near a sink for easy access to water for rinsing and cleaning. Have a bottle of hand sanitizer nearby to maintain hygiene throughout the process. Consider your seating arrangement carefully. Choose a comfortable chair that allows you to maintain good posture and adjust your position as needed. Proper ergonomics can prevent back and neck strain during the potentially lengthy removal process. If you plan to watch instructional videos or follow online tutorials, position your device (smartphone, tablet, or laptop) at eye level to avoid neck strain. Temperature and ambiance also play a role in creating a comfortable workspace. Ensure the room is at a pleasant temperature, as extreme heat or cold can affect the nail removal process and your overall comfort. Some people find that playing soft background music or a podcast can help create a relaxing atmosphere and make the time pass more quickly. By taking the time to create a comfortable, well-organized workspace, you set yourself up for a more pleasant and successful fake nail removal experience. This thoughtful preparation can help reduce stress, prevent accidents, and ensure that you have everything you need at your fingertips, allowing you to focus on safely and effectively removing your fake nails.
Assessing the type of adhesive used
Assessing the type of adhesive used is a crucial step in preparing for fake nail removal, as different adhesives require different removal techniques. The two primary types of adhesives used for attaching fake nails are nail glue and press-on adhesive tabs. Nail glue, also known as cyanoacrylate adhesive, is a strong, fast-acting bond that creates a more durable and long-lasting attachment. This type of adhesive is commonly used for acrylic nails, gel nails, and some types of glue-on artificial nails. On the other hand, press-on adhesive tabs are pre-applied strips that come with certain types of fake nails, offering a less permanent and easier-to-remove option. To determine which type of adhesive was used, start by examining the packaging or instructions that came with your fake nails. If you no longer have this information, carefully inspect the area where the fake nail meets your natural nail. Nail glue typically creates a more seamless and nearly invisible bond, while adhesive tabs may be visible as a thin strip between the fake and natural nail. Additionally, consider how long the nails have been in place and how secure they feel. Nails attached with glue tend to last longer and feel more firmly attached than those applied with adhesive tabs. The removal process varies significantly depending on the adhesive type. For nail glue, you'll need to use acetone or a specialized nail glue remover to break down the adhesive bond. This process can be more time-consuming and may require soaking your nails for an extended period. Adhesive tabs, however, can often be removed more easily by gently prying the fake nail off or using oil to loosen the adhesive. It's important to note that some professional nail technicians may use a combination of methods or specialized adhesives, which can complicate the removal process. If you're unsure about the type of adhesive used or if your nails were professionally applied, it's best to consult with a nail technician before attempting removal at home. They can assess the nails and recommend the safest and most effective removal method. Correctly identifying the adhesive type not only helps you choose the appropriate removal method but also helps prevent damage to your natural nails. Using the wrong removal technique can lead to nail breakage, peeling, or other forms of damage. By taking the time to assess the adhesive properly, you can ensure a smoother, safer removal process and maintain the health of your natural nails.
Softening and Loosening the Adhesive
Removing fake nails can be a delicate process that requires patience and the right techniques to avoid damaging your natural nails. Whether you're dealing with acrylic, gel, or press-on nails, softening and loosening the adhesive is a crucial first step in ensuring a safe and effective removal. This article will guide you through three proven methods to gently break down the bond between your natural nails and the artificial enhancements. We'll explore the benefits of soaking your nails in warm, soapy water, which can help to soften the adhesive and make it more pliable. Next, we'll discuss the use of acetone-based nail polish remover, a powerful solvent that can dissolve many types of nail adhesives. Finally, we'll delve into the application of cuticle oil, which not only moisturizes your nails and surrounding skin but can also help to loosen the bonds holding the fake nails in place. By understanding and implementing these techniques, you'll be well-prepared to tackle the task of fake nail removal with confidence and care. As we move forward, we'll discuss how to properly prepare for the removal process, ensuring that you have all the necessary tools and materials at hand.
Soaking nails in warm, soapy water
Soaking nails in warm, soapy water is a gentle yet effective method for softening and loosening the adhesive used to attach fake nails. This technique is particularly useful for those who want to remove their artificial nails without causing damage to their natural nails or surrounding skin. The process works by utilizing the properties of water and heat to gradually break down the adhesive bonds, making it easier to remove the fake nails with minimal force. To begin, fill a bowl with comfortably warm water – not too hot to avoid burning your skin, but warm enough to promote the softening of the adhesive. Add a few drops of mild liquid soap or a small amount of gentle dish detergent to the water. The soap helps to break down oils and create a more effective soaking solution. Submerge your fingertips in the warm, soapy water, ensuring that the fake nails are fully immersed. It's important to note that patience is key during this process, as it may take anywhere from 15 to 30 minutes for the adhesive to soften sufficiently. While soaking, you can gently massage your nails and cuticles to encourage the water to penetrate the space between the fake nail and your natural nail. This action helps to further loosen the adhesive and can make the removal process easier. As you soak, you may notice the edges of the fake nails starting to lift slightly – this is a good sign that the adhesive is beginning to weaken. For stubborn adhesives or particularly well-attached fake nails, you can enhance the soaking process by adding a few drops of cuticle oil or olive oil to the water. These oils can help to further break down the adhesive and provide additional moisturizing benefits to your skin and nails. Some people also find success in adding a small amount of acetone-free nail polish remover to the water, though this should be used sparingly to avoid drying out the skin. It's important to resist the urge to forcefully pry off the fake nails during or immediately after soaking. Instead, gently test the edges of the nails periodically to see if they're loosening. If you encounter resistance, continue soaking for a few more minutes. Once the nails feel sufficiently loose, you can proceed with carefully removing them using a wooden orange stick or a soft, flexible nail file to gently push from the edges. After removing the fake nails, you may notice some residual adhesive on your natural nails. This can typically be removed by gently buffing with a soft nail file or continuing to soak and massage your nails. Following the removal process, it's advisable to moisturize your nails and surrounding skin to counteract any drying effects from the soaking and to promote healthy nail growth.
Using acetone-based nail polish remover
Using acetone-based nail polish remover is a highly effective method for softening and loosening the adhesive that holds fake nails in place. This powerful solvent works by breaking down the chemical bonds in the glue, making it easier to remove the artificial nails without causing damage to your natural nails. When applied correctly, acetone can significantly reduce the time and effort required to remove fake nails, making it a popular choice among both professionals and at-home users. To begin the process, you'll need to gather your supplies, including 100% pure acetone nail polish remover, cotton balls or pads, aluminum foil, and a nail file. Start by gently filing the top layer of the fake nails to remove any shine or topcoat, as this will allow the acetone to penetrate more effectively. Next, soak a cotton ball or pad in the acetone-based remover and place it directly on top of the fake nail. Wrap each finger individually with a small piece of aluminum foil to keep the cotton in place and prevent the acetone from evaporating too quickly. It's important to note that while acetone is highly effective, it can also be drying to the skin and nails. To minimize potential damage, limit the exposure time to about 15-20 minutes. During this time, the acetone will work its magic, softening the glue and loosening the fake nail's grip on your natural nail. You may feel a slight warming sensation as the acetone reacts with the adhesive, which is normal. After the allotted time has passed, carefully remove the foil and cotton from one finger at a time. You should notice that the fake nail has become soft and pliable. Gently attempt to lift the edge of the artificial nail using a wooden cuticle stick or an orangewood stick. If the nail doesn't come off easily, re-wrap it and wait for an additional 5-10 minutes before trying again. Never force the fake nail off, as this can cause damage to your natural nail bed. While acetone is highly effective, it's worth mentioning that it may not be suitable for everyone. Those with sensitive skin or allergies may need to explore alternative methods or use non-acetone removers. Additionally, if you have extensions or acrylics that were professionally applied, it's often best to return to the salon for removal to ensure the health and integrity of your natural nails. Once all the fake nails have been removed, it's crucial to properly care for your natural nails. Wash your hands thoroughly to remove any residual acetone, and apply a nourishing cuticle oil and hand cream to replenish moisture. This will help counteract the drying effects of the acetone and promote healthy nail growth. With proper technique and aftercare, using acetone-based nail polish remover can be an efficient and relatively safe method for removing fake nails at home.
Applying cuticle oil to moisturize and loosen bonds
Applying cuticle oil is a crucial step in softening and loosening the adhesive bonds of fake nails, making them easier to remove while also nourishing the natural nails and surrounding skin. This process not only aids in the removal of artificial nails but also promotes overall nail health and prevents damage during the removal process. Cuticle oil is a specialized product designed to moisturize and condition the cuticles and nails. It typically contains a blend of nourishing oils such as jojoba, vitamin E, and essential oils that penetrate deeply into the nail bed and surrounding skin. When applied to fake nails, the oil can seep into the tiny gaps between the artificial nail and the natural nail, gradually weakening the adhesive bonds. To begin the process, choose a high-quality cuticle oil that is free from harsh chemicals or potential irritants. Using the applicator brush or dropper that comes with the oil, apply a generous amount to the edges of each fake nail, paying particular attention to the area where the artificial nail meets the natural nail. Gently massage the oil into the cuticles and along the sides of each nail, ensuring thorough coverage. For best results, it's recommended to apply the cuticle oil multiple times throughout the day, allowing it to work its magic between applications. This repeated application helps to maximize the oil's penetration and effectiveness in loosening the adhesive. As you massage the oil into the nails, you may notice a slight give or flexibility in the fake nails, indicating that the process is working. In addition to its adhesive-loosening properties, cuticle oil provides much-needed hydration to the natural nails and surrounding skin. This is especially important as the removal process can be potentially drying and damaging to the nails. The nourishing ingredients in the oil help to counteract any adverse effects and maintain the health and integrity of your natural nails. For those who prefer a more natural approach, certain household oils can serve as alternatives to commercial cuticle oils. Coconut oil, olive oil, or even vitamin E oil can be effective in moisturizing and loosening the bonds of fake nails. However, it's important to note that these alternatives may not be as potent or fast-acting as specialized cuticle oils. As you continue to apply the oil over time, you may notice that the fake nails become increasingly loose and easier to manipulate. This gradual loosening process is gentler on your natural nails compared to forceful removal methods, reducing the risk of damage or breakage. It's essential to be patient during this process, as rushing the removal can lead to nail trauma and weakening. By incorporating cuticle oil application into your fake nail removal routine, you're not only facilitating an easier and safer removal process but also pampering your nails with essential nutrients. This step sets the stage for a smoother transition back to natural nails and helps maintain their health and appearance in the long run.
Safely Removing Fake Nails and Aftercare
Fake nails have become a popular beauty trend, offering instant glamour and the ability to experiment with various styles. However, when it's time to remove them, it's crucial to do so safely to protect your natural nails. This article will guide you through the process of safely removing fake nails and provide essential aftercare tips to maintain healthy, beautiful nails. We'll explore three key steps: gently prying off loosened nails, filing down remaining adhesive, and nourishing and strengthening your natural nails post-removal. By following these methods, you can minimize damage to your nail beds and cuticles while ensuring a smooth transition back to your natural nails. Whether you're dealing with acrylics, gels, or press-ons, understanding the proper removal techniques is essential for maintaining nail health. Additionally, we'll discuss the importance of aftercare, including moisturizing and strengthening treatments to help your natural nails recover from the stress of wearing fake nails. Before diving into the removal process, it's essential to properly prepare for the task at hand. Let's begin by exploring the necessary steps for preparing for fake nail removal.
Gently prying off loosened nails
Gently prying off loosened nails is a crucial step in the process of safely removing fake nails that have been glued on. This technique requires patience and care to avoid damaging your natural nails or causing discomfort. Once you've successfully softened the adhesive using methods like soaking or applying acetone, it's time to begin the delicate process of removing the artificial nails. Start by identifying the edges of the fake nails that have begun to lift. These areas will be your entry points for removal. Using a wooden orange stick or a specialized nail removal tool, carefully insert the flat end under the loosened edge of the artificial nail. Apply gentle pressure to slowly work the tool further underneath the fake nail, moving from one side to the other. It's essential to maintain a steady hand and avoid using excessive force, as this could lead to splitting or peeling of your natural nail. As you continue to work the tool beneath the fake nail, you may feel the adhesive gradually giving way. Take your time with this process, allowing the nail to lift naturally rather than forcing it off. If you encounter resistance, pause and apply more acetone or soak the nail again to further weaken the glue. Remember, the goal is to remove the fake nail with minimal stress to your natural nail bed. While prying, pay close attention to any signs of discomfort or pain. If you experience any sharp sensations, stop immediately and reassess your technique. It's possible that the adhesive hasn't fully dissolved in some areas, or you may be applying too much pressure. In such cases, it's better to take a break and allow the softening agents more time to work rather than risking damage to your natural nails. As the fake nail begins to detach, you may notice residual adhesive on your natural nail. Don't be tempted to scrape this off forcefully. Instead, gently buff it away with a soft nail file or leave it to be removed during your aftercare routine. Some stubborn pieces of the artificial nail may remain attached; these can usually be softened with additional soaking and then carefully removed. Throughout the process, be mindful of your natural nail's integrity. If you notice any signs of thinning, splitting, or excessive flexibility in your natural nail, it's advisable to seek professional help for removal. A nail technician can assess the condition of your nails and use specialized techniques to safely complete the removal process. By approaching the prying process with patience and gentleness, you can successfully remove fake nails while minimizing the risk of damage to your natural nails. This careful technique sets the stage for proper aftercare, allowing your nails to recover and regain their strength and health following the removal of artificial enhancements.
Filing down remaining adhesive
Filing down remaining adhesive is a crucial step in the process of safely removing fake nails and ensuring proper aftercare for your natural nails. After successfully removing the artificial nails, you may notice some stubborn adhesive residue clinging to your nail beds. This leftover glue can be unsightly and potentially harmful if left unaddressed, making it essential to remove it carefully and thoroughly. To begin the filing process, choose a nail file with a grit that is appropriate for your natural nail strength. A medium-grit file is generally suitable for most people, but if you have particularly delicate nails, opt for a finer grit to minimize potential damage. Gently file the surface of your nails in one direction, focusing on the areas where adhesive remains. It's important to avoid aggressive filing, as this can weaken your natural nails and potentially cause pain or discomfort. As you file, you'll notice the adhesive slowly coming off in small particles. Take frequent breaks to assess your progress and brush away the debris. This not only helps you see which areas still need attention but also prevents you from over-filing any particular spot. If you encounter stubborn patches of glue, resist the temptation to apply more pressure. Instead, consider using a small amount of nail polish remover or acetone on a cotton swab to soften the adhesive before resuming gentle filing. Throughout the process, pay close attention to the condition of your natural nails. If you notice any signs of thinning, excessive flexibility, or discoloration, stop filing immediately and consult a professional nail technician or dermatologist. These could be indicators that you've filed too much or that your nails have been damaged during the removal process. Once you've successfully removed all visible traces of adhesive, it's time to focus on nourishing your natural nails. Apply a cuticle oil or nail strengthening treatment to help replenish moisture and promote healthy nail growth. Gently massage the product into your nails and surrounding skin to improve circulation and aid in the absorption of nourishing ingredients. Remember that your nails may be more sensitive and prone to breakage immediately after removing fake nails, so treat them with extra care in the days following. Avoid using harsh chemicals or engaging in activities that put excessive stress on your nails. Instead, give them time to recover and regain their strength naturally. By taking the time to properly file down remaining adhesive and providing appropriate aftercare, you'll help ensure that your natural nails remain healthy and strong. This careful approach not only improves the appearance of your nails but also sets the stage for future nail health, whether you choose to apply new artificial nails or embrace your natural look.