How To Make A Bottle Rocket
Here is the introduction paragraph: Are you ready to take your DIY skills to new heights? Literally! Making a bottle rocket is a fun and educational project that can be enjoyed by people of all ages. With just a few simple materials and some basic knowledge of physics, you can create a rocket that can soar into the air and reach impressive heights. But before you can launch your rocket, you need to design it, build it, and test it. In this article, we will guide you through the process of making a bottle rocket, from designing the perfect shape and size, to building the rocket and its launch system, to launching and testing it to see how high it can fly. So, let's get started with the first step: designing the bottle rocket.
Designing the Bottle Rocket
Designing a bottle rocket is an exciting project that requires careful consideration of several key factors to ensure a successful and safe launch. When it comes to creating a high-flying bottle rocket, the design process is crucial. Three essential aspects to focus on are choosing the right materials, designing the nose cone and fins, and creating a stable and aerodynamic shape. By carefully selecting the materials used, designers can ensure that their rocket is both durable and lightweight. A well-designed nose cone and fins are also vital for stability and control during flight. Finally, a stable and aerodynamic shape is necessary to minimize air resistance and maximize the rocket's altitude. By paying attention to these three critical design elements, individuals can create a bottle rocket that is not only fun to launch but also reaches impressive heights. To start, it's essential to choose the right materials for the job.
Choosing the Right Materials
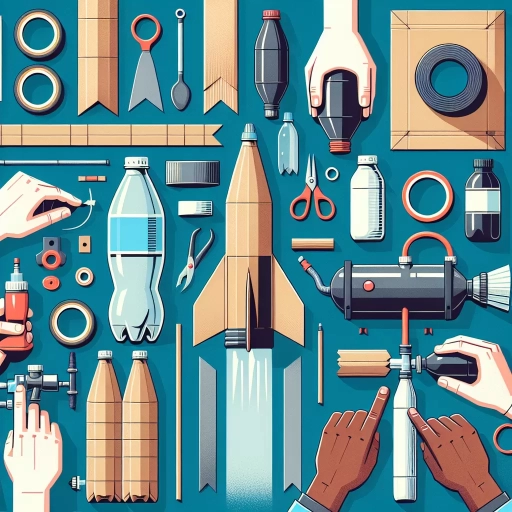
When it comes to designing a bottle rocket, choosing the right materials is crucial for a successful and safe flight. The body of the rocket should be made from a lightweight yet durable material, such as plastic or paper mache, to minimize weight and maximize aerodynamics. The fins, which provide stability and control, can be made from balsa wood, plastic, or even cardboard. It's essential to ensure the fins are securely attached to the body using a strong adhesive, such as hot glue or epoxy. The nose cone, which houses the parachute, should be made from a lightweight material, such as plastic or foam, and should be securely attached to the body using a strong adhesive. The parachute itself should be made from a lightweight, yet strong material, such as nylon or polyester, and should be designed to deploy smoothly and consistently. The launch pad and launch tube should be made from a sturdy material, such as PVC pipe or cardboard, to provide a stable and secure launch platform. Finally, the propulsion system, which can be made from a variety of materials, including compressed air, water, or even a small engine, should be carefully designed and tested to ensure a safe and controlled flight. By choosing the right materials for each component, you can ensure a successful and enjoyable bottle rocket launch.
Designing the Nose Cone and Fins
Designing the nose cone and fins of a bottle rocket is a crucial step in ensuring its stability and aerodynamics during flight. The nose cone, which is the front section of the rocket, should be designed to be aerodynamically shaped to reduce air resistance and drag. A conical or rounded shape is ideal, as it allows the rocket to cut through the air with minimal resistance. The nose cone can be made from a variety of materials, such as paper, plastic, or foam, and should be securely attached to the bottle using glue or tape. The fins, which are located at the rear of the rocket, play a critical role in stabilizing the rocket's flight path. They should be designed to be symmetrical and evenly spaced, with a slight angle to provide stability and control. The fins can be made from lightweight materials, such as cardboard or plastic, and should be attached to the bottle using glue or tape. The size and shape of the fins will depend on the size and weight of the rocket, as well as the desired flight characteristics. A larger rocket may require larger fins to provide stability, while a smaller rocket may require smaller fins to reduce drag. By carefully designing the nose cone and fins, you can create a bottle rocket that is both stable and aerodynamic, and that will fly smoothly and efficiently through the air.
Creating a Stable and Aerodynamic Shape
When designing a bottle rocket, creating a stable and aerodynamic shape is crucial for achieving optimal flight performance. A stable shape ensures that the rocket flies straight and true, while an aerodynamic shape reduces air resistance, allowing the rocket to reach higher speeds and altitudes. To create a stable shape, the rocket's body should be symmetrical and evenly weighted, with the center of gravity located near the bottom of the rocket. This can be achieved by using a cylindrical or conical shape, with the fins and nose cone positioned to provide stability and balance. An aerodynamic shape, on the other hand, is achieved by streamlining the rocket's body to reduce drag. This can be done by using a tapered nose cone, a rounded body, and a narrow tail section. The fins should also be angled to provide stability while minimizing drag. Additionally, the rocket's surface should be smooth and free of any protrusions or irregularities that could disrupt airflow. By combining a stable and aerodynamic shape, you can create a bottle rocket that flies efficiently and effectively, reaching new heights and distances.
Building the Bottle Rocket
Building a bottle rocket is an exciting and educational project that can be enjoyed by people of all ages. The process of creating a bottle rocket involves several key steps, including assembling the rocket body and fins, attaching the nose cone and recovery system, and adding the propulsion system and ignition. By following these steps, you can create a high-flying and safe bottle rocket that will provide hours of entertainment and learning. In this article, we will explore each of these steps in detail, starting with the foundation of the rocket: assembling the rocket body and fins.
Assembling the Rocket Body and Fins
Assembling the rocket body and fins is a crucial step in building a bottle rocket. To start, take the plastic bottle and cut off the bottom third using scissors or a craft knife. This will create the rocket's body. Next, cut out three to four triangular fins from the plastic or cardboard, depending on the design you prefer. The fins should be evenly spaced and angled to provide stability during flight. Attach the fins to the rocket body using glue, tape, or a hot glue gun, making sure they are secure and evenly spaced. For added stability, you can also attach a small nose cone made from a paper cone or a plastic cone to the top of the rocket body. Finally, decorate your rocket with paint, markers, or stickers to give it a personalized touch. With the rocket body and fins assembled, you're one step closer to launching your very own bottle rocket.
Attaching the Nose Cone and Recovery System
Attaching the nose cone and recovery system is a crucial step in building a bottle rocket. The nose cone serves as the rocket's front section, providing aerodynamics and housing the recovery system. To attach the nose cone, start by applying a thin layer of glue to the top of the bottle and the inside of the nose cone. Carefully slide the nose cone over the bottle, ensuring it is centered and secure. Hold the nose cone in place for a few seconds to allow the glue to set. Next, attach the recovery system, which typically consists of a parachute and a shock cord. The parachute helps slow down the rocket's descent, while the shock cord connects the parachute to the nose cone. Attach the shock cord to the nose cone using glue or tape, making sure it is secure and won't come loose during flight. Finally, attach the parachute to the shock cord, following the manufacturer's instructions. With the nose cone and recovery system in place, your bottle rocket is now ready for launch.
Adding the Propulsion System and Ignition
The propulsion system of a bottle rocket is what gives it the thrust it needs to lift off the ground and soar into the air. To add the propulsion system, you will need a few simple materials, including a plastic bottle, a bicycle pump or air compressor, and a valve. The valve is a crucial component, as it allows you to control the release of air pressure that propels the rocket. You can purchase a valve at a hobby store or online, or you can make your own using a piece of PVC pipe and a few fittings. Once you have all of your materials, you can begin to assemble the propulsion system. Start by attaching the valve to the bottle, making sure that it is securely fastened. Next, attach the bicycle pump or air compressor to the valve, and make sure that it is tightly connected. Finally, add a few drops of water to the bottle to create a small amount of pressure. With the propulsion system in place, you can now add the ignition system. The ignition system is what ignites the fuel that propels the rocket. In this case, the fuel is the compressed air, which is ignited by the release of pressure. To add the ignition system, you will need a few simple materials, including a piece of string or twine, a match or lighter, and a small piece of tape. Start by tying the string or twine around the valve, leaving a small loop at the end. Next, attach the match or lighter to the loop, making sure that it is securely fastened. Finally, add a small piece of tape to the valve, covering the match or lighter. With the ignition system in place, you can now test the rocket. Make sure that the area is clear of any obstacles, and that you have a safe place to launch the rocket. With the propulsion and ignition systems in place, you are now ready to launch your bottle rocket and watch it soar into the air.
Launching and Testing the Bottle Rocket
Launching a bottle rocket is an exciting and educational experience that allows individuals to explore the principles of aerodynamics and propulsion. To ensure a successful and safe launch, it is essential to follow a structured approach. This involves preparing the launch site and taking necessary safety precautions, launching the rocket and collecting data on its flight, and analyzing the results to make improvements for future launches. By following these steps, individuals can gain a deeper understanding of the science behind bottle rockets and develop essential skills in experimentation and problem-solving. In this article, we will delve into the process of launching and testing a bottle rocket, starting with the crucial step of preparing the launch site and safety precautions.
Preparing the Launch Site and Safety Precautions
Preparing the launch site and taking necessary safety precautions are crucial steps before launching a bottle rocket. First, choose a safe and open area, away from buildings, trees, and power lines, with a clear trajectory for the rocket to fly. Ensure the launch site is clear of any obstacles, such as rocks or debris, that could interfere with the rocket's flight or cause injury. Next, set up a launch pad or a stable surface to support the rocket, making sure it is level and secure. It's also essential to have a fire extinguisher or a bucket of water nearby in case of emergencies. Additionally, make sure all spectators are at a safe distance, at least 10-15 feet away from the launch site, and that they are aware of the potential risks and hazards associated with launching a bottle rocket. It's also a good idea to have a first aid kit on hand and to designate a person to be in charge of safety during the launch. Furthermore, check the weather conditions before launching, avoiding strong winds, thunderstorms, or other adverse weather conditions that could affect the rocket's flight or safety. By taking these precautions, you can ensure a safe and successful launch of your bottle rocket.
Launching the Rocket and Collecting Data
Launching the rocket and collecting data is a crucial step in the bottle rocket project. To launch the rocket, make sure the area is clear of obstacles and people. Place the rocket on the launchpad, ensuring it is securely fastened. Next, attach the bike pump or air compressor to the launchpad and begin pumping air into the bottle. Monitor the pressure gauge to ensure the pressure reaches the desired level, usually between 50-100 psi. Once the pressure is reached, quickly release the valve to launch the rocket. As the rocket soars into the air, observe its flight and take note of its altitude, distance traveled, and any notable features, such as spinning or tumbling. To collect data, use a stopwatch to measure the time it takes for the rocket to reach its maximum altitude and return to the ground. You can also use a tape measure or meter stick to measure the distance the rocket travels. Additionally, consider using a camera or smartphone to capture video or photos of the launch, which can provide valuable visual data. By collecting and analyzing this data, you can refine your design and make improvements for future launches.
Analyzing the Flight and Making Improvements
Analyzing the flight of your bottle rocket is crucial to making improvements and achieving better performance. To do this, observe the rocket's trajectory, noting its height, distance, and stability. Measure the time it takes for the rocket to reach its maximum altitude and return to the ground. You can use a stopwatch or a smartphone app to record the flight time. Take note of any wobbling or instability during the flight, as this can indicate issues with the rocket's design or balance. Additionally, observe the parachute's deployment and descent, ensuring it opens correctly and slows down the rocket's fall. By analyzing these factors, you can identify areas for improvement, such as adjusting the fins, nose cone, or parachute design. You can also experiment with different launch angles, pressures, and nozzle designs to optimize the rocket's performance. By making data-driven improvements, you can refine your bottle rocket's design and achieve better results in future launches.