How To Crop On Canva
Here is the introduction paragraph: Cropping is a fundamental design skill that can make or break the visual appeal of your graphics, social media posts, and marketing materials. With Canva, a popular graphic design platform, cropping is a breeze. In this article, we'll take you through the basics of cropping on Canva, provide a step-by-step guide on how to do it, and even share some advanced techniques to take your designs to the next level. Whether you're a beginner or a seasoned designer, you'll learn how to effectively crop your images to enhance their impact. To get started, let's first understand the basics of cropping on Canva, including the different types of crops, how to access the crop tool, and what to consider when cropping your images.
Understanding the Basics of Cropping on Canva
Here is the introduction paragraph: Cropping is a fundamental skill in graphic design that can make or break the visual appeal of an image. When it comes to creating stunning visuals on Canva, understanding the basics of cropping is essential. But before we dive into the nitty-gritty of cropping on Canva, let's take a step back and explore what cropping is and why it's crucial in graphic design. We'll also cover getting familiar with Canva's interface and tools, as well as choosing the right image for cropping. By the end of this article, you'll be equipped with the knowledge to crop like a pro and take your graphic design skills to the next level. So, let's start with the basics - what is cropping and why is it important in graphic design?
What is Cropping and Why is it Important in Graphic Design
Cropping is a fundamental technique in graphic design that involves selecting and removing unwanted parts of an image to enhance its composition, focus, and overall visual appeal. It is an essential skill for designers to master, as it allows them to refine their images and make them more effective in communicating their message. By cropping an image, designers can eliminate distractions, improve the balance and symmetry, and draw attention to the subject or key elements. Cropping also enables designers to adapt images to different aspect ratios, resolutions, and formats, making them suitable for various mediums and platforms. In the context of Canva, cropping is a crucial feature that allows users to easily trim and resize their images to fit their design needs. By understanding the basics of cropping on Canva, users can unlock the full potential of their images and create visually stunning designs that capture their audience's attention.
Getting Familiar with Canva's Interface and Tools
To get familiar with Canva's interface and tools, start by logging in to your account and clicking on the "Create a design" button. This will take you to the main dashboard, where you'll see a variety of templates and design types to choose from. Select the template that best suits your needs, or start from scratch with a blank canvas. Once you've chosen your template, you'll be taken to the editor, where you'll see a range of tools and features along the top and left-hand sides of the screen. The top toolbar allows you to undo and redo actions, as well as access the file menu and zoom in and out of your design. The left-hand toolbar is where you'll find the majority of Canva's design tools, including the elements, text, and media tabs. The elements tab allows you to add shapes, icons, and other graphics to your design, while the text tab enables you to add and edit text. The media tab is where you'll find Canva's vast library of images, videos, and audio files, which you can use to enhance your design. As you explore the interface, you'll also notice the drag-and-drop functionality, which makes it easy to add and arrange elements on your design. Additionally, the resize and crop tools are located in the top toolbar, allowing you to easily adjust the size and shape of your design elements. By taking some time to explore Canva's interface and tools, you'll be well on your way to creating professional-looking designs with ease.
Choosing the Right Image for Cropping
When it comes to choosing the right image for cropping on Canva, there are several factors to consider. First and foremost, select an image that is high-resolution and clear, as this will ensure that the cropped version remains sharp and detailed. Avoid using low-quality or pixelated images, as they may become distorted or blurry when cropped. Additionally, consider the composition of the image and choose one that has a clear subject or focal point. This will make it easier to crop the image effectively and draw attention to the desired area. It's also essential to think about the aspect ratio and orientation of the image. If you're cropping an image for a specific design or social media platform, choose an image that is already in the correct aspect ratio to avoid unnecessary cropping or stretching. Finally, consider the content and context of the image. Ensure that the image is relevant to your message or brand, and that it doesn't contain any distracting or irrelevant elements that may detract from the cropped version. By carefully selecting the right image for cropping, you can create a visually appealing and effective design that communicates your message clearly.
Step-by-Step Guide to Cropping on Canva
Cropping is a fundamental editing technique in graphic design, allowing you to focus attention, remove distractions, and enhance the overall composition of an image. Canva, a popular graphic design platform, offers a user-friendly cropping tool that enables you to achieve professional-looking results with ease. In this step-by-step guide, we will walk you through the process of cropping on Canva, covering the essential steps to help you master this skill. We will start by uploading and selecting the image to crop, followed by using the crop tool to resize and reframe, and finally, adjusting the crop settings for precise control. By the end of this tutorial, you will be able to confidently crop your images on Canva and take your design skills to the next level. So, let's get started by uploading and selecting the image to crop.
Uploading and Selecting the Image to Crop
To upload and select the image to crop on Canva, start by clicking on the "Uploads" tab on the left-hand side of the screen. From there, you can either drag and drop your image file into the designated area or click on the "Upload your own images" button to browse your computer for the file. Once your image is uploaded, it will appear in the "Uploads" tab, and you can click on it to select it. Alternatively, you can also use Canva's built-in image search feature to find and select a free image from their library. To do this, click on the "Elements" tab and then select "Free photos" from the dropdown menu. Use the search bar to find an image that suits your needs, and then click on it to add it to your design. Once you have selected your image, it will appear on the design canvas, and you can proceed to crop it using Canva's intuitive cropping tools.
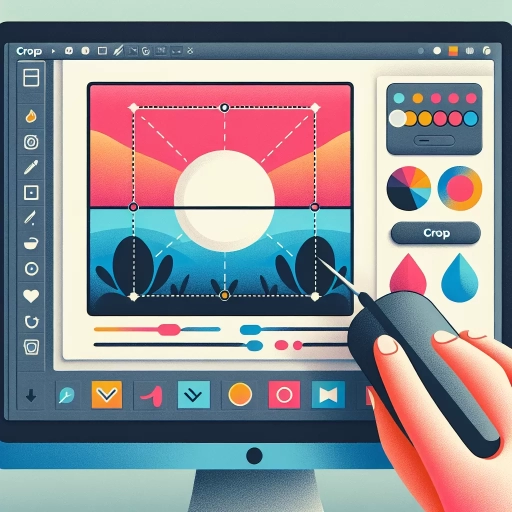
Using the Crop Tool to Resize and Reframe
Using the Crop Tool to Resize and Reframe is a crucial step in the cropping process on Canva. To access the Crop Tool, simply click on the "Crop" button located in the top toolbar or use the shortcut key "Ctrl + Shift + C" (Windows) or "Command + Shift + C" (Mac). Once the Crop Tool is activated, a bounding box will appear around your image, allowing you to resize and reframe it to your desired dimensions. To resize, simply drag the corners or edges of the bounding box to adjust the image's width and height. You can also enter specific dimensions in the "Width" and "Height" fields located in the top toolbar. To reframe, click and drag the bounding box to move it to a different part of the image. You can also use the "Aspect Ratio" dropdown menu to select a pre-set ratio, such as 1:1, 4:3, or 16:9, to ensure your image is proportionate. Additionally, you can use the "Flip" and "Rotate" buttons to flip your image horizontally or vertically, or rotate it by 90 degrees. By using the Crop Tool to resize and reframe your image, you can ensure it fits perfectly in your design and effectively communicates your message.
Adjusting the Crop Settings for Precise Control
Adjusting the crop settings on Canva allows for precise control over the final output of your image. To access the crop settings, click on the "Crop" button in the top toolbar and select "Custom dimensions" from the dropdown menu. This will open the "Crop settings" panel, where you can enter specific dimensions for your image. You can choose to crop your image to a specific width, height, or aspect ratio, giving you complete control over the final shape and size of your image. Additionally, you can also adjust the crop settings to fit your image to a specific frame or template, ensuring that your image is perfectly aligned and proportioned. By adjusting the crop settings, you can ensure that your image is cropped to perfection, with precise control over every aspect of the final output. This level of control is particularly useful when working with images that require specific dimensions, such as social media graphics or website headers. By taking the time to adjust the crop settings, you can ensure that your image looks professional and polished, and is perfectly optimized for its intended use.
Advanced Cropping Techniques on Canva
When it comes to creating visually stunning designs on Canva, advanced cropping techniques can make all the difference. By mastering these techniques, you can take your designs to the next level and create professional-looking graphics that capture your audience's attention. In this article, we'll explore three advanced cropping techniques that can help you achieve this: using the grid and snap features for alignment, cropping images to fit specific shapes and frames, and combining cropped images with other design elements. By the end of this article, you'll be equipped with the skills to create complex and visually appealing designs that showcase your creativity. Let's start by exploring the first technique: using the grid and snap features for alignment.
Using the Grid and Snap Features for Alignment
Using the grid and snap features in Canva is a game-changer for achieving precise alignment in your designs. The grid feature allows you to create a series of horizontal and vertical lines that serve as a guide for placing elements in your design. By enabling the grid, you can easily align objects to the grid lines, ensuring that your design is symmetrical and balanced. The snap feature takes it a step further by automatically aligning objects to the grid lines or other elements in your design. This feature is especially useful when working with multiple elements that need to be aligned in a specific way. To use the grid and snap features, simply go to the "File" menu and select "Grid" or use the keyboard shortcut "Ctrl + '" (Windows) or "Cmd + '" (Mac). You can also adjust the grid settings to customize the size and style of the grid lines. Additionally, you can use the "Snap to Grid" and "Snap to Objects" options to control how the snap feature behaves. By mastering the grid and snap features, you can take your Canva designs to the next level and achieve professional-looking results with ease. Whether you're creating a social media graphic, a presentation, or a marketing material, using the grid and snap features will help you achieve precise alignment and create a visually appealing design.
Cropping Images to Fit Specific Shapes and Frames
Cropping images to fit specific shapes and frames is a crucial skill in graphic design, and Canva makes it incredibly easy. With Canva's advanced cropping tools, you can transform your images into unique shapes and frames that elevate your designs. To crop an image to fit a specific shape, start by selecting the image and then clicking on the "Crop" button in the top toolbar. From there, you can choose from a variety of pre-made shapes, such as circles, triangles, and hexagons, or create your own custom shape using the "Custom" option. If you want to crop an image to fit a specific frame, such as a polaroid or a vintage camera frame, Canva has a range of frame templates that you can use. Simply select the frame template, adjust the size and position of the image, and then crop it to fit the frame. Canva also allows you to crop images to fit specific aspect ratios, such as 1:1, 4:5, or 16:9, which is perfect for creating social media graphics or YouTube thumbnails. Additionally, you can use the "Grid" feature to crop multiple images at once, making it easy to create a cohesive look for your designs. With Canva's advanced cropping tools, the possibilities are endless, and you can create stunning, professional-looking designs that capture your audience's attention. Whether you're a seasoned designer or just starting out, Canva's cropping features make it easy to take your designs to the next level.
Combining Cropped Images with Other Design Elements
Combining cropped images with other design elements is a powerful way to enhance the visual impact of your designs on Canva. By merging cropped images with text, shapes, icons, and other graphics, you can create complex and engaging compositions that capture your audience's attention. To combine cropped images with other design elements, start by selecting the cropped image and dragging it to the desired location on your design canvas. You can then add text, shapes, or icons around the image to create a cohesive look. Use Canva's alignment tools to ensure that the elements are properly aligned and balanced. Experiment with different font styles, colors, and sizes to add depth and visual interest to your design. You can also use Canva's built-in graphics and illustrations to add an extra layer of creativity to your design. For example, you can add a subtle pattern or texture to the background of your design to make the cropped image stand out. Additionally, you can use Canva's photo editing tools to adjust the brightness, contrast, and saturation of the cropped image to make it blend seamlessly with the other design elements. By combining cropped images with other design elements, you can create stunning visual effects that elevate your designs and make them more engaging and effective. Whether you're creating social media graphics, presentations, or marketing materials, combining cropped images with other design elements is a powerful technique to add to your design toolkit.