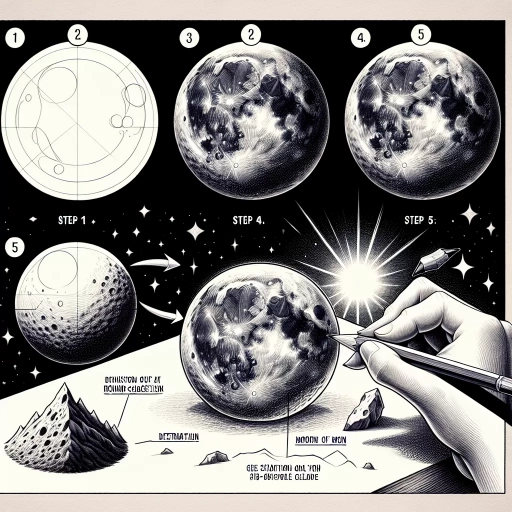
How To Draw The Moon
 Immersing oneself in the natural world can inspire beautiful works of art, and one of the many captivating entities that has mesmerized artists for centuries is the moon. Offering a distinct combination of simplicity and complexity, learning how to accurately portray the moon's unique features can be an enlightening experience for both beginner and accomplished artists. This comprehensive and insightful article provides a step-by-step guide to mastering the art of drawing the moon, from understanding the basics to implementing advanced techniques and adding a touch of realism to your creations. Armed with just a pencil, an eraser, and your imagination, you are on your way to creating your own lunar masterpiece. So, let's embark on this artistic journey, beginning with understanding the basic elements of drawing the moon. Get ready to delve into the unparalleled beauty of our celestial neighbor and unlock your potential as an artist. You'll find yourself not just observing the moon, but interacting with it, capturing its essence, and bringing it to life on your canvas. But before you can capture the moon's distinctive craters and captivating glow, there's some fundamental groundwork to lay, starting with understanding the basics of drawing the moon.
Understanding the Basics of Drawing the Moon
knowledge of the lunar phases is crucial in understanding how to draw the moon effectively. From waxing to waning and everything in between, each phase lends a different perspective to the viewer. Drawing a full moon requires a different approach than drawing a crescent moon or a half moon. Familiarizing yourself with these cycles will help you capture the dynamic nature of the moon and reflect authentic lunar phases in your drawings. Additionally, comprehending the moon's shape and size is equally important. Rarely will you find the moon perfectly round or enormous in the sky. Recognizing these variations will enhance the realism of your sketches. Lastly, no lunar drawing can ever be complete without the right lighting. Light plays into the perception of shape, size, and phase, and understanding how it interacts with the moon's surface is integral in creating a realistic depiction. Now, let us delve into our first topic to deepen our understanding: familiarizing yourself with the moon's phases. Crafting realistic lunar depictions begins by truly understanding the moon in all its phases.
1. Familiarize yourself with the Moon's Phases
Understanding the moon's phases is essential before you start drawing the moon. The moon, our closest celestial neighbour, goes through a regular cycle of phases due to its position relative to the Sun and Earth. Familiarizing yourself with these phases will enhance your ability to represent the moon realistically in your drawings. There are eight discernible phases of the moon, each characterized by its unique appearance. These include: New Moon, Waxing Crescent, First Quarter, Waxing Gibbous, Full Moon, Waning Gibbous, Last Quarter, and Waning Crescent. A New Moon is nearly invisible to the naked eye as the illuminated side of the moon is facing away from Earth. The Waxing Crescent phase follows, where a sliver of the moon's lit surface begins to appear in the sky. The term 'waxing' refers to the growing illumination of the moon's visible surface. During the First Quarter phase, the moon appears half-lit and half-dark from our perspective on Earth. Next, the Waxing Gibbous phase sees more than half of the moon illuminated but not fully. The Full Moon phase follows, where the moon appears completely illuminated when seen from Earth. This is the stage most commonly depicted in art and culture due to its dramatic and breathtaking appearance. The moon then enters the Waning Gibbous phase, where more than half of the moon's face is still lit, but the illumination is decreasing. The term 'waning' refers to the shrinking illumination of the moon's visible surface. During the Last Quarter phase, only half of the moon's face is still illuminated. Finally, the Waning Crescent phase occurs when the moon appears as a thin crescent before disappearing completely, marking the start of a New Moon. Understanding these phases is not just about knowing how much of the moon is visible at a given time. It also involves understanding the direction and intensity of light hitting the moon, which influences the moon's apparent shape, the pattern of light and shadow, and the overall mood of your drawing. Incorporating these factors will add depth, realism, and a touch of drama to your moon drawings, turning them into masterpieces that accurately mirror this celestial body's splendor. So before you pick up your sketchpad and drawing tools, spend some time studying the moon's phases. Observe them in the night sky if possible, or refer to photographs and diagrams. This preparatory work will go a long way in honing your ability to portray the moon with accuracy and artistry. Remember, drawing is not just about copying what you see. It's also about understanding your subject to reflect its true essence, and when it comes to drawing the moon, understanding its phases is a must.
2. Learn about the Moon's Shape and Size
Understanding the fundamentals of anything before you dive into it is vital. In this context, an essential step in the process of learning how to draw the moon is accruing knowledge about its shape and size. This understanding creates a solid bedrock for you to build your drawing skills upon. So, let's delve into the mysteries of the moon's dimensions and look. Firstly, the shape of the moon is not perfectly round as it's often perceived. According to NASA, the moon is egg-shaped with the larger end pointed towards Earth. However, this difference is so slight that to the naked eye and for drawing purposes, the moon appears to be a perfect circle. Therefore, when sketching the moon, starting with a round shape is the first step. In terms of size, the moon may look tiny when viewed from Earth, making it easy to underestimate its real dimensions. The moon's diameter is about 2,159 miles (3,474 km), approximately a quarter the size of Earth. This relative size makes the moon the fifth-largest moon in our solar system. To put this into perspective, you can fit about four moons across the width of the Earth. However, when drawing, the moon's size will depend on the scale of your portrayal. Larger scales will require the moon to be depicted as larger, while smaller scales will require it to be drawn smaller. When we talk about the size, we should also understand that the moon isn't always the same size to us. Its apparent size can vary since its orbit around Earth isn't a perfect circle but an ellipse. When the moon is closest to the Earth, or at its perigee, it appears larger. This is often called a supermoon. And when it’s further away, at its apogee, the moon looks smaller. Shadows and craters are additional factors that can affect the moon's look in your drawing. They give the moon its unique texture and provide depth to your portrayal, making it more realistic. These features vary in size and shape and are often what make the moon interesting to draw. In essence, familiarizing yourself with the shape and size of the moon is a foundational step towards accurately representing it in your drawing. This knowledge combined with effective technique and attention to details like shadows and craters can make your moon sketch more convincing and engaging. Remember, it's not just about creating a mirror image, but breathing life into your drawing by understanding and capturing the essence of your subject — in this case, the fascinating moon.
3. Understand the Importance of Lighting in Moon Drawing
Foundational to the art of drawing the moon is the understanding of the importance of lighting. Lighting dramatically impacts the appearance of the moon and can imbue your lunar artistic creations with a range of different effects, moods, and aesthetics. It is crucial to note that the moon does not generate its own light. Instead, it shines with a reflected luminance garnered from the sun. This aspect is significant as it directly informs how we perceive and draw the moon's numerous phases - full, half, crescent, and new. When drawing the moon, you must consider how light falls on its surface to create the vivid lunar landscapes, textured craters, and sharp contrasts we see. At full moon, its surface is fully illuminated, presenting as a bright white disk sharply contrasted against the black night sky. The lack of shadows at this phase makes this a challenging one for beginners. In contrast, a half-moon or crescent moon promotes considerable shadow activity that forms a unique tapering shape and a sense of depth on the moon's surface. These shadows also provide an opportunity to explore a variety of textures and contrasts, providing an exciting drawing challenge. Thirdly, lighting plays an essential role in the artistic representation of the mood of the moon. A brightly illuminated moon may transmit feelings of hope, positivity, or splendor. A dimly lit moon might reflect mystery, tranquility, or sadness. Therefore, by judiciously manipulating light and shadow, the artist can curate the emotional essence of their moon drawing. Lighting also influences the perception of the moon's size and distance from the viewer. Moon drawings with intense lighting might appear larger and closer, while those shadowed subtly might come across smaller and further away. Thus, understanding the effects of lighting can aid in creating more realistic moon drawings. In conclusion, for those learning to draw the moon, comprehending the integral role of lighting is crucial. The reflected light from the moon provides for diverse and satisfying artistic opportunities to explore distinctive contrast, form, texture, and emotion. The masterful manipulation of light and shadow gives an artist the ability to not simply draw an image of the moon, but to illustrate a heavenly body that is alive with texture, depth, mood, and movement. This exploration adds to the richness in one's learning journey on the basics of drawing the moon.
Mastering the Techniques of Drawing the Moon
Drawing the moon, a familiar yet enchanting celestial body, may seem challenging due to its intricacies, but with the right methods and skills, you can certainly master it. This informational article will guide you through a three-fold process in achieving your lunar artwork masterpiece. Firstly, familiarity with the Moon's unique topography is crucial - practicing the drawing of the moon's craters and mountains is an excellent starting point; learning to simulate the depth and drama of these features can add realism to your sketches. Secondly, capturing the Moon's unique texture and patterns will bring your drawing to life - utilize studied observation of the lunar surface to understanding its granularity and distinct markings. Lastly, experimenting with different drawing tools and media can greatly enhance the final output of your lunar artwork, providing you with the opportunity to express your creativity and individual style. Each of these steps will be detailed and discussed in the following paragraphs. Let's delve into the first step: practicing drawing the Moon's craters and mountains. Here, the essence is to learn how to give your lunar portrayals a lifelike and dynamic touch.
1. Practice Drawing the Moon's Craters and Mountains
Mastering the delicate art of drawing the moon requires an intrinsic understanding of its features – most notably, its craters and mountains. Delving into this aspect, we realize it is a sublime fusion of sci-fi fascination and aesthetic accuracy. Start off by understanding the Moon's surface - the lunar terrain is replete with various crevices, mountains, and craters, each with a unique identity. The rugged lunar topography offers an exciting opportunity for artists to explore texture, depth, and contrast. The key to successfully depicting these features lies in careful observation and detail-oriented drawing. It's intriguing to note that the celestial body's craters are typically round in shape due to the high-impact collisions that occur with meteoroids. The size, depth, and detail of each crater can vary, providing an interesting compositional element in your lunar illustrations. Use soft gradient shading to create the illusion of these round indentations. Bear in mind that the direction of your shading should comply with the direction of the light source to create a realistic image. Always make sure to incorporate a range of tones from light, medium to dark; the contrast you create will lend a more three-dimensional feel to your craters. Likewise, lunar mountains, known as lunar highlands, are striking features that significantly contribute to the moon's rugged appearance. The sharp, irregular, steep slopes of these mountains are the result of ancient volcanic activity and asteroid impacts. Investing time in fine details like introducing jagged lines for the mountains' peaks can elevate your drawing to the next level. The play of light and shadow on these highland peaks is crucial, as it adds an extra layer of texture and depth to your illustration. In essence, drawing the moon's craters and mountains is a practice of enhancing your drawing skills in shading, depth perception, and understanding light and shadow. A well-executed lunar sketch can also instill a sense of cosmic wonder, sparking curiosity about the vast universe beyond our own planet. By mastering this intricate drawing aspect, you pay homage to celestial beauty while refining your artistic abilities. The key is patience and practice. The more you observe and engage with this outer space stunna, the more accurate and confident your lunar drawings will become. So grab your pencils and let this moon mastery journey begin!
2. Learn to Capture the Moon's Texture and Patterns
If you are looking to truly master the art of lunar sketching, mastering the technique of capturing the moon's textures and patterns is of utmost importance. The moon, while appearing relatively smooth from a glance, is in fact a rich cacophony of intricate patterns and undulating textures that add a profound depth to any lunar illustration. Begin by understanding that the circular scars that litter the moon's surface are, in fact, craters formed by meteor impacts over eons. The shadows and light play caused by the craters' indentation, depending on the position of the sun, create a mesmerizing pattern of light and dark across the lunar surface. Accordingly, mastering the rendering of these forms is a skill you need to acquire. It is helpful to start with basic sketches using a pencil to capture the moon's rough texture. Effective shading is crucial in providing an illusion of depth to your moon drawing. Use a range of values from very light to very dark, to convincingly render the moon's surface. To achieve smooth shading, you might want to learn techniques such as cross-hatching or blending. Cross-hatching can help depict the craters effectively, recreating the unique patterns on the moon. An important tip while sketching is to observe your subject closely. Always keep a keen eye on the lunar surface's detailing, its patterns, and the play of light and dark. Using high-quality sketching paper that can hold your strokes well is also essential. It can capture the layers and textures better, thereby ensuring that your art piece stands out. After getting the hang of craters, it is essential to explore the moon's other unique features, such as the lunar maria, the dark, basaltic plains caused by ancient volcanic eruptions. These features have their nuances and learning to depict them accurately will enhance the substance of your lunar renditions. Capturing the moon's texture and patterns is not only about the actual drawing skills, but also using the right tools and techniques to accurately depict textures, patterns, and shadow-and-light play. In conclusion, drawing the moon is more than just a circle with dots, but a profound process that could open a window to the universe right from your paper. By developing the ability to capture the texture and patterns of the moon, you are not only creating a realistic portrayal of our lunar companion but it also trains your eyes to see patterns, identify texture, and enhance your understanding of light, thereby giving an edge to your overall artistic skills.
3. Experiment with Different Drawing Tools and Media
Skill in drawing the moon is not entirely dependent on talent or natural drawing ability. It has a lot to do with practice, focus, and familiarity with various drawing tools and media. As an artist, it is essential to experiment with different drawing tools and media to achieve the desired effect and refinement in your moon drawings. These can range from pencils and charcoal, to watercolor, pastels, and digital tools. When starting, it may seem more comfortable to stick to traditional graphite pencils. The use of different graphite grades will give different levels of depth and texture to a drawing. Soft graphite (B pencils) is perfect for the darker shadows and craters, while hard graphite (H pencils) will help in sketching the lighter areas. For a more dramatic effect, charcoal can be used. It affords a richer, darker tone that adds a more profound eeriness to your moon drawings. Exploring pastels or watercolors can introduce a more realistic, vibrant aspect to your drawings. The blending of colors that these media allow can emphasize the planet's rough texture and gradient of the shadowed and illuminated parts. Tones of white, grey, and black can bring out the moon's starkness against the night sky, but don't be afraid to throw in dashes of color for a surreal or whimsical effect. Digital tools also provide a vast array of options to experiment with and are excellent for tweaking minor details or making significant changes without ruining the original piece. They also have the added advantage of a limitless color palette and the ability to adjust hues, saturation, and brightness easily, giving the artist maximum control over the desired effect. Finally, it is important to remember that the choice of drawing paper can significantly impact the outcome. Working on black paper, rather than white, can create an interesting contrast that more accurately depicts the moon’s gleam in a dark night sky. When using dark paper, white charcoal or chalk can be employed for the lighter parts of the moon. Experimenting with different tools and media can greatly enhance your moon drawing skills and broaden your artistic horizons. It allows for a more profound understanding of the methodology behind the use of these tools and their reactions on various surfaces. This knowledge and experience will significantly benefit when applying techniques to create the depth, texture, and tone unique to each artist's representation of the moon.
Adding Realism and Depth to Your Moon Drawings
Adding realism and depth to your moon drawings can significantly enhance their aesthetic appeal, transforming them from basic sketches into captivating works of art. Achieving such results requires a comprehensive and careful approach that includes the study of the moon's atmosphere and shadows, learning to draw the moon's surface features in perspective, and adding context and background to your drawings for a more realistic representation. Delving deeper into the study of the moon's atmosphere and shadows allows for a more accurate and realistic rendering of its overall appearance. It helps artists understand how light interacts with the surface of the moon, making shapes appear less flat and more three-dimensional. Similarly, learning to draw the moon's surface features in perspective contributes significantly to the depth and realism of your drawings. An understanding of the moon's craters, seas, and mountains helps to add texture and detail to your work. Lastly, adding context and background brings your moon drawing to life by placing it in a realistic setting. This often involves drawing elements such as stars, clouds, or the Earth as seen from the moon. Now, let’s delve into the first aspect, the study of the moon's atmosphere and shadows, to start this intriguing journey into lunar art.
1. Study the Moon's Atmosphere and Shadows
Understanding the Moon's atmosphere and shadows is crucial when attempting to lend realism and depth to your lunar drawings. Unlike the Earth, the moon does not have a substantial atmosphere. Consequently, the lunar sky is always black, even during the lunar day. The thin lunar atmosphere consists of unusual elements like helium, neon, and argon, among others, which are hard to depict accurately in drawings. Therefore, focus more on the representation of the moon's surface and shadows, which are influenced by both the position of the sun and earth’s atmosphere. When observing the moon, especially through telescopes, the surface isn’t just a bland white or gray—it varies from light to dark, indicating the various lunar landscapes. The moon's surface is filled with craters, mountains, valleys, and "seas" (plain areas), many of which are naturally highlighted or obscured by shadow. It is this interplay of light and shadow that contributes to the moon's visual texture and should not be overlooked when creating lunar drawings. Since the moon lacks an atmosphere to diffuse sunlight, shadows on the moon are darker and sharper compared with those on Earth. The direction of the light source also affects how the shadows appear. When the sun is low, shadows are long and highlight the moon's topography; they shrink as the sun gets higher. By observing these shadows, one can depict the moon's curvature and surface complexities. To enhance the realism of your lunar drawings, try to capture the contrast between the bright illuminated areas and the deep, dark shadows. Emphasizing the starkness of the light and shade will add depth and dimension to your representation, creating a sense of three-dimensionality. Pay attention to capturing the gradation of light and shade across the lunar surface; this can be achieved by altering the pressure exerted on your drawing tool. Remember, lunar drawings require more than just black and white. By incorporating a range of grays, from very light to very dark, you can convey the moon's unique, contrasting landscapes. Understanding the moon's atmosphere and shadows is an exploration of light, reflection, and contrast. Such studies will not only enhance the realism and depth of your lunar drawings but will also unlock a greater appreciation of the moon's elusive beauty and open up new possibilities for your artistry.
2. Learn to Draw the Moon's Surface Features in Perspective
Drawing the moon's surface with realism and depth is a skill that requires not only attention to detail but also an understanding of the art of perspective. Whether you're an artist wanting to capture the beauty of the moon or a student studying lunar geography, learning how to draw the moon's surface features can add depth and realism to your drawings. Start by comprehending the moon's physical characteristics; the moon is full of craters, mountains, and valleys, all of which can affect the shading and texture of your drawing. These features do not just appear as they are; instead, they shift in appearance depending on the moon's phase and the viewing angle, hence necessitating the mastering of perspective. Perspective drawing is the art of depicting a three-dimensional object on a two-dimensional surface. It's about portraying the relative sizes and positions of objects accurately. In drawing the moon, for instance, the craters near its visible edges should look elliptical due to the curve of the moon, while those near the center appear more circular. Creating an illusion of depth also contributes significantly to the realistic appearance of your artwork. By varying the tones and contrasts, your representation of the moon can pop from the flat surface. Drawing the shadows that the moon's topography creates during different lunar phases is another crucial aspect of adding depth to your drawings. Keep in mind that the shadows often change in position and length, affected by the moon's dib and wane. Your drawing's texture also creates a sense of realism. The moon is not a smooth celestial body; it has a mostly rough surface pocked by billions of years' worth of impact craters. To mimic this texture, you can employ various shading techniques that create a grainy or bumpy feeling. Lastly, always remember that your moon drawing is not in a void. Conveying how the moon interacts with its surroundings - the dark expanse of space, the bright stars surrounding it, the beams of light bouncing off its surface - adds the final realism touch. In conclusion, learning to draw the moon's surface features in perspective helps enhance the realism and depth in our artwork, allowing us to capture this celestial body's ethereal beauty. Through careful observation, accurate representation of perspective, and the application of various shading techniques, we can create a moon drawing that possesses an aspirational degree of detail and depth. In essence, the moon, with all its craters and valleys, is not just an object to draw; it's a subject that invites us to explore and appreciate the complexity of the universe's larger picture. So the next time you look up and admire the night sky, remember there's an art to capturing that marvel on paper, an art that involves perspective, depth, and a whole lot of moon love.
3. Add Context and Background to Your Moon Drawings
Adding depth and realism to your moon drawings is further facilitated by incorporating context and background details. Understanding the placement of the moon in the vast canvas of the night sky is crucial to rendering a realistic image. To capture the essence of the moon and the celestial ambiance surrounding it, consider the broader perspective of the stars, clouds, and the glowing halo that usually frames the moon. These additional details lend an authentic feel to the sketch, offer intensity to the moon drawing, and help depict the three-dimensional attribute of the celestial sphere. Think about the night sky as a backdrop to your moon. What color is that backdrop? Is it a pitch-dark, rich black, or a soft, dusky hue with a splash of navy or indigo? Understanding the nighttime color palette plays a significant role in amplifying the aesthetics of your moon sketch. Remember, most scenes featuring the moon also exhibit a scattering of stars. Carefully sketch these luminous specks, taking care not to make them overwhelmingly bright. Abandon the traditional white and consider silver or grey to add a sense of distant twinkling. Clouds, on the other hand, can add a shrouded mystery to your moon drawings. Wisps of cloud cover drifting over the moon can aid in achieving a more comprehensive depth of field. The translucency and variance in opacity must be reflected upon to provide a genuine and profound effect. A trick to conjure an ethereal atmosphere can be to play with lights and shadows. The moon's radiance often creates a subtle glow in the surrounding clouds which, if captured accurately, can contribute to a softer and more realistic edge to your drawings. Remember, when including the moon's halo, ensure it expands softer and brighter as it reaches away from the moon. This phenomenon, often admired when the moon is full, is caused by the ice crystals in the earth's atmosphere refracting the moon's light. Capturing this requires a clever handling of lighting and shadowing—don't make it too pronounced, but allow the halo to have a gleaming edge to suggest a glow emanating from the moon. Recall your goal is to create a lifelike, depth-filled moon sketch. Adding background and context refines the perception of your drawing by offering a holistic celestial scene, instead of merely a standalone sketch of the moon. As you work on these broader elements, take note of your moon's details and ensure they match the selected backdrop. This wholeness and careful attention to context and background amounts to a final piece that is filled with depth, sincerity, and upholds a heightened degree of realism, making your moon drawing stand out in its genuine portrayal.