How To Hem Dress Pants
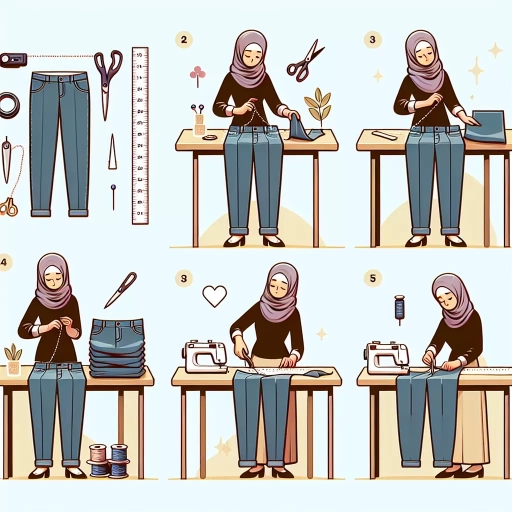 Hemming dress pants might seem like an intimidating task, relegated only to those with seasoned sewing skills. However, we're here to demystify the process and show you that it's simpler than you think. This comprehensive article will arm you with all the essential information, ranging from understanding the basics of hemming dress pants to preparation steps and an easy-to-follow, step-by-step guide to the hemming itself. Firstly, it's crucial to have a clear grasp of the fundamentals of hemming dress pants, as this could make or break the final result. Secondly, adequately preparing your dress pants for hemming can streamline the process, making it a breeze. Finally, with the basics covered and your dress pants prepared, we'll delve into the actual art of hemming, guiding you through each step to ensure you achieve a professional finish. No matter if you're a seasoned seamstress or a beginner looking to develop your skillset, this article is geared towards helping you succeed. So, let's dive into the world of hemming and firstly explore the bedrock: the basic principles of hemming dress pants.
Understanding the Basics of Hemming Dress Pants
In the world of tailoring, precision, skill, and a keen understanding of different fabrics are paramount. Hemming dress pants, to the untrained eye, may seem like an easy task, yet, it encompass several critical processes deserving of careful attention. These processes include choosing an appropriate hemming method, accurately marking and measuring the hemline, and navigating the unique hemming approaches required for diverse fabrics. Each fabric, from wool to polyester, requires a distinct technique for hemming, and failure to note this can lead to undesirable results. The first process, choosing the right hemming technique, is arguably as important as the sewing itself. The chosen methods will set the groundwork for your tailoring project, and determining which is best depends largely on the type of fabric and the desired pant style. In the succeeding paragraphs, we will explore the vital aspects of these cornerstone processes, beginning with understanding how to choose the right hemming method.
Choosing the Right Hemming Method
The process of hemming dress pants is a task that demands a good understanding of various techniques. One of the most vital decisions you have to make before proceeding, is choosing the right hemming method that suits your unique needs and abilities. Your choice largely depends on the type of fabric, the pants' style, your sewing skills, and the tools you have to hand. There are several different methods out there, which you might not know if you are new to the world of sewing and hemming. The simplest of these is the fold-and-sew method. This technique is excellent for beginners, as it only involves folding up the fabric to the desired length, pinning it in place, and sewing along the fold line. Though easy, this method can struggle with thicker fabrics and does not provide the cleanest finish. Another method is the double-fold method, which provides a more polished, professional finish than the first one. This involves folding the fabric twice to conceal the raw edges within the fold before sewing it into place. It is ideal for thicker fabrics, but requires higher sewing expertise to execute correctly. Other techniques include blind hemming, which creates an invisible seam on the outside of the pants, and ideal for classic and formal trousers. On the other hand, if you are dealing with stretchy fabrics, the zig-zag or stretch method is more appropriate, as it allows the hem to flex with the fabric. The rolled hemming method offers an incredibly neat finish for lightweight and thin materials and is generally executed with a special sewing machine foot for precision. And lastly, the use of hem tapes or adhesives, which allows you to create a hem without any stitches at all, suitable for those who are not confident with their sewing skills or do not own a sewing machine. Choosing the right hemming method thus becomes a balance of various elements, the type of pants, the fabric's nature, the final appearance you desire, and your comfort with the technique itself. It is crucial to allow yourself time to understand and practice each method to enhance your skills and ameliorate your experience, thus enabling you to perfectly choose the right method for any hemming task at hand. Remember, the right hemming technique is the key to the perfect finish!
Measuring and Marking the Hemline
Tailoring the hemline of dress pants is a critical step in ensuring an optimal fit. This task requires precision and an understanding of fundamental measuring and marking techniques to guarantee the finest result. Primarily, an accurate measurement of the leg length is necessary – this is the distance from the waistband to where you want the hemline to fall. Keep in mind, different styles require varying lengths. For example, formal dress pants should just touch the top of the shoe, while a more casual style can fall a bit higher. To begin, have the wearer put on the pants, along with the shoes they're likely to wear with them. The shoe's height will influence the pant's length. Once the individual is standing straight, use a tape measure to determine the distance from the waistband to the desired hemline spot. This measurement should be taken from the side seam to avoid any discrepancies that may arise from front or back measurements. Also, it's advisable to check the measurement on both legs since it's common for people to have slightly uneven legs. Once you've noted the appropriate length, it's time to mark the fabric. A fabric marker or tailor's chalk can be used to create clear and visible markings. When using either of these tools, be sure to draw a line around the entire circumference of each leg, ensuring an even hemline. Remember, the marked line represents where the bottom edge of the pants will fall, not where you'll sew. When marking, consider adding about ½ inch for the single fold hem or 1½ inches for a double fold hem – this excess fabric is necessary to create a clean edge. Repeatedly check the measurements and markings since they lay the foundation for the final alterations. The process of measuring and marking the hemline, while seemingly simple, requires meticulous attention to detail. It's a fundamental phase in the customization of dress pants, significantly contributing to their overall appearance and comfort. Knowing how to correctly measure and mark contributes a level of proficiency in hemming dress pants, helping to achieve a polished and tailored finish. Too long, and the they'll drag and wear out quickly; too short, and you'll end up with an undesirable high-water effect – neither is a satisfactory outcome. Therefore, mastering these initial stages is key to successful garment alteration and, in turn, exuding style and confidence with beautifully tailored dress pants.
Understanding Hemming Techniques for Different Fabrics
of Dressmaking. Understanding the various hemming techniques for different fabrics is a vital skill to comprehend for anyone delving into the art of dressmaking, specifically when it comes to tailoring dress pants. Hemming not only provides a neat finish to garments but it also prevents the fabric from fraying. Various types of fabric necessitate different methods of hemming due to their unique textures, weight, and look. Therefore, it's important to choose the right technique that complements the fabric's properties while maintaining its aesthetics. One classic method is the double-fold hem, which is most commonly used on medium-weight materials such as cotton, linen, and synthetic fabrics. This technique involves folding the fabric edge twice, thus hiding the raw edge within the folds. It provides a clean, tailored finish that's ideal for dress pants. For light, delicate fabrics like silk or chiffon, a rolled hem is most suitable. It creates a distinctly tiny edge, preserving the lightness and fluidity of the fabric, making it perfect for formal pants that demand refined details. In contrast, for heavier fabrics like wool or denim, a single-fold hem should be used. This involves folding the fabric only once, providing a strong, even hemline while preventing excess bulk. The use of blind hem, which is invisible or barely noticeable on the outside of the garment, is another technique, usually employed for formal or professional quality garments. It offers a professional finish, disguising all stitching inside the garment. Some fabrics, however, have a tendency to fray excessively, such as lace or tweed. In such cases, a pinking shears method is used where the fabric edge is cut in a zigzag pattern to prevent it from fraying. Afterward, a simple straight stitch can be used to hem the garment. Alternatively, an overlock machine can be used to bind the edge, providing a durable finish. Then there are specialty hems, like horsehair hems commonly used in bridal and eveningwear dresses. Horsehair braid is sewn into the hem, giving the garment a structured yet flexible finish, allowing it to hold its shape. This particular technique is rarely used in dress pants, but it's a useful method to know and understand if you’re interested in expanding your dressmaking repertoire. In conclusion, the understanding of different hemming techniques is key to achieving professional tailoring finishes, particularly in dress pants. From lightweight silks to sturdy wools, each fabric requires a specific hemming technique that not only adds durability but also enhances the garment's aesthetic qualities. Honing these techniques can elevate the simplest pair of dress pants to a professionally tailored garment, resulting in a better fit and improved longevity of the apparel. Therefore, the right hemming method is as crucial to dressmaking as the art of cutting and stitching itself.
Preparing Your Dress Pants for Hemming
The art of preparing dress pants for hemming requires an understanding of not only the sewing process but also pre-sewing steps to ensure an optimal finish. Proper preparation includes three important strategies - removing the existing hem or altering the current one, pressing and ironing the pants for a smooth finish, and using hemming web or interfacing for support. Firstly, you need to unpick the original hem without damaging any fabric, or if the current hem is still good but only needs a slight modification, you can simply alter it. Secondly, ensure that the pants are adequately pressed and ironed for a seamless alteration. Wrinkles or creases can majorly undermine the accuracy of the new hem. Lastly, add elasticity and durability by sufficiently employing hemming web or interfacing to the pants. It also enables the pant to maintain its shape after several machine washes. Let's begin with the first step - removing the existing hem or altering the current one. It's a crucial step that requires care and precision in order to not compromise the overall structure of the dress pants.
Removing Existing Hem or Altering the Current One
of Sewing. Before you get started with the actual process of hemming, it's crucial to effectively remove an existing hem or alter the current one to pave the way for a flawless alteration. Unpicking the original hem is often the first step in the process, which requires a careful approach to ensure the fabric isn't damaged. Using a seam ripper, gently undo the existing stitches that have been used to create the hem. Always start at the seam and progress slowly around the pants' hem. It'll reduce the possibility of any unintended rips, tears, or damage to your dress pants. After this initial step, ironing will play a pivotal role in creating a new, accurate hemline. The old crease line, if visible, needs to be ironed out. Not only does this provide a 'clean slate' for the new hem, but it also ensures you have a more accurate reading when you re-measure and mark the new hemline. Bear in mind, the temperature setting for ironing should be appropriate for your pants’ fabric to prevent any heat-based damage. In cases where your current hem just needs minor alterations, rather than its complete removal, you would need to mark the new hemline. Wearing your dress pants and the shoes you plan to wear with them, pin the hem at the desired height. Try to keep the pinning even all the way around to maintain uniformity in the newly created hem. Then, gently iron this new folded edge to create a fresh crease. One must remember, a key tip to successful alteration is patience. Rushing through the process is likely to lead to inaccuracies in measurements and potential damage to the fabric. Just like couture tailoring, hemming is an art where precision, patience and practice all contribute to the eventual perfect fit of your dress pants. Whether you're modifying an existing hem or creating a new one, each phase of the process needs to be carried out thoughtfully and meticulously. From careful unpicking to accurate ironing, every detail matters and will contribute to a professional-looking, well-fitted pair of dress pants. The dimensions and final appearance depend on your accuracy at each step. An individual learns and achieves proficiency with practice, so don't be disheartened if your first few attempts don't yield perfect results. Remember, even the most skilled tailors had a first time.
Pressing and Ironing the Pants for a Smooth Finish
For a flawless hemming process, it is vital to adequately prepare your dress pants, with pressing and ironing being one of the essential steps. A well-pressed and ironed pant not only ensures a smooth fabric but also a more precise hem. The pressing process begins by setting your iron to the appropriate setting for the fabric you’re working with - cotton, wool, or synthetic. Ensuring the right temperature is essential to avoid burning or damaging the material. Start ironing from the top of the pants, moving downwards, carefully handling the seams and creases. Utilize the tip of the iron to navigate trickier spots like pockets and pleats. Uniformity is key; hence, make sure the crease runs straight down each leg from the waist to the hem. Next, you'll need to press the pants. Pressing is somewhat similar to ironing, but it involves applying more pressure to the fabric. Turn the pants inside out before you start pressing. This step aims to remove any possible wrinkles that might interfere with the smoothness of the fabric. Again, regulate the temperature of your pressing iron accordingly to avoid damaging the fabric. Start with gentle strokes as you progressively apply more pressure. Also, focus on pressing the inseam and outer seam as these areas contribute significantly to the perfect fit of the pant. Ironing and pressing are vital, especially around the hems where you'll be doing the most work. It would help if you had a clear, flat surface to obtain an accurate measurement and, subsequently, a precise cut. Additionally, a well-pressed pair of pants will fold more neatly, making it easier to stitch the hemline. Do pay attention to the original hemline while pressing as it can guide you to maintain the pants' original design while making adjustments. Upon completing the pressing and ironing process, your pants should lay flat and wrinkle-free, making it easier for you to navigate the next steps of the hemming process. Please do not rush these processes; careful pressing and ironing are, in essence, the foundation of an excellent hemming job. Remember, the goal here is precision rather than speed. In conclusion, preparing dress pants for hemming requires diligence, patience, and attention to details. Ironing and pressing are crucial preparatory steps that lead to a precisely hemmed pair of dress pants. Following these steps correctly will provide a smoother finish, improve the overall appearance of your dress pants, and potentially extend their lifespan. After all, a well-cared-for garment reflects the wearer's attention to detail and perception of style. Therefore, take all the necessary steps to ensure your pants are appropriately ironed and pressed before the hemming process. The results will be undeniably worth the effort.
Using Hemming Web or Interfacing for Support
of Success Expertly-hemmed dress pants not only elevate your professional appearance but also contribute to the longevity of your attire. To ensure the best possible result, using a hemming web or interfacing is often suggested. Hemming web, known also as fusible web, acts as a no-sew adhesive that can effectively shorten your dress pants. It applies easily between the pant fabric layers with a warm iron and bonds them together, creating a durable seam. It's an immensely practical method if you're pressed for time or lack sewing skills. On the other hand, interfacing is a supplementary material often used to firm up areas of a garment like collars, cuffs, and indeed hems. It lends additional support and structure, ensuring the hem remains crisp and neat and prevents it from rolling or fraying. Interfacing comes in various weights, from light to heavy, giving you flexibility to match the right interfaces with the thickness of your pants' material. To use either of these supportive measures, start by trimming your pants to the preferred length, remembering to leave an additional one to two inches for the hem. If using hemming web, fold up and iron the hem to your desired length, then place the web inside and press until it sticks. Allow to cool before testing the bond. For interfacing, it's usually sewn or ironed on the inside of the garment. Cut it to match the size of the hem, affix it according to the package's guidance, then fold up and stitch the hem. In addition to its use in hemming, interfacing can also be used to repair worn or torn areas. For example, if the knees or elbows of your dress pants are starting to weaken, a strategic layer of interfacing can help reinforce those areas and extend the garment's use. Hemming web, with its bonding abilities, can also be used to repair small rips or tears. Therefore, using either hemming web or interfacing can not only assist in hemming your dress pants but they also play integral roles in the overall maintenance of your garments. With these simple techniques and the appropriate materials at hand, you can ensure your dress pants are always tailored to perfection and have the kind of longevity that will serve you well in the long haul. So, whether you’re preparing for a high-stakes business meeting or a formal social event, you can step out with confidence, knowing your dress pants are impeccably hemmed and structurally sound. But remember, achieving a perfect hem is only as good as the materials you use. Quality matters, so be sure to invest in a reliable hemming web or interfacing product for the best result. The ideal dress pants are, after all, a bedrock of success that carries your personal style and professionalism in every stitch.
Step-by-Step Guide to Hemming Dress Pants
Hemming dress pants at home not only saves you money, but it also allows you to achieve the perfect length specific to your measurements. This engaging step-by-step guide provides three separate methods to help you achieve a tailored finish to any pair of dress pants. Our first method introduces the use of a regular sewing machine to create a new hemline, perfect for beginners. The second method delves deeper into the art of hand-stitching, allowing for a more precise and controlled finish. Lastly, for a more professional result, using a serger or overlock machine is explored, providing a seamless and clean-cut finish that mirrors a store-bought pair of dress pants. These methods cater to all levels of sewing abilities, ensuring everyone can achieve perfectly hemmed dress pants at home. The first method we will talk you through is creating a new hemline with a sewing machine. This method is straightforward and ideal for those with basic sewing machine knowledge. The process is simplified and will set the foundation for the next methods discussed in the guide. So, grab your sewing machine, and let's begin.
Creating a New Hemline with a Sewing Machine
Creating a new hemline with a sewing machine is an integral part of hemming dress pants. Hemming is an essential skill every sewing enthusiast should learn as it ensures the pants fit perfectly and enhances their overall appearance. The process starts with determining the new hemline. First, turn the pants inside out and try them on, ensuring they reach the desired length. Ideally, dress pants should hit the top of your shoes and have a slight break in the front. Mark this length using a chalk or a fabric marker, then take them off. The next step revolves around the use of a sewing machine. It is recommended to use the machine’s blind hem stitch function as it creates an invisible and professional finish. To do this, you need to fold and pin the fabric in a way that the original hemline is 1/4″ below the new marked line. Ensure the fold is smooth and even all the way around. Next, select the blind hem stitch on your machine, which typically looks like a series of straight stitches punctuated by a zigzag pattern on one side. The straight stitch should fall on the fold, and the zig zag should bite into the single thickness hem allowance. Thread your sewing machine with a color that matches your pants to keep the stitch line as invisible as possible. Slowly start sewing around the new hemline you have pinned, remembering to remove the pins as you go. Be cautious to make sure the machine is only sewing through the single layer of fabric and not catching the outer layer. Once you’ve sewed around the entire hemline, iron the new hem to set the stitches and flatten the fold. Finally, try the pants on again to ensure the new hemline falls exactly where you want it. Creating a new hemline with a sewing machine is a fairly straightforward process but does require precision and patience. The keys to a perfect hemline lie in your preparation stages and taking the time to carefully measure, fold, pin, and sew. With a little practice and attention to detail, you can transform ill-fitting pants into a professional outfit staple, using nothing more than your sewing machine. In essence, creating a new hemline is more than just sewing; it’s about imparting your taste and personality into your clothing, preserving the life of dress pants and saving you the cost of investing in new pairs. If you are a DIY enthusiast or a sewing professional, mastering the art of creating new hemlines will certainly add value to your skillset.
Hand-Stitching a Hemline for a More Precise Finish
Of all the sewing techniques out there, hand-stitching surely offers an exceptional control and precision, which is why it's ideally recommended for hemming dress pants. It guarantees not just an elegant finish, but also an enduring one, particularly on the hemline. Predominantly, professionals prefer the hand-stitching technique because it renders an effective, subtle control to maintain the shape and consistency, especially at the bottom. To start hand-stitching a hemline, you ideally need a needle, thread matching your fabric's color, dressmaker pins, and of course, your dress pants. Begin the process by turning your pants inside out and carefully pinning the fabric where you want the new hem to lie. Ensure to pin evenly around the whole pant leg to maintain symmetry. Once you've pinned the fabric, you should then cut a piece of thread about 18-24 inches long and thread your needle. At this stage, it's advisable to double the thread for a stronger stitch and secure it with a knot at the end. Your stitching technique is dependent on the nature of the fabric. For instance, if it's a bulkier fabric, a slip stitch could be perfect due to its hidden attribute. However, if your fabric is on the finer side, a blind stitch would work best to create an almost invisible stitch on the right side of the pants. To execute either of these stitches, you should start from the inside of the hem, then take a tiny stitch into the pant leg, and finally, take another stitch into the hem. Carry on this process moving along the hemline, always making sure that the thread is hidden within the fabric folds. Throughout the stitching process, ensure that the stitches are even and secure, considering the strain the hemline usually undergoes. Moreover, remember to keep the tension consistent - neither too loose nor too tight - to prevent any unwanted puckering or stretching. Once you have sewed around the entirety of the pant leg, secure the thread with a sturdy knot and trim any excess remaining. Hand-stitching the hem delivers an unarguably superior finish, as it allows the hem to sit closely against the pant leg, offering a sleek and precise look. Furthermore, it enables you to control every stitch, resulting in a hem that hangs nicely and stays sturdy over time. Notably, although this method seems tedious and time-consuming initially, with consistent practice, the pace and technique can dramatically improve. With the correctly hand-stitched hemline, your dress pants will undeniably exhibit an improved fit, along with a boost in their lifespan.
Using a Serger or Overlock Machine for a Professional Finish
Using a serger or overlock machine can truly make the difference between a DIY sewing project and a professional-grade finish, especially in hemming dress pants. This impressive piece of equipment, which often remains underutilized in home sewing rooms, has the power to create clean, finished edges on your garments that mimic those you see in well-made store-bought clothing. The serger, or overlock machine, works by trimming the seam and encasing the seam allowance or edge of the fabric inside a thread casing. This casing is generated by loopers which are special needles that can pierce and loop threads around the fabric edge. These loopers secure the threads together, creating a seam that not only prevents fabric from fraying but also has a degree of stretch, making it ideal for clothing. It truly elevates the seam quality and enhances the overall look, feel, and durability of the garment. In the specific process of hemming dress pants, using a serger can make the task much more manageable and professional. Initially, you'll need to trim excess fabric to create cleaner lines and to avoid unnecessary bulkiness in the finished product. Here's where a serger comes in handy - it quickly trims and finishes the cut edges within a few seconds, ensuring they do not fray or unravel during the hemming process. Beyond prepping the fabric for hemming, sergers can also create a blind hem, which is a popular technique for dress pants. This type of hem is virtually invisible from the outside. Creating a blind hem with a serger requires a special blind hem foot, but once you have mastered the technique, you will find it is a faster and more efficient way to hem pants compared to the traditional method performed on a regular sewing machine. Moreover, sergers can handle thicker fabrics and multiple layers with ease, which is frequently required when hemming dress pants. Without a doubt, equipping yourself with a serger opens a new world of possibilities in sewing projects. The professional finish it provides in hemming dress pants is just one testament to its potential. Its capacity to slice through fabric and simultaneously sew over the edge gives your projects a polished look that is tough to match. Therefore, choosing to invest in a serger or overlock machine is a decision that will positively impact your sewing skills and performance, taking your creations to the next level of sophistication and professionalism.