How To Churn Butter
Churning butter is a traditional process that has been passed down for generations, and with the right techniques and tools, you can create delicious homemade butter in the comfort of your own kitchen. To get started, it's essential to understand the basics of butter churning, including the type of cream to use, the importance of temperature, and the role of agitation in separating the butterfat from the buttermilk. Once you have a solid grasp of the fundamentals, you can begin preparing for the churning process, which involves selecting the right equipment and ingredients. Finally, with your preparation complete, you can dive into the butter churning process itself, which requires patience, persistence, and a bit of elbow grease. In this article, we'll explore each of these steps in detail, starting with the basics of butter churning.
Understanding the Basics of Butter Churning
Butter churning is a traditional process that has been used for centuries to produce high-quality butter. Understanding the basics of butter churning is essential for anyone interested in dairy production, cooking, or food science. In this article, we will delve into the world of butter churning, exploring its importance, the science behind it, and the various methods used to churn butter. We will begin by examining what butter churning is and its significance in the dairy industry, followed by a discussion on the scientific principles that govern the churning process. Finally, we will look at the different types of butter churning methods, including traditional and modern techniques. By the end of this article, readers will have a comprehensive understanding of the basics of butter churning and its relevance in today's food landscape. So, let's start by exploring what butter churning is and its importance.
What is Butter Churning and Its Importance
Butter churning is a traditional process of separating butterfat from buttermilk by agitating cream or milk, resulting in the production of butter and buttermilk. The importance of butter churning lies in its ability to preserve milk fat, which is a valuable source of nutrition, and to create a versatile and delicious dairy product that can be used in various culinary applications. Butter churning has been a crucial practice in many cultures for centuries, providing a means of preserving milk fat during times of abundance and scarcity. The process of churning cream or milk releases the butterfat globules, which then clump together and separate from the liquid, forming butter. This separation process allows for the creation of a concentrated source of fat, which can be used in cooking, baking, and as a spread. The importance of butter churning extends beyond its practical applications, as it also plays a significant role in preserving traditional dairy practices and cultural heritage. In addition, butter churning has been recognized for its potential health benefits, as it allows for the creation of a nutrient-rich dairy product that is high in fat-soluble vitamins and conjugated linoleic acid (CLA). Overall, butter churning is a vital process that has been essential to human nutrition and culinary traditions for centuries, and its importance continues to be recognized today.
The Science Behind Butter Churning
The science behind butter churning lies in the manipulation of cream's physical properties. Cream is primarily composed of water, milk fat, and proteins. When cream is agitated, the fat molecules, which are normally dispersed throughout the liquid, begin to stick together and form clumps. This process is known as coalescence. As the agitation continues, the clumps grow in size and eventually separate from the liquid, forming butter grains. The remaining liquid, now devoid of most of its fat content, is buttermilk. The churning process can be facilitated by the addition of salt, which helps to strengthen the fat molecules' bonds and promote coalescence. Temperature also plays a crucial role, as cold cream is more conducive to butter formation. The ideal temperature for churning is between 40°F and 50°F (4°C and 10°C), as this range allows for optimal fat coalescence and separation. Understanding the science behind butter churning is essential for achieving the perfect churn, as it enables individuals to manipulate the variables that affect the process and produce high-quality butter.
Types of Butter Churning Methods
There are several types of butter churning methods, each with its own unique characteristics and advantages. The traditional method of churning butter is the hand-churning method, which involves using a wooden churn or a dasher to agitate the cream until the butter forms. This method is often preferred for its simplicity and the ability to produce high-quality, cultured butter. Another popular method is the stand mixer method, which uses a stand mixer with a whisk or paddle attachment to churn the butter. This method is faster and more efficient than hand-churning, but may not produce the same level of quality. The food processor method is also a popular choice, which uses a food processor to churn the butter quickly and efficiently. However, this method can be noisy and may not be suitable for large quantities. The blender method is another option, which uses a blender to churn the butter, but this method can be messy and may not be suitable for all types of cream. The electric churn method is a modern and efficient way of churning butter, which uses an electric motor to agitate the cream. This method is fast and easy to use, but may not produce the same level of quality as traditional methods. Finally, the cultured butter method is a type of churning method that involves adding a bacterial culture to the cream before churning, which produces a tangy and flavorful butter. Each of these methods has its own advantages and disadvantages, and the choice of method will depend on the individual's preferences and needs.
Preparing for Butter Churning
Preparing for butter churning is an essential step in producing high-quality, homemade butter. To ensure a successful churning process, it's crucial to focus on three key aspects: selecting the right cream for churning, gathering the necessary equipment, and sanitizing the equipment and workspace. By paying attention to these details, you'll be able to produce butter that's not only delicious but also safe to consume. Selecting the right cream for churning is particularly important, as it directly affects the flavor, texture, and overall quality of the final product. With the right cream, you'll be able to create butter that's rich, creamy, and perfect for cooking, baking, or simply spreading on toast. In the next section, we'll take a closer look at the characteristics of ideal cream for butter churning and provide tips on how to choose the best cream for your needs.
Selecting the Right Cream for Churning
When selecting the right cream for churning, it's essential to consider the type of cream, its fat content, and its freshness. Heavy cream or whipping cream with a high fat content of around 35-40% is ideal for churning, as it will yield a higher percentage of butterfat and a more tender crumb. Ultra-pasteurized cream, on the other hand, may not be the best choice, as the high heat used in the pasteurization process can damage the fat molecules, resulting in a lower yield and a less desirable texture. Freshness is also crucial, as old or spoiled cream can impart off-flavors and aromas to the butter. Look for cream that has been stored properly in the refrigerator at a temperature below 40°F (4°C) and has a "sell by" or "use by" date within a few days. Additionally, consider the breed and diet of the cows that produced the cream, as grass-fed cows tend to produce cream with a more nuanced flavor profile and a higher nutritional content. By choosing the right cream, you'll be well on your way to creating delicious, high-quality butter that's perfect for cooking, baking, or simply spreading on toast.
Equipment Needed for Butter Churning
To churn butter, you will need a few pieces of equipment. The most essential item is a butter churn, which can be manual or electric. A manual churn typically consists of a wooden or metal container with a handle attached to a plunger or dasher that moves up and down to agitate the cream. Electric churns, on the other hand, use a motor to rotate the dasher, making the process faster and easier. You will also need a large mixing bowl or container to hold the cream, a measuring cup to measure the cream, and a wooden spoon or spatula to scrape the sides of the bowl. Additionally, you will need cheesecloth or a butter muslin to strain the butter and remove any remaining buttermilk. A stand mixer with a whisk attachment can also be used to churn butter, but it's not necessary. It's also a good idea to have a thermometer on hand to monitor the temperature of the cream, as it should be between 50°F and 60°F for optimal churning. Finally, you will need a clean workspace and a sink with cold running water to rinse the butter and equipment.
Sanitizing the Equipment and Workspace
Sanitizing the equipment and workspace is a crucial step in preparing for butter churning. This process ensures that all the tools and surfaces that will come into contact with the cream are free from bacteria, dirt, and other contaminants that can spoil the butter or affect its quality. To sanitize the equipment, start by washing all the utensils, including the churn, dasher, and any other tools, in warm soapy water. Rinse them thoroughly and then submerge them in a sanitizing solution, such as a mixture of equal parts water and white vinegar or a commercial sanitizer, for at least 30 minutes. After sanitizing, rinse the equipment again with clean water to remove any residue. Next, sanitize the workspace by wiping down all surfaces with a sanitizing solution, paying particular attention to any areas that will come into contact with the cream. This includes the countertops, sink, and any other surfaces that the equipment will touch. Allow the sanitizing solution to air dry, rather than wiping it off, to ensure that the surfaces remain sanitized. By sanitizing the equipment and workspace, you can ensure that your butter is made in a clean and safe environment, which is essential for producing high-quality butter. Additionally, sanitizing helps to prevent the growth of bacteria and mold, which can cause the butter to spoil or develop off-flavors. By taking the time to sanitize your equipment and workspace, you can enjoy delicious and healthy homemade butter.
The Butter Churning Process
The butter churning process is a traditional method of making butter from cream that has been passed down through generations. It involves agitating cream until the butterfat globules clump together and separate from the liquid, also known as buttermilk. To achieve this, one must first understand the step-by-step process of churning butter, which will be outlined in the following section. However, it's also important to be aware of common issues that may arise during the churning process and know how to troubleshoot them. Additionally, once the butter has been churned, it's essential to shape and salt it properly to enhance its flavor and texture. By mastering these three key aspects of the butter churning process, you'll be well on your way to creating delicious, homemade butter. So, let's start with the basics and take a step-by-step look at how to churn butter.
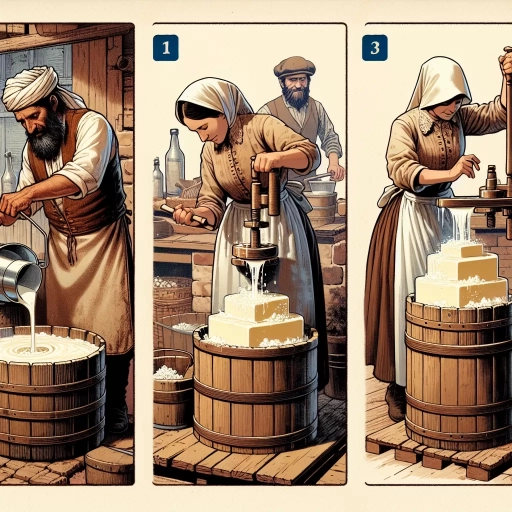
Step-by-Step Guide to Churning Butter
Churning butter is a multi-step process that requires some effort, but with the right tools and a bit of patience, you can create delicious homemade butter. Here's a step-by-step guide to churning butter: First, start by pouring heavy cream into a stand mixer or a large mixing bowl. Make sure the cream is cold, as this will help the churning process. Next, beat the cream on medium to high speed until it begins to thicken and hold its shape. This should take around 2-3 minutes. As you continue to beat the cream, you'll start to notice it becoming thicker and more whipped. Keep beating until the cream becomes stiff and forms soft peaks. At this point, you'll start to notice the cream breaking down and releasing butterfat globules. This is where the magic happens, and you'll start to see the butter come together. Continue beating the cream until it becomes grainy and separated, with a clear liquid (buttermilk) forming at the bottom of the bowl. This is a sign that the butter is almost ready. Stop the mixer and drain off the buttermilk. Rinse the butter under cold running water to remove any remaining buttermilk. Use a wooden spatula or spoon to knead the butter and remove any excess liquid. Finally, shape the butter into a ball or log, and wrap it in plastic wrap or wax paper. Your homemade butter is now ready to use in cooking and baking. With a little practice, you'll be churning butter like a pro in no time.
Troubleshooting Common Issues During Churning
Troubleshooting Common Issues During Churning. If you encounter any issues during the churning process, don't worry, it's not uncommon. Here are some common problems and their solutions: if the cream doesn't thicken, check the temperature, as it should be between 50°F and 60°F (10°C and 15°C) for optimal churning. Also, ensure that the cream is fresh and of good quality. If the butter doesn't separate from the buttermilk, it may be due to over-churning or using low-quality cream. Stop churning and let it sit for a few minutes before resuming. If the butter is too grainy or separated, it could be due to over-churning or using cream that's too cold. Try warming the cream slightly or churning it for a shorter time. If the butter is too soft or runny, it may be due to under-churning or using cream that's too warm. Try churning it for a longer time or cooling the cream slightly. By identifying and addressing these common issues, you can achieve the perfect churn and enjoy delicious homemade butter.
Shaping and Salting the Churned Butter
Once the butter has been churned, it's time to shape and salt it to enhance its flavor and texture. Shaping the butter involves removing any remaining buttermilk and rinsing the butter under cold running water to remove any impurities. This process helps to create a smooth and creamy texture. Next, the butter is shaped into its desired form, such as a block, roll, or pat. This can be done using a butter mold or by simply shaping the butter by hand. Some people also like to add a decorative touch to their butter by creating a pattern or design on its surface. After shaping, the butter is salted to bring out its natural flavors. Salt enhances the flavor of the butter and helps to preserve it by drawing out any remaining moisture. The amount of salt added can vary depending on personal preference, but a general rule of thumb is to use about 1/4 teaspoon of salt per pound of butter. The salt is typically sprinkled evenly over the surface of the butter, then gently massaged in to ensure it's evenly distributed. Finally, the shaped and salted butter is wrapped in wax paper or plastic wrap and chilled in the refrigerator to allow the flavors to meld together. This final step helps to create a rich and creamy butter that's perfect for spreading on bread, cooking, or using in baking.