How To Fillet A Trout
 Whether you are an experienced angler or a culinary budding enthusiast looking for a new skill to master, learning how to fillet a trout correctly can elevate your meal to an entirely new level. This article aims to provide a comprehensive guide to filleting trout through its three main sections, each addressing a critical aspect: the tools and ingredients needed, the precise technique for removing bones and skin, and some unique concepts to finesse your filleting technique. Initially, we explore the foundation for any culinary endeavor in "Preparation is Key: Essential Tools and Ingredients for Filleting a Trout," ensuring you are well-equipped for the task. Subsequent to that, you will be guided through "The Filleting Process: A Step-by-Step Guide to Removing the Bones and Skin," a detailed analysis of the actual process of filleting. Finally, we reveal some secrets to refine your skill in "Tips and Variations for Perfecting Your Trout Filleting Technique." Let's thus dive into the fascinating world of trout filleting by firstly understanding the importance of preparation.
Preparation is Key: Essential Tools and Ingredients for Filleting a Trout
of any successful culinary venture is rooted in the quality and availability of the right tools and ingredients. This is especially true in the realm of fish preparation, specifically when it comes to filleting a trout, a delicate task requiring particular consideration and care. In this detailed and informative guide, we will navigate through the essential prerequisites for this culinary mission, focusing on three key components: a sharp fillet knife, a fresh trout, and a reliable cutting board and tray. Initially, we will discuss the significance of a sharp fillet knife and its unparalleled role in ensuring a smooth filleting process. Following this, we will explore how the freshness and quality of the trout you choose inevitably affect the filleting experience and the final taste. Lastly, we will delve into the necessity of a clean and stable workspace for filleting, illustrating the importance of a sturdy cutting board and tray. Each of these elements, when considered and implemented attentively, will facilitate the most efficient and enjoyable trout filleting experience. Now, let us slice into the discussion with the first and arguably the most critical tool - a sharp fillet knife.
Sharp Fillet Knife: The Most Important Tool for a Smooth Filleting Process
Fishing enthusiasts, professional chefs, and cooking aficionados would agree that a sharp fillet knife is an indispensable tool for filleting a trout. Fundamentally, these sleek and refined knives are tailored to cut precisely and smoothly through the fish, separating the meat from the bone with ease. Ergonomically designed, this indispensable tool's tapered, thin, and particularly sharp blade is the secret behind the close and precise cuts, ensuring an almost effortless glide along the fish's backbone. The efficiency of a fillet knife stems from its sharpness, allowing you to shave off the fillets cleanly, which not only makes the process more manageable but also retains as much meat as possible. A fillet knife is sharper than an ordinary kitchen knife, and its blade's sharpness doesn't degrade quickly. It's equipped to deal with the delicacy involved in deboning and skinning a trout. Another boon of a sharp fillet knife is the consistency of the fillets. With a blunt knife, the cuts can be uneven and jagged. Still, a sharp fillet knife's precise, clean slices ensure uniform thickness throughout, which is vital for evenly cooked and aesthetically pleasing results. Furthermore, a sharp fillet knife is safer to use. It may seem counterintuitive, but a sharp knife is less likely to cause injuries than a dull one because you don't need to apply as much pressure when cutting. Consequently, reducing the risk of the knife slipping and causing potential harm. By the same token, the speed and efficacy of a sharp fillet knife save time during preparation, contributing to a more enjoyable and less strenuous cooking experience. Choosing a fillet knife is equally important. It should comfortably fit in your hand, and the blade's sharpness should be long-lasting. Many fillet knives nowadays come with a comfortable, non-slip handle that ensures a firm grip, even when your hands are wet. This feature adds another layer of safety and comfort to the whole process. In conclusion, a sharp fillet knife is crucial for a smooth, efficient, and safe filleting process. Its sharpness, design, and consistency are key drivers behind the ease and quality of fish filleting. These attributes make it an inherent part of the kitchen arsenal for amateur cooks, professional chefs, or fishing enthusiasts. After all, the flavor and sensation of eating a well-filleted fish rest largely on the knife's quality and sharpness. You're not just picking a tool; you're enhancing your culinary skills and uplifting the dining experience.
Fresh Trout: Choosing the Right Fish for Filleting
Nothing can quite compare to the succulence of fresh trout, especially when it's expertly filleted and swiftly prepared. Selecting the right trout for filleting can indeed make all the difference. Trout, known for its sweet, delicate flavor and subtle texture, is available worldwide in numerous varieties. Two well-recognized species are the Rainbow Trout and Brown Trout - popular choices among seafood enthusiasts and professional chefs alike. When it comes to choosing the right trout for filleting, you should first consider its freshness. Fresh trout has a vibrant color, clear eyes, and an absence of blemishes and bruises. It should emit a mild scent, reminiscent of the ocean, and not an overwhelming fishy aroma. The flesh should spring back when pressed firmly and should not feel slimy to touch. The size of the trout is another factor to consider. A medium-sized trout, about 1 to 2 pounds, is perfect for filleting as it tends to have a superior flavor and delicate texture compared to larger, older fish, which might possess a stronger taste. Moreover, filleting a medium-sized trout is relatively easier and produces a satisfactory yield. Wild or farm-raised could also be a choice, each having its own merits. Wild trout is praised for its robust and diverse flavors, resulting from a natural, varied diet. However, farm-raised trout, often grown in regulated conditions, promises a consistent flavor and tends to be more readily available throughout the year. Properly stored trout can maintain its freshness for a couple of days. It should ideally be placed on ice or refrigerated at a temperature close to freezing immediately after purchase. It's also worth mentioning that the sustainability of trout should be kept in mind. Many fisheries are now offering trout that's been responsibly farmed or caught in a manner that respects the environment and aids in species preservation. Look out for certifications or seals that vouch for environmentally friendly practices. Ultimately, the right trout for filleting boils down to personal preference. Whether you prefer a milder or stronger flavor, wild or farm-raised, rainbow, or brown trout, ensuring its freshness and proper storage will deliver a delicious, tender fillet. Preparing fresh trout for filleting can be a delightful experience and is an opportunity to appreciate the value of high-quality, responsibly sourced seafood.
Cutting Board and Tray: A Clean and Stable Workspace for Filleting
Using the right tools is essential for fish preparation, and among these, the importance of a cutting board and tray cannot be overlooked. Serving dual purposes, this apparatus provides a clean and stable workspace necessary for filleting a trout effectively. The cutting board serves as a sturdy, flat surface that holds the fish in place, preventing possible sliding or moving during the filleting process. This stability is critical given the precision required in filleting to ensure that no part of the fish is wasted. The quality of your cutting board matters - opt for a surface that's easy to clean and doesn't dull your knife. High-density polyethylene boards are an excellent choice since they are knife-friendly, durable, hygienic, and dishwasher safe. On the other hand, the tray underneath the cutting board plays a significant role, especially in maintaining cleanliness. It collects the juices, scales, and other debris that might fall off during filleting, ensuring that these don't spread across your kitchen counters leading to possible contamination. Some cutting boards even come with grooves on the board's perimeter to facilitate the flow of juices into the tray, making cleanup much easier. Furthermore, having a dedicated tray for your cutting board can streamline your trout preparation process. When you catch numerous fish, like trout, during a fishing trip, it is best to have an orderly workspace. You can place the un-filleted fish on one end of the tray and the filleted ones at the other end. This simple organization can help prevent confusion and cross-contamination. To keep your workplace as hygienic as possible, clean your cutting board and tray after every use. Soak both the cutting board and tray in a mixture of warm water and mild dish soap. For stubborn stains or smells, a solution of baking soda and water can be applied. Rineproperly and let these tools dry before store to prevent bacterial growth. In conclusion, a high-quality cutting board and tray provide a clean, stable, and organized workspace for filleting a trout. These tools not only enhance the process of filleting but also play an essential role in maintaining a sanitary kitchen environment. Investing in these necessary tools will ensure that your trout preparation is efficient, effective, and, most importantly, safe. Whether you're cooking for a big family gathering or a quiet dinner at home, with these tools, you'll be more than prepared to fillet a trout.
The Filleting Process: A Step-by-Step Guide to Removing the Bones and Skin
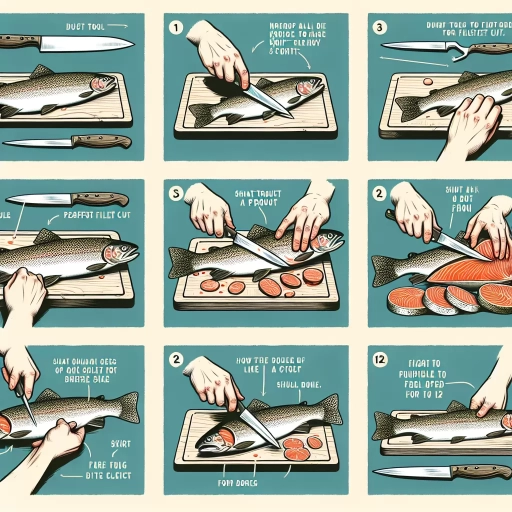
The art of filleting a fish is an intricate blend of skill, knowledge, and dexterity. It's a vital component in seafood cuisine, allowing cooks to remove bones and skin to obtain the choice parts of the fish. This informative and engaging guide breaks down the filleting process into three main steps, each detalied in their respective supporting paragraphs - starting with making the initial incision along the belly of the trout, a precise cut requiring a steady hand and eye. Next, we delve into the process of removing the innards and gills, a delicate task with great significance in preserving the quality of the fillets. Finally, the way to expertly separate the fillets from the bones is explored, with the spotlight on the gentle prising motion necessary to release the tender flesh without causing damage. This comprehensive overview will equip you with the essential tools and techniques for mastering the filleting process, from understanding the structure of a fish to the tricks for getting a clean cut. Let's dive in and start with our first step: making a careful incision along the belly of the trout.
Make the Initial Incision: A Careful Cut Along the Belly of the Trout
The filleting process of a trout begins with a careful incision along its belly, a step correctly termed as "Making the Initial Incision". This is arguably one of the most critical junctures in the procedure since it is the gateway to the trout's interior anatomy. A precise cut ensures minimal meat loss and avoids unnecessary mutilation of the fish, contributing to a cleaner and more efficient filleting procedure. A sharpened, flexible filleting knife is quintessential for this step, allowing for the gentle curvature of the cut to match the trout's form. The incision is initiated at the anus of the trout, extending upwards to its lower jaw. Plan your cut to be shallow at first; the objective of this initial incision is to penetrate the skin and the belly wall without damaging the internal organs. The trout should be placed flat on your working surface, with its back facing you and the head pointing to the right (if you are left-handed, the head should point to the left). Hold the trout steady with your non-knife hand, but be careful not to apply too much pressure; otherwise, you might squeeze the internal organs through the incision. In this phase, maintaining control over the depth and direction of the knife is key. Your goal is to keep your cut smooth and steady, following the contour of the fish's abdomen. Maintaining one's focus while making the initial incision along the belly of the trout is of paramount importance. Incising too deep could damage the intestines, filling your fillet with waste, which will subsequently taint the fish's flavor. Conversely, a too shallow incision may miss the stomach cavity entirely, making it difficult to remove the intestines and leaving you with a mess to clean up. The initial incision leads to a delicate and potent journey of extracting the most value from the coveted trout, setting the tone for the rest of the filleting process. It is undeniably a practice that demands respect for the catch and attentiveness to detail. A small but significant facet of the trout-filleting process, the initial incision can make or break the fillet, ultimately determining the quality of your culinary efforts with the fresh trout. Thus, mastering the careful cut along the belly of the trout is an essential skill that will greatly enhance the filleting process, offering an invaluable avenue for maximizing yield, preserving the structure, and maintaining the freshness of the trout.
Remove the Guts and Gills: A Delicate Process to Avoid Damaging the Fillets
The process of gutting and removing the gills in trout is a delicate, but necessary part of the filleting process that requires a high level of precision and finesse to avoid cutting into the valuable fillets. The first step in this intricate process is to make an incision at the anus of the trout and cut upwards, following the belly line until you reach the fish's lower jaw. This should expose the internal organs of the trout. It is important to be extra cautious during this process as puncturing the trout's gallbladder can result in a bitter liquid being released that could spoil the fish’s taste. Once the belly has been opened, the guts including the stomach, liver and intestines can be carefully removed and discarded. Next, in the process is removing the gills - an important part in order to prevent the trout from acquiring a fishy taste and smell. To do so, one must open up the gill covers and firmly hold onto the gill rakers. A sharp cut should be made at the point where the gills attach to the body of the trout. Throughout this process, care should be taken not to pull or tear at the gills, as this can lead to unnecessary damage to the fillets. These processes contribute to an optimal end product and leave the trout ready for filleting. This next step involves removing the flesh of the trout from the fish’s skeleton, also known as the backbone and rib bones. The key to a successful filleting process lies in the practitioner's ability to maintain patience and precision, while having a sharp, high-quality knife suitable for filleting to enable smooth and even cuts. It is also advisable to rid the board and fillet knife of any residual slime and scales seen in trout before proceeding with skinning as this ensures a clean fillet. The journey that begins with a fresh trout ends with a skillfully filleted fish, ready to be cooked to perfection. Attention to detail, combined with dexterity and patience, are the hallmarks of a swift and seamless process of removing the guts and gills, ultimately leaving behind neatly filleted segments that promise rich flavor and texture. Therefore, gutting and gill removal form an underlying bedrock of the filleting process, preparing the trout for subsequent steps while maintaining its fundamental integrity. This meticulous approach to filleting ensures the trout's flavor is preserved, guaranteeing an end product that is not only delectable, but promotes the respect and appreciation for the fish that provides such a primal yet gourmet culinary experience.
Separate the Fillets from the Bones: A Gentle Prising Motion to Release the Flesh
One crucial step in the process of filleting a trout involves carefully separating the fillets from the bones, which calls for a gentle but firm prising motion to release the flesh. No matter how finely honed your filleting knife may be, this task requires a certain level of patience, precision and mastery that only comes with practice. Starting from the tail end, your knife should smoothly glide along the backbone, feeling the resistance of the rib bones beneath. You'll need to gently pry up the fillet as you progress, using a motion that's akin to lightly lifting or prying, rather than cutting. Attention to detail is paramount here: you'll want to feel the knife point slightly graze against the bones. At the same time, applying a bit of gentle pressure will ensure the knife moves in a controlled manner, allowing it to detach the fillet from the bones with minimal flesh left behind. It's almost like peeling a delicate fruit, where you'd want to preserve as much of the flesh as possible while getting rid of the exterior, or in this case, the bones. Throughout this process, it's important to maintain the knife's position at all times. The blade should be slanted slightly towards the fish's bones to make certain that you're not leaving behind any valuable meat. But don't apply too much pressure; the last thing you'd want is to cut through the bones, requiring a time-consuming do-over. Instead, remember the golden rule: firm, gentle, and controlled motions are key to obtaining a bone-free, beautifully shaped fillet. Additionally, bear in mind that the key to ensuring the detachment of the fillet from the bones is not to rush. Move slowly and intentionally, allowing the knife to do the majority of the work. This will not only ensure efficient separation of the fillet from the bones but it also makes the task safer, reducing the chance of a slip that could potentially lead to a cut. Lastly, make sure to always use a well-sharpened knife when filleting. The success of this step largely depends on how sharp your knife is, as a dull blade can damage the meat and make the process much more arduous. A sharp knife, on the other hand, will glide through the flesh and against the bones with ease, making for a clean and efficient cut, and a beautiful, ready-to-cook trout fillet. In conclusion, the art of filleting a trout and separating the fillets from the bones lies in the hands of the one who wields the knife. Careful, steady prising motions, patience, and the right tools can turn this intricate task into an enjoyable process, yielding delectable, boneless fillets that are worthy of any culinary masterpiece. It's a skill worth learning, and one that will certainly elevate your cooking game to new heights.
Tips and Variations for Perfecting Your Trout Filleting Technique
Mastering the art of trout filleting is not just about acquiring a much-needed kitchen skill; it is also about making the process more enjoyable, efficient, and free from costly errors. This article will provide essential tips and variations to help improve your trout filleting technique, ensuring you get the most out of your catch. We will delve into alternative methods for deboning and skinning, offering insights into how different techniques might yield better results. Furthermore, we will explore proper portioning and storage techniques; understanding these practical principles will ensure that your fillets remain fresh and flavorful for later use. Of course, the path to perfection is not free from obstacles, hence we will discuss common issues faced during trout filleting and effective ways to overcome them to continuous improvement. With the right knowledge and practice, you can make filleting an effortless and rewarding part of your cooking repertoire. Let's dive in by starting with innovative ways of deboning and skinning your trout, an integral part of the process, and often the most tricky part for beginners. The following section will help shed light on how to do it efficiently while preserving the integrity of the fish.
Deboning and Skinning: Alternative Methods for Removing the Bones and Skin
The process of deboning and skinning is a delicate task that requires precision and technique. Both are alternative methods used in trout fillet preparation, with each method having its unique approach and advantages. Deboning, as the term implies, involves the removal of bones from the trout. Despite seeming like a complicated procedure, with a sharp, thin fillet knife and a bit of practice, you can quickly and safely debone your trout. Begin by making a cut just behind the gill plate, slicing down until you reach the backbone. Gently turn the blade parallel to the backbone and starting slicing towards the tail. Pay close attention to the feel of the bone structure to avoid cutting into it. Gradually, work the blade deeper, ensuring you separate the flesh from the bones completely. For skinning, place the knife at the tail end of the fillet (skin side down) and hold it firmly, then push the blade along the skin with a sawing motion. Make sure your blade is flat against the skin to prevent cutting into the flesh. The deboning and skinning methods can cater to your preferred cooking style or dining experience. For those who prefer boneless dining, deboning is the most suitable method. It removes all fine bones and simplifies eating the trout. On the other hand, if you want to infuse more flavor into your trout, then skinning might be the better option. Keeping the skin on during cooking locks in flavor and gives the trout fillet a crispy finish when grilled or fried. The success of both methods, however, largely depends on the use of the right tools and precise technique. The use of a sharp fillet knife is a must for clean and accurate cuts. Also crucial is maintaining a certain level of firmness and control during the entire procedure. How you hold the knife, the angle at which you cut, and the direction of your slicing motion – all contribute to achieving a perfectly deboned and skinned trout fillet. Amid these methods, safety should always be a priority. Since these procedures involve the use of sharp objects, exercising caution is a must to avoid injuries. Always cut away from your body and ensure your hands are dry to prevent the knife from slipping. In essence, deboning and skinning are efficient and beneficial methods for trout fillet preparation, bringing about a seamless dining experience. With continuous practice, these methods will enhance not only your trout filleting technique but your overall culinary skills as well.
Portioning and Storage: How to Cut and Store Your Fillets for Later Use
Portioning and storage play a crucial role in creating delicious trout meals, even days after filleting. Once you have filleted your trout to perfection using your newfound techniques, the next step is to decide on portion sizes, whether to consume immediately or to store for future use. The rule of thumb for portioning is generally six to eight ounces per person. A standard size trout usually allows two portions, a larger trout can generate several. Storing the fillets correctly is important to maintain freshness, texture, and to prevent foodborne illnesses. If you're planning to consume the trout within two days, refrigeration is a suitable storage option. Wrap the fillets tightly in cling film or foil, place in a sealable plastic bag, and store in the coolest part of the refrigerator, ideally at 0-4 degrees celsius. Labelling with the fillet date is a good practice to adopt. For longer-term storage, freezing your fillet is the most recommended method. There are several techniques to freeze trout fillets, but a commonly accepted method is what's known as the water-glazing technique. This involves dipping each individual fillet in cold water and then placing them in the freezer on a baking sheet. After the water has frozen, you can repeat the process a couple of times to create a substantial protective layer of ice around the fillet. This glaze prevents freezer burn, dehydration, and oxidation, keeping the trout at ideal quality. Once glazed, place the fillets in a freezer safe bag, squeeze out the air, seal, date, and freeze. Fish frozen using this method can be stored for up to six months without substantial loss of quality. The fillets should be slowly defrosted in the fridge when ready to consume. By correctly portioning and storing your filleted trout, not only can you better manage your meals and reduce food waste, but you can also ensure that every serving of trout is as flavoursome and nourishing as possible. Just remember that even though freezing preserves the trout, it doesn’t kill all bacteria, so handle your trout with clean tools and hands and cook to the right temperature. Following these tips will ensure that your filleted trout remains a safe, healthy, and delicious choice whenever you decide to consume it.
Troubleshooting Common Issues: Overcoming Obstacles and Improving Your Technique
Fishing for trout can be an incredibly rewarding experience, but filleting them can sometimes prove challenging, especially for beginners. This task can be further compounded by a series of common issues that can occur if proper technique and precautions are not taken. To ensure that you yield the maximum portion of edible meat and maintain the integrity of the fillet, it's critical that you learn to troubleshoot these issues effectively. Firstly, the most commonly faced problem is tearing the meat during the filleting process. This is often a result of using a blunt or inappropriate knife. To counteract this, use a sharp, flexible filleting knife and employ long, uniform strokes instead of sawing haphazardly. Careful handling is absolutely paramount in preventing the meat from getting damaged or shredded. Remember that every trout has a slightly different conformation, and adjustments may have to be made from fish to fish. Secondly, failing to properly remove all the bone structure often proves cumbersome. It is not only inconvenient and unpleasant to consume, but it can also pose choking hazards. An efficient way to mitigate this issue is to use needle-nose pliers or tweezers to carefully extract any remaining bones after the main spine has been removed. Running your fingers along the meat can help identify any missed bones. Additionally, the issue of wasting meat is quite common when filleting trout. Wastage usually happens when the angler makes incorrect, shallow cuts, which leave a lot of edible meat on the bones. To avoid this, aim to cut as close to the spine and skin as possible. Try to keep your filleting knife angled towards the bones to ensure that you get the maximum yield. Accurate, confident cuts will result in minimal loss of meat. Lastly, maintaining hygiene and cleanliness cannot be stressed enough. Avoid cross-contamination by cleaning the work surface, knife, and your hands before starting the filleting process. Furthermore, dispose of the waste properly and make sure the fillets are promptly refrigerated to avoid spoilage. In conclusion, while filleting a trout might initially seem daunting, with listening to seasoned anglers, observing closely, practicing diligently, and making necessary adjustments can significantly improve your technique. Overcoming these common obstacles will not only result in a better fillet but also increase your satisfaction and dare we say, pride in your skills as an angler. So, grab your fishing gear, and let's effective troubleshooting guide you to enjoy an even more delightful trout feasting experience. A perfect fillet makes all the difference between an average and an exceptional trout dish.