How To Combine Two Word Documents
Combining two Word documents can be a daunting task, especially when dealing with complex formatting and layouts. However, with the right approach, it can be a straightforward process that saves you time and effort in the long run. To successfully merge two Word documents, it's essential to follow a structured approach that involves preparation, merging, and finalizing the combined document. In this article, we will guide you through the process, starting with the importance of preparation, where we will discuss how to ensure that your documents are compatible and ready for merging. We will then move on to the merging process, where we will explore the different methods for combining your documents. Finally, we will cover the finalizing stage, where we will provide tips on how to refine and polish your combined document. By following these steps, you'll be able to combine your Word documents with ease and confidence. Preparation is key, so let's start there.
Preparation is Key
Preparation is key to achieving success in various aspects of life, including academics, career, and personal development. When it comes to comparing and contrasting two documents, preparation is crucial to ensure accuracy and efficiency. To effectively compare and contrast two documents, one must first open both documents in Microsoft Word, allowing for a side-by-side comparison. This initial step sets the stage for a thorough review of the content of both documents, enabling the identification of similarities and differences. By saving a copy of each document, one can ensure that the original documents remain intact, while also having a backup in case of any errors or changes. By taking these preparatory steps, individuals can ensure a smooth and effective comparison process, ultimately leading to a deeper understanding of the documents and their contents. Therefore, to begin the comparison process, it is essential to open both documents in Microsoft Word.
Open Both Documents in Microsoft Word
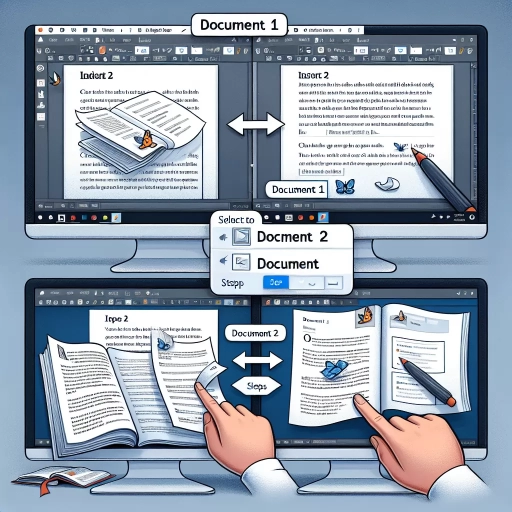
When working with multiple documents in Microsoft Word, it's often necessary to have both documents open at the same time. This allows you to easily compare, reference, and transfer content between the two documents. To open both documents in Microsoft Word, start by opening the first document as you normally would. Then, go to the "File" menu and select "Open" to open the second document. Alternatively, you can use the keyboard shortcut "Ctrl + O" (Windows) or "Command + O" (Mac) to open the second document. Once both documents are open, you can switch between them by clicking on the document title in the taskbar or by using the "Window" menu and selecting the document you want to view. You can also use the "View Side by Side" feature to display both documents side by side, making it easier to compare and transfer content. To do this, go to the "View" menu, select "View Side by Side," and then select the document you want to view alongside the first document. This feature allows you to scroll through both documents simultaneously, making it easier to find and transfer content. By having both documents open in Microsoft Word, you can work more efficiently and effectively, and make the process of combining two documents much easier.
Save a Copy of Each Document
When working with multiple Word documents, it's essential to save a copy of each document before merging them. This precautionary step ensures that you don't accidentally overwrite or lose any important information. By saving a copy of each document, you can preserve the original content and formatting, allowing you to revert to the original version if needed. This is particularly crucial when combining documents from different sources or collaborators, as it helps maintain the integrity of each document. Moreover, saving a copy of each document enables you to track changes and revisions, making it easier to identify and address any discrepancies or inconsistencies. To save a copy of each document, simply go to the "File" menu, select "Save As," and choose a new file name and location. This way, you can work on the merged document without worrying about altering the original files. By taking this simple yet vital step, you can ensure a smooth and successful document merging process.
Review the Content of Both Documents
Here is the paragraphy: When combining two Word documents, it's essential to review the content of both documents to ensure a smooth and accurate merge. Start by carefully reading through each document, paying attention to the structure, formatting, and content. Check for any inconsistencies in headings, font styles, and paragraph spacing. Verify that the information in both documents is up-to-date and accurate, and make any necessary corrections before proceeding. Additionally, look for any duplicate content or conflicting information that may need to be resolved. By reviewing the content of both documents, you can identify potential issues and make informed decisions about how to combine the documents effectively. This step is crucial in ensuring that the final merged document is cohesive, well-organized, and free of errors.
Merging the Documents
Merging documents is a common task in various industries, including business, education, and law. When working on a project, it's often necessary to combine multiple documents into one cohesive file. Fortunately, there are several ways to achieve this, depending on the desired outcome and the software being used. Three effective methods for merging documents include using the "Insert" tab to combine documents, utilizing the "Object" option to embed one document into another, and copying and pasting content from one document to another. By understanding these techniques, individuals can efficiently merge documents and create a polished final product. To start, one can use the "Insert" tab to combine documents, a straightforward and user-friendly approach that yields impressive results.
Use the "Insert" Tab to Combine Documents
When combining multiple documents in Microsoft Word, the "Insert" tab is a powerful tool that can help you merge your files efficiently. To start, open the document into which you want to insert the other files. Then, navigate to the "Insert" tab in the ribbon at the top of the screen. In the "Text" group, you'll find the "Object" button, which allows you to insert a variety of objects, including other Word documents. Click on the "Object" button and select "Text from File" from the drop-down menu. This will open a dialog box where you can browse for the document you want to insert. Select the file and click "Insert" to merge it into your current document. Alternatively, you can also use the "Insert File" feature, which can be accessed by clicking on the "Insert" tab and then clicking on the "File" button in the "Text" group. This will allow you to insert the contents of another file into your current document. By using the "Insert" tab, you can easily combine multiple documents into a single file, saving you time and effort in the process.
Utilize the "Object" Option to Embed One Document into Another
When you need to merge two Word documents, you can utilize the "Object" option to embed one document into another. This method allows you to insert a document as an object, which can be edited independently of the main document. To do this, open the document into which you want to embed the other document, and go to the "Insert" tab. Click on the "Object" button in the "Text" group, and select "Text from File" from the drop-down menu. Then, browse to the location of the document you want to embed, select it, and click "Insert." The document will be inserted as an object, and you can resize it as needed. You can also double-click on the object to open it in a separate window, where you can edit it independently of the main document. This method is useful when you need to merge documents that have different formatting or layouts, as it allows you to preserve the original formatting of each document. Additionally, you can use this method to embed other types of files, such as Excel spreadsheets or PowerPoint presentations, into your Word document.
Copy and Paste Content from One Document to Another
When merging two Word documents, one of the most efficient ways to combine content is by copying and pasting from one document to another. This method is particularly useful when you need to transfer specific sections, paragraphs, or even individual sentences from one document to another. To copy content, simply select the desired text in the source document, right-click on it, and choose "Copy" from the context menu. Alternatively, you can use the keyboard shortcut Ctrl+C (Windows) or Command+C (Mac). Once the content is copied, switch to the target document and place your cursor where you want to insert the copied text. Right-click on the cursor location and select "Paste" from the context menu, or use the keyboard shortcut Ctrl+V (Windows) or Command+V (Mac). The copied content will be inserted at the cursor location, allowing you to merge the documents seamlessly. This method is also useful when you need to duplicate content within the same document, such as when creating a template or repeating a section. By copying and pasting content, you can save time and effort, and ensure consistency throughout your document. Additionally, you can also use the "Paste Special" option to paste the content without formatting, which can be useful when you want to maintain the target document's formatting style. Overall, copying and pasting content is a quick and easy way to merge documents and create a cohesive final product.
Finalizing the Combined Document
Finalizing the Combined Document is a crucial step in the document creation process. It involves reviewing the document for consistency and flow, making any necessary edits, and saving the final version. To ensure that the combined document is of high quality, it is essential to review it carefully for consistency and flow. This involves checking that the document's tone, style, and formatting are consistent throughout, and that the information flows logically from one section to another. By reviewing the document for consistency and flow, you can identify any areas that need improvement and make the necessary edits to create a polished and professional document. With a thorough review, you can ensure that your combined document is accurate, complete, and easy to understand, making it an effective tool for communication. Now, let's take a closer look at the first step in finalizing the combined document: Review the Combined Document for Consistency and Flow.
Review the Combined Document for Consistency and Flow
Here is the paragraphy: Reviewing the combined document for consistency and flow is a crucial step in the process. This involves carefully reading through the document to ensure that the formatting, headings, and content are consistent throughout. Check for any inconsistencies in font styles, sizes, and colors, as well as any discrepancies in the layout and spacing. Additionally, review the document's flow to ensure that the information is presented in a logical and coherent manner. This may involve reorganizing sections or paragraphs to improve the overall structure and readability of the document. It's also essential to check for any grammatical errors, typos, or punctuation mistakes that may have been introduced during the combining process. By reviewing the document for consistency and flow, you can ensure that the final product is polished, professional, and easy to read.
Make Any Necessary Edits to the Combined Document
When combining two Word documents, it's essential to review the resulting document carefully to ensure that the content flows smoothly and that there are no formatting issues. Make any necessary edits to the combined document to achieve a cohesive and polished final product. Start by reviewing the document's layout, checking for consistency in font styles, sizes, and spacing. Verify that headings, subheadings, and bullet points are correctly formatted and aligned. Next, review the content for any inconsistencies in tone, style, or voice, making adjustments as needed to ensure a unified narrative. Additionally, check for any grammatical errors, typos, or punctuation mistakes, and correct them promptly. If necessary, reorganize sections or paragraphs to improve the document's overall structure and flow. Finally, proofread the document multiple times to catch any remaining errors or issues, and make any final edits before considering the combined document complete.
Save the Final Combined Document
Here is the final combined document. Review it carefully to ensure everything is in order. Check the formatting, headings, and content flow. Make sure all the sections are properly aligned and the text is evenly spaced. Verify that all the images, tables, and charts are correctly placed and formatted. If necessary, make any final adjustments to the layout, font, or margins. Once you're satisfied with the final document, save it with a clear and descriptive file name. Include the date and version number in the file name to keep track of changes and updates. Save the document in a location that is easily accessible, such as a shared drive or cloud storage. This will ensure that all team members can access and review the document as needed. Finally, consider saving a backup copy of the document in a separate location, such as an external hard drive or cloud storage, to prevent data loss in case of an emergency. By following these steps, you can ensure that your final combined document is complete, accurate, and easily accessible to all stakeholders.