How To Sift Flour Without A Sifter
Sifting flour is a crucial step in many baking recipes, as it helps to remove lumps, aerate the flour, and ensure even mixing. However, not everyone has a flour sifter in their kitchen arsenal. Fortunately, there are several alternatives to sifting flour without a dedicated sifter. In this article, we will explore three effective methods for sifting flour, including using a fine-mesh sieve, utilizing a whisk or fork, and employing a food processor or blender. Each of these methods has its own advantages and can produce excellent results. For those who prefer a more traditional approach, using a fine-mesh sieve is a great option. This method allows for a high degree of control and can be used to sift both small and large quantities of flour. In the next section, we will take a closer look at how to use a fine-mesh sieve to sift flour.
Using a Fine-Mesh Sieve
Using a fine-mesh sieve is an essential technique in various culinary and laboratory applications, requiring attention to detail and the right approach. To achieve optimal results, it's crucial to consider several key factors. Firstly, selecting the right sieve size is vital, as it directly affects the efficiency of the sifting process. Additionally, positioning the sieve correctly is essential to ensure that the material being sifted flows smoothly and evenly. Finally, mastering the technique of shaking and tapping the sieve is necessary to dislodge any stubborn particles and achieve a uniform texture. By understanding and implementing these critical steps, individuals can unlock the full potential of their fine-mesh sieve and achieve professional-grade results. In the following sections, we will delve into the importance of choosing the right sieve size, exploring the various options available and how to select the ideal one for your specific needs.
Choosing the Right Sieve Size
Choosing the right sieve size is crucial when sifting flour without a sifter. A fine-mesh sieve is ideal for sifting flour, as it allows for a high level of precision and control. The mesh size of the sieve refers to the number of wires or openings per inch, with a higher number indicating a finer mesh. For sifting flour, a sieve with a mesh size of 100-150 is recommended. This size mesh is fine enough to catch any lumps or large particles, but not so fine that it becomes clogged with flour. A sieve with a mesh size that is too small can be difficult to clean and may not allow for efficient sifting, while a sieve with a mesh size that is too large may not catch all of the lumps and particles. By choosing the right sieve size, you can ensure that your flour is sifted evenly and efficiently, resulting in a lighter and more tender final product.
Positioning the Sieve for Optimal Sifting
Positioning the sieve for optimal sifting is crucial to ensure that the flour is evenly aerated and separated from any lumps or large particles. To achieve this, hold the sieve over a large, shallow container or a piece of parchment paper, allowing the sifted flour to collect underneath. Make sure the sieve is at a comfortable height, with your arm at a 90-degree angle, to prevent straining your back or shoulder. Next, gently tilt the sieve to a 20-30 degree angle, allowing the flour to flow smoothly through the mesh. This angle will help to prevent the flour from clumping or forming a mound, ensuring that it is evenly distributed and aerated. As you sift, slowly rotate the sieve in a circular motion, allowing the flour to fall through the mesh in a steady stream. By positioning the sieve in this way, you will be able to achieve optimal sifting results, with a light and airy texture that is perfect for baking.
Shaking and Tapping for Effective Sifting
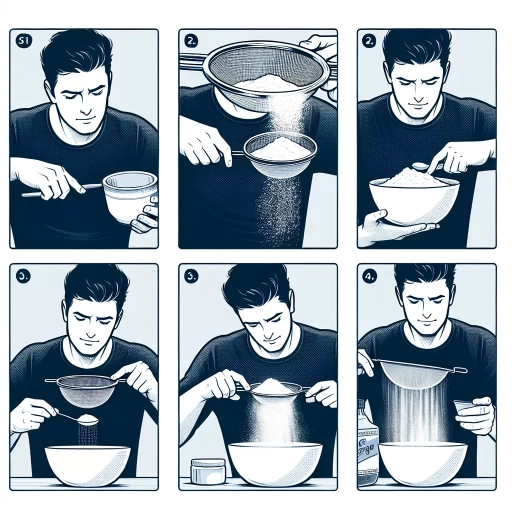
Shaking and tapping are two simple yet effective methods for sifting flour without a sifter. To start, hold the fine-mesh sieve over a large bowl or container, and gently pour the flour into the sieve. Next, hold the sieve by the handle and gently shake it back and forth, allowing the flour to pass through the mesh. As you shake, tap the side of the sieve with your fingers or a spoon to dislodge any clumps or large particles that may be stuck. Continue shaking and tapping until the flour has been fully sifted and there are no remaining lumps or clumps. This method is especially useful for small batches of flour and can be done quickly and easily. Additionally, shaking and tapping can be used in conjunction with other sifting methods, such as using a whisk or fork, to ensure that the flour is thoroughly sifted and aerated. By incorporating shaking and tapping into your sifting routine, you can achieve light and fluffy baked goods with ease.
Utilizing a Whisk or Fork
When it comes to mixing and blending ingredients, two of the most essential tools in the kitchen are the whisk and fork. Both tools have their unique uses and benefits, and understanding how to utilize them effectively can make a significant difference in the outcome of your dishes. In this article, we will explore the techniques of whisking for aeration and sifting, forking methods for breaking down clumps, and how combining both techniques can lead to the best results. By mastering these techniques, you'll be able to create lighter, fluffier textures, and more evenly distributed ingredients. Let's start by examining the art of whisking, and how it can be used to incorporate air and sift ingredients with ease.
Whisking Techniques for Aeration and Sifting
Whisking techniques play a crucial role in incorporating air and sifting ingredients, especially when a sifter is not available. To effectively whisk for aeration, hold the whisk vertically and insert the wires into the dry ingredients, then gently lift and rotate the whisk in a circular motion. This action introduces air pockets and loosens the ingredients, allowing for even distribution. For sifting, whisking can be used to break down lumps and aerate the ingredients simultaneously. Hold the whisk horizontally and move it in a gentle, sweeping motion, working your way through the ingredients to remove any lumps and incorporate air. When whisking wet ingredients, such as eggs or cream, use a more vigorous motion to incorporate air and increase volume. Be cautious not to over-whisk, as this can lead to deflation and tough textures. By mastering whisking techniques, you can effectively aerate and sift ingredients, even without a sifter, and achieve light and fluffy textures in your baked goods.
Forking Methods for Breaking Down Clumps
When it comes to breaking down clumps in flour, forking methods can be an effective alternative to sifting. One approach is to use a fork to gently tease apart the clumps, working from the bottom of the container upwards. This helps to loosen and separate the particles, allowing for a more even distribution of flour. Another technique is to insert the tines of the fork into the clump and twist it gently, using a gentle prying motion to break up the clump. This method can be particularly useful for larger clumps that are more stubborn. Additionally, using a fork to break up clumps can also help to incorporate air into the flour, which can be beneficial for recipes that require a light and fluffy texture. By using a fork to break down clumps, you can achieve a similar effect to sifting, without the need for specialized equipment.
Combining Whisking and Forking for Best Results
When it comes to sifting flour without a sifter, combining whisking and forking can yield the best results. This method is particularly effective for smaller quantities of flour, such as when baking a small cake or making a batch of cookies. To start, place the flour in a large mixing bowl and use a fork to gently break up any clumps or lumps. This initial forking helps to loosen the flour and prepare it for whisking. Next, insert a whisk into the bowl and begin to whisk the flour in a smooth, sweeping motion. Be sure to whisk in a consistent pattern, working your way around the bowl to ensure that all of the flour is well incorporated. As you whisk, use the fork to occasionally scrape the sides and bottom of the bowl, releasing any flour that may have become stuck. This combination of whisking and forking helps to aerate the flour, removing any lumps or clumps and leaving it smooth and even. By alternating between whisking and forking, you can achieve a light and fluffy texture that is perfect for baking. This method may take a bit more time and effort than using a sifter, but the end result is well worth it. With a little practice, you'll be able to combine whisking and forking like a pro, and your baked goods will thank you.
Employing a Food Processor or Blender
When it comes to employing a food processor or blender in the kitchen, there are several techniques to master in order to get the most out of these versatile appliances. One of the key skills to develop is the ability to sift and aerate ingredients effectively, which can greatly impact the texture and consistency of the final product. To achieve this, there are three primary methods to consider: pulsing for gentle sifting and aeration, using the processor's sifting attachment, and blending for thorough sifting and mixing. By understanding the strengths and applications of each approach, home cooks and professional chefs alike can unlock new levels of creativity and precision in their cooking. For delicate ingredients that require a light touch, pulsing for gentle sifting and aeration is often the way to go.
Pulsing for Gentle Sifting and Aeration
Pulsing for Gentle Sifting and Aeration is a technique that can be employed when using a food processor or blender to sift flour. This method involves processing the flour in short, gentle pulses, rather than continuously blending it. By doing so, the flour is aerated and sifted simultaneously, resulting in a light and fluffy texture. The pulsing action helps to break down any lumps and incorporates air into the flour, making it ideal for recipes that require a tender crumb. Additionally, this technique is particularly useful when working with delicate or low-protein flours, as it helps to prevent over-processing and preserves the flour's natural texture. By pulsing the flour in a food processor or blender, bakers can achieve a smooth and even consistency, making it easier to mix and blend with other ingredients. Overall, Pulsing for Gentle Sifting and Aeration is a simple yet effective technique that can elevate the quality of baked goods and make the sifting process more efficient.
Using the Processor's Sifting Attachment
Using the processor's sifting attachment is a convenient and efficient way to sift flour, especially when working with large quantities. This attachment is designed to mimic the action of a manual sifter, using a series of small holes and a spinning motion to separate the flour particles and aerate them. To use the sifting attachment, simply attach it to your food processor and add the flour. Process the flour for about 10-15 seconds, or until it reaches the desired consistency. The sifting attachment will break down any lumps and evenly distribute the flour particles, leaving you with a smooth and consistent texture. This method is particularly useful for recipes that require a high volume of sifted flour, such as cakes, cookies, and pastries. Additionally, the sifting attachment can also be used to sift other dry ingredients, such as sugar, cocoa powder, and spices, making it a versatile tool in your baking arsenal.
Blending for Thorough Sifting and Mixing
Blending for Thorough Sifting and Mixing. Blending is an effective method for sifting and mixing flour, especially when you need to incorporate other ingredients like sugar, cocoa powder, or spices. To blend flour effectively, start by adding the flour to a blender or food processor along with any other dry ingredients. Process the mixture on high speed for about 10 seconds, or until the ingredients are well combined and the flour is aerated. Be careful not to overprocess, as this can lead to a dense or tough final product. For best results, blend in short pulses, stopping to scrape down the sides of the blender as needed. This will help ensure that all ingredients are evenly distributed and that the flour is thoroughly sifted. By blending your flour, you can achieve a light and fluffy texture in your baked goods, and ensure that all ingredients are well incorporated.